DIY Rolling Storage Cart

Chic, stylish storage is the new black. These industrial-styled DIY rolling storage carts are a perfect solution for storage needs, whether hidden or on display for the world to see (or a hazy somewhere in between). In my home, storage space is at a premium; in fact, it’s pretty much nonexistent, until I spied the space under my daughters’ bed as a perfect space for some custom storage bins.
Step-by-Step Instructions to Create Your Own Rolling Cart

This tutorial will demonstrate three ways to achieve the same look in creating your own DIY rolling storage cart. This example utilizes leather handles, walnut stain, and casters for an industrial vibe. Feel free to customize the size, shape, and finishing touches of your own storage unit – after all, that’s the real beauty of DIY!
DIY Level: Intermediate
Materials Needed for a DIY Rolling Storage Cart:
- Plywood, cut to cart “floor” size (example shows three 16”x21” carts)
- 1×4 pine boards (length determined by the size of your cart/s) Tip: Make sure to factor in the height of your casters as you determine the overall height allowed for your rolling cart; this is particularly important for under-the-bed storage.
- Wood glue
- Four casters per cart
- A strip of leather for handle/s and two screws/bolts of your choice for attaching each handle
- Wood stain
- Optional but recommended: Sander, miter saw, scrap 2×4, screws, drill, leather punch
ROLLING CART DESIGN #1: GLUED CORNERS

Step 1 – Cut the Plywood to Prepare
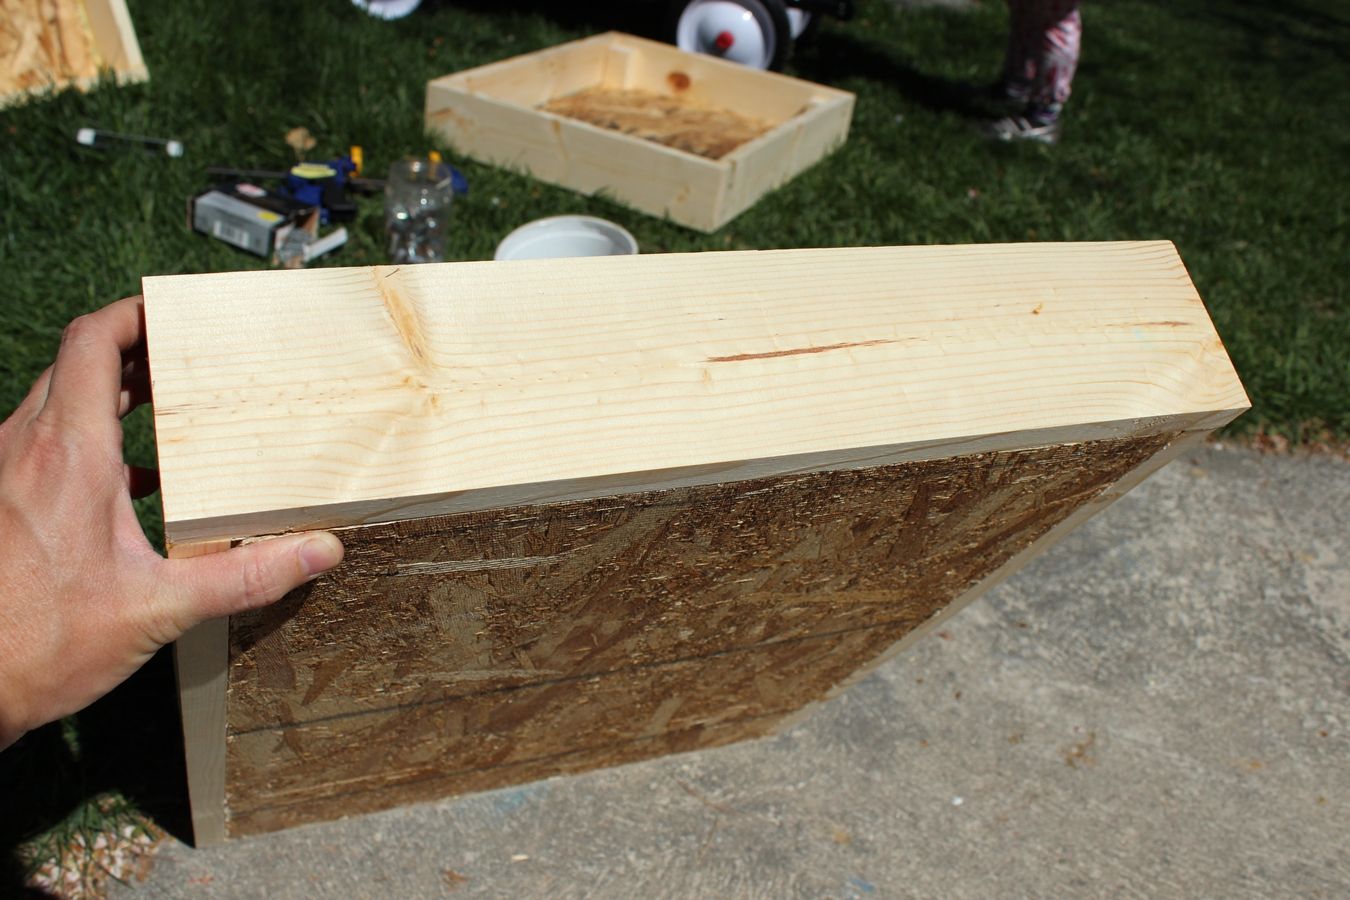
This is the simplest, most basic of the rolling cart designs in this tutorial, although the others aren’t terribly complicated either. Start with your piece of plywood, cut to size. Cut two 1×4 pieces the length of your plywood (in this case, 21”). Set them next to the plywood but don’t do anything else with the wood yet.

Step 2 – Check the Measurements and Cut the Next Pieces
Measure from the outside edge of one 1×4 to the outside edge of the other 1×4, or simply add 1-1/2” to the width of your plywood. (In this case, the width was 16”, so the new measurement would be 17-1/2”.) Cut two 1×4 pieces to this size. Tip: Depending on the preciseness, or lack, of your cart floor, you may want to measure each side anyway and custom cut each board accordingly. I found that my measurements varied by up to 1/4”, so custom measuring and cutting made a better end product.

Step 3 – Add Wood Glue to the Length Boards
Run a line of wood glue along one side each of your length boards.

Step 4 – Attach the 1x4s to the Plywood
Attach the gluey 1x4s to the sides of the plywood.

Step 5 – Add the Front and Back Pieces
With the two longer sides glued in place, you’re ready to attach the front and back 1×4 pieces.

Place wood glue in a U-shape on the side of one of your 1×4 pieces.

Attach to the ends of your plywood and 1×4 side pieces. Repeat for other 1×4 end.

Step 6 – Add the Final Touches and Let Your Cart Dry
At this point, you should have four “walls” on your rolling cart. Run a thin line of wood glue along the interior seams and smooth it out with your finger (similar to caulking). Let dry completely.
ROLLING CART DESIGN #2: SQUARED CORNER BRACES
For those of you looking for additional support in the structure of your rolling cart, you might want to try adding in squared corner braces. To do this, complete the steps shown in the example above for Rolling Cart Design #1 up until the “let dry” step, then proceed as described below.

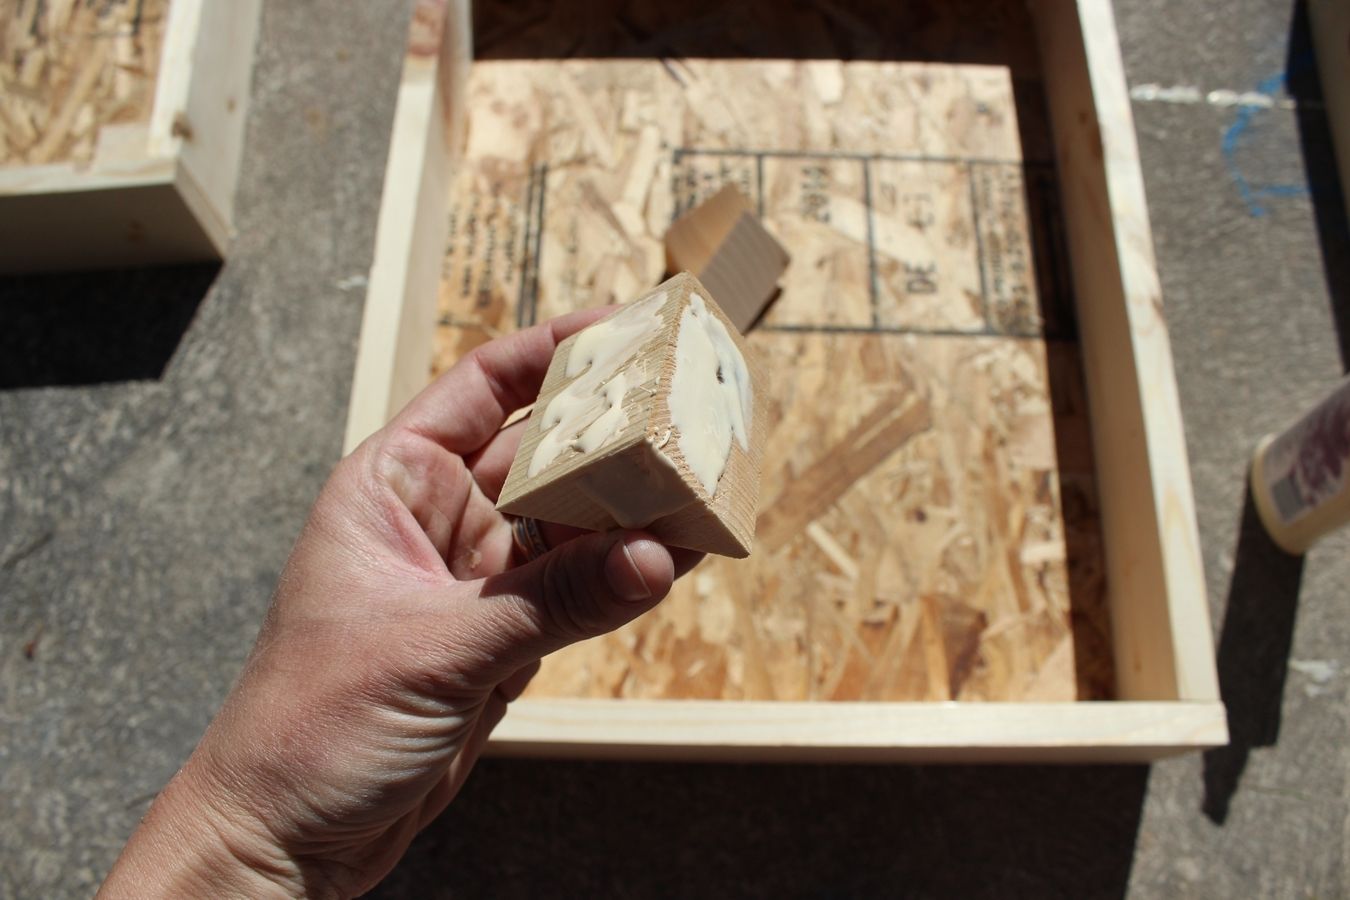
Step 1 – Create Four Pieces of Cut 2x4s
Take a 2×4 scrap, about 3” tall, and cut it in half, being sure to use the proper safety precautions in making such a cut. Repeat for one more 2×4 scrap, so you are left with four pieces of cut 2x4s.

Step 2 – Place Glue on Two of the Blocks
Place glue on the bottom and two sides of one of your 2×4 blocks.

Step 3 – Add Blocks to the Corner of Your Rolling Cart
Glue the 2×4 block into one corner of your rolling cart.

Repeat for the other three corners.

Step 4 – Leave to Dry
Wipe away excess glue. Let dry thoroughly.
ROLLING CART DESIGN #3: TRIANGLE CORNER BRACES
For the added support provided by corner braces but with less infringement on the actual storage space within your rolling cart, triangle corner braces are an excellent alternative. It takes slightly more steps than the squared corner braces, but not a lot. The end result is a strong, stable, and smooth rolling cart. Out of all three options, I’d recommend this one. To accomplish this, complete the steps for Rolling Cart Design #1, up until the “let dry” step, then proceed as described below.

Step 1 – Create a Triangular Piece with a Miter Saw
Adjust your miter saw to 45-degrees, then stand a 2×4 up on its short side (the 2” side).

Make the cut so that you’re left with a triangle piece of 2×4.

Step 2 – Cut the Triangular Piece in Half
Using appropriate safety precautions, cut this triangular 2×4 scrap in half short-wise, so you are left with two shorter pieces of triangular wood.

Step 3 – Repeat Again to Create Four Pieces
Repeat the triangular cuts so that you end up with a total of four short triangles. These will be your corner braces.
Step 4 – Glue the Triangles Into Your Cart
Place wood glue on the triangular bottom and two right-angle sides of a triangle piece.

Firmly press gluey triangle piece into a corner of your rolling cart.

Step 5 – Final Touches and Leave to Dry
Repeat for the other three corners, so that you have four triangle-braced corners when done. Let dry completely.
ALL ROLLING CART DESIGNS

Step 1 – Screw Support
When the glue on your rolling cart has dried thoroughly, you’re ready to move onto the next phase: screw support. Tip: Because you’re working with the ends of wood pieces, always predrill your screw holes to prevent splitting.

For the Glued Corner Design #1: Screw the longer side pieces (21” sides, in this example) to the plywood. This will strengthen the glue seams. Tip: Pay attention to the placement of these screws, making sure they don’t “pop” out on the top of the plywood inside your rolling cart.

For the Squared and Triangle Brace Designs #2 and #3: Place two screws into each bracket on these side (21”) boards, for a total of four screws on each side board.

Your sides will look like this. If you want, you can add in a screw or two along the bottom into the plywood, but it’s not necessary if your fit is snug.

Step 2 – Prepare the Front of Your Rolling Cart
For all rolling cart designs: Decide which of the shorter boards will be the front of your rolling cart, then leave this front side completely alone for now. Turn your cart over so the back is facing upward, ready for drilling. Predrill, then screw the ends of this back board (17-1/2” board, in this example) into the edges of the longer side boards (Glued Corner Design #1) or the braces (Squared and Triangle Designs #2 and #3), as well as the plywood.

At this point, the front of your rolling cart should be screw-free, while the other three sides of your cart should be secured with glue and screws. The Glued Corners Design #1 is done and ready to move on to staining.

For the Squared Brace Design #2: Predrill, being careful NOT to drill through the front board, then screw two 2” screws through the brace toward the front board. Repeat for the other front brace.

For the Triangle Brace Design #3: Carefully angle your drill into the triangle corner brace, being careful NOT to drill through the front board.

One or two screws in each triangle brace should hold the front board securely.
At this point, your braces should be holding both sides and the front and back securely, with the front board face showing no evidence of screw support. Isn’t that clever of you?
ALL ROLLING CART DESIGNS

Step 3 – Sand Any Surfaces of Your Rolling Cart
Gently sand any surface of your rolling cart that needs it – specifically, the corners, sides, and the cart floor.

Step 4 – Prepare for the Painting or Staining Process
Elevate your rolling cart in preparation for staining/painting/whitewashing. Choose the finish that works for your style and taste! This example shows staining the rolling carts.

This example uses Minwax wood stain in dark walnut.

Brush the stain on with a brush.

Wipe off any excess stain every 3-5 minutes. (Sooner if you want a lighter look overall, or longer if you prefer a darker stain effect.)

Let the stain dry thoroughly.

Step 5 – Make the Leather Handles
While the stain on your rolling cart is drying, it’s a perfect time to move on to preparing your leather handles. After playing around with the leather a bit to see how curved/flat/long/short you want it, cut a piece of leather to your desired length (three pieces of leather are shown in this photo because I made three rolling carts for this tutorial).

Find the size of hole punch that will work best with your particular leather screws, bolts, or attachment pieces.

Punch a hole in the leather. If you don’t have a leather punch, you could try using a drill bit or a screwdriver and hammer. The holes themselves won’t be seen.

Make sure your leather screws/bolts fit snugly into the hole you’ve punched.

Admire your chic and sleek leather handles, but continue to wait for the wood stain to dry completely. It’s hard to wait but important for a beautiful finished product!

Step 6 – Attach the Leather Handles
When the stain has dried completely, measure and mark where you want your handles to be attached. Drill the two screws/bolt holes in the front board of your rolling cart.

Attach the leather handles.

Admire your handywork so far. You’re almost done! Just need to attach the casters.

Step 7 – Add the Four Casters
Attach your four casters on the four corners of your rolling cart. Make sure, if you choose to screw into the plywood floor, that your screw is short enough to not pop through the other side.

I felt the casters were secure enough with just three (predrilled) screws placed into the two adjoining side boards, so I didn’t even bother with the fourth screw to secure it to the plywood.

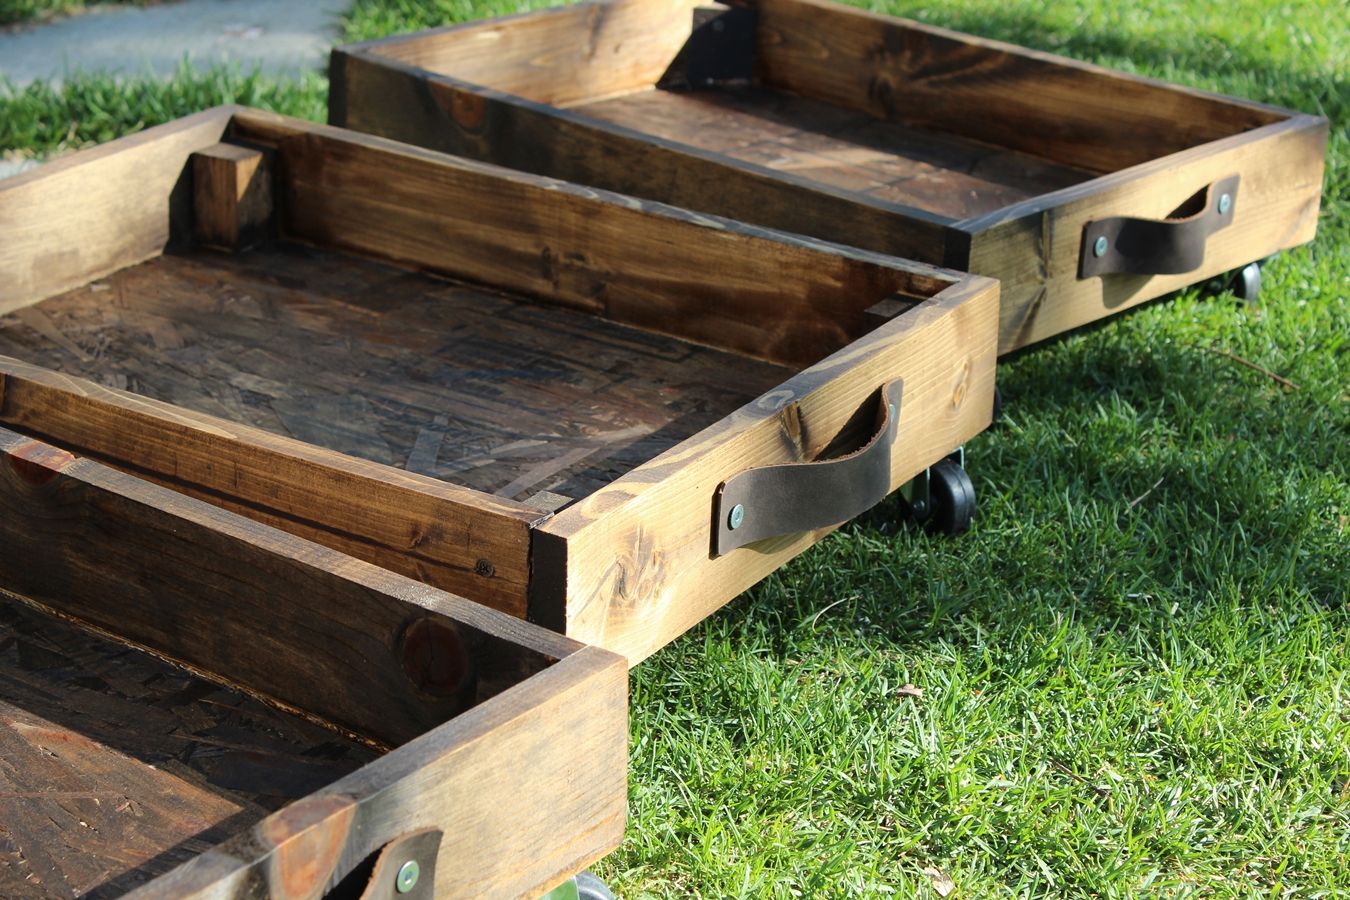
Viola! You’re done!

This really is a showstopper, with the wood stain showing off the wood grain, the leather handles adding a modern, sleek look, and the casters providing exceptional functionality.


You’re ready to go find something to store under the bed (or sofa or desk) now, aren’t you? Good news: You can!

And you don’t have to be ashamed if a corner or two peek out from wherever you’ve rolled this storage piece to because it’s beautiful.

This is such a fun and easy project to complete and is ideal for a weekend DIY project. There are so many places in your home where you’ll find this to be a handy storage solution, and due to its low height, you can easily store it under your bed or desk. The best thing about working with wood is that you can fully customize this project to your needs. Whether you want a subtly stained storage cart or a bold and colorful rolling storage cart, you can paint the cart once it’s finished to suit your home décor. I’m sure once you’ve made one rolling storage cart, you’ll be returning again to add a few more to your home.
We hope you enjoy making these DIY rolling storage carts, but more than that, we hope that they provide exceptional functionality and storage for your home and life. Happy DIYing!