DIY Confetti Pumpkin for a Festive Halloween

I love it when holiday decorations overlap; where one season’s style inspires another season’s décor. This DIY confetti pumpkin is just such a project – New Year’s Eve meets Halloween with a matte black pumpkin and plenty of copper-colored “confetti.”


This project is quite simple, although it’s not as fast as some because of the confetti placement. So, settle in with a good podcast, and enjoy creating a sparkling masterpiece for this year’s DIY Halloween décor.

Materials Needed for a cool Confetti Pumpkin:
- Craft pumpkin(s)
- Flat/matte black spray paint
- Metallic tape
- Scissors
Step by step Halloween pumpkin decor tutorial:

Step 1: seal the stem
Lend a slightly “real” flavor to your confetti pumpkin by leaving the stem in its natural state. (Or, if you want to paint it, skip this step altogether.) Place the stem in a plastic sandwich bag, and twist closed.

Place painters’ tape around the base of the stem to hold the plastic bag closed and in place.

Step 2: Add a drop cloth
Set the pumpkin on a drop cloth, and shake up your spray paint. Work in light strokes, and spray the entire pumpkin.

Step 3: Spray paint
Even matte/flat spray paint looks glossy when wet. Don’t let this bother you.

It’ll turn flat as it dries.

Step 4: second coat of paint
Add a second coat of paint after about 5-10 minutes, taking care that the insides of all the pumpkin creases are painted. Tip: Work your way around the pumpkin clockwise for one coat of paint, wait 5-10 minutes, then work your way around counter-clockwise for the second coat of paint.

Step 5: create the confetti part
As your spray paint is drying, you can make use of your time by creating your “confetti.” This can really be anything with a metallic face and a sticky back – washi tape would work well, as would contact paper or painted masking tape or anything, really. This particular example uses copper insect repellant tape, because it’s what I had on hand and because…copper. Yum.

Step 6: Cutting process
Cut confetti-size bits of your tape. These should be proportionate to the size of your pumpkin; for very small pumpkins, you will likely want them to be less than an inch long (this example shows 1” tape).

Cut about a hundred million of the confetti bits. Keep them slim so that, when applied, they resemble confetti.

When your craft pumpkin has thoroughly dried (notice how matte it is? A perfect backdrop for metallic tape bits), you’re ready to begin.
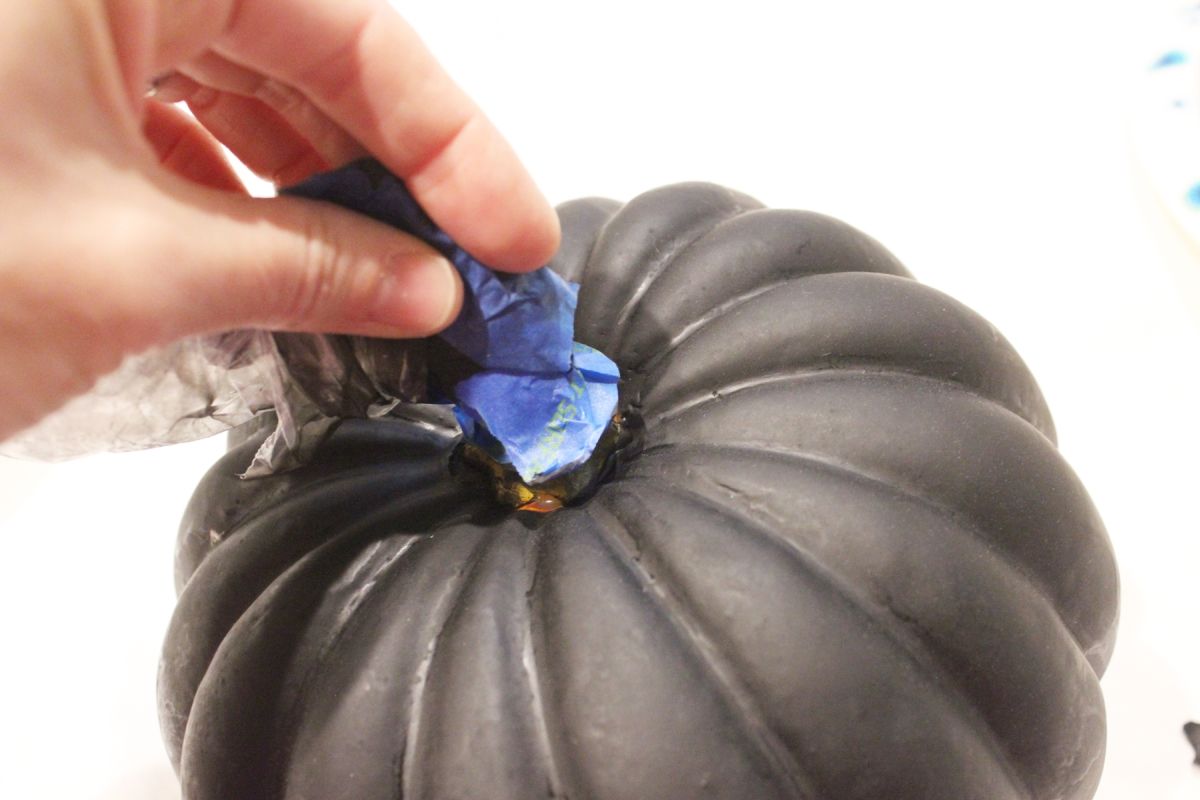
Step 7: Remove the plastic bag
Carefully remove your painters’ tape and plastic bag.

Step 8: use tweezers
Because there are so many pieces of confetti, I recommend using tweezers to remove the backs from the sticky tape. This helps to reduce the paper cut potential from using your fingernail over and over and over again.

Step 9: Start from the bottom
Start near the bottom of your pumpkin. You can, although you certainly don’t need to, add confetti to the very bottom of the pumpkin. In this example, the first part of the pumpkin sides curving up from the bottom served as the confetti’s starting point.

To make this pumpkin confetti work, you’ll want the confetti to be thickest at the bottom of the pumpkin, then gradually lighten as you move up the pumpkin sides toward the stem. This resembles floating confetti.

Step 10: Keep a few gaps
Maintain a few gaps of paint showing through your confetti bits as you apply them near the bottom, but don’t hesitate to overlap them to really make a solid showing of metallic confetti color down here.

About a third of the way up the pumpkin sides (confetti should be pretty packed in this lower third), it’s time to start spacing out the confetti a bit more. Move into confetti groupings of two or three, rather than whole masses. Then, on the top third of the pumpkin, confetti bits should be singles only.

To enhance the contrast of confetti mass toward single confetti bits, and if you have extra confetti strips, feel free to fill in the bottom of the pumpkin even more at this point.

It’s looking good. This is sort of therapeutic, in a DIY crafting way.

Conclusion
The bottom of this pumpkin looks like this. Copper is pretty solid for the bottom inch or so, then paint gaps become visible between the confetti bits, becoming more and more sparse as they travel up the sides of the pumpkin.

Use the pumpkin as a stand-alone decoration, or pair with other neutral pumpkins for a unique spin on your Halloween décor this year.

This project could be modified in a number of ways – change out the copper metallic tape for gold or silver if you want to match the décor you’ve already got.

You could also opt for a different paint color – white or cream with copper or gold confetti would brighten up your décor for Halloween as well as through the Thanksgiving holiday.

If you have metallic dishes, consider coordinating your confetti pumpkin with those. Gold trim on some stemware, for example, might make you want to try gold tape on your confetti pumpkin.

This copper confetti pumpkin stars in a simple centerpiece with copper hammered drinking cups on the table.

You could try to use a real pumpkin for this project if you want. Beware, though, the waxiness of some pumpkin shells will make it harder for the paint and tape to stick and stay put. And you won’t be able to keep it year after year.

We hope you enjoy creating your own DIY copper confetti pumpkin.
Happy Halloween DIYing!