DIY Personalized String Art – Tree

By definition, string art is the product of one’s using string, wool, or wire to create geometric or representational designs by stringing the medium between points. Many variations of string art exist, including the one shown in this tutorial – the medium being strung to create the negative, or inverse, design. The process is not hard; in fact, it can be somewhat therapeutic. But the end result is a personalized string art design that you are going to love.(If you’re a fan of string art, check out another string art tutorial that involves maps.)
DIY Level: Beginner

Materials Needed:
- Wood cut to size (example uses a 12”x12” piece of plywood, sanded and stained)
- Nails (example uses 17 gauge 1” nails)
- String (example uses white crochet thread)
- Hammer, butcher paper cut to size of wood, and pencil

Decide what design or picture you want your string art to represent. I found a picture of a redwood tree with a silhouette that I liked and decided to use that as my guide. Sketch the silhouette onto your paper.

Line up your paper on your piece of wood. Hammer a couple of nails to hold the paper in place.
(Before you attach your sketch to the wood, pay attention to the wood grain if it plays any role in your string art design. For example, for this redwood tree, I wanted the grain of the wood to flow vertically and so attached my sketch accordingly.)

Follow your sketched silhouette to hammer in nails about every 1/2″. Depending on the complexity of your drawing, you may need to make modifications – you may not be able to capture every detail drawn, but do the best you can. I found it helpful to visualize where the actual string would go as I hammered, so that I came out with a silhouette that stayed true to my concept, if not the actual sketch.
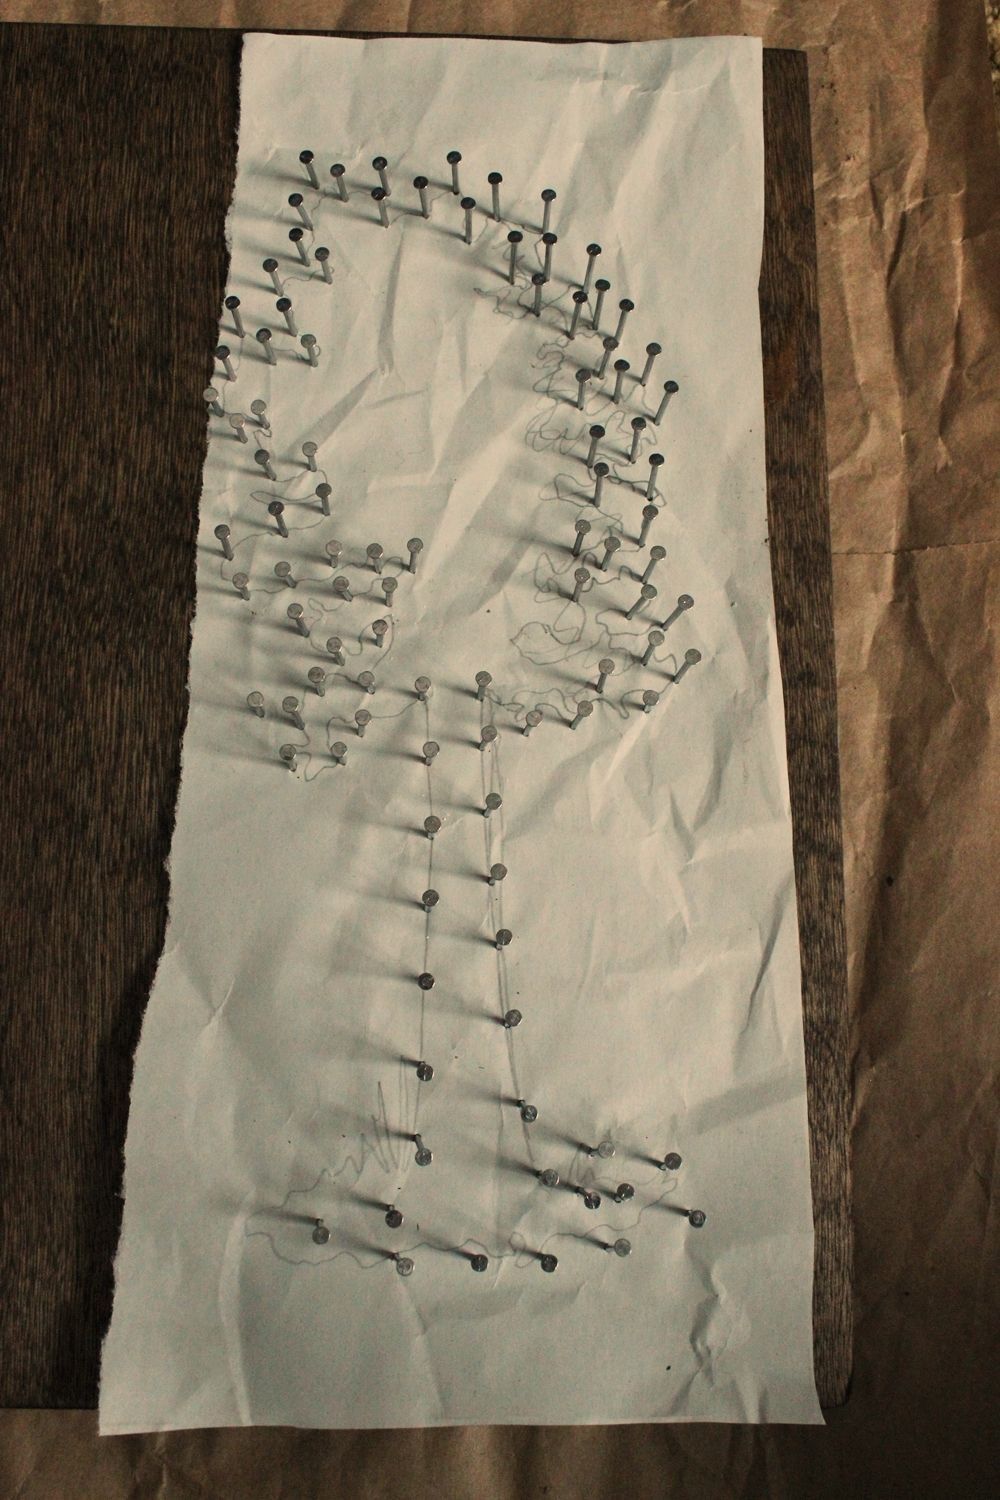
When I finished my tree, the nail-to-sketch result looked like this. If you look closely, you’ll see many places where I had to veer from the sketch in order to make the string art work with the nails.

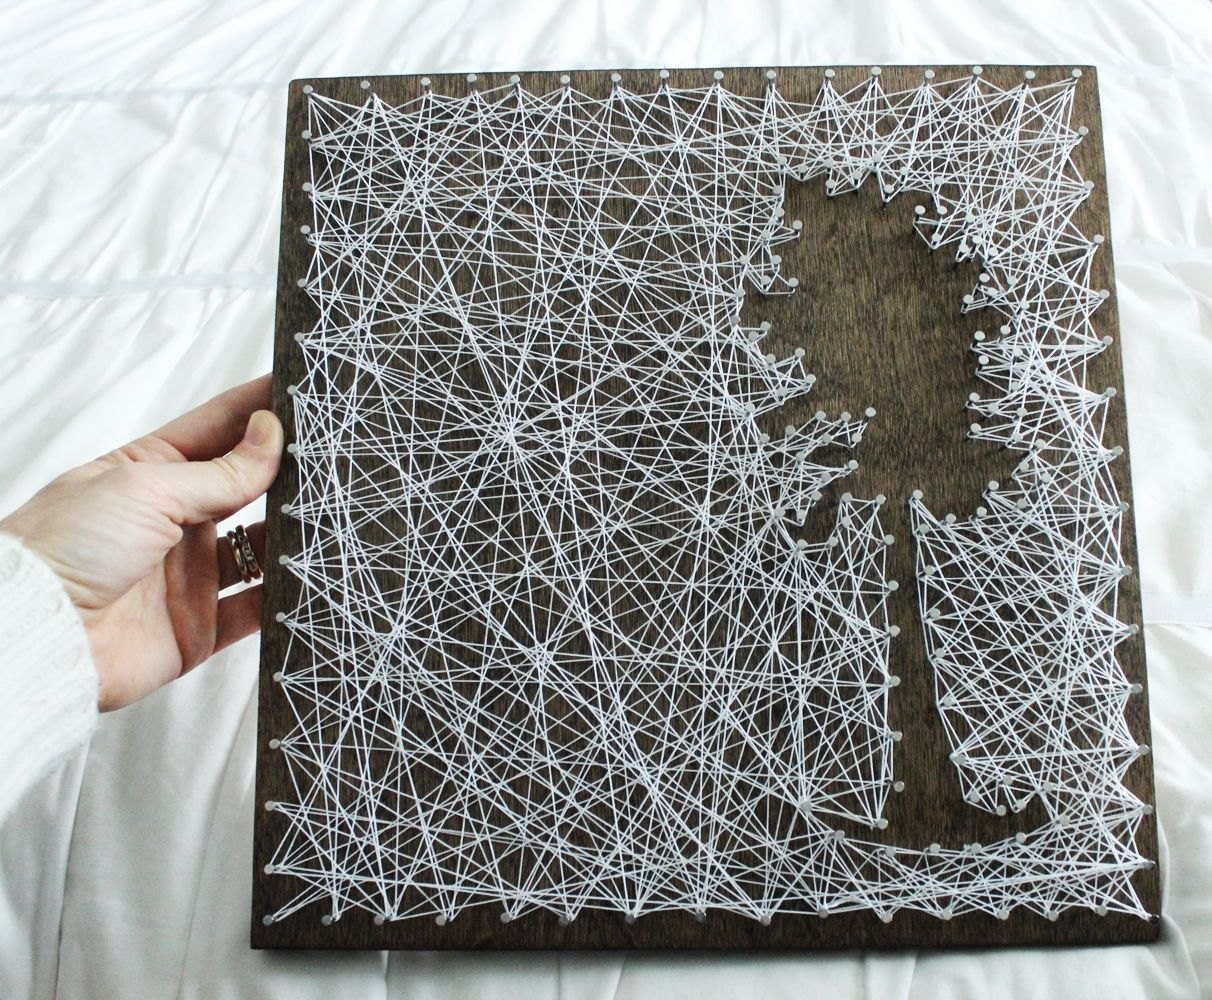
Now hammer nails evenly around the perimeter of your board, about 1/4″-1/2” from the edge. Use your hammer to gently straighten out the line formed by the nail heads, if necessary.

Your string art might look something like this at this point. You can choose to remove your paper sketch now or not. Because the nails were a little confusing, I chose to keep the paper on for a while.

Make a small loop at the end of your string, and choose an obscure nail to hook it to.

Hook the loop to the nail of your choice.

Tighten the loop, then do another loop to tighten the knot around the nail.

Pull the knot small and tight.

Trim the end of your string close to the nail. You’re ready to go.

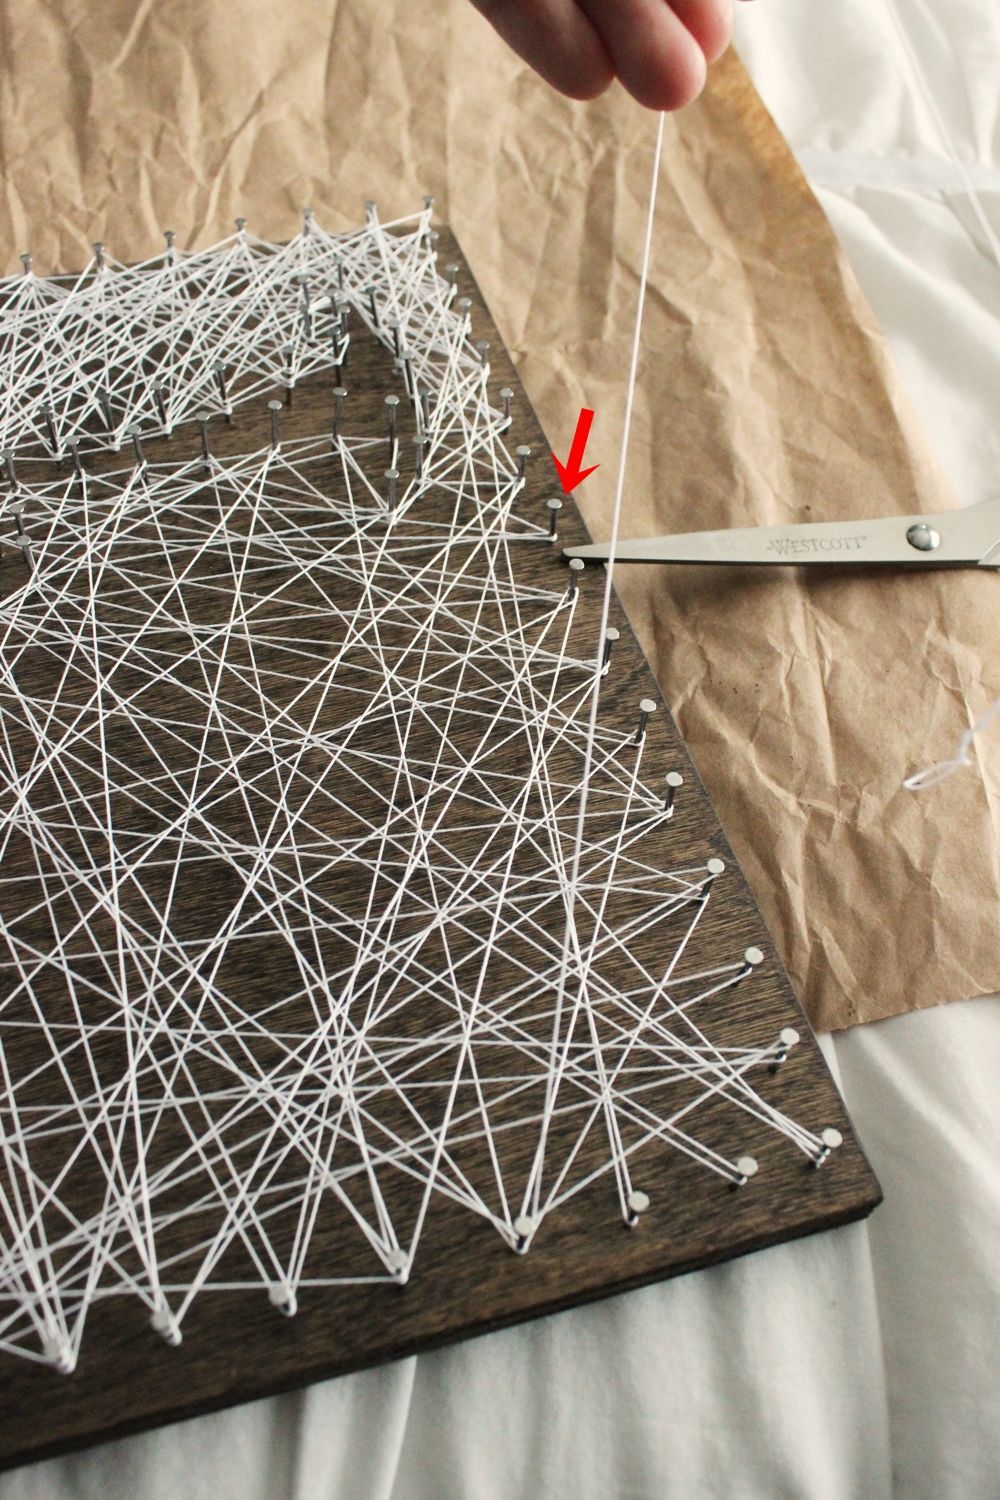
Start stringing the string toward the nails along the outer edge.

Make the string around each nail of your design meet up with many other nails. The idea in creating an inverse or negative string art design is to fill the space around it with string – key word: FILL the space. This is accomplished by lots of string running in a variety of directions, angles, and lengths to form a semi-solid look.

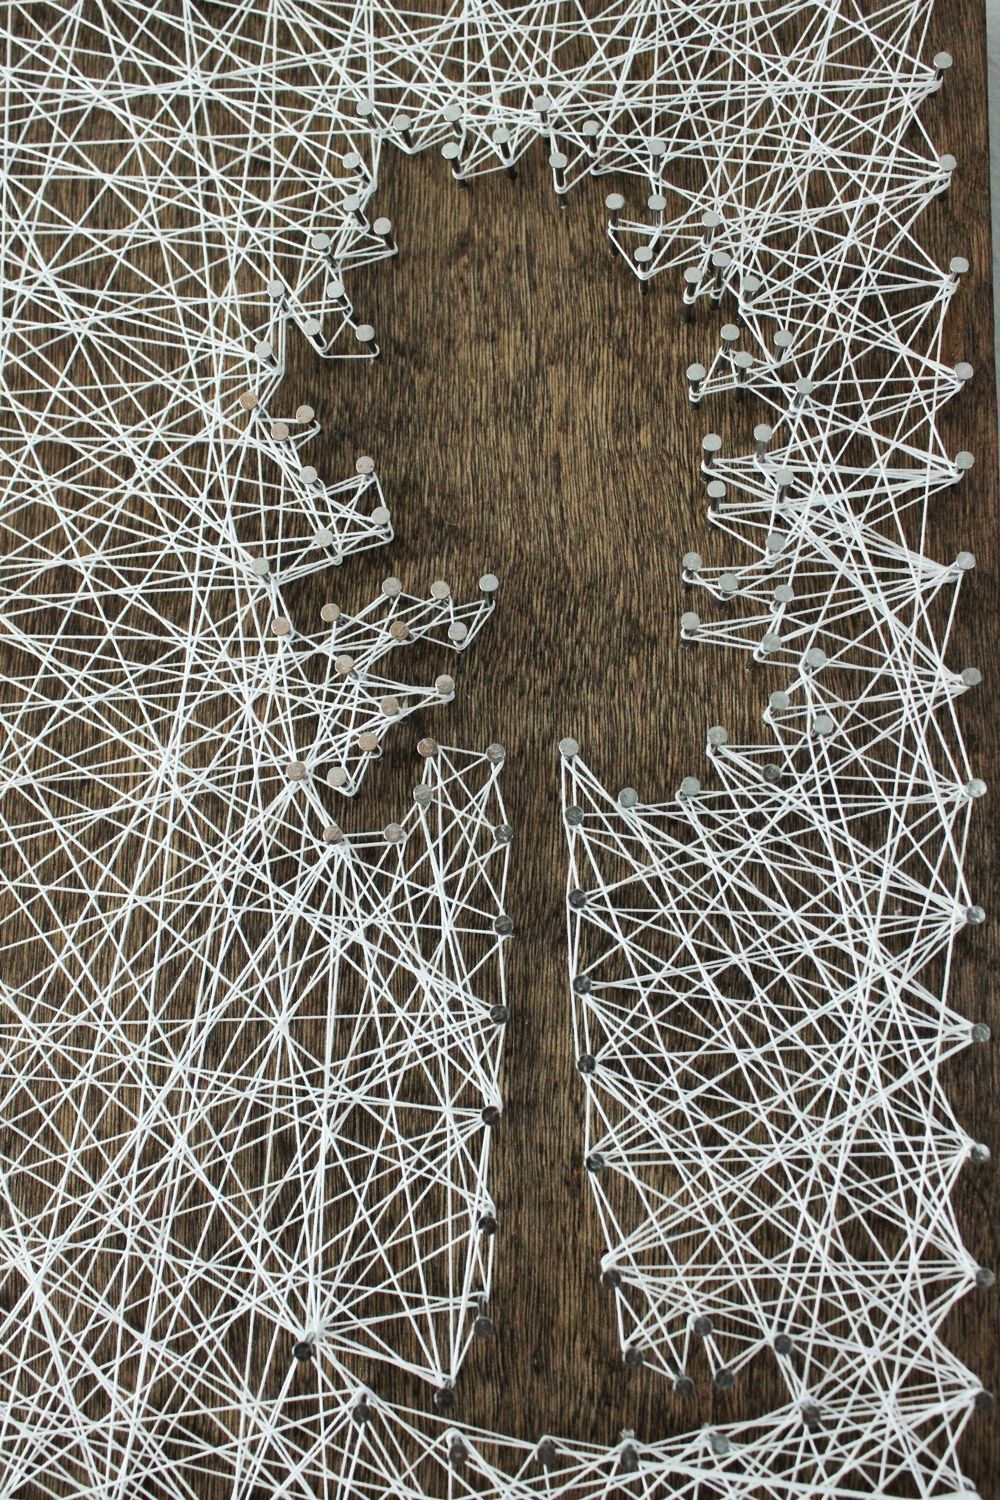
It might prove helpful to frame the silhouette by weaving the string around the nails as you creating your angled string lines.

This is effective in a case like this tree, where the nails don’t form a definitive shape at first glance; it will help to keep you from stringing through nail gaps that are meant to be kept open.

It’s fun, right? Keep a variety of lengths and angles.

If you’ve chosen to keep your sketch paper intact, now is a good time to rip it out, when you can still access it relatively easily. Rip it, then use fingers or tweezers to pull out the pieces. Take care not to pull or stretch the string.

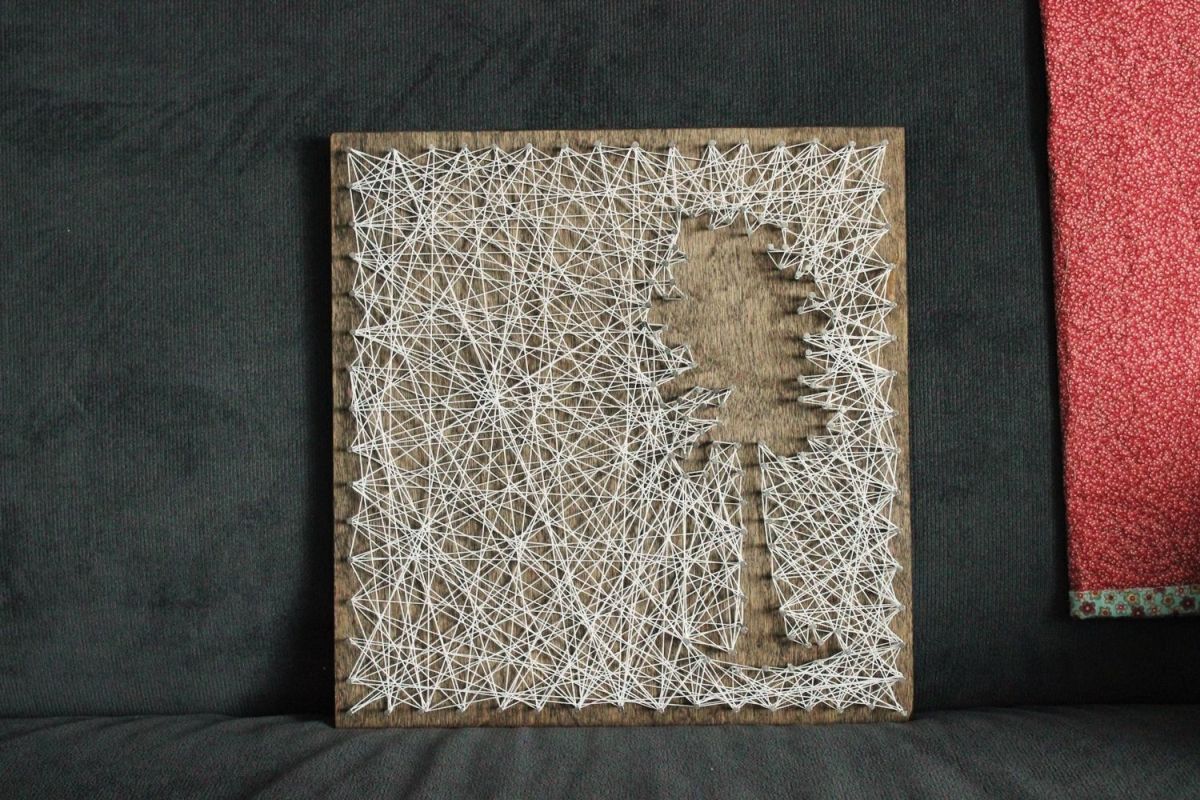
If your string art design is off-centered, as this redwood tree is, you’ll want to make sure the feel of the string fill is equal on both sides. In other words, you don’t want one side of your design to look very full and the other side to look stringy and weak. As you string your piece, keep an eye on both sides to keep them looking even.
Another tip is to check your perimeter nails. Ideally, you want strings to fan out from each nail. If a nail has a large space on one side, this means that your string art overall is missing that angle.

Maneuver your string so that you can fill that angle. Do this on all nails where you notice a blank space.

Take a step back. Fill spaces as needed. When your string art has an even fill all around your design and has enough fill to make the negative design itself stand out, you’re ready to tie off your string.

Pull the string taut (but not too tight) toward the nail you will end your string on.

Repeat the loop-knot steps that you used to begin forming your string art. I tied three knots on this final nail, for good measure.
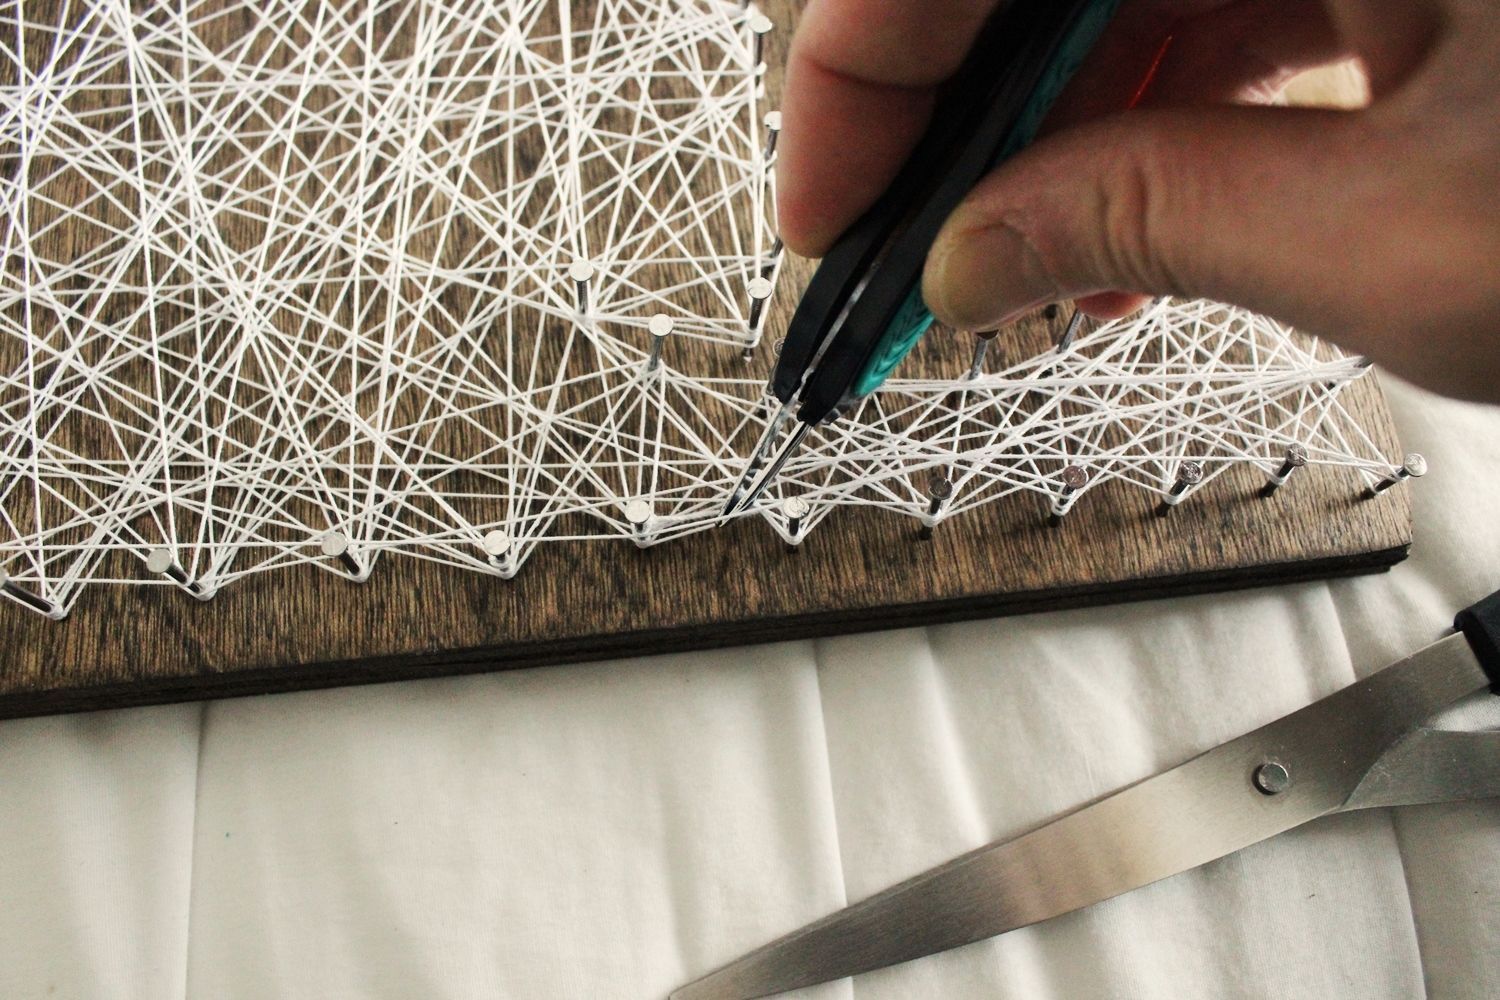
Trim the string very close to the nail OR cut it a little longer and use tweezers to “hide” it in a nearby mass of strings.

You’ve done your job perfectly if you can’t even tell where the end of the string is.

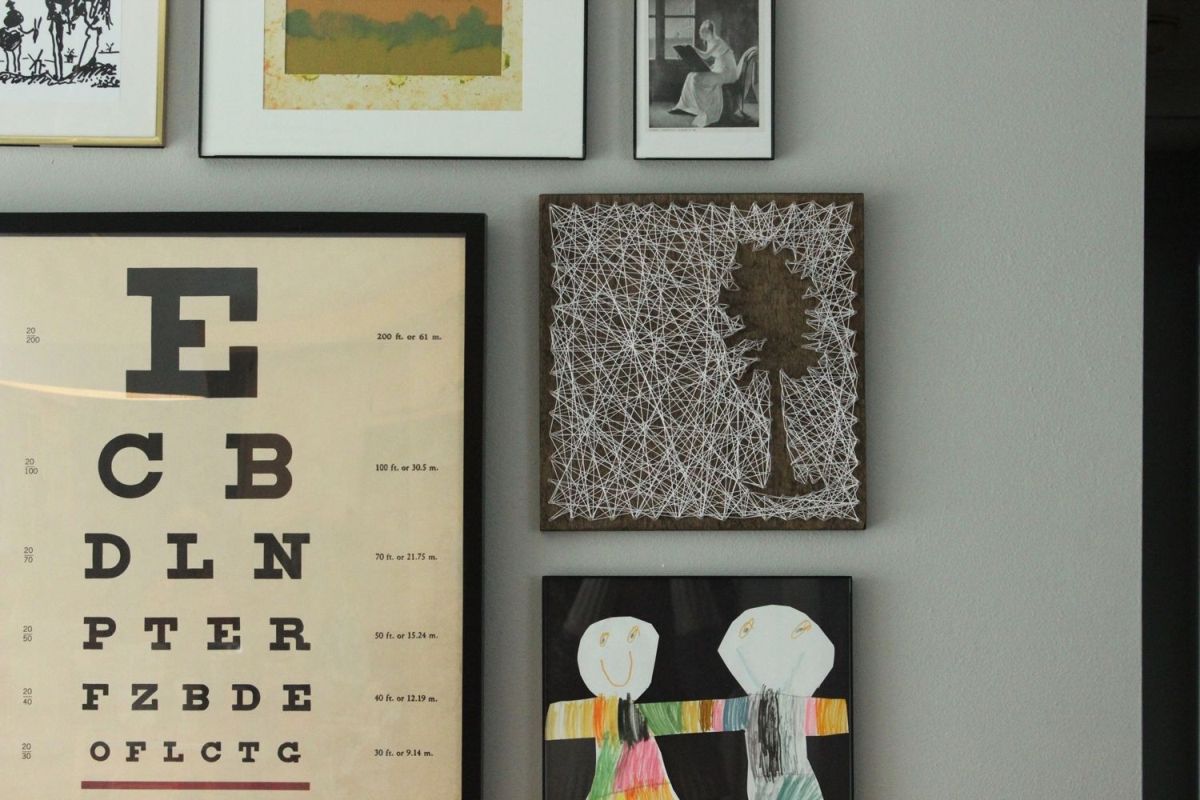
Add a picture-hanging attachment if you’d like, and hang your string art masterpiece on its own or add it to your gallery wall.
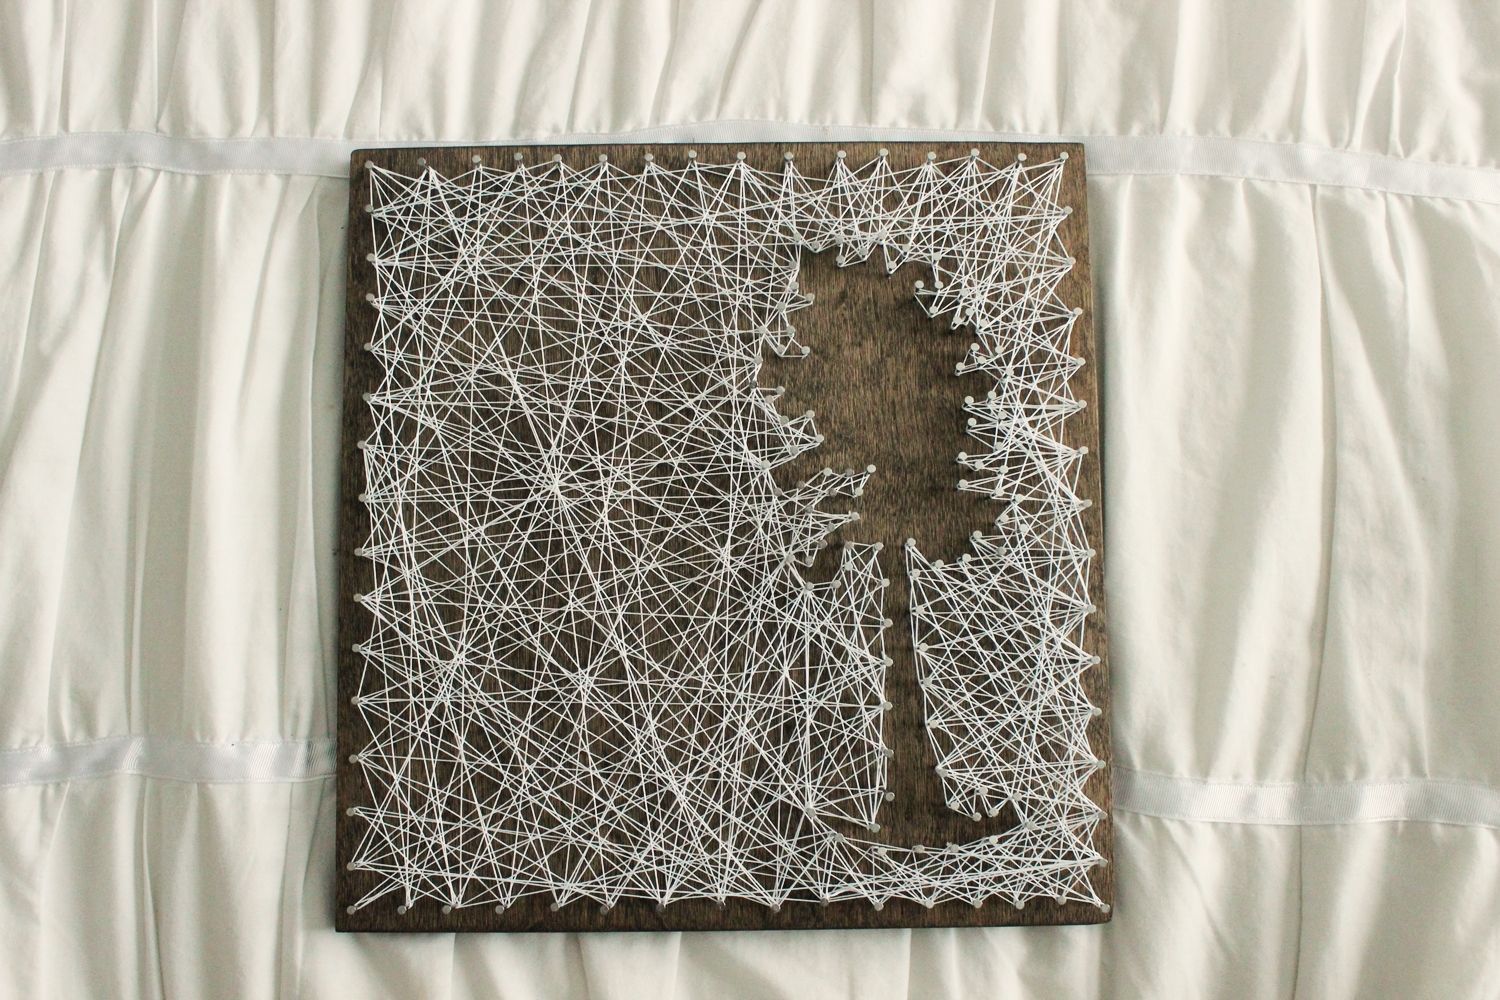
It really is a beautiful piece. I love how the organic feel of the thing perfectly matches the redwood image.

And I love how the grain of the wood enhances the negative string art tree as well. I just love it all.

Negative pieces are inherently unexpected and, therefore, a great addition to any gallery wall. A face silhouette, an initial, a piece of fruit, an animal…the possibilities really are limitless.

We hope you enjoy your new DIY string art piece! It’s a fun project to create, and the end artistic result is very satisfying.