DIY Modern Thanksgiving Banners

Typically when we host Thanksgiving, I’m so busy planning the menu and tablescape, that all other decor tends to fall by the wayside. This year, however, I’m ahead of schedule (yahoo!) and decided to tackle some Thanksgiving banners to hang above my buffet and around the house. The banner phrases center around the main themes of Thanksgiving and attempt to reinforce what the day is really all about. The styling is simple and modern which means, pumpkins to footballs, they’ll be a welcomed festive addition in a variety of decor aesthetics.


Materials:
- Printable PDF Iron-Transfers
- Canvas Fabric
- Iron-on Hem Tape
- Good Quality Iron-on Transfer Paper
- Iron
- 12″ Wood Dowel
- Leather Shoestring
- Basic Crafting Materials: Scissors, Ruler, Pencil

1. Draw a 13″ x 10.5″ rectangle on canvas fabric. Then measure 1/2″ inward on the left and right sides and bottom of the rectangle, essentially drawing a 3-sided rectangle inside the larger one.
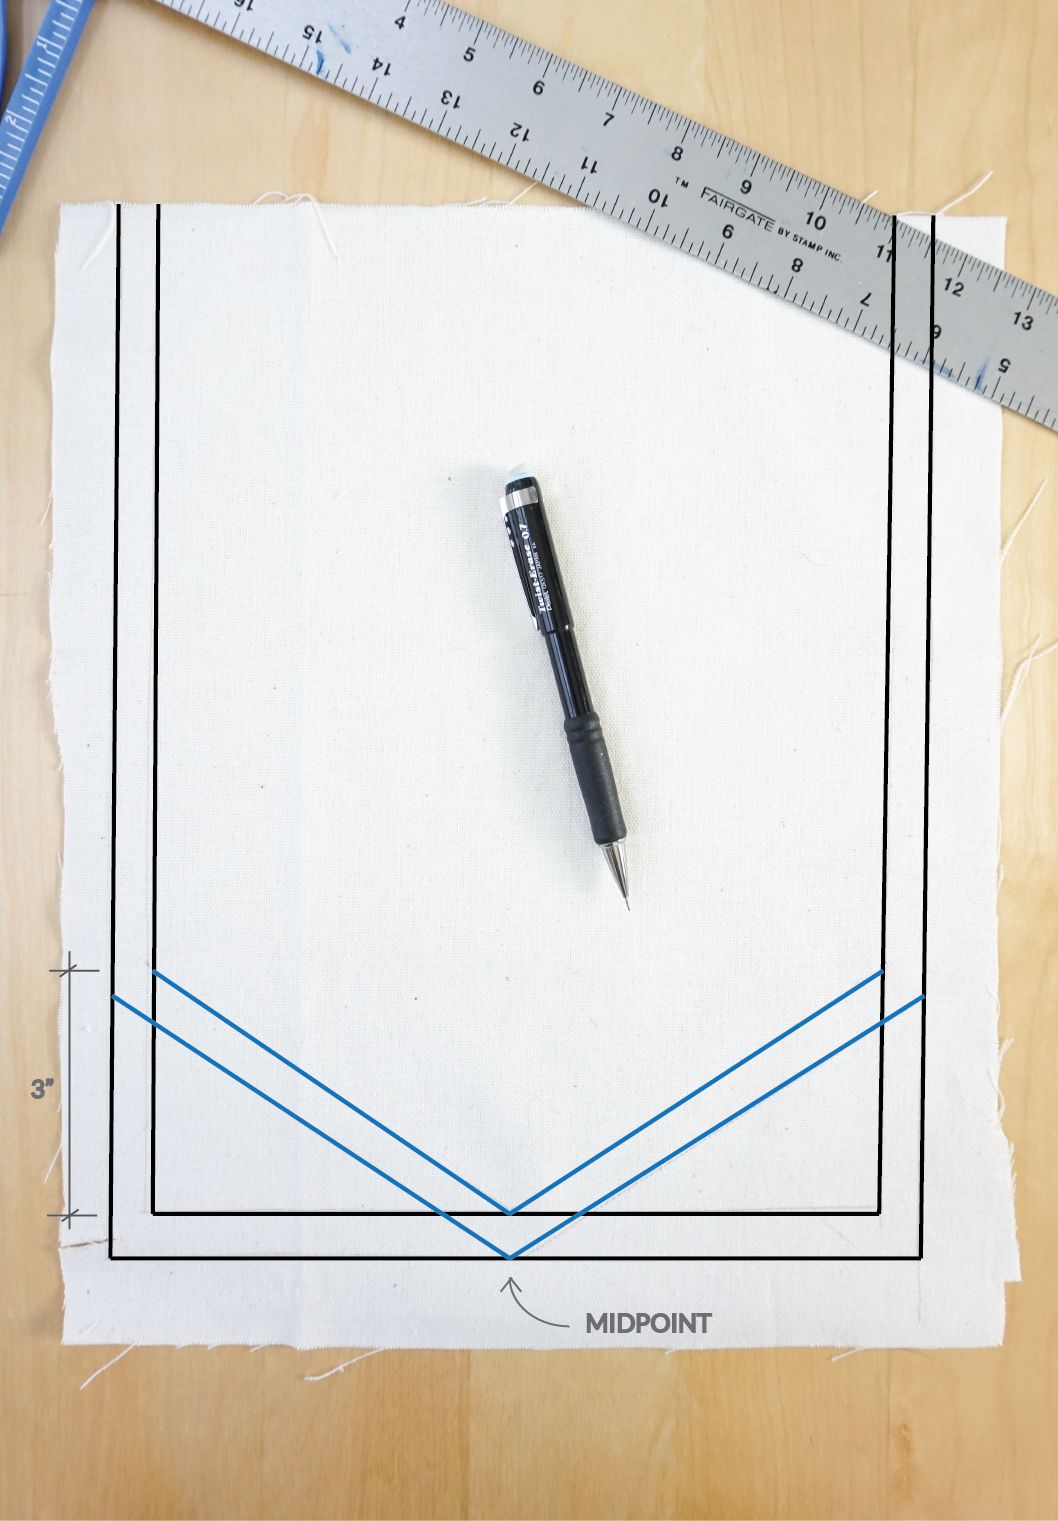
2. Find the midpoint of both bottom (horizontal) lines. Measure 3″ up from the bottom corners of each rectangle on the left side. Repeat with the right side. Connect the larger rectangle’s midpoint to the marks on the sides of the larger rectangles with a diagonal line. Repeat with the smaller rectangle’s midpoint and side marks.
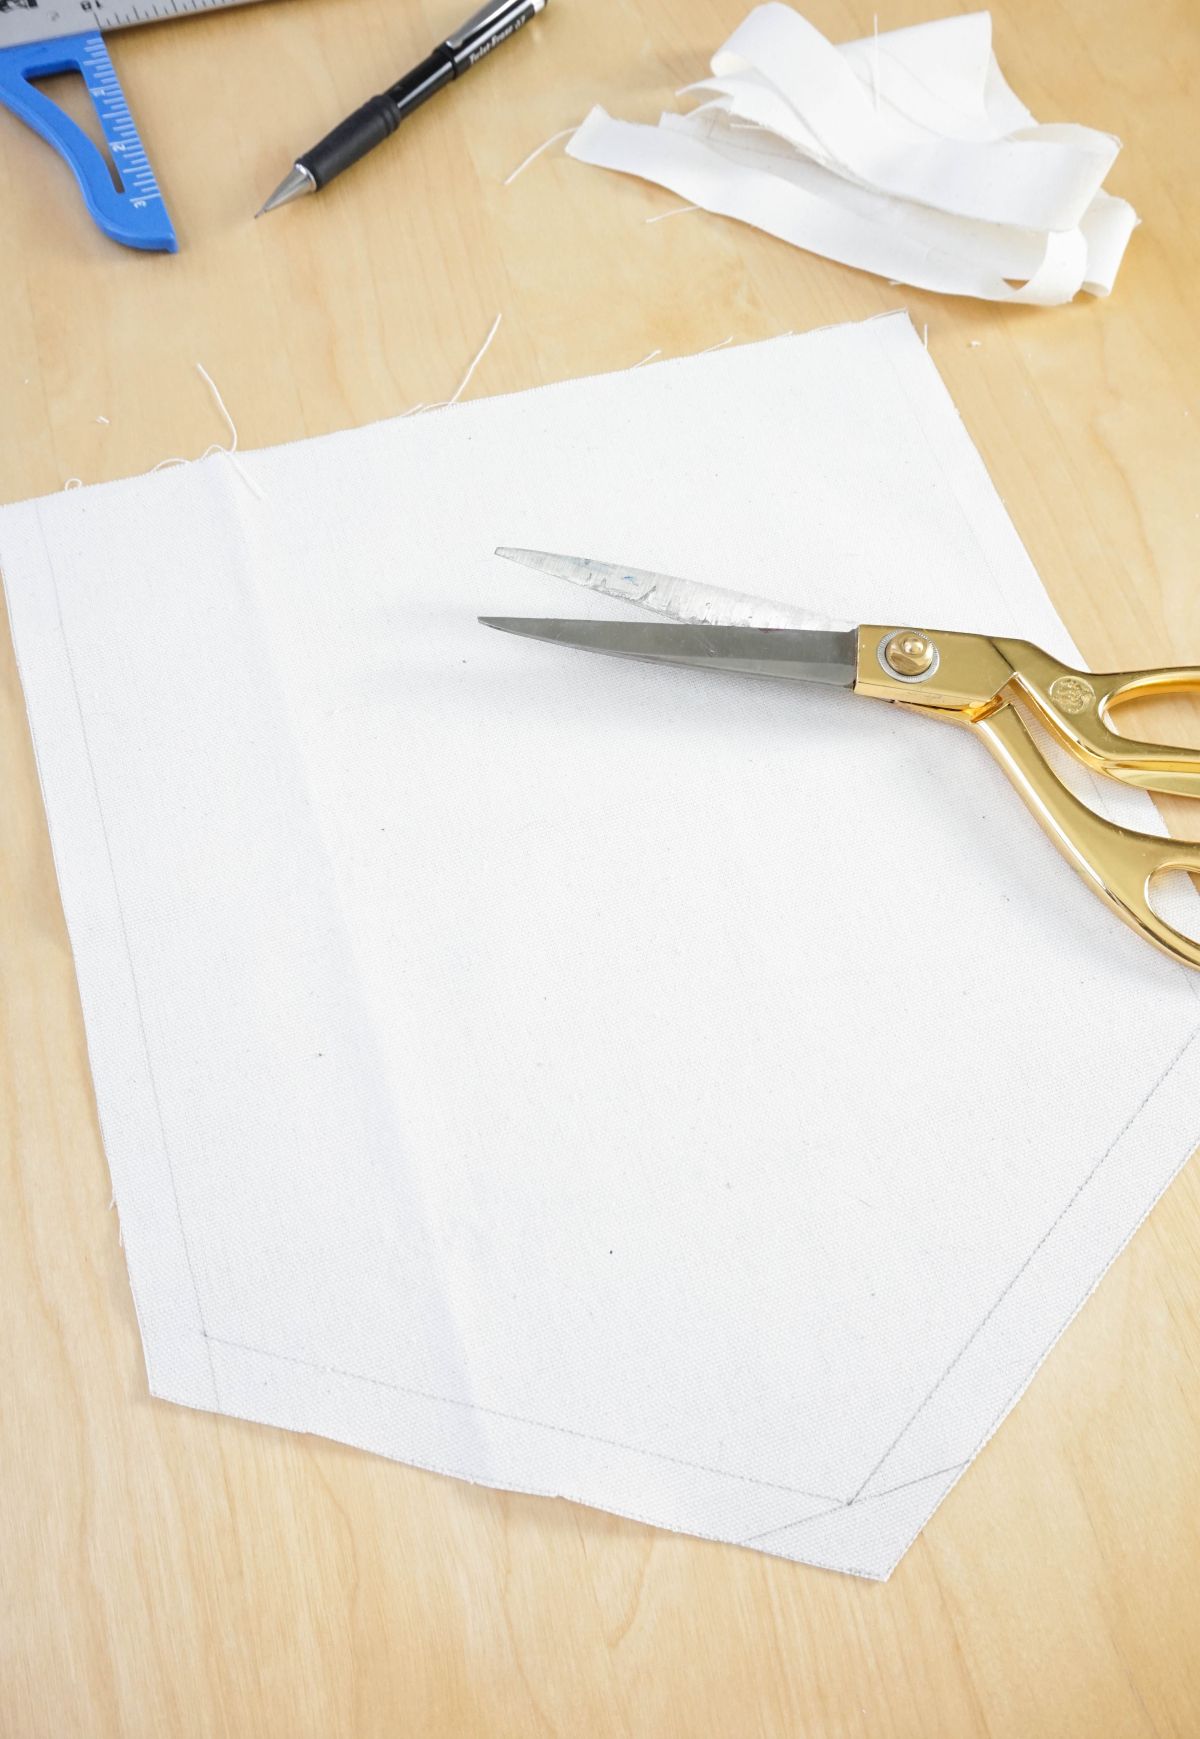
3. Cut out the banner shape along the outermost outline.

4. Place iron-on hem tape just inside the smaller banner outline. Heat your iron to the hottest setting, no steam.

5. Fold the fabric over at the smaller banner outline, enclosing the hem tape, and iron. Repeat with the opposite side of the banner, as well as the bottom triangular point.

6. Create the rod pocket for the wood dowel by folding the top edge of the banner down 1.5″. Secure the edge in place by ironing a strip of hem tape between the layers of fabric. Make sure to leave enough space for the wood dowel to fit through.

7. Print the Iron Transfer PDF onto iron transfer paper using an inkjet printer.

8. Cut out the words leaving an 1/8″ white border around the letters. Center them face down on the front of the banner.

9. Heat the words with an iron set to the highest setting for about 60 seconds. Press down firmly on the iron with both hands, and pay close attention to corners.

10. Allow the iron transfers to cool completely and steadily peel the backing off.

11. Thread the wood dowel through the top rod pocket.

12. Tie leather string onto each end of the wood dowel.
