He Rebuilt His 1957 Kitchen With Cabinets He Made Himself: The Entire Remodel Cost Just $5,000

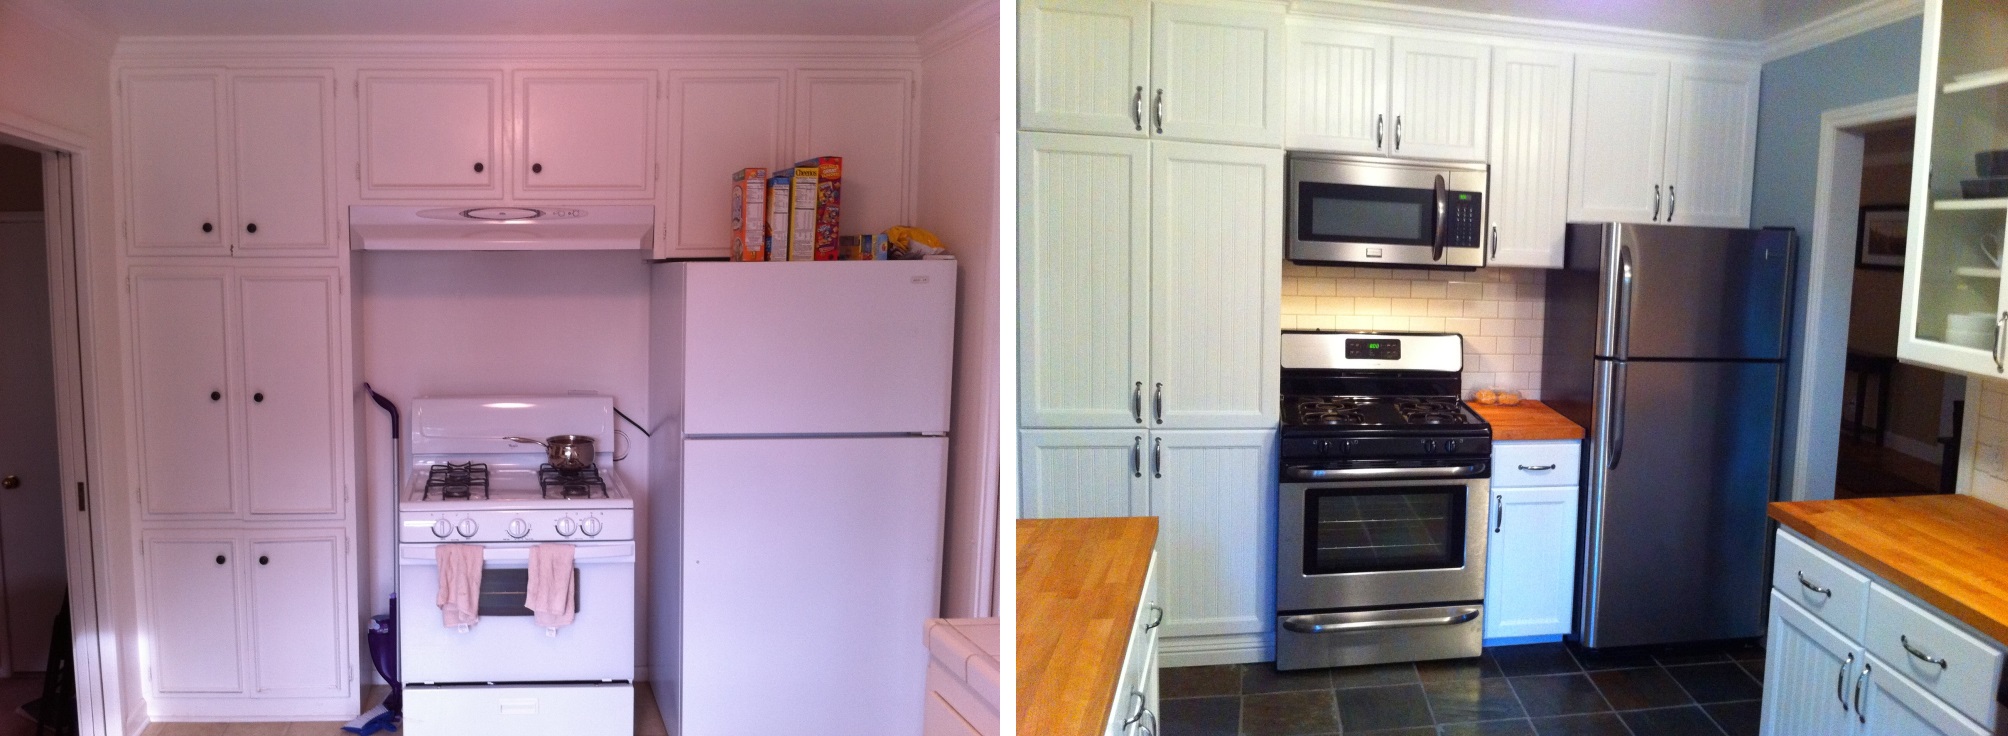
White cabinets covered one wall of a 1957 kitchen, with a gas stove squeezed between tall storage units and a refrigerator standing beside it. The house still had its original cabinetry, while a tiled countertop added decades later occupied part of the room. Storage was limited, counter space was scarce, and an opening toward the adjoining room left another section of the kitchen without much purpose.
Instead of ordering replacement cabinets, Imgur creator matt10187 built his own using plywood and poplar. He bought appliances on sale and sourced the sink, cabinet hardware, and countertops from IKEA, bringing the reported renovation cost to a little over $5,000.
The project involved removing the original cabinets, opening sections of wall, building new storage, and installing a farmhouse sink, butcher-block counters, and dark slate flooring. The finished kitchen has more work surfaces and a different layout, but the most interesting part is how the unused spaces became part of the new design.
The 1957 kitchen still had its original cabinets
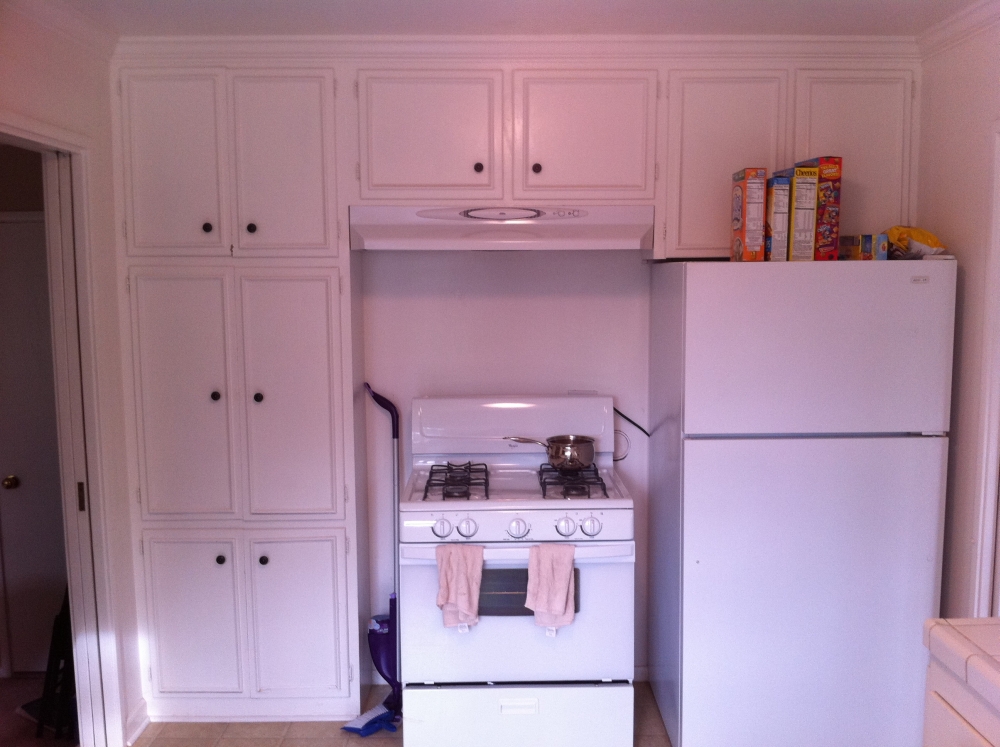
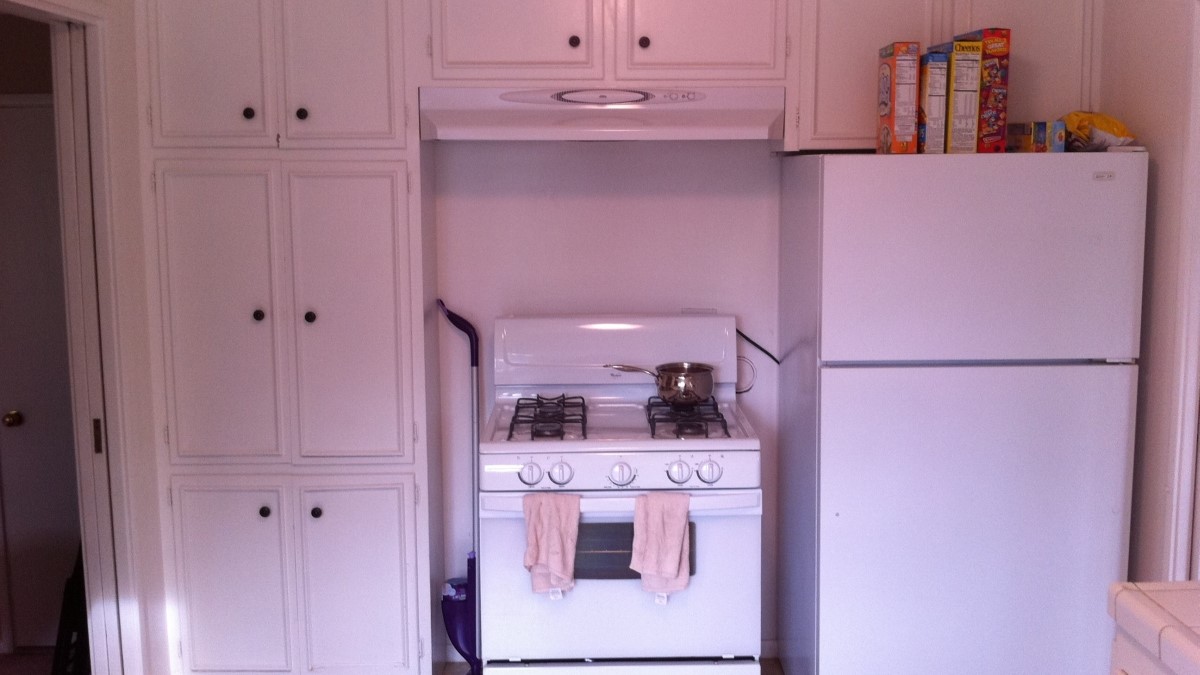
The original cooking wall had tall white cabinets beside a freestanding gas stove, with smaller upper cabinets above the range hood. A white refrigerator occupied the remaining space, leaving almost no counter between the appliances.
The cabinet doors had raised borders, black round knobs, and a finish that matched the stove and refrigerator. Although the storage reached close to the ceiling, the arrangement provided little room for food preparation.
The pass-through occupied a wall without useful storage
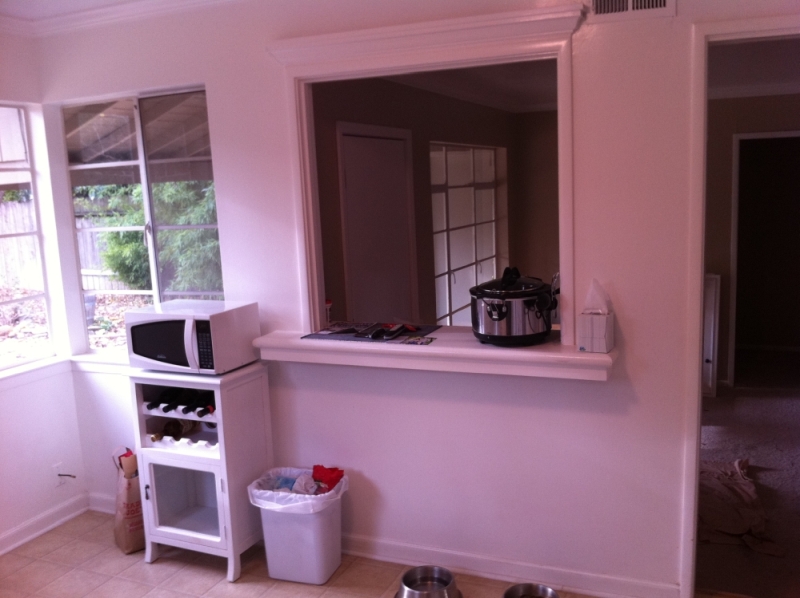
A wide pass-through connected the kitchen with the adjoining room, with a narrow ledge beneath the opening. A small microwave stand sat beside the windows, while the floor area below the pass-through held a trash can and pet bowls.
The opening offered a view into the next room but left a section of wall without built-in storage. The renovation would introduce a cabinet and countertop beneath it, using space that had previously remained open.
Demolition exposed the plumbing behind the sink wall
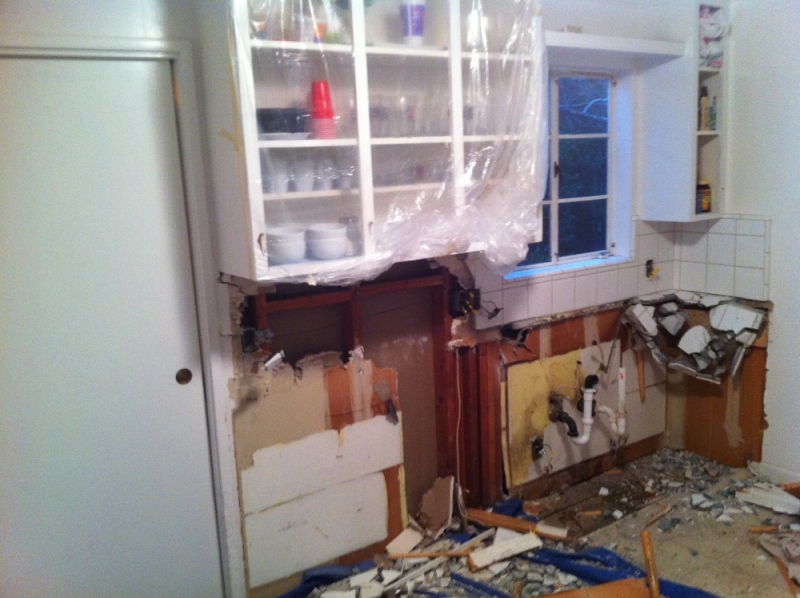
Removing the original lower cabinets and tiled countertop exposed sections of framing beneath the window. The sink plumbing remained visible, while broken tiles and wall material covered the floor.
The upper glass-front cabinets were protected with plastic during this stage. Their position beside the window remained part of the new arrangement, while the lower section was cleared for replacement cabinet boxes and a different sink.
The stove wall was stripped before the new cabinets went in
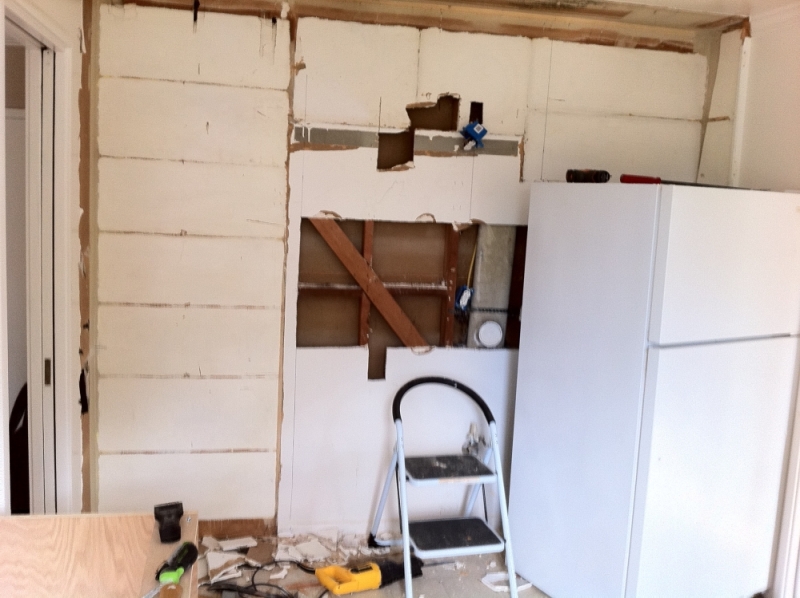
The former cooking wall shows the marks left by the removed cabinets, including horizontal lines across the plaster and an opening exposing the framing behind the range position.
The refrigerator remained beside the work area during construction. The cleared wall provided space for new cabinetry designed around the replacement stove, microwave, and refrigerator.
Plywood cabinet boxes formed the new sink run
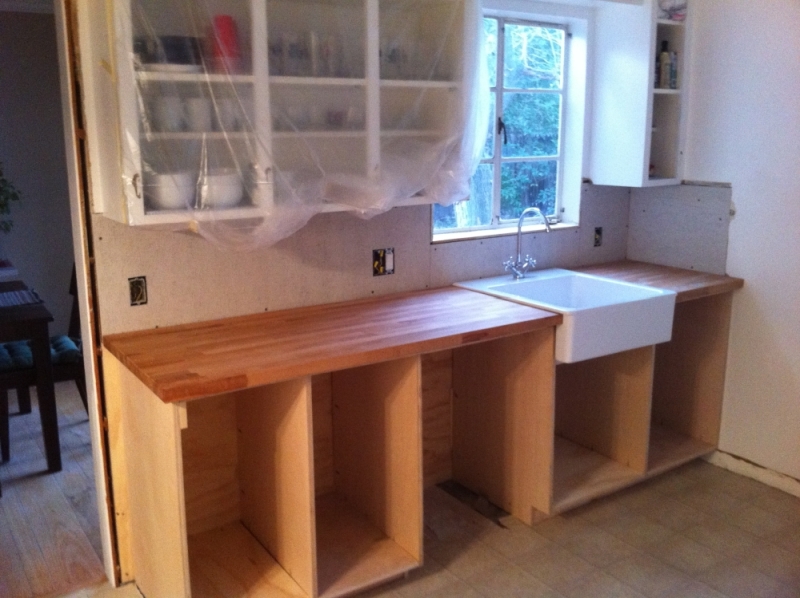
New plywood cabinet boxes were installed beneath the window, with open compartments awaiting doors and drawers. A butcher-block countertop extended across the units, interrupted by a white farmhouse sink with an exposed front apron.
The sink was positioned beneath the existing window, with a curved metal faucet mounted behind it. Building the base cabinets allowed the dimensions to accommodate the sink and adjacent work surfaces without ordering a complete fitted cabinet package.
The pass-through received a cabinet and wood countertop
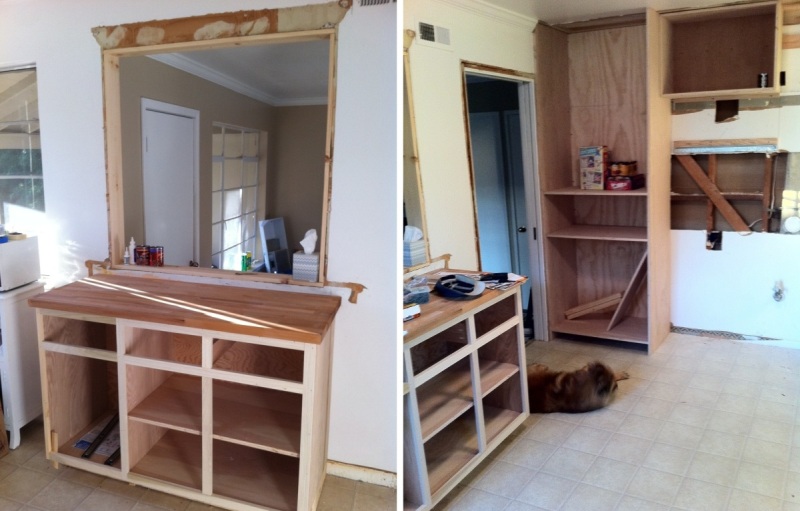
The empty wall beneath the pass-through gained a new base cabinet with drawers and open storage compartments. A butcher-block surface extended across its top, providing another preparation or serving area.
Beside it, a tall plywood cabinet was assembled to add vertical storage. The construction photographs show the cabinet frames before the white doors, drawer fronts, and finishing trim were installed.
A microwave cabinet was built into the cooking wall
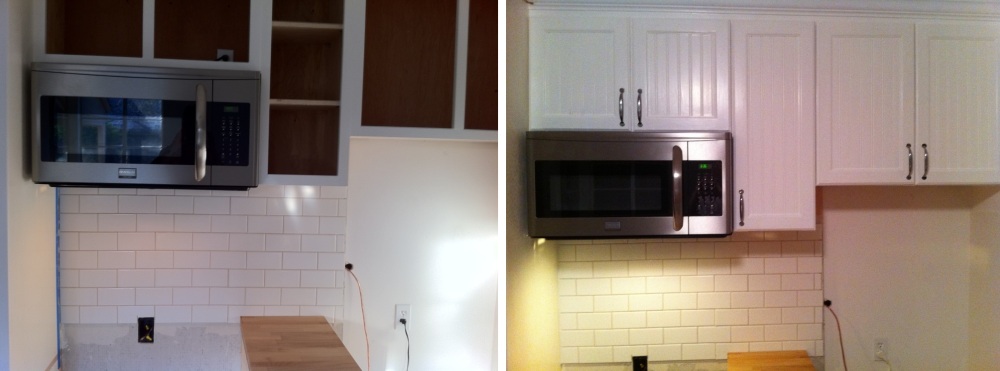
The replacement microwave was positioned within the new upper cabinetry, above a white subway tile backsplash. Open cabinet boxes surrounded the appliance during installation, showing how the storage was built around its dimensions.
The tile extends across the wall beneath the cabinets, replacing the plain surface behind the original stove. The new microwave arrangement also frees the surrounding wall for enclosed storage.
Beadboard cabinet fronts completed the sink wall
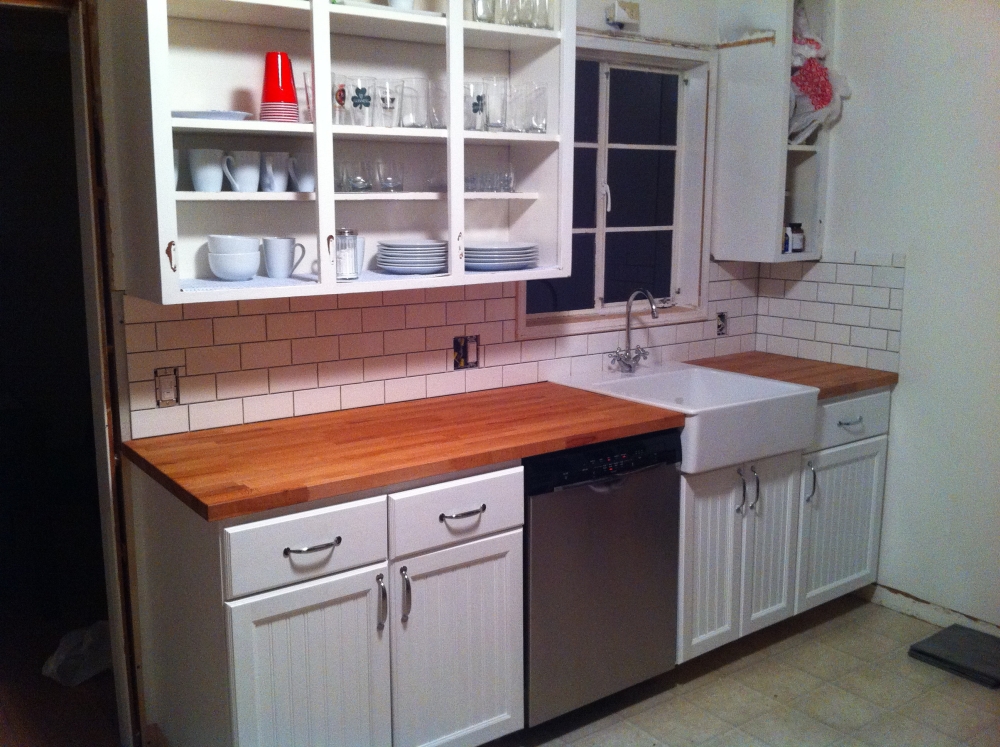
White cabinet doors with vertical beadboard panels covered the new plywood boxes, while curved silver handles replaced the original black knobs. The base cabinets frame a stainless dishwasher and the farmhouse sink beneath the window.
The butcher-block countertops remain exposed on both sides of the sink, introducing a natural wood finish against the white cabinetry and subway tile.
Glass-front cabinets remained above the new work surface
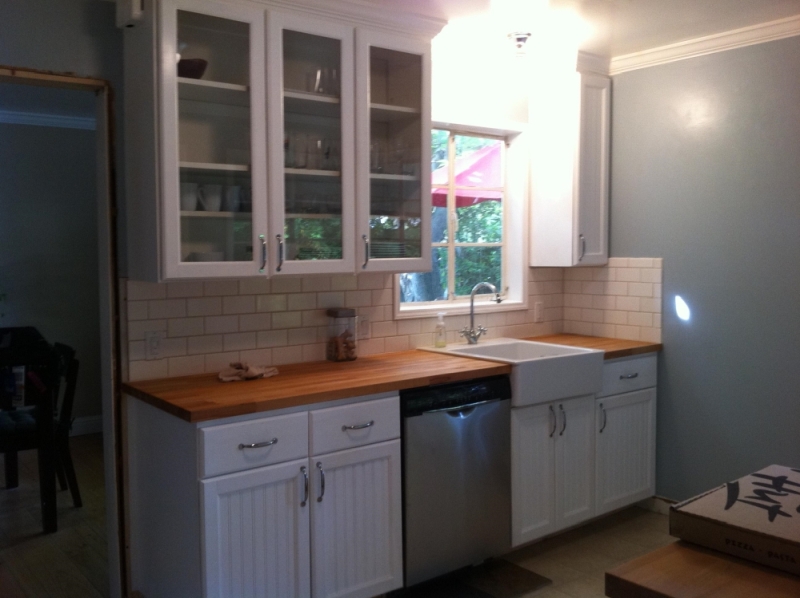
The upper cabinets beside the window have glass doors displaying dishes and glassware. Beneath them, the new base cabinets provide enclosed storage and drawers, with a stainless dishwasher positioned between the left counter and sink cabinet.
The backsplash follows the countertop around the window wall, while narrow open shelves occupy the space beside the upper cabinets.
A built-in bench replaced the empty space beneath the windows
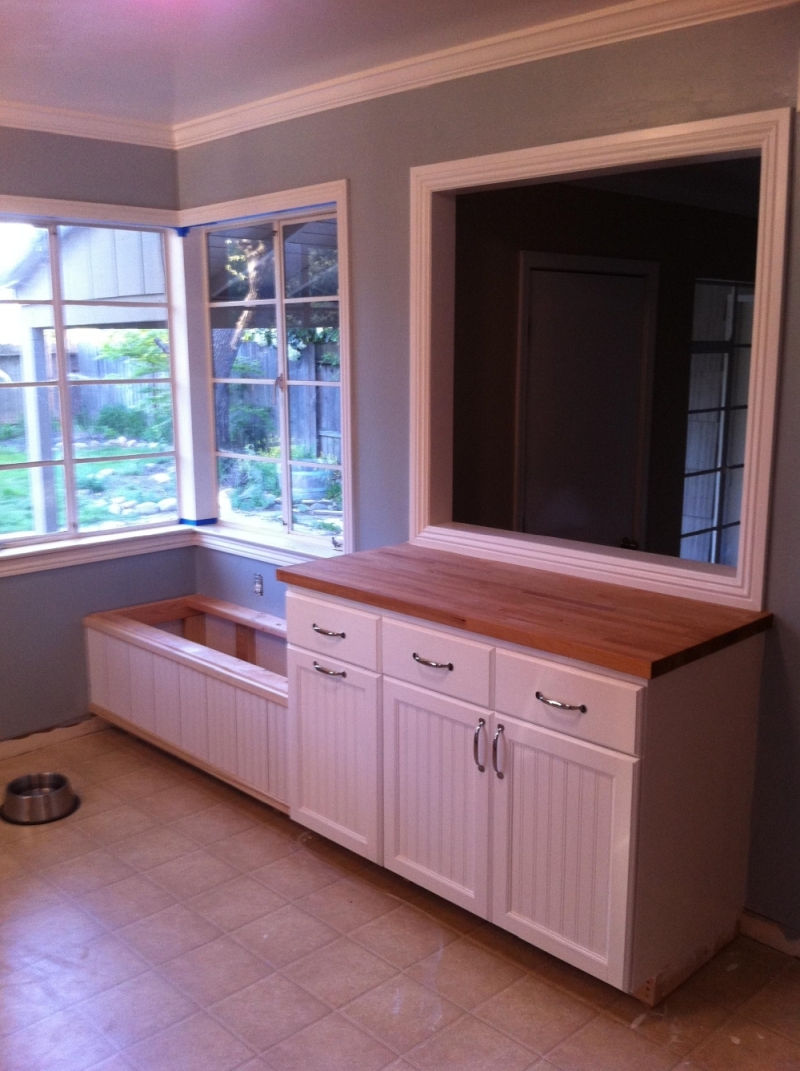
The corner beneath the windows gained a built-in bench beside the cabinet installed under the pass-through. White vertical paneling covers the bench front, while the adjoining cabinet has drawers, lower doors, and a butcher-block top.
The new arrangement uses the wall for seating and storage without closing the pass-through. It also removes the need for the separate microwave stand that previously occupied part of this area.
Dark slate tiles replaced the original light floor
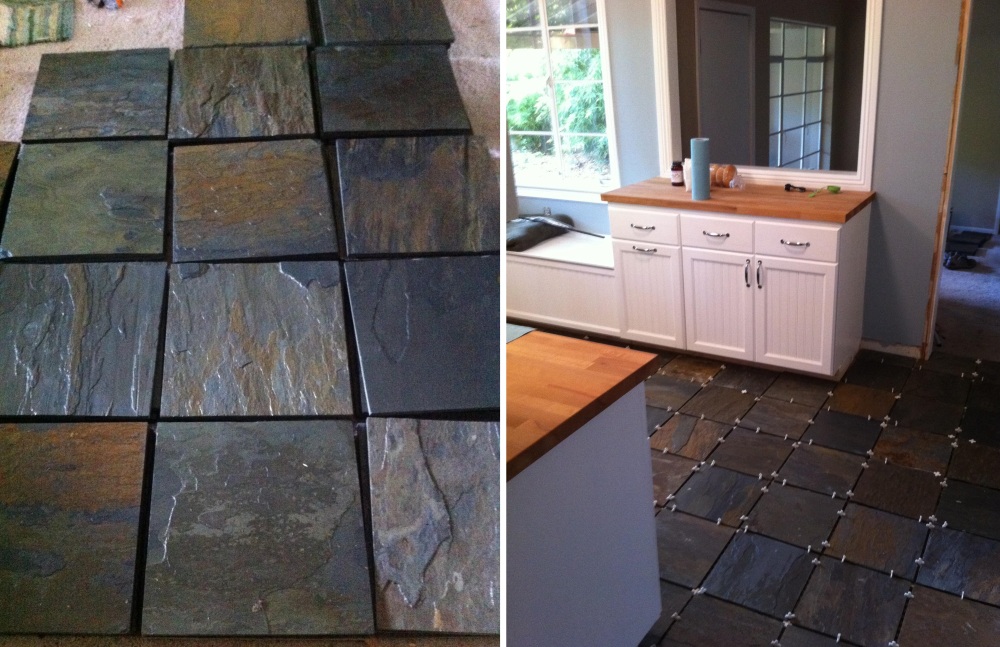
The renovation replaced the light-colored floor with dark slate tiles featuring gray, charcoal, brown, and muted green tones. The installation photograph shows the square tiles arranged in a grid, with spacers maintaining the joints.
The slate introduces a darker surface beneath the white cabinets and wood countertops, creating contrast across the room without changing the original window positions.
The finished cooking wall gained storage around the appliances
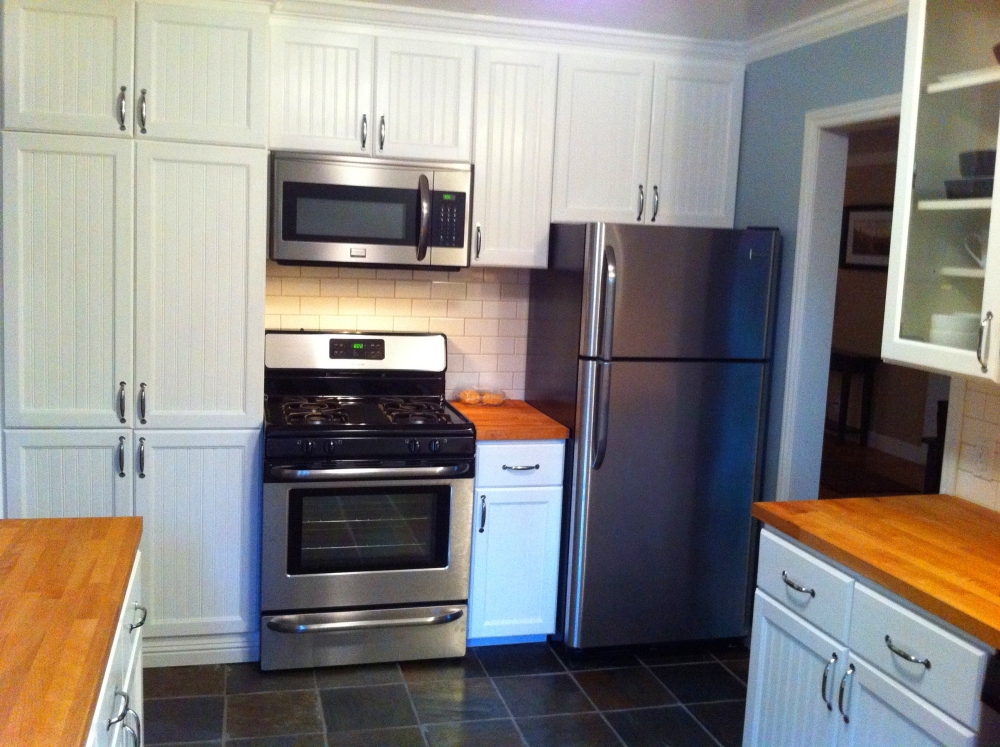
The completed cooking wall has tall pantry cabinets on the left, a stainless gas range beneath the microwave, and a stainless refrigerator on the right. White cabinets extend above the appliances, with crown molding connecting the upper units near the ceiling.
A short butcher-block counter sits between the stove and refrigerator, while another counter occupies the opposite side of the kitchen. The tall cabinet provides storage where the original arrangement had a narrower collection of doors and compartments.
The before-and-after shows what $5,000 changed
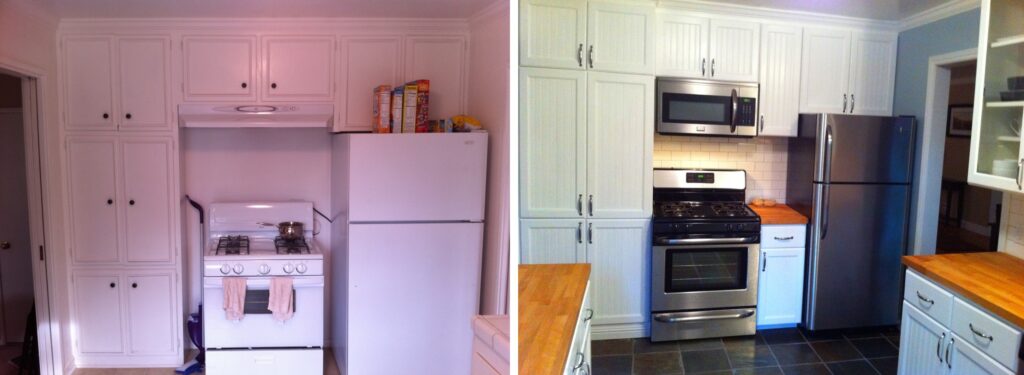
The original kitchen had white appliances, limited work surfaces, and cabinets dating to the home’s construction. The finished room has new cabinetry made from plywood and poplar, stainless appliances, butcher-block counters, a farmhouse sink, and slate flooring.
The homeowner reported spending a little over $5,000 by constructing the cabinets himself, buying appliances on sale, and purchasing the sink, countertops, and hardware from IKEA. The renovation was completed around 2012, before the project was shared on Imgur in 2014.
The finished kitchen retains the home’s main walls and windows, but the new cabinet arrangement makes use of the former pass-through area, adds a built-in bench, and provides more storage around the cooking appliances.
All project photographs and renovation details are credited to Imgur creator matt10187.