DIY Modern Wooden Christmas Trees

Create your own colorful forest of geometric wooden Christmas trees for a modern twist on this year’s holiday decor! These bright and fun trees are crafted from thin plywood and once put together stand on their own for a simple holiday display- perfect for a table centerpiece or mantle decor!

Supplies you’ll need for DIY wooden Christmas trees:
- thin plywood (available in small cuts at your local hardware or craft store)
- ruler or straight edge
- pencil
- paint (acrylic or spray paint if preferred)
- paint brush
- band saw

Instructions step by step to craft the Christmas trees:
Step 1: collect scrap wood from local craft stores
Ensure that you are working with manageable sizes of wood. Your local craft store will have smaller sized pieces of thin plywood. Also you local hardware store may have larger pieces that they can cut down to size for you. You want each piece to be just slightly larger than the tree size that you want so that you can maneuver easily on the band saw.
Step 2: Drawing Trees
Start by measuring and drawing your trees on the plywood with a pencil. Use the ruler as a straight edge to make for cleaner, easier cuts of your geometric Christmas tree. You will want to use 2 pieces of plywood stacked together while you are drawing your trees. Keep the wood stack together for your cuts- use a clamp if needed.
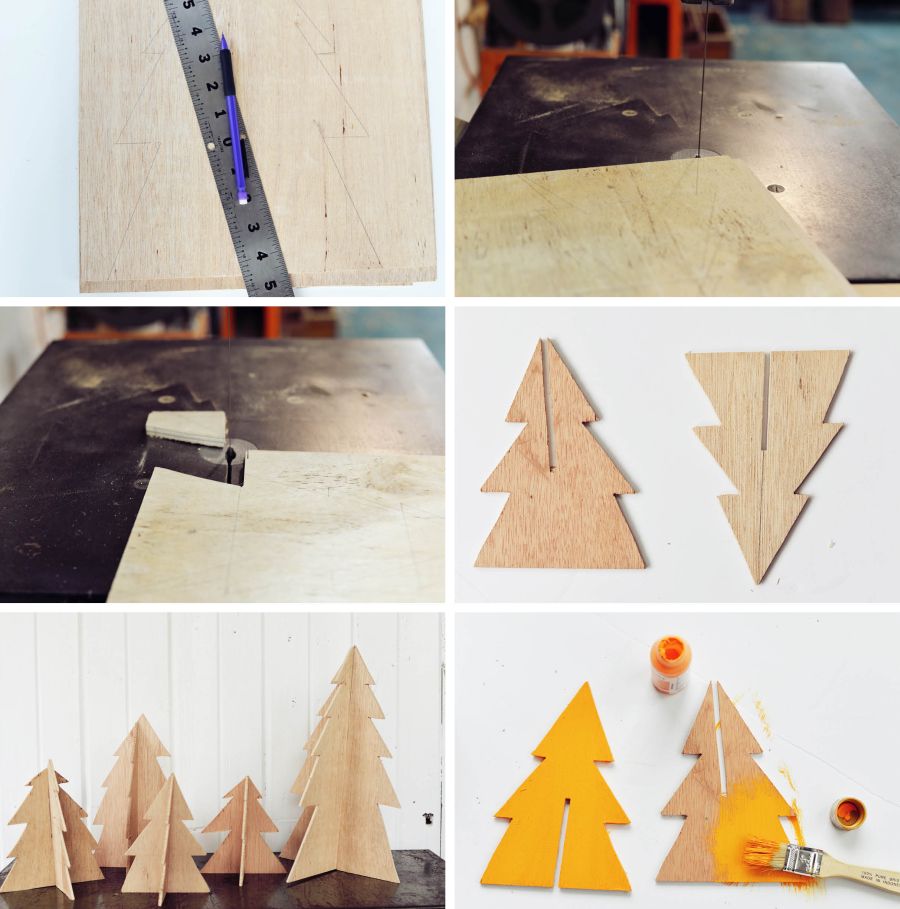
Step 3: Cutting process
Once you have drawn all your trees on the wood, use the band saw to cut out your trees. You will want to keep your 2 pieces of plywood stacked together while making these cuts so that you end up with 2 tree cut outs that are the same size.
Step 4: Cut small slat
Once your trees have been cut out, you will need to cut a small skinny slat in the top of one of the trees (from the tip of the tree to half way down the tree) and the bottom of the other tree (from the bottom of the tree to half way up the tree). The slat will need to be as wide as the width of your plywood. Make sure to evenly mark the center of your trees for the slats so that when you put the trees together they meet at the top at the center of each tree.
Step 5: Painting process
Lastly, paint your trees. You can brush paint or spray paint them in a variety of colors!

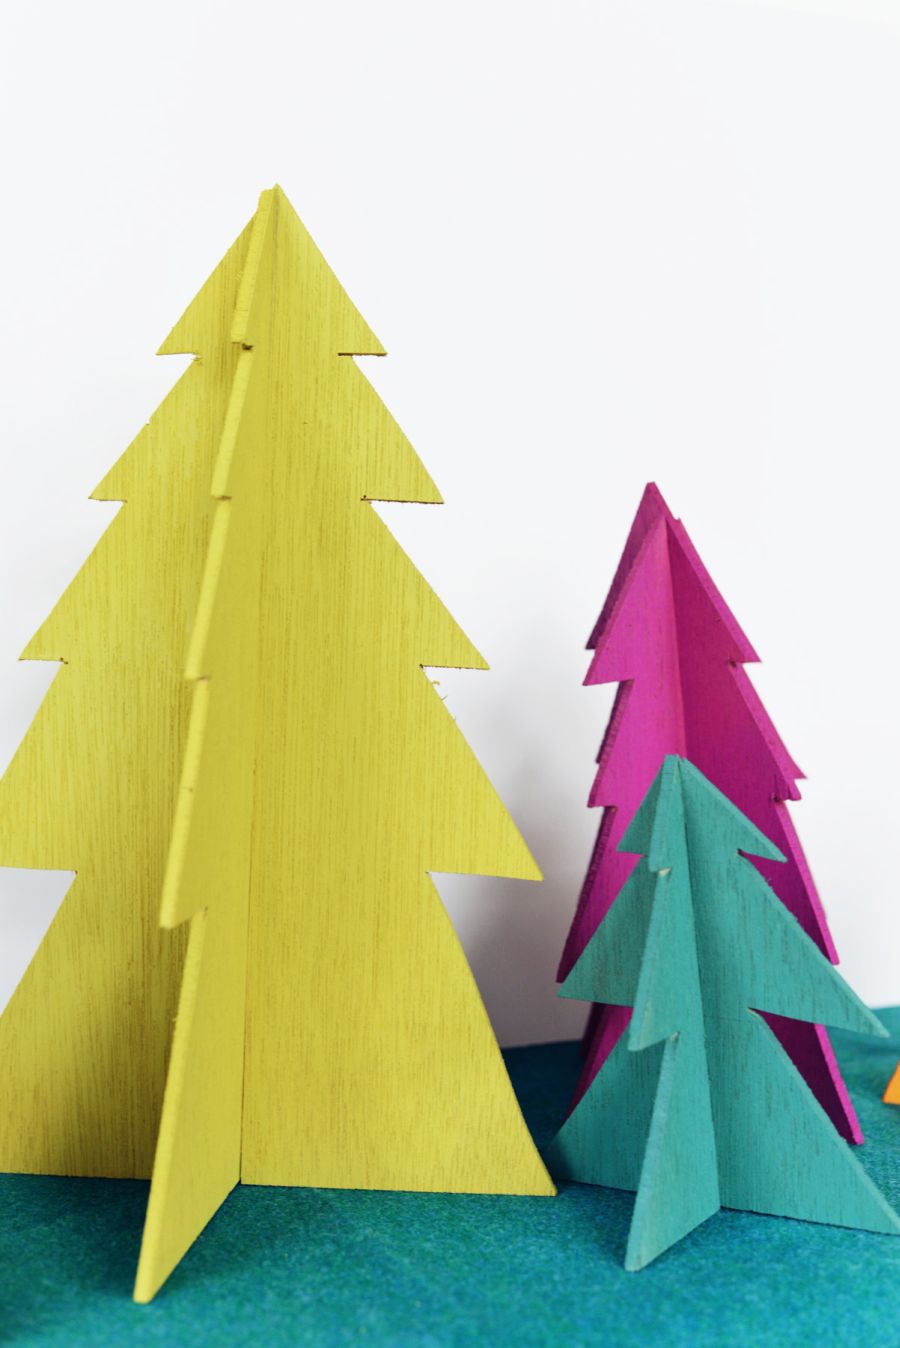
Put your trees together (they should slat into each other easily) and watch your forest grow!