A Stylish DIY Stair Handrail For Your Home


Does your stair handrail crave a new look? If so, you can easily do that yourself with some basic tools.

This DIY stair handrail tutorial will take you through the step-by-step process of removing your old stair railing, building a new one, and installing as well as securing it.
The Step-by-Step to Build a DIY Indoor Stair Handrail

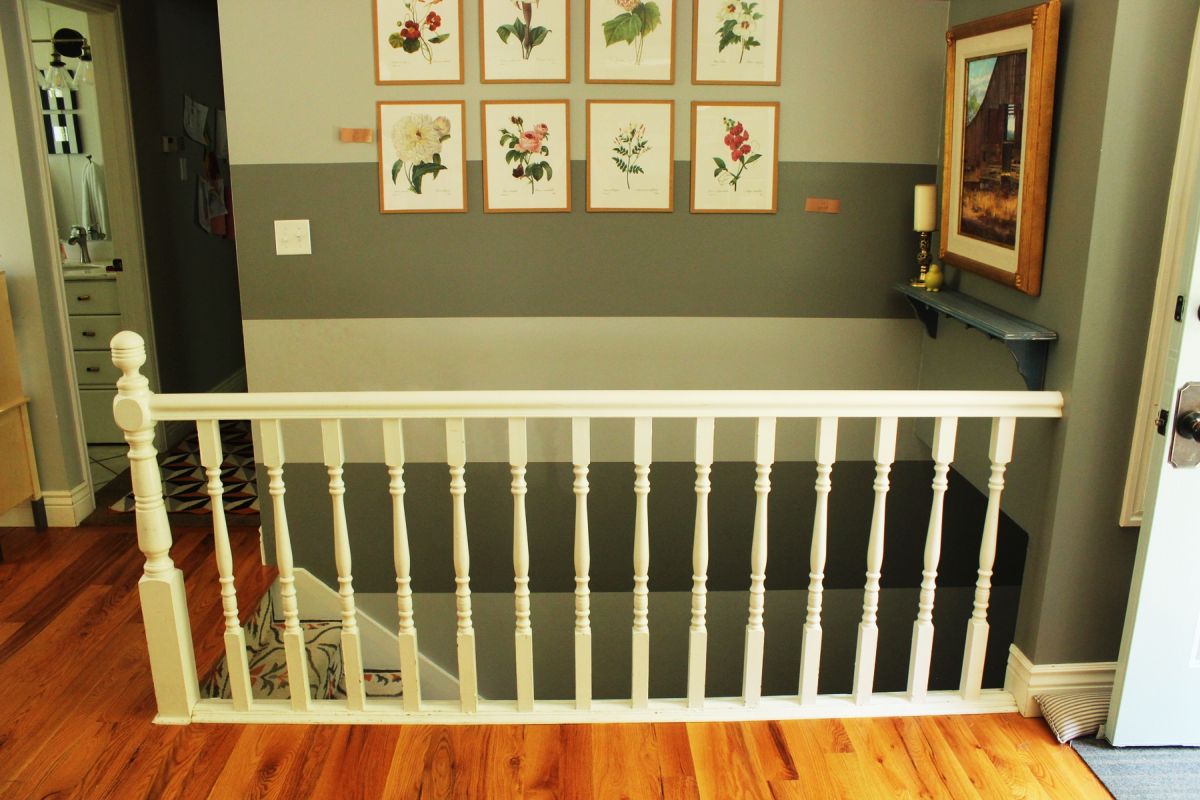
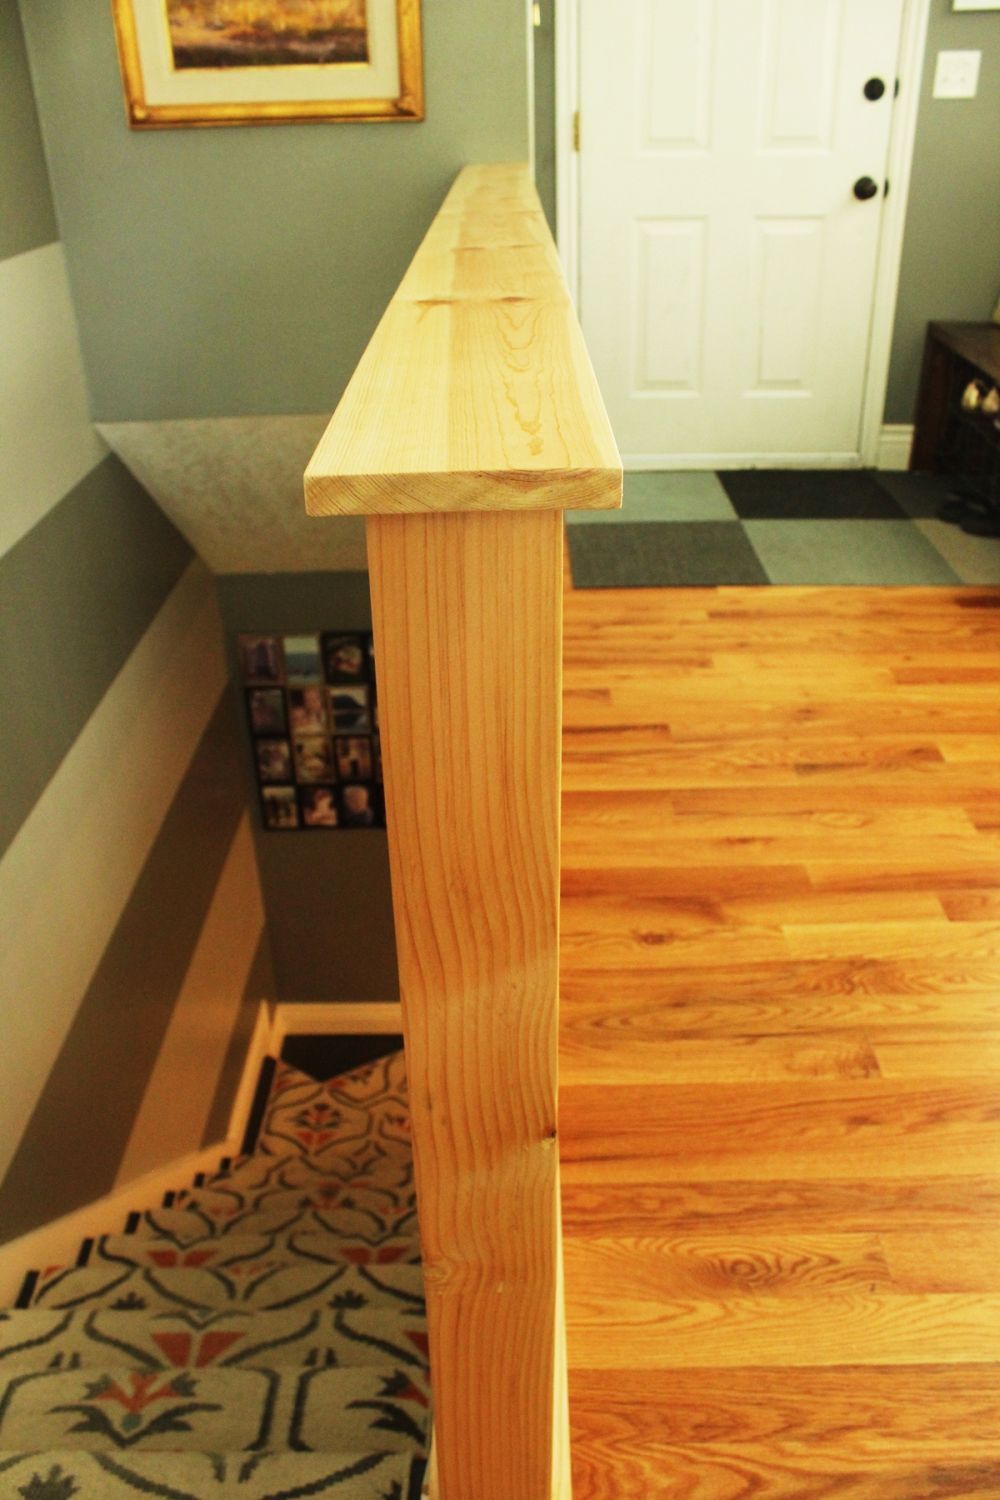
This is how the white stair handrail looked before the DIY project was implemented.

Rails are wooden and generic in style. The residential stair handrail height code was lacking, too.

Materials needed for the black stair handrail project:
- Measuring tape
- Paper and pencil
- Drill and drill bits
- Wood clamp
- Milter saw
- Sandpaper
- Electric sander
- Dremel
- Hammer
- Screwdriver
- Screws
- Brad nails
- Baluster Connectors
- Kreg jig HD

Part 1: Measure your stair handrail height & plan layout

You’ll want to measure the length of your railing, from wall to the outer edge of where your post will be.

Outline your plan.
Note: For this example 4x4s for the two side posts, 4x4s for the top and bottom rails attaching between the vertical posts, and a 1×6 as the top surface of the railing.

Measure and mark the length of your top railing (minus the width of your two posts) on the 4×4.
Pro Tip:
Choose the best 4×4 for the job of your top and bottom railings.
Remember that the top side of your top railing will be covered with the 1×6 piece, so you can use your worst side for the top of the top railing.
Same for the bottom of the bottom railing. The sides and the top of the bottom railing are going to be most visible, so choose the best 4×4 faces for these positions.
Part 2: Use miter saw to begin cutting railings & measure posts

Use a miter saw to cut your 4×4 precisely.
Repeat this for your bottom railing.

Measure your posts. (You’ll want to work backward on this.)
The length of the pipe spindles/rails (standard are 26” and 32” rails) plus the height of your top and bottom railings PLUS the 1×6 cap piece must be to code.
Important Note:
In this project example, it exceeded code, with a 39-3/4” handrail height, floor to top. (32” rails + 3-1/2” nominal height of 4×4 top railing + 3-1/2” bottom railing + 3/4″ nominal height of 1×6 cap.)
So, the posts themselves are 39” (the height of everything except the 1×6 cap).

Measure, mark, and cut your posts.
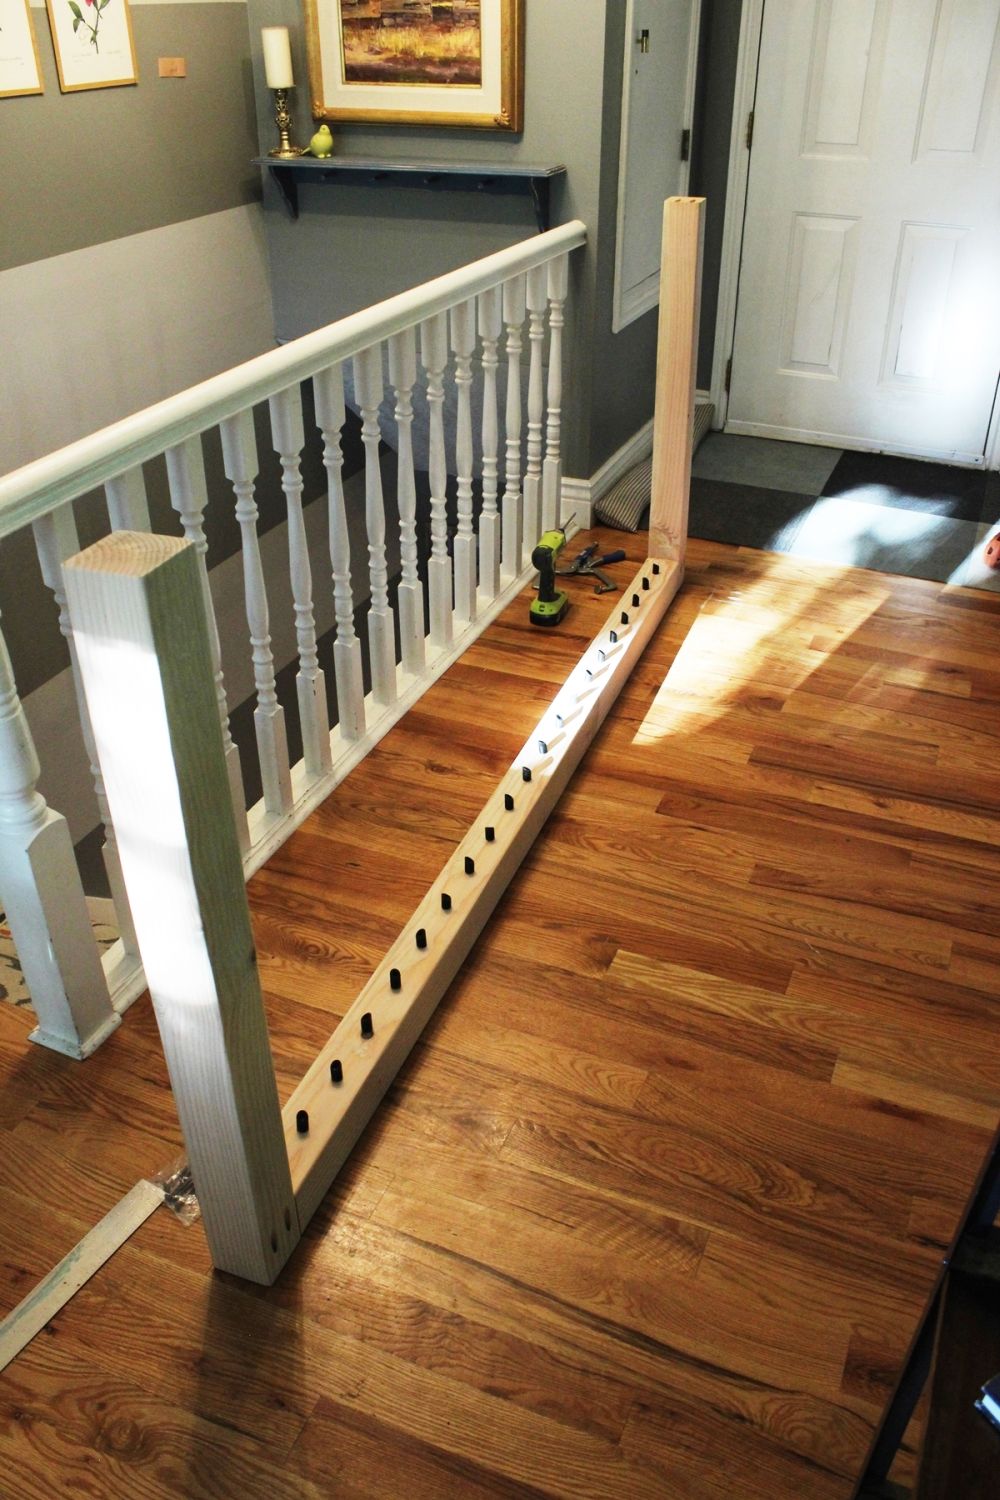
At this point, you should have two identical-length top and bottom railings and two identical-length side posts, all out of 4×4.

Take stock of all the pieces and decide which pieces will go where.
In a place that will be covered or hidden, write the piece’s orientation to your space so that you can keep your favorite lumber faces exposed and front-and-center (and the worst faces tucked away).
Part 3: Use the Kreg Jig to create pocket holes in your stair handrail posts

Prepare all the joints that need to happen on this handrail/railing.
You’ll need the Kreg HD jig for the 4×4 posts.

First, adjust the stop collar on your HD drill bit so it is 4-3/4” away from the shoulder of the bit.
Tighten the stop collar into place.

Next, attach the stop block to the drill guide.
Place the drill bit through the drill holes, and make sure that the tip of the drill bit is 3/8” away from the stop block.
Adjust if necessary.

Take one of your vertical posts and, on the bottom end of the side that will be facing you when the handrail is installed (opposite the stairs), center and clamp the drill guide in place.


Drill into the two guide holes to create two pocket holes.

When you’re drilling into 4x4s, you don’t have to adjust the drill guide to get two perfectly spaced and centered pocket holes.

Turn your post over, and drill two more holes on the exact opposite side of the bottom of your post.
At this point, you should have four pocket holes drilled into the two opposite sides of one vertical post.
These drilled sides will be the sides that face the stairs and the room; the two non-drilled sides will face the railing and wall (or whatever else lies along that handrail axis at your house).
Repeat this step on the bottom end of your other vertical post.

If you’re mounting the handrail to a wall, you will drill pocket holes into the top end of ONLY the post that mounts to that wall.
For reference:
In this example, one vertical post mounts to a wall, and the other is a freestanding post in the center of nothing, at the top of the stairs.
So, toward the “wall” side on the top of this vertical post, I will drill two pocket holes.

Place the drill guide accordingly.
Drill your pocket holes through the top edge.

This post is now ready to be installed on the wall via the top, and attached to the floor (on the two sides 90-degrees from this wall-mount side) via pocket screws on the bottom sides.
Part 4: Prepare the bottom and top railings

You now need to prepare the top and bottom railings.
Label these accordingly.

On both ends of the top of the TOP railing, drill two pocket holes.
These holes are for attaching the railing to the vertical posts.
Then, spin your TOP railing over 180 degrees so you’re looking at the bottom of the top railing; drill two more pocket holes into each side.
At this point, on your TOP railing, you should have four pocket holes at each end; two on top, and two on bottom.
Pro Tip:
The bottom holes on your top railing will technically be visible, but because they’re on the bottom of the railing, you won’t actually see them.
The top holes on your top railing will be covered by the 1×6 cap piece.
On only the bottom side of your BOTTOM railing, drill two pocket holes on each end. DO NOT DRILL POCKET HOLES INTO THE TOP SIDE OF YOUR BOTTOM RAILING, as these will be totally visible.

On the facing sides of your railings (e.g., the top side of your bottom railing, and the bottom side of your top railing), use a guide to drill light holes to mark the spindle/rail placements.
For reference: This example shows rails spaced precisely 4” on center, which means the actual space between the rails is less than 3-1/2” because the rails themselves are 3/4″ in diameter.

Mark these rail points in the same direction on your top railing as on your bottom railing.
Be sure your two left sides align and the two right sides align, and use your template moving in the same direction on each railing.
This will facilitate perfection in vertically aligned rails/spindles.
Part 5: Sand all your wood

Use a medium grit (120) sandpaper, and sand everything. Don’t forget the corners.

Wipe away the dust.
Part 6: Apply wood filler

Apply wood filler to cracks, splits, knot holes, or any imperfections that you want to seal up on the sides of your 4x4s that will be visible.

Smooth the wood filler, but don’t stress about getting it perfect at this point. You’ll sand it down after it dries thoroughly.

Let the wood filler dry completely.
Pro Tip: Place your 4x4s on a slightly raised surface to allow maximum air flow and circulation while they dry.
Part 7: Once wood filler sets, sand again

When the wood filler is completely dry, use a fine grit (220) sandpaper and have at it.

Take note if your wood filler needs hand sanding as opposed to high-speed orbital sander.
Part 8: Place the Baluster Connectors

Time to insert the baluster connectors.

Note: The most important thing with screwing these connectors in place is, aside from their actual precise placement along the board itself, to screw them in exactly straight up-and-down.
Part 9: Begin installation of railings

To begin installation, attach the bottom railing to the vertical posts via the two pocket holes on the bottom side of the bottom railing.

Use a right-angle clamp to hold the pieces in place and together, after double-checking the positioning of the vertical post.

Use 2-1/2” HD pocket screws to attach the railing to the post.
Repeat for the other vertical post.
Note: Your handrail is held together at this point with four pocket screws on the bottom (two on each end) and now resembles a “U” shape.

Pro Tip (Optional): Dry-fit the rails/spindles/balusters onto your connectors, then place your top railing onto them.
Use a rubber mallet to gently tap the top railing down so it is flush with the top of your vertical posts.

Don’t worry if it doesn’t side exactly square at this unconnected point.
Part 10: Position the stair handrail, adjust as needed

Position the handrail where it’s going to go.
Now is the time to make any obvious adjustments.
Part 11: Remove existing stair handrail

Time to remove the existing handrail.

Start by removing the existing spindles.

Then, remove the top railing.

Finally, remove the bottom railing.
Part 12: Installing stair handrail

Because the wall that we’re connecting to has baseboards, we’ll have to cut that out in order to fit our handrail flush against the wall itself.
Use a square to mark precisely where the baseboard needs to be cut.

Use a multi-function (Dremel) tool to cut it out.

A file or chisel and hammer should remove the baseboard chunk pretty easily.

Flat wall should be achieved for the post.


Drill a hole for where you’ll place the bolt to hold the stair handrails in place.
Part 13: Flatten and smooth surface

Use a reciprocating saw to carefully cut the post at the level of the sub-floor (or whatever level the rest of your handrail will be sitting on), then flatten and smooth the surface as needed with a file and hammer.


With the handrail fitting into its perfect footprint, it’s now time to mount it.
Pro Tip: This is definitely a two-person job, as you’ll want to ensure level at all three dimensions before you install.
Part 14: Install timber screws

Use 6” timber screws to attach the bottom part of the vertical post to the wall.

Remove the top railing and several (if not all) of your spindles.

Determine the level/height at which you want your timber screws to be installed, then pre-drill holes into your 4×4 at that/those positions.
Pro Tip: Be sure to check for framing stud presence first, or the timber screws won’t be much help.

Slide and hold the handrail in place, flush against the wall and level every other direction, then screw the timber screws into the wall.

Use 2-1/2” HD pocket screws now to attach the bottom of the now-wall-mounted vertical post to the floor, two screws on each side through the pocket holes.

Double checking the flush and level lines.
Attach the top of the vertical post to the wall via the two top-edge pocket holes.

This end should be secure with timber screws in place.
Part 15: Add support to the ‘floating’ post

Since the vertical post is only connected to the bottom railing via two pocket screws on the bottom, you’re going to add support with two more 6” timber screws.
Predrill through the vertical post into the top part of the bottom railing, taking care not to aim too high, which will expose the screw.

The trim piece will hit in the middle of these screws’ heads, you have to counter-sink them with a 1/2″ drill bit.

Screw the timber screws into the vertical post all the way, so their heads fall at or below the vertical post face.

Replace all your spindles and the top railing.
When the railing is flush with the top of your vertical posts, use 2-1/2” HD pocket screws to attach the end of the railing to the wall-mounted vertical post via the top pocket holes.

Do the same on the bottom pocket holes.

And repeat for the other “floating” post end, top and bottom pocket holes of the top railing into the vertical post.

Because screwing into pocket holes can sometimes (not always, but sometimes) move the entire piece a fraction of an inch, we wanted the floating end to be secured to the floor before attaching the pocket screws. So, we centered and marked where we wanted four sets of timber screws along/through the bottom railing.

Predrill these holes for the 6” timber screws.

Install the timber screws, taking care with the first one especially that the handrail is precisely in place and level everywhere.

Here is one set of timber screws.

Part 16: Secure floating posts to floor

Now, use those 2-1/2” HD pocket screws and secure the floating post to the floor via the four pocket holes.
Part 17: Time for the trim

Measure and mark your 1/3 trim boards to lie flush against the wall, the bottom railing, and the floating vertical post.
Use a miter saw to cut a 45-degree angle that leads OUT AND AWAY from the measured distance.

Repeat for both sides of your handrail, then cut the top piece with two 45-degree angles to fit perfectly against them.

Fill the tops of your pocket holes with wood filler, because these will be visible above your 1×3 trim board.
Let them dry, then sand with 220-grit sandpaper until they are smooth and the wood filler perimeter disappears.

Measure, mark, and cut your 1×6 board to extend 3/4” or 1” longer than your entire top surface (vertical post end to vertical post end).
Sand this board until it’s perfectly smooth. Run a bead of wood glue along the top of your vertical posts and top railing.

Center, then lay your 1×6 on top of your modern stair handrail. Clamp into place.

Use 1-1/4” or 1-1/2” brad nails to nail cap board into place.

These nail holes will be visible, so you’re going to want to fill them to re-create your smooth top of your pipe stair handrail.

Fill with wood filler, let it dry, then sand it smooth.

Your pocket hole wood filler sands easily and will look something like this.

Your handrail cap board will be perfectly smooth and delightful after sanding. Wipe away all sanding dust.
Part 18: Add your stain to the stair handrail

We simply applied a few coats of matte clear Polycrylic
Stain the wood with your preference or use a clear finish coat.

Apply the stain to the wood stair handrail.

Sand your wall mounted stair rail with fine grit, then apply a second coat of stain or clear coat.
Repeat sanding and application for a third coat.

Let it dry. Congratulations! Your new contemporary-industrial handrail looks gorgeous.

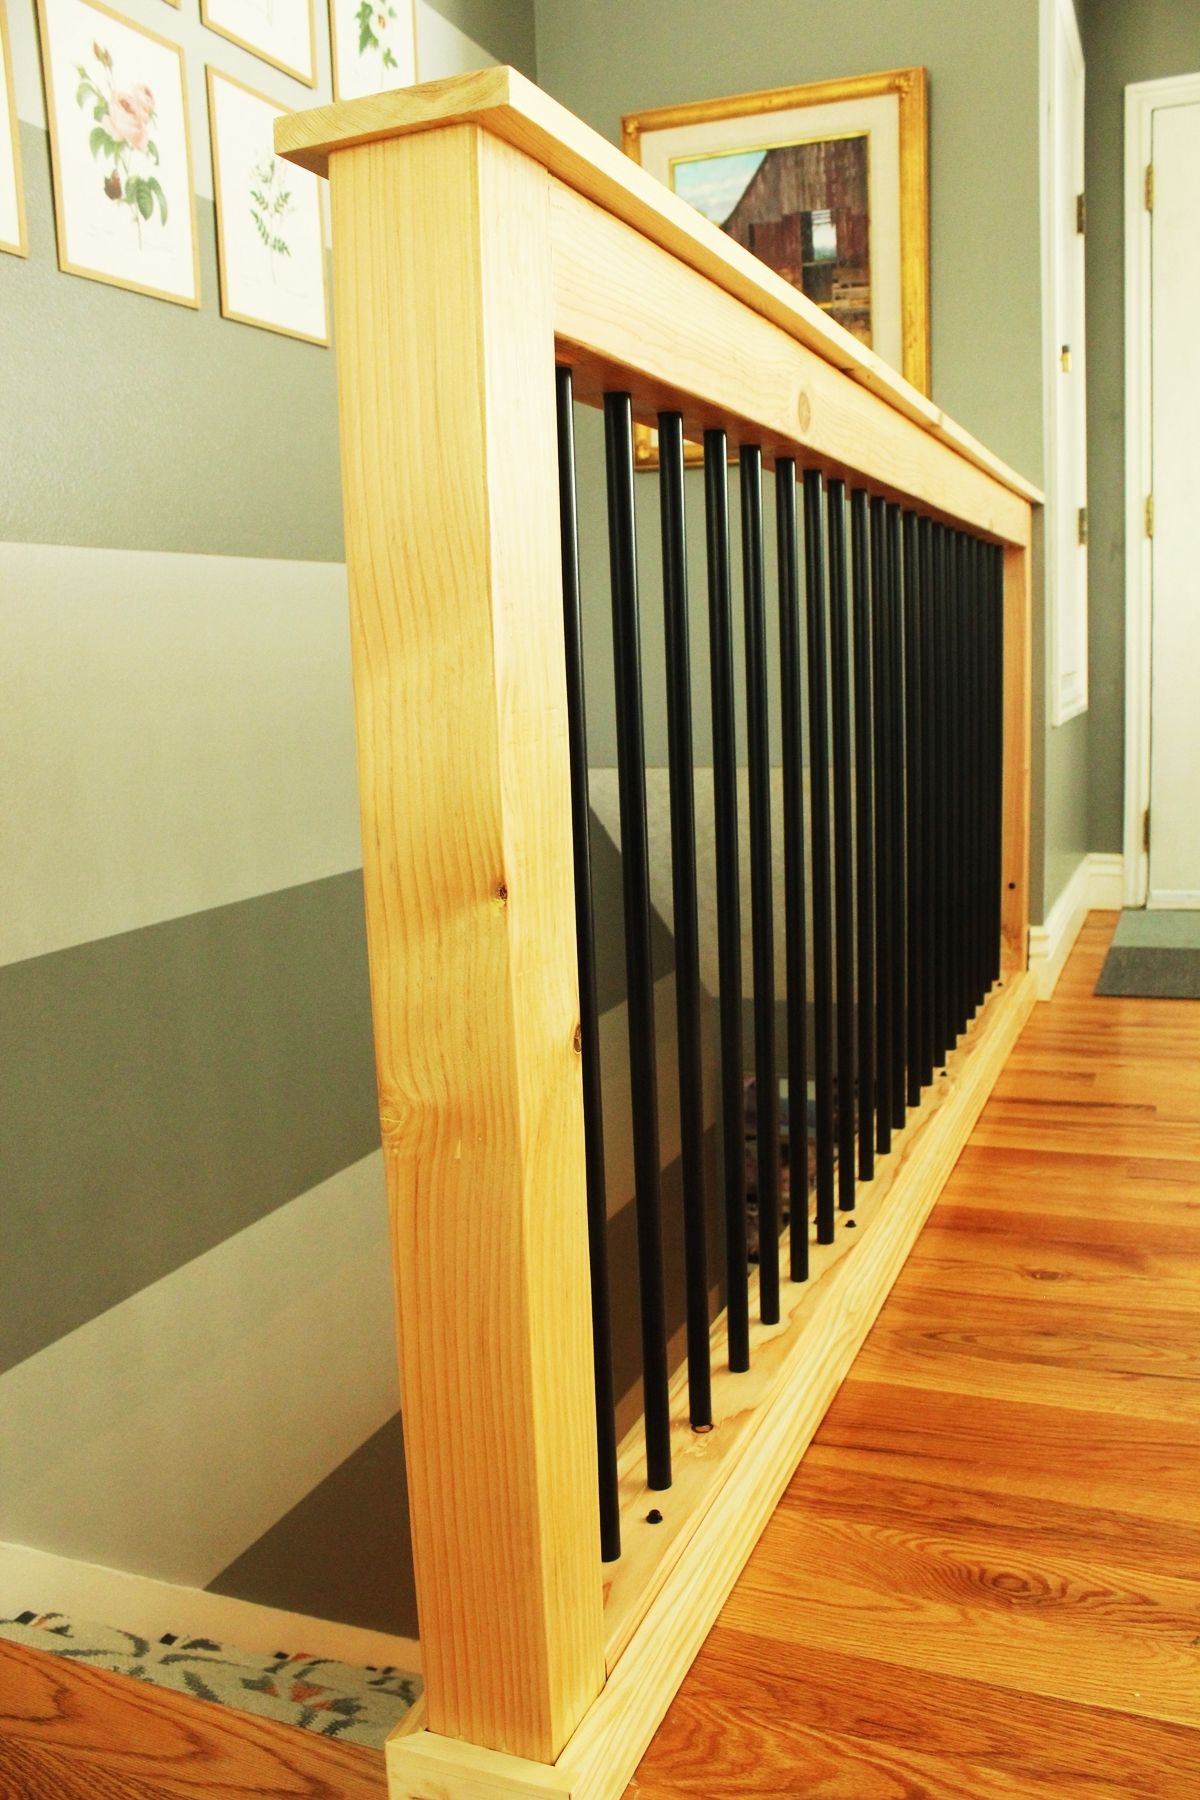
Black pipe rails (aka balusters or spindles) are both straightforward and chic.
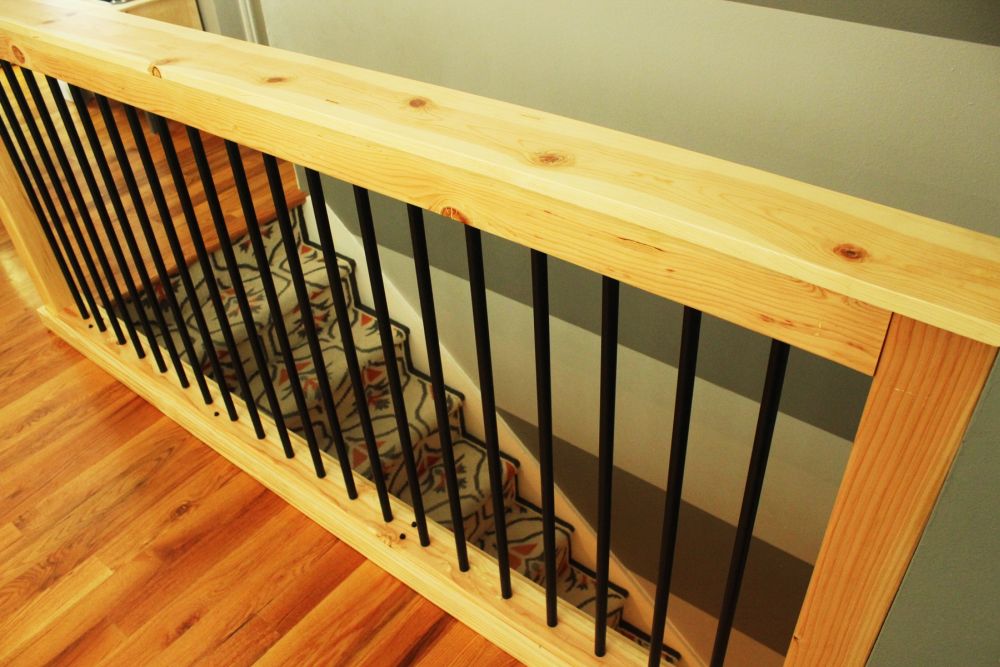
The contrast of the black spindles of this stair railing and the blonde wood is striking.

You can see here the overhang of the 1×6 cap board. This adds some substance to the railing, as well as hides the holes and flaws underneath. It does have a bit of craftsman flavor, too.


Frequently Asked Questions (FAQ)FAQ
Which side should handrail be on stairs?
The side the stair handrail will be depends one where your wall falls. If you have a wall on the left, then the handrail will be on the right, and vice versa.
What is the difference between a handrail and a stair rail?
The difference between a handrail and a stair rail is that one is optional and the other mandatory. A handrail is primarily support for elders, who may need additional support as they move about an area, be it a stairway or bathroom. A stair handrail is a necessary support along a staircase to prevent anyone from falling, providing balance.
How much do stair handrails cost?
This depends. A stair handrail can cost up to $10,000 with installation on the higher end, or as low as $700. For this reason, we recommend a Home Depot stair handrail, aka, one you make yourself.
What is a handrail of stairs called?
A handrail is also called a banister
Is it better to paint or stain a stair handrail?
While the choice is ultimately down to aesthetic preference, a stain will always be more durable than paint. Paint fades or chips and will require upkeep through the years.
Do stairs and floors have to match?
Nope! In fact, using complementary colors is the perfect way to give your space dimensional appeal.
How to install stair handrails?
While a bit more complicated than a traditional home DIY project, you can install stair handrails yourself over a weekend. All it takes to install stair handrails is some great wood, cutting equipment, screws, and patience!
Conclusion:
We hope you enjoyed this DIY stair handrail and look forward to completing it in your home!
These stair handrail ideas are just a few to kickstart your own process; whether it’s to make it yourself as laid out above or help you find stair handrail kits instead.
While we showed you how to make an interior stair handrail, you can also apply this technique to exterior stair handrails (like your pool deck stair handrail!).
Happy creating!