She painted the 1980s vanity Caldwell Green, and the bathroom they hated now feels elevated


Foam laminate on the floor, a yellow shade on the walls, a stained vanity with rusty hinges and a floor-to-ceiling plastic tub enclosure. It’s the kids’ bathroom, so it gets used hard, and it looks like it.
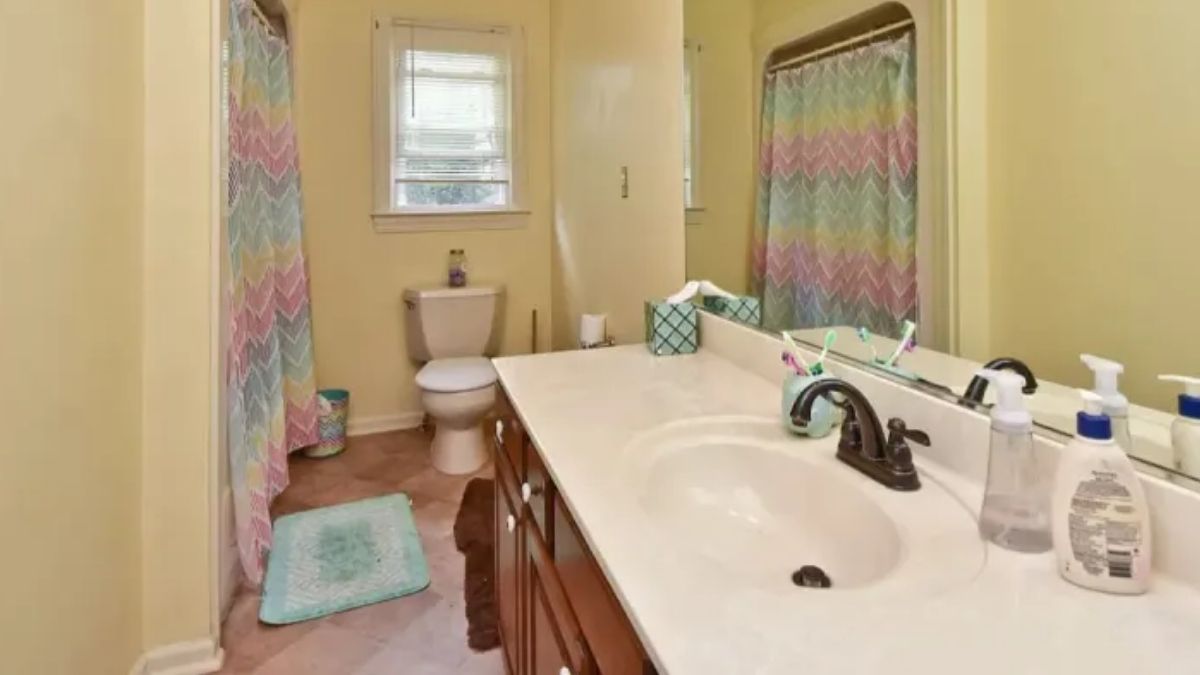
The bathroom wasn’t beyond saving, it was just tired. Melissa Strassner, her husband, Case, and their four kids, ages 3 to 10, lived with one like that. Its features were “truly a product of the 1980s,” Melissa says. “We hated every part of it!” Together, they redid it in five days for about $800.
Why it felt so dated
Voir cette publication sur Instagram
Every surface was tired at once: stained vanity cabinets, rusty hinges, yellow-toned walls, peeling moulding and dated lighting. When nothing in a small room looks fresh, the eye has nowhere good to land.
The fix started with color. The cabinets went Benjamin Moore Caldwell Green, a creamy green. “I ADORE the green on the cabinets!” Melissa says. The walls and moulding went Sherwin-Williams Alabaster, a white, and new paneling on the lower walls went Sherwin-Williams Repose Gray.
A painted vanity is one of the cheapest ways to change a whole bathroom, and bolder shades work too: a muted red-violet like Barberry can replace a builder-grade gray finish and change the feel of the room.
The five-day makeover, step by step
- Clean and prep. The kids cleaned the baseboards and prepped the room for paint.
- Paint everything. The family painted the walls, moulding, cabinets and paneling in their three colors.
- Add one architectural detail. Case installed vertical paneling on the lower half of the walls. “It’s such an ordinary space, but that easy, inexpensive addition makes it feel elevated,” Melissa says.
- Replace the floor and toilet. New luxury vinyl went down, and the toilet was upgraded.
- Finish the details. They framed the existing sheet mirror and added modern hardware and lighting.
Plan B, if the budget won’t cover everything: keep the most expensive piece for later. They kept the plastic tub enclosure, nicknamed the “space capsule,” and replacing it is on her DIY list for the future.
Where this makeover has its limits
Plumbing can surprise you. During the toilet install, a pipe burst all over the newly installed floors. “Fortunately, my husband was able to replace and update the plumbing without tearing out the whole project,” Melissa says. If you’re not comfortable with plumbing, call a licensed plumber before the new floor goes down.
A kids’ bathroom also deals with steam every day, and a fresh paint job deserves protection from it. The EPA says to run the bathroom fan or open a window when showering, and to keep indoor humidity below 60 percent, ideally between 30 and 50 percent.
Working with kids takes planning. Melissa’s family lets them do projects “at their ability plus 1,” and her advice is that with “a good combination of instruction and supervision,” kids can handle more than you’d expect.
Paint the vanity a color you love, add one inexpensive detail, and save the biggest piece for later. That’s the trick.