Make Painted Concrete Letters

This is one of those projects that I really wasn’t sure how it was going to turn out. But since I either already had all of the supplies or they would cost under a few dollars, I figured it wouldn’t be a huge loss if it didn’t turn out. But it did turn out, and man am I happy with the result!

I honestly don’t have many trinkets around our home. Except for a few framed wedding photos around the house, almost everything either has a purpose or is a potted plant. So this project is a little different for me because it’s something I did with absolutely no purpose in mind. And it looks great sitting on my shelves in our bedroom! You can easily customize this project using different letters, which you can buy in all different sizes. Read on for the full tutorial.
Supplies:
- Concrete and water
- Paper mache letter
- Small knife or box cutters
- A workspace that can get a little messy
- Disposable mixing bowl and something to mix with
- Assorted sandpaper
- Acrylic craft paint and brush
- Painter’s tape
Instructions:
1. First, find a paper mache letter. I got mine at my local craft store, but you can also find them online in different sizes and styles. They feel sturdy, but they are actually hollow inside. Use a small knife, a pair of scissors, or a box cutter to very carefully cut off one side of the letter. Pull out any cardboard from the inside.


2. Mix enough concrete to fill your letter. The amount of concrete you mix will depend on the size of your letter. I eyeballed it and then made more than that, just to be safe. Since I was throwing away my mixing bowl when I was done, it didn’t matter if I had leftover concrete in it.
Tip: Don’t mix your concrete until your work area is set up and you are ready to go. Once you mix the concrete, it will set up very quickly, so you’ll need to pour it very quickly!
3. Pour the concrete—this is where it can get messy. I don’t have a dedicated workbench, so I threw down a big drop cloth and a few pieces of newspaper. Lay the letter on the ground with its hollow side facing up. Then, slowly pour the concrete into the letter. Some might spill over the side. That’s okay, just try to be as neat as possible.

4. Immediately after you’ve filled the hollow letter with concrete wet, pick the letter up a few inches off of the ground and gently drop it back on the ground. This will help the concrete get into the corners, and it also helps pop air bubbles. You can take something like a spoon and tap all along the outside of the letter, too—this will help the concrete settle.
5. I let my letter set up overnight before peeling the cardboard mold off and using 220-grit sandpaper to polish some of the grittier areas. I wanted my letter to have gold-dipped effect, so I used painter’s tape to tape off the bottom half of the letter and painted it using gold acrylic paint.


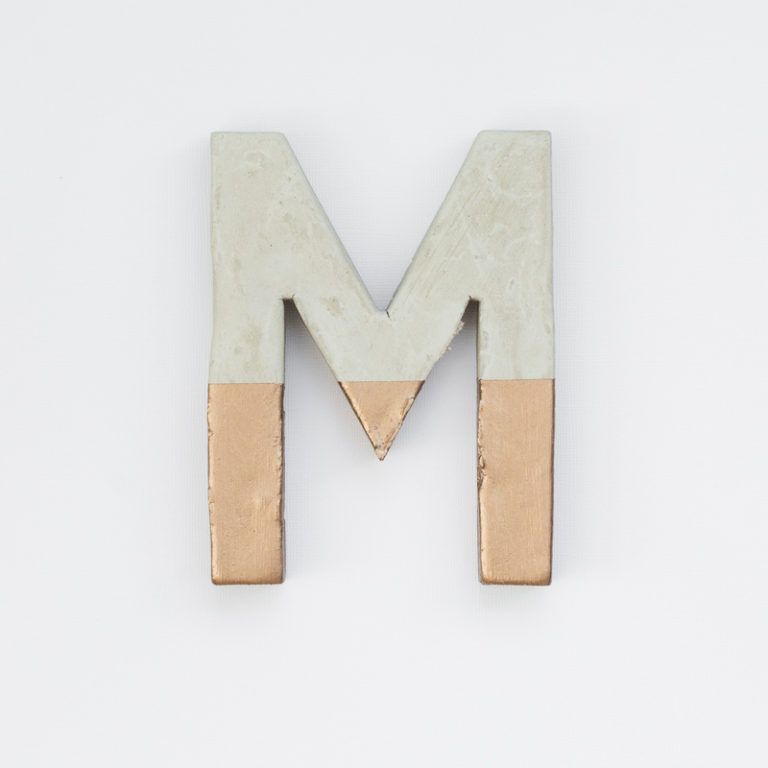

When the paint dries, peel the painter’s tape off and you’re done!


