DIY Copper Foil Planter

I have a terrible black thumb and struggle to keep plants alive. This year I was determined to work on my plant caring skills and managed to grow this succulent plant. It came in an uninspiring terracotta pot, so I decided to make this DIY Copper Foil Planter project to give it a classier feel.


You will need:
- White Paint
- Paintbrush
- Copper Foil
- Sealant (optional)

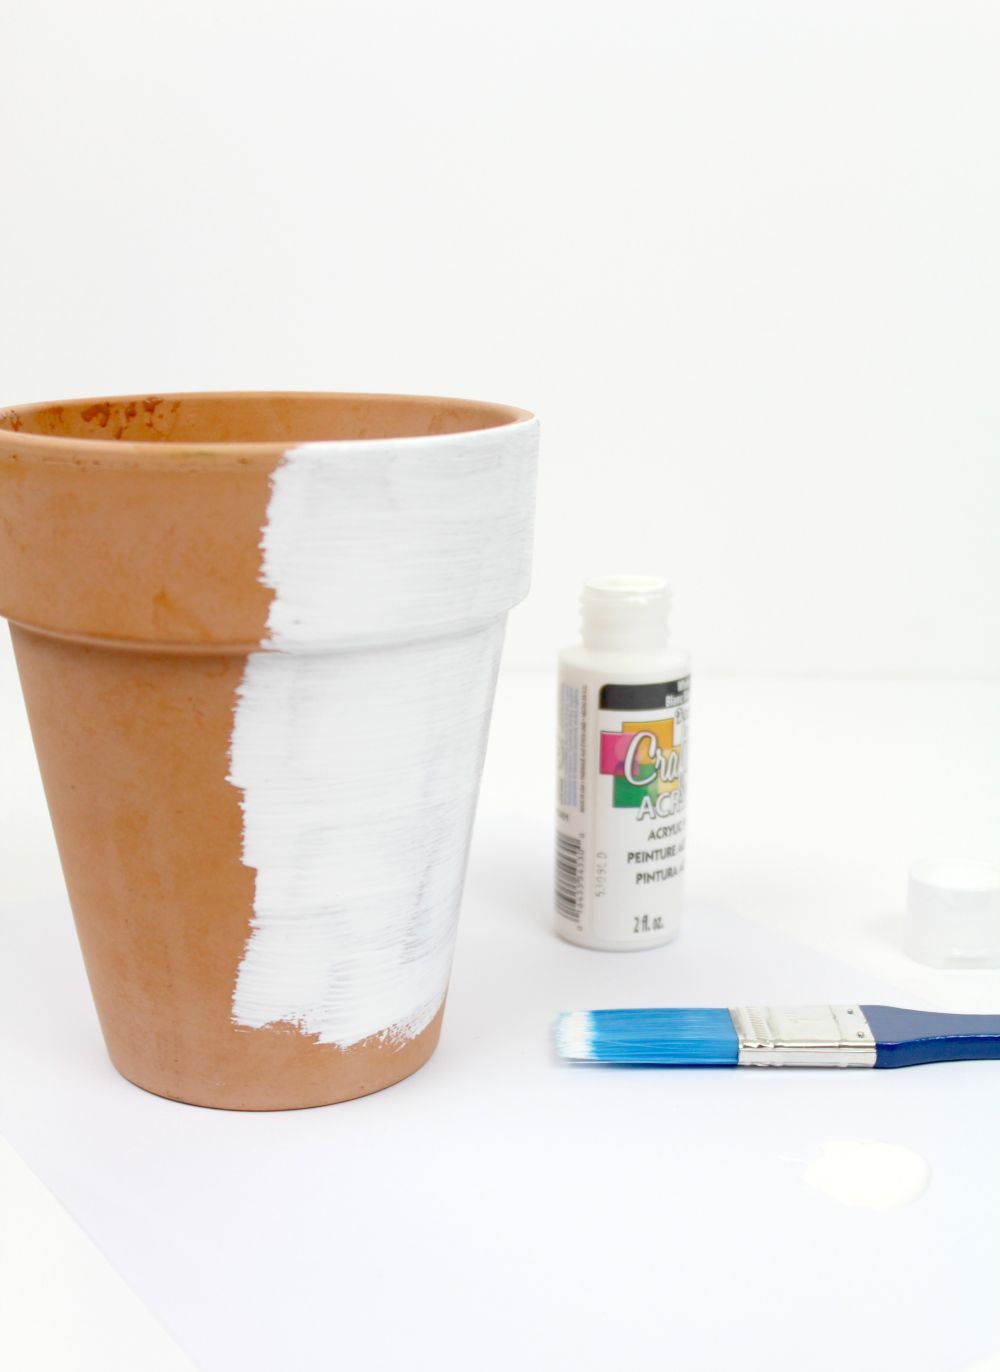
Begin my wiping your planter clean with a damp cloth and drying it with a paper towel. Paint with 2-3 coats of acrylic white paint. I think this DIY could also look amazing with black or coloured paints – you can change it depending on your interior colour scheme.
You can paint the inside of the planter if you wish, but I left this step as my internal plant pot covers this.

Working with copper foil can be fiddly, so I recommend using tweezers to hold and place pieces. Whilst the paint is still wet, add pieces of copper foil in a random pattern around the planter.

You can use your finger to flatten each piece of foil and to adhere it to the planter. I didn’t do this for every piece as I liked a bit of a 3D feel in places.

An optional step is to paint or spray the planter with a sealant. This works best if you have flattened the copper foil pieces.

The planter is suitable for indoor plants only, but it looks fantastic when grouped with other planters and your favourite print.

