Clay Giraffe Planter DIY with Kids in Mind

This little DIY clay giraffe planter is the perfect addition to a shelf or a kids room to hold your plants! It is kid friendly to make so you can recruit your littles ones to help you create a whole fleet of animals and set up your own mini safari. I really want to make a zebra to go along with this clay giraffe planter.


This DIY was inspired by a similar planter that I saw at Anthropologie, but it is a lot cheaper and you get the satisfaction of making it yourself. That’s a win-win in my book!

Materials:
- Air drying clay
- Knife
- Paint
- Paint brush
- Plant
How to Make this Clay Giraffe Planter:
1. Start by rolling out 4 pieces of clay to make legs. I did this by tearing off a small piece of clay and then rolling it on the table much like a rolling pin. Make sure to keep your legs the same thickness, if one is too long you can simply cut it to match the others.


2. Next, you will make the body of the animal. To do this I rolled out a pancake-esque shape and then flattened the clay against the table. Do this until you have a shape that is wide enough to fit all 4 of your legs.
3. Now roll out another super long piece of clay that will wrap on top of your pancake body. You’ll want this to be pretty thick so you have more clay to work with when styling the body. You will want this roll to fit almost all the way around the body, but leave room for a neck that you will make later.


4. Attach the long body roll of clay to the pancake like shape by gently pushing the clay together. Do this all the way around making sure to leave a small opening for the neck. Once the two body parts were attached I played with the outer rim a bit making it taller and skinner. This is up to you and how deep you want your planter to be/look.
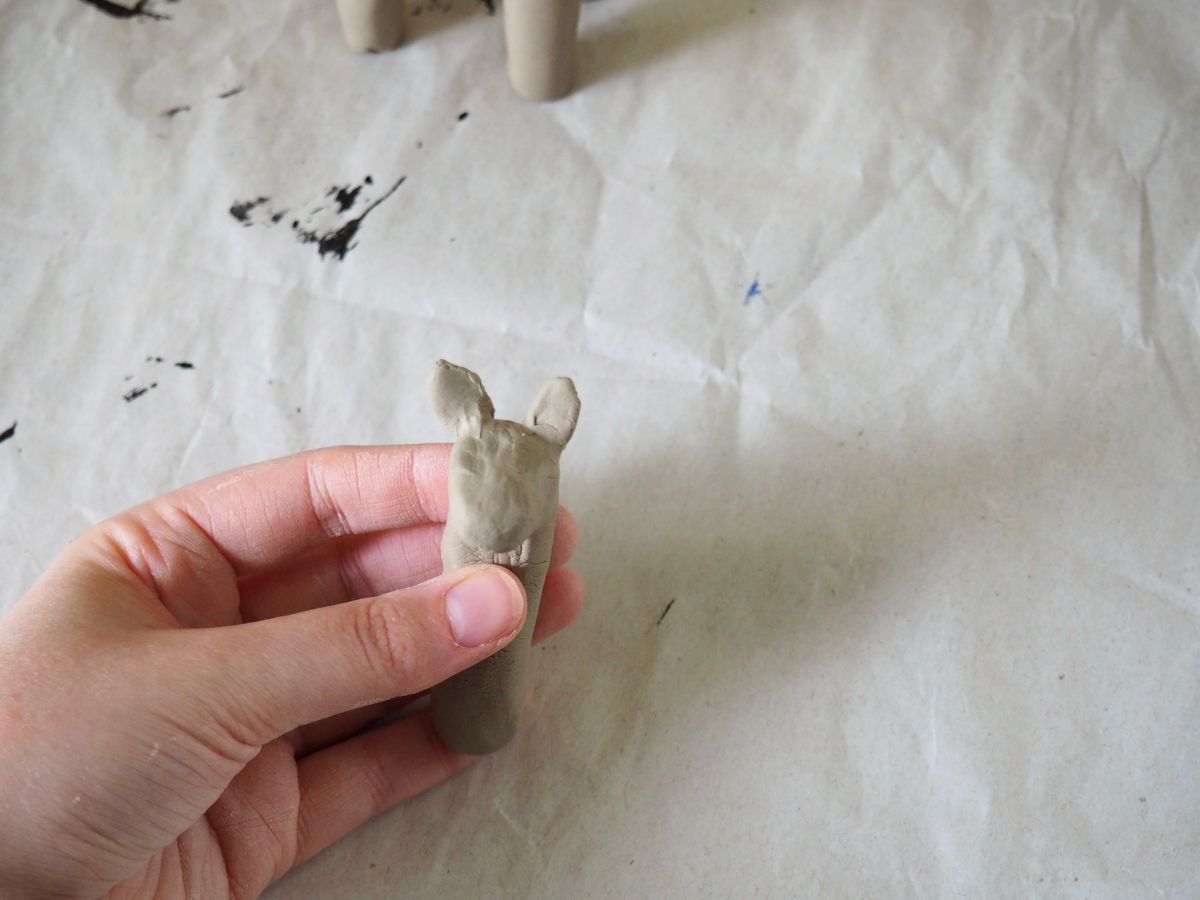
5. To make the neck of the giraffe, roll out another piece of clay slightly bigger than the legs. Taking one end of the roll, squeeze it and fold it over a little to start to form a head. Pinch and pull the head to shape it how you want.

6. To attach the legs to the body you will use the same method as in step 4 that you used to attach the two body parts. Line up one of your legs on the underside of the body and then gently push the clay from the leg onto the body. Once you’ve done this around the whole leg go back and smooth it all out. Do this for the other 3 legs.

7. Put the neck of the giraffe in the little hole that you left on the body and then attach it using the same method you’ve been using, making sure to attach it to the base of the body and the sides.

8. To make a tail I rolled out a thin skinny piece of clay and then pressed one end of it down to make a wider section. Then I took my knife and drew little slits into it. Attach the tail to the body.
9. To make ears I rolled out a thin pancake like shape and then cut out two ear shapes using a knife. Attach to the top of the head.
Optional: you can use your knife to gently cut diamond-like shapes onto the giraffe to represent it’s spots.Let the clay dry for 24 hours.
If you are planning on painting your giraffe, grab a paintbrush and some yellow paint. I found a sponge brush left less brush strokes so I opted for that for the yellow paint. Paint the whole giraffe yellow. Let dry.
Taking a small paintbrush and some brown paint, go into the body and where you left those little diamond cut-outs, fill them in with brown paint. Let dry completely.
Grab your plant and place it into the body of the giraffe!
Now you have a cute little clay giraffe planter to hold all your plants! I stuck an air plant in mine but you can totally put some soil in the base and plant into it.
