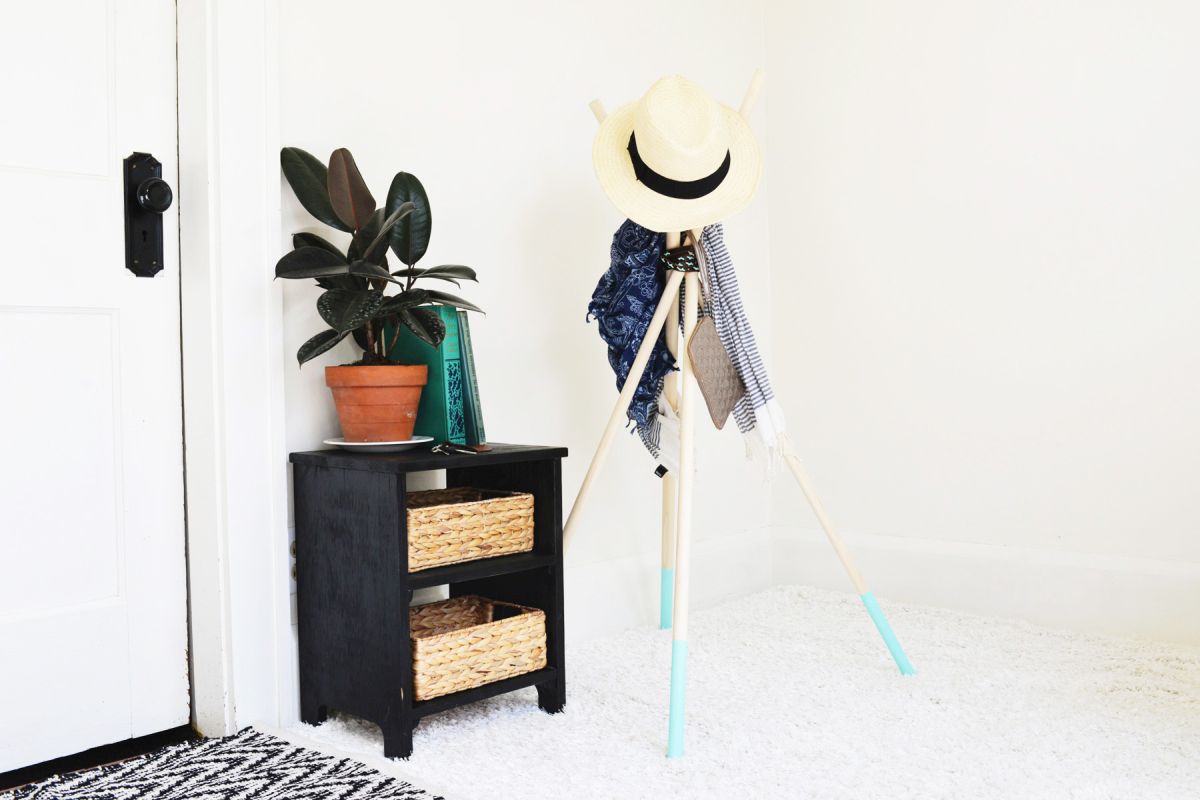
Modern DIY Standing Wooden Coat Rack

Need some extra storage space that doesn’t require a commitment to putting holes in the wall? Create this easy, functional, and storable coat and accessory hanger to display hats, scarves, bags, or clothing within easy ready. This modern project is easy on the budget and is a great one for renters or those with limited space!


Supplies you’ll need for a freestanding coat rack:
- 4 Wood dowel rods
- Craft paint
- Paintbrush or sponge
- Painter’s tape
- Clearcoat finish
- Leather belt
Instructions to build a standing wooden coat rack to keep entryway organized:

Step 1: Dowel rods
Pick out 4 wooden dowel rods (here we used a light poplar) all the same diameter and at the height you desire (here we used 48″ rods as they were the largest available at the hardware store, for this project you could use up to 60″ or 72″). If you buy your dowel rods from a craft or hardware store, they ideally should be ready to go and not require any prep (like sanding or cutting) except taking off the price tag.
Step 2: Painting process
Use painter’s tape to mark off a section of each dowel rod where you can add a colorful accent. Measure each dowel rod at equal distance and tape off those sections. Paint the taped off section as well as the ends of each dowel rod. Let dry according to the instructions on the back of the bottle of your paint.

Step 3: Apply the protective coat
Once your paint is dry, you can apply a protective finish. Place the rods gently against a table or fence (with newspaper or poster board covering anything that you want to protect from clear coat). Apply a thin, even layer or clear protective finish to one side of the dowel rods. Let dry according to the instructions on the back of the bottle. Once that coat is dry, spin the dowels around to clear coat the back (so that you have covered the dowel all the way around) and let dry.

Step 4: Put them together
Once the rods are dry from paint and finish, pull the rods together so that all the tops are aligned evenly into a square shape. Wrap your leather belt (or you can alternatively use rope or colorful string) around the dowels tightly. Secure the belt (here we just simply buckled it in place once the belt was pulled tight). You can then manipulate the rods by moving the 2 closest to you outward and the ones furthest from you the opposite direction. Then do the same thing with each of the individual rods to open up the “rack” and create a stable base.

Conclusion
Toss up your scarves, hats, purses, or light coats and sweaters so they can hang from the new rack! If it’s off season and you don’t have a need for the rack, you can simply and easily fold it right back up and easily store it vertically! Quite the functional and fun project!