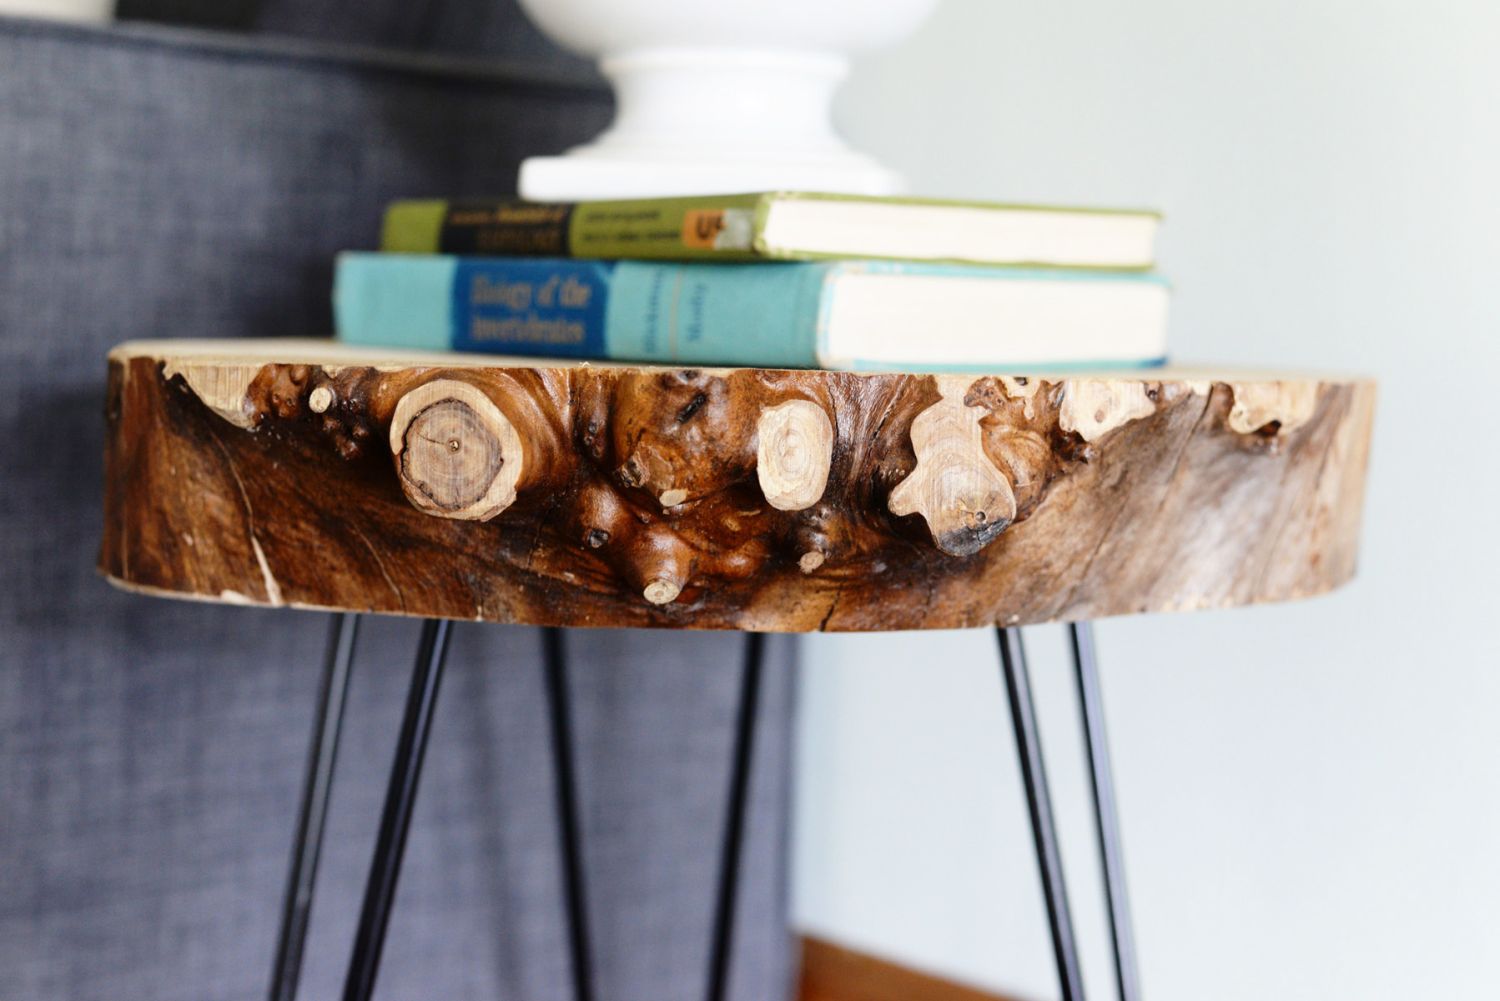
DIY Side Table With A Wooden Slab and Hairpin Legs

Nothing is better than making your own furniture. Creating something that is functional, customized, and budget-friendly is a win-win. This rustic modern side table with a wooden slab and hairpin legs is on point and the perfect addition to your living room or bedroom. Add a bold color pop to the legs or keep them a neutral color to go with any decor style!


Supplies you’ll need to DIY side table:
- wood slab from a large log or tree stump
- belt sander
- clear coat or polyurethane
- paint brush
- three hairpin legs
- black spray paint
- 6 screws
- drill or impact driver with phillips head bit and regular bit
Instructions step by step to craft a side table:

Step 1: Prepare wood slab
To start, you will prep your wood slab. For this piece we used a wood slab approximately 2 inches thick. You will need something at least 1 inch to have enough room to drill the legs in. We sanded ours with a belt sander on the top and bottom and used a little extra sand paper on the edges to get rid of any splintered areas.
Step 2: Apply a coat
Once the slab is smooth and prepped, apply a thin coat of polyurethane with a paint brush. Allow for drying time as indicated on the back of the bottle or can of polyurethane. Apply extra coats as needed to fully coat and protect the wood slab on the top, bottom, and edges.
Step 3: Painting the hairpin legs
While the clear coat is drying on your wood slab, paint your metal hairpin legs. Apply an even coat of spray paint on the legs and allow to try for the amount of time indicated on the back of the bottle.
Step 4: Place the legs
Once the slab and the legs are dry, flip the slab over, bottom side up. Place your hairpin legs in place and mark the spots for the screws with a pen or pencil.
Step 5: Drill holes
Pre-drill the holes for the screws with a thin drill bit.
Step 6: Drilling process
Put your hairpin legs back in place and drill in the screws through the screw holes in the hairpin legs.

Flip the table right side up and you’re finished! Accessorize the table with books, plants, or a small lamp. Use coasters with drinks to protect the wood and this piece should last your quite a while!