DIY Trendy Metal House You Need To Have This Season

As a visual person, I am always thinking about new, creative ways to organize ‘things’ in the prettiest possible way, where ‘prettiest’ is definitely the key word. My recent favorite storage-display solution is the Brass House-shaped unit which can also serve as a basket, so it’s a kind of – ‘make one, get one free’ project here.

If you look at the Autumn/Winter collections of the major design labels, the wire brass accessories are still very much trending so in case you have any doubts, let me help you out – yes, you need one of those this season! They are very handy, practical, super pretty and you can use them in a few different ways. A doable, simple project which will recreate what you see in the stores, for much less, so let’s get into it!

You will need:
- wire, metal grid (strong and thick, however not the rigid one)
- pliers
- super glue
- brass finish spray paint
Instructions:
1. We will start off, by cutting the pieces to which your house shaped unit will be composed of. First of all decide how big you want your house to be – I would suggest to make it: 18 cm wide, 10 cm deep, 24cm high. However if you need a bigger or smaller version, modify the measurements.

2. By using the pliers, cut out 5 pieces of the metal grid according to the picture above.
- one back of the house piece: 18cm / 18cm / 18cm / 10 cm / 10 cm
- two equal sides of the house: 18 cm / 10 cm
- one bottom of the house : 18 cm / 10 cm
- one top of the house : 20cm / 10 cm

3. Once you have all the pieces ready, you can start gluing them together. Make sure to wear gloves, as super glue is very difficult to remove from your hands.
Place the base of you house on a piece of paper to protect the surface from getting dirty.
Apply a fair amount of super glue on the back border and then place the ‘back’ of the house piece on top of it. Now this is when you will need a bit of patience – hold both pieces in place, for as long, as the glue dries, connecting two pieces together (about 15 minutes).

4. Repeat the procedure with the two sides of the house.

5. Once you have the base and all the walls of the house in place, it’s time to put the roof on it. As you noticed in the picture with measurements the roof part is slightly bigger (20cm) than the base part (18cm) and that’s because we will have to bend it to form a roof shape. When this element is ready you can glue it to the rest of the house, by repeating the same method.

5. All right, now your house is ready – leave it for about 1 hours to make sure that the glue dried well.

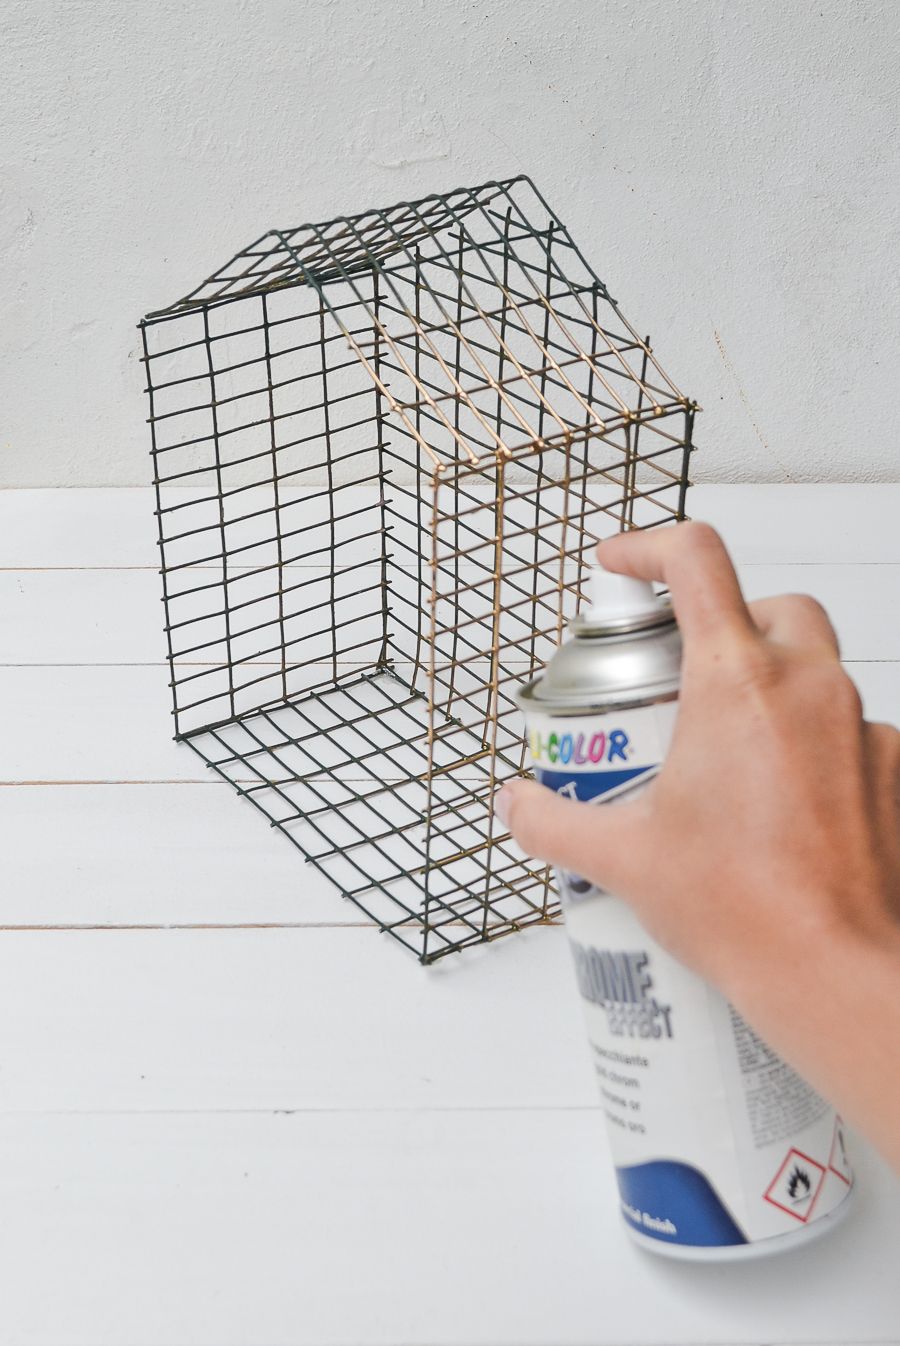
6. Spray paint the house with the brass finish spray paint. Of course if you prefer different color feel free to make it – white, metallic, or pastel.

Now you can style your shelf and use it just the way you like it. As I mentioned at the beginning of this post – there a few possibilities.
The first one is a display shelf, you can place your brass house on any surface and display small accessoriesinside. It’s a chic accent that will add a bit of sparkle to your home decor.

The second option is to use it as a hanging shelf, installed on a hook, again you can display small items inside.

And the last is to use it as a little, pretty storage basket which will keep your items organized.

I am a little bit in love with this project and the final result and feel like this is my favorite DIY ever. What do you think?