She painted the honey oak cabinets Hampshire Taupe to work with the brown granite


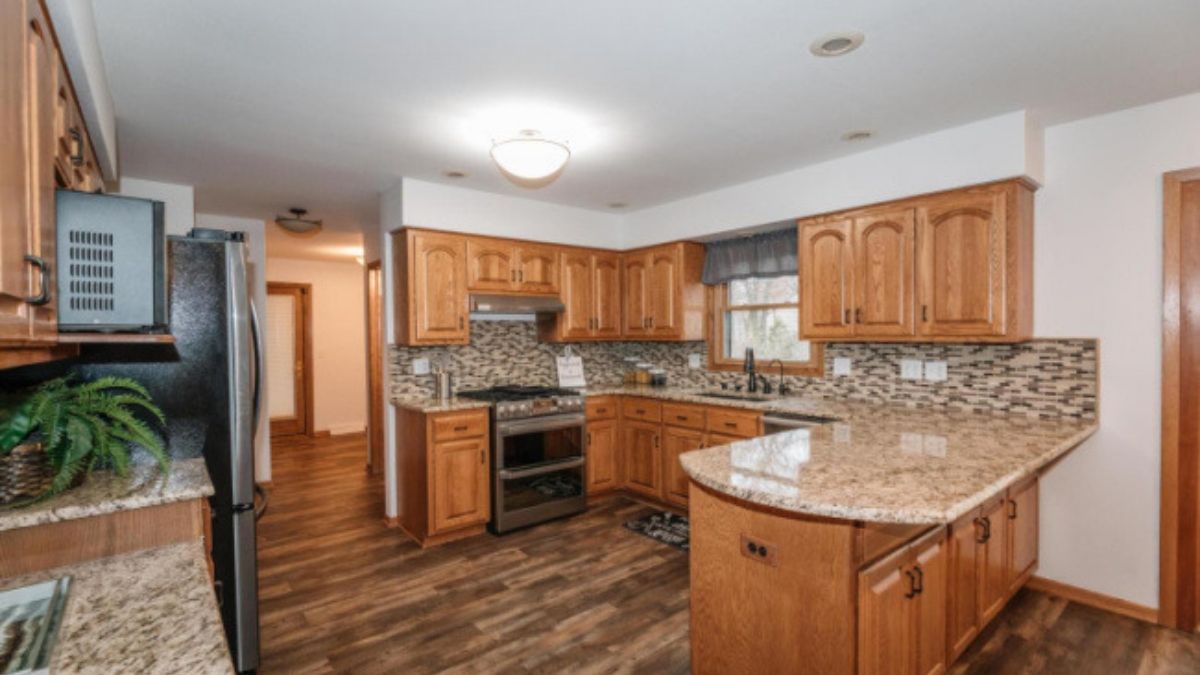
White feels like the safe choice for honey oak cabinets, until the doors are back on and the old countertops suddenly look darker and busier than before. Bre Eggert had exactly that setup: “Orange oak or honey oak cabinets, brown and cream granite countertops, and a brown and cream glass mosaic backsplash … were all relics of a 1990s kitchen renovation.”
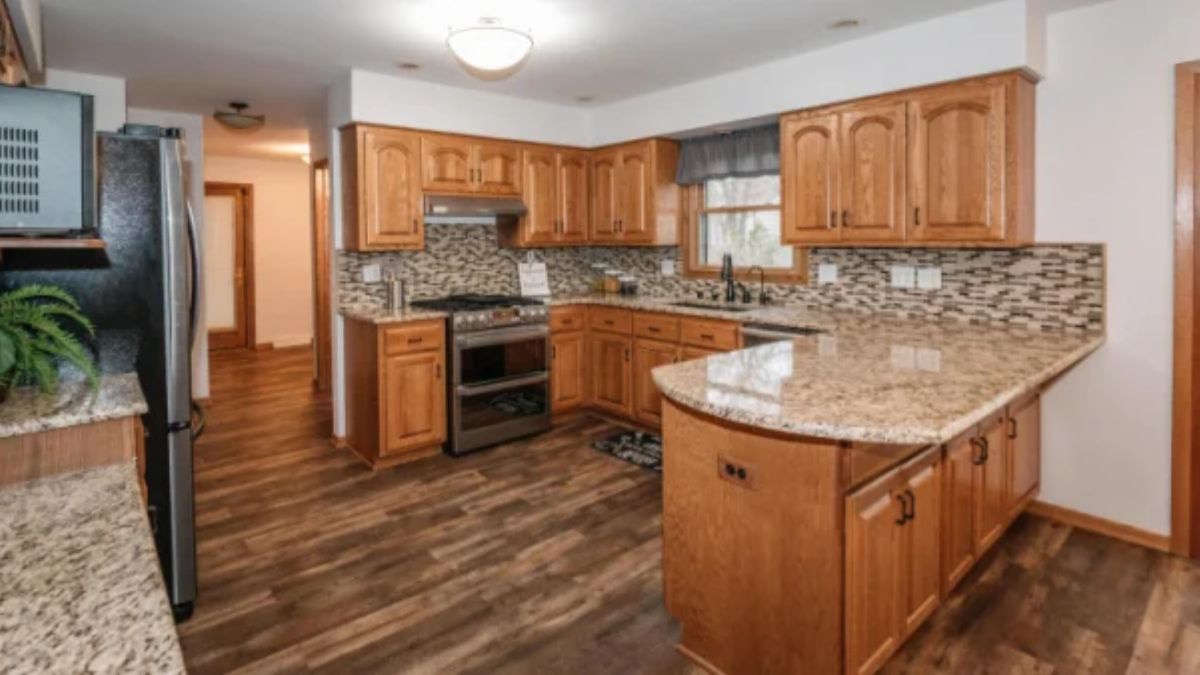
“While this kitchen was in good shape, the finishes were dated,” she writes. The granite wasn’t going anywhere yet, so the paint had to make peace with it. That ruled out the obvious answer. White, she says, “would have been too stark with the current countertops.”
Why taupe beat white next to brown granite
Stark is the right word. Bright white cabinets set right on top of brown and cream stone create a hard line where the two meet, and the darker tones in the stone can look heavier than before. A warm mid-tone does the opposite: it shares some of the stone’s brown and cream, so the countertop reads as part of the color scheme instead of a leftover.
“I wanted a color that works with the current brown and cream granite countertops, as well as a color that will work with the new quartz countertops we plan to install next year,” Bre says. She chose Benjamin Moore Advance in Hampshire Taupe for both the uppers and the lowers. “I never thought I would have taupe kitchen cabinets, but here we are.”
The same logic saved another dated kitchen: honey-orange oak cabinets sprayed a pale green-gray like Sea Salt stopped fighting the beige floor tile, because the new color no longer added another orange-brown surface next to it.
How she painted 30-something doors and drawers herself
Before touching the kitchen, Bre read painters’ forums and talked to professional painters. Their advice: use high-quality cabinet paint rather than chalk paint, and don’t skip sanding. Here is how she worked:
- Test first. She tried the products and method on an oak china cabinet before starting on the kitchen.
- Go section by section. “I did not have the space to paint all 30-something doors and drawers at once,” she says. She didn’t empty the cabinets either.
- Spray the doors, roll the boxes. She sprayed the doors and used a roller on the cabinet frames.
- Decide about the grain. She used no grain filler, so the oak grain still shows in places, especially on drawer edges and door panel details. If you want a smooth, modern finish, fill the grain before painting.
- Bridge the backsplash for now. She painted the brown and cream glass mosaic cream with leftover paint from an earlier bookcase project, since it was due to be replaced.
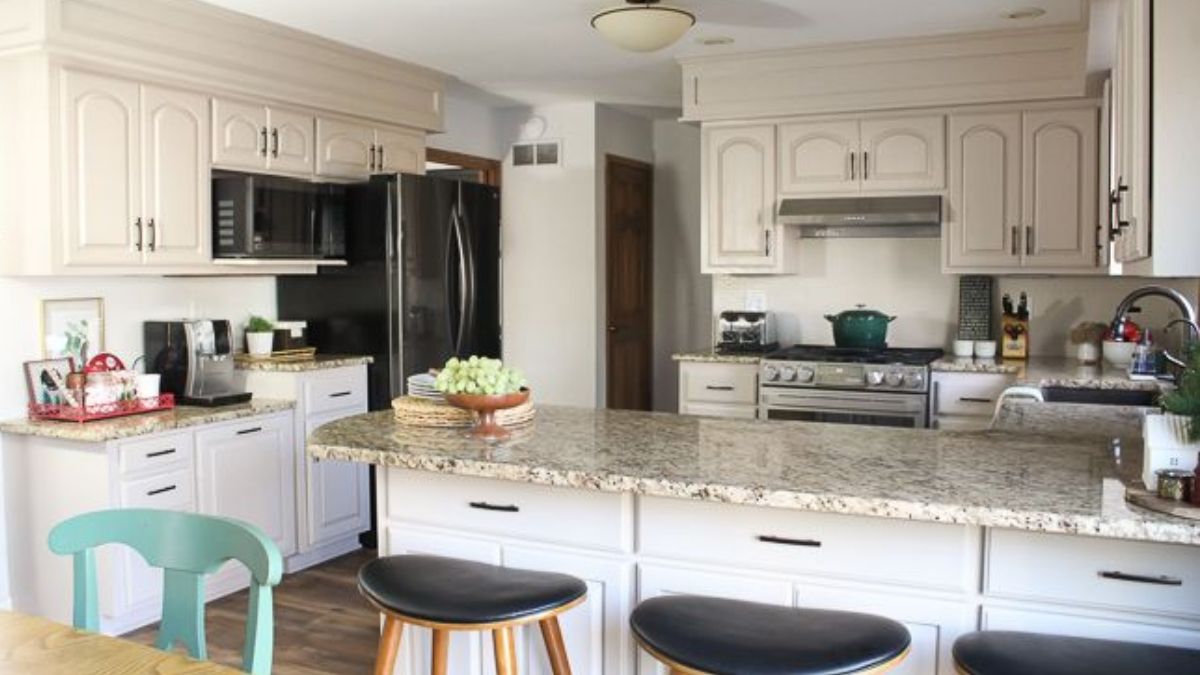
She started on October 17, 2020 and finished on November 25, a little under six weeks in a kitchen that stayed in use. “Even though I did not love the process, I believe it was 100% worth it to paint my kitchen cabinets myself,” she says, adding: “I saved thousands of dollars with a DIY cabinet painting job.”
The granite chapter did end, as planned. In May 2021 she shared that the new backsplash and countertops were in. Taupe was chosen to work with both, which is why the cabinets didn’t need repainting when the stone changed.
What a coat of taupe won’t hide on oak
Paint covers color, not texture. Oak has open grain, and without filler it shows through, as it does on Bre’s drawer edges. Some people like that hint of wood; others want a sleek finish and should fill the grain first. Skipping the sanding is the bigger risk: the professionals she consulted were clear that it is required, because paint on slick, unsanded cabinets is the paint that peels.
Leftover paint is worth keeping for touch-ups on doors and drawers, which take the most hits. For leftover latex paint, Chicago’s city guidance suggests wrapping the can’s lid in plastic wrap so it seals tight, and drying out what you won’t use with kitty litter, shredded paper or sawdust before throwing it away. That’s the trick.