She painted her grandpa’s knotty pine lowers Privilege Green and the kitchen felt brighter


Picture a small kitchen where every cabinet, top and bottom, wears the same orange-yellow knotty pine. The drawers stick, the stain glows under the lights, and the room feels smaller than it is. Ripping it all out starts to look like the only answer.
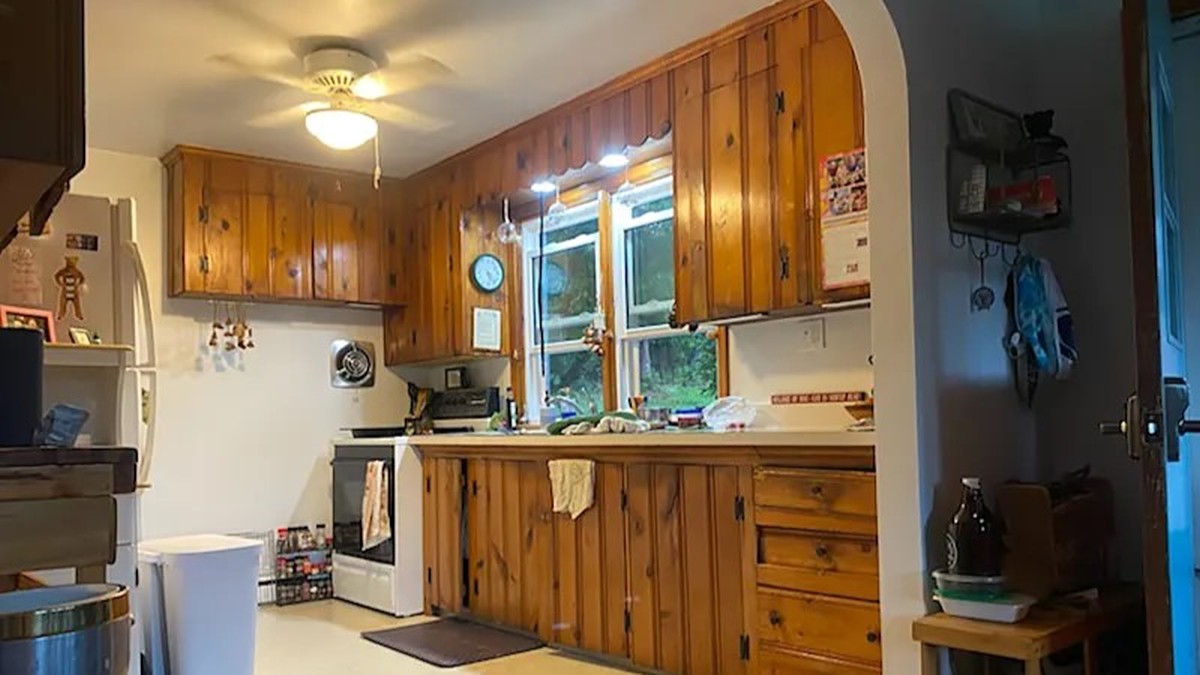
The cabinets weren’t the problem, the finish was. Brittany’s kitchen is a 116-square-foot room in the family home her grandfather built in 1956, and he built the cabinets himself with local carpenters. “I couldn’t take the knotty pine overload anymore!” she says. But she wasn’t willing to trade handmade cabinets for what she calls “poorly made new composite cabinets.” So she kept them and changed the finish.
Why all that pine felt like too much
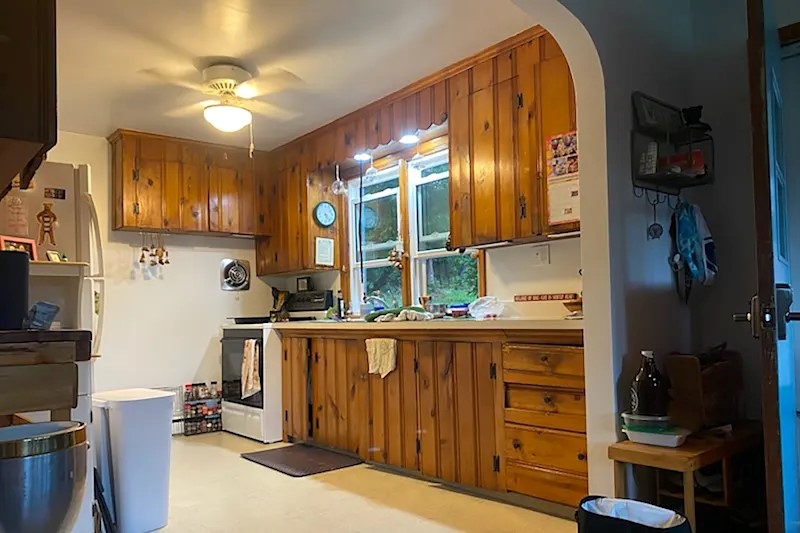
“The cabinets dominated the room with traditional orange-y yellow stain,” Brittany says. When uppers and lowers share one warm tone, the whole room reads as one wall of wood, and the orange takes over. The color was in the varnish, not the pine itself, which is why sanding it off brought back the original wood.
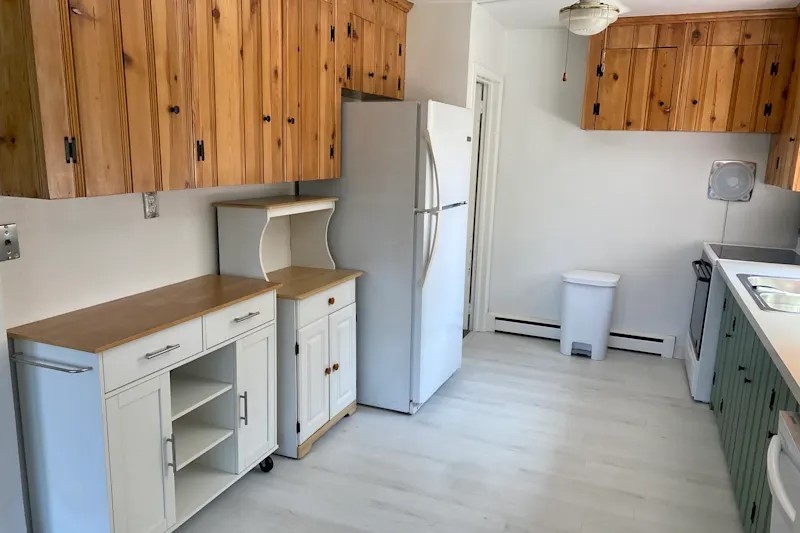
Splitting the colors between top and bottom is a reliable way to break up a wall of orange wood, and it works on oak too: white uppers over blue lowers can give a dated kitchen a custom-built look without new doors.
The makeover, step by step
- Sand off the orange. Brittany sanded the cabinets to remove the orange-tinted varnish, with help from her brother, Joe, and her boyfriend, Kyle. “The intricate groove pattern on the cabinet faces took much longer to sand than I had anticipated,” she says. Budget extra time for any grooved door.
- Test on scrap wood first. Her plan was an antique white stain on the uppers. On a spare piece of wood, it gave “more of a driftwood look than just a light cottage feel,” so she dropped it.
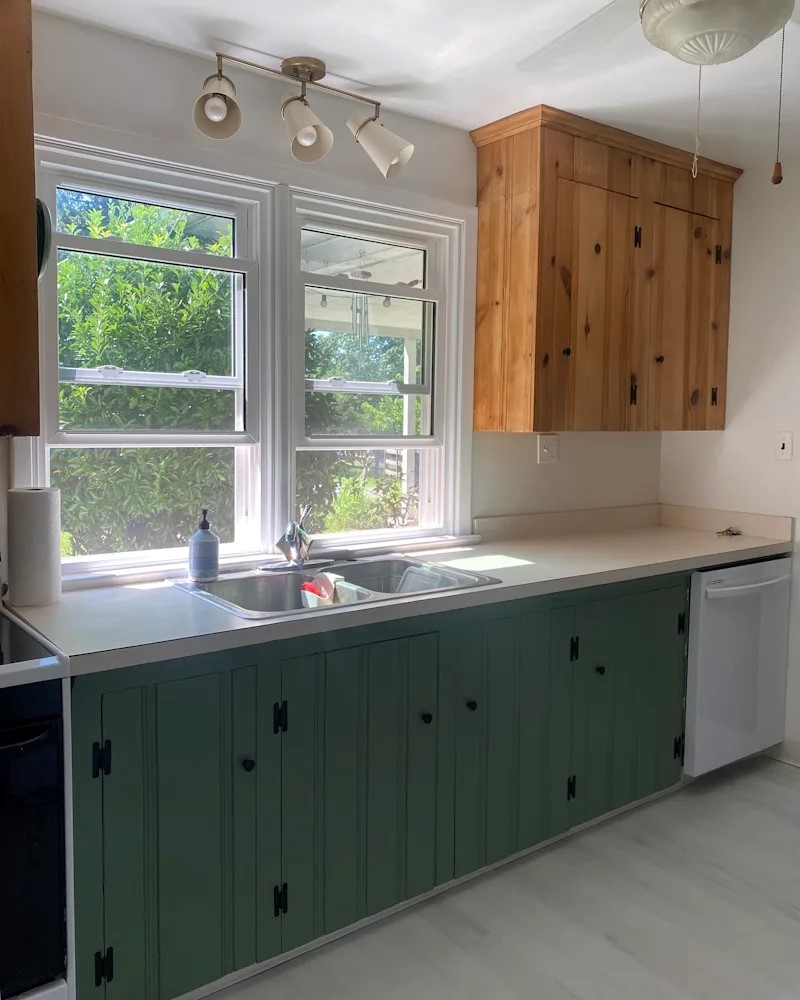
- Keep the uppers natural. “Ultimately, we ended up putting only a clear polyurethane coat on the upper cabinets to eliminate the orange,” she says.
- Paint the lowers. They went Sherwin-Williams Privilege Green, SW 6193, so the color sits low and the natural wood stays at eye level.
- Reuse the hardware. “Instead of purchasing new hardware, I removed it, let it soak in a degreaser, and then spray-painted it black,” she says. More than 10 months later, she says it has held up well.
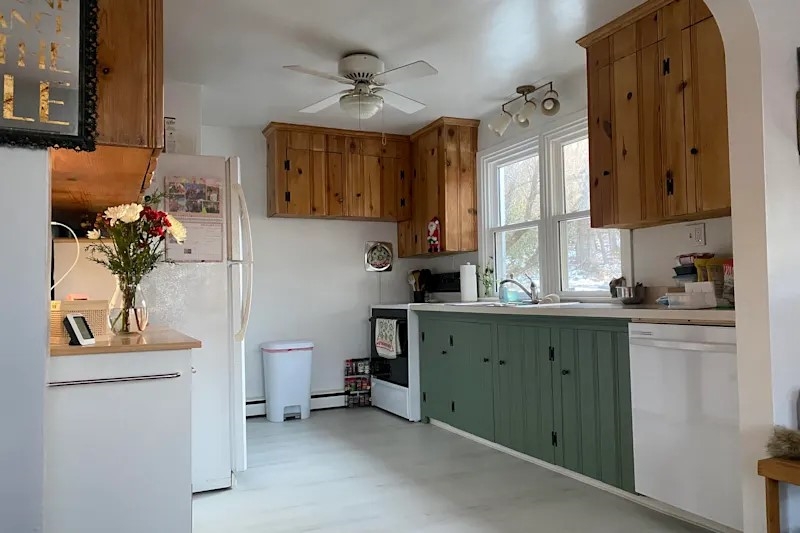
Paint wasn’t the only change. The $2,460 project also swapped the drawer section, whose rails were broken, for a dishwasher, with a $144 storage cart to make up for the lost drawers. She removed the scalloped panels above the sink, added a new light fixture and had new flooring installed by a professional. “The overall lighter, brighter feel of the room makes me so happy,” she says.
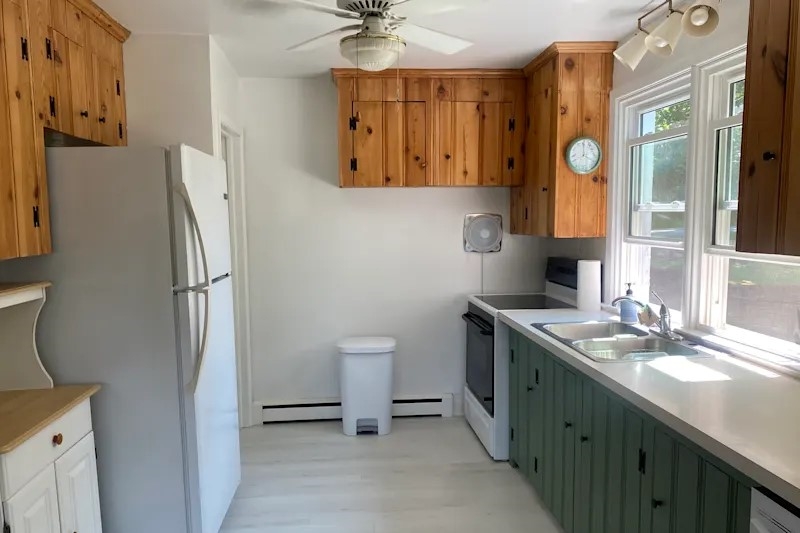
Plan B, if the grooved doors are too much to sand all at once: start with the lowers, since paint covers more than a clear coat does, and decide on the uppers once you see the green in the room.
Where this makeover has its limits
Sanding is the real job here, and it takes longer than you think on detailed doors. A clear coat only removes the orange look if the old varnish is fully off, so don’t rush that step.
Old houses deserve a check before any sander comes out. The CDC notes that homes built before 1978 are likely to have some lead-based paint, and that sanding can create hazardous lead dust. If any surface you plan to sand has old paint on it, test it first or hire a lead-safe certified pro.
Some parts of this project are not DIY for everyone. A dishwasher needs water, drain and electrical hookups, and Brittany left the flooring to a professional. Call a licensed pro for anything you’re unsure about.
Sand off the orange, keep the wood up high, and let green carry the bottom half. That’s the trick.