Christmas Tree Inspiration for Every Decorating Style

It’s easy to decorate your Christmas tree on autopilot, using the same ornaments every year. Your meaningful family pieces stay, of course — but you can still refresh the look with a coordinated color palette.

Decorating a tree in a coordinated color palette takes a little planning. Just like when you decorate a room, you’ll want to consider colors, scale, style and texture. Decide what color and style appeal to you and then start your plan.
You’ll need to consider lights, garlands and ornaments. Moreover, you’ll want ornaments of different sizes, shapes and textures. The tree should be visually interesting whether you go monochrome or multicolored.
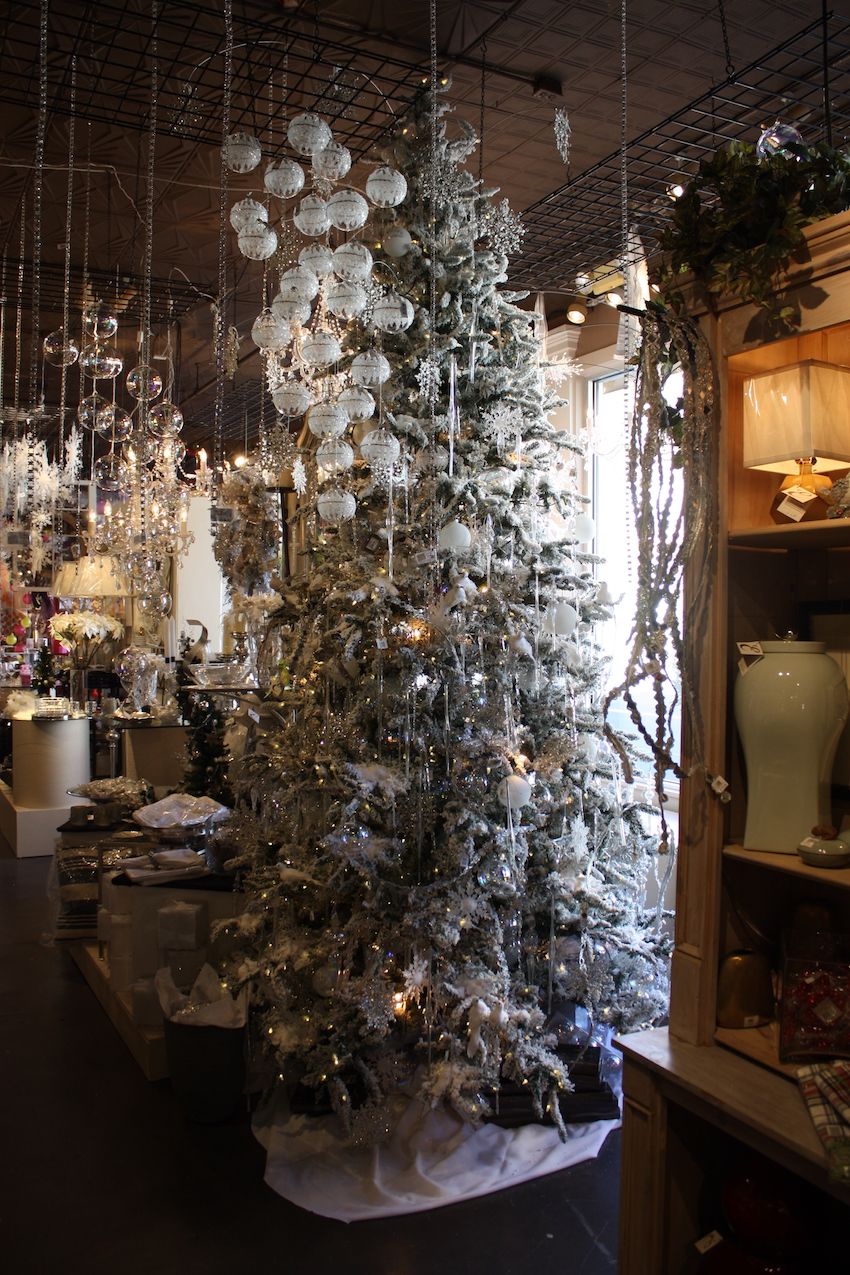
White Themed Christmas Decoration
A snow-covered fir tree is a classic holiday image, and you can recreate it at home with an all-white decorating scheme. Start with a flocked tree — a tree coated with a snow-like mixture made from paper fibers, cornstarch, and a flame-retardant agent to mimic the look of real snow.
Once you have your white base, layer in white ornaments, silver accents, and crystal pieces like icicles. Together they create a frosty, elegant look that brings the feel of a “White Christmas,” especially for homes in warm climates where flocked trees are most popular.

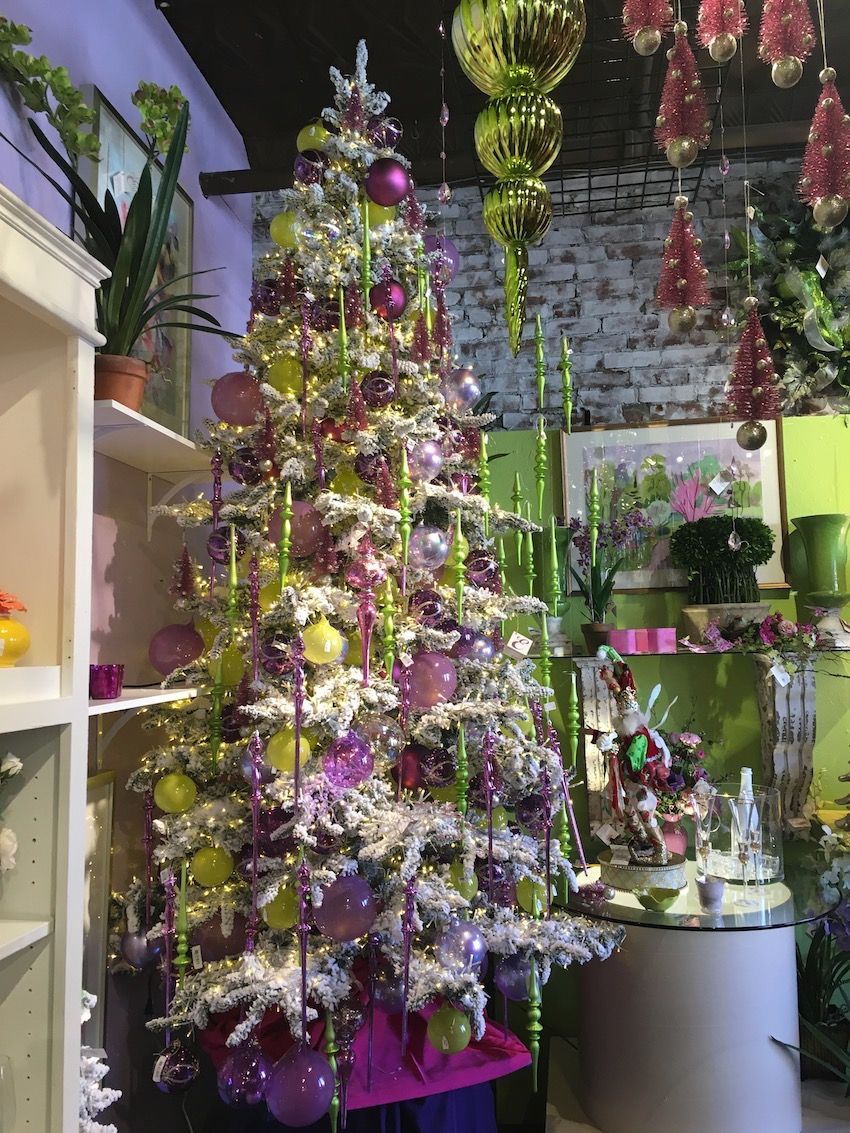
Non-traditional color combos
Like to do things differently? Christmas decor in atypical color combinations has become very popular and creating a tree with a non-traditional color scheme makes a huge statement. Add twinkling lights and it’s sure become the talk of the neighborhood. This tall, slender flocked tree is decked out in shades of pink and chartreuse green. Ornaments both round and long create a look that is totally modern and a a bit reminiscent of Dr. Seuss.
A traditional tree is also a great foundation for an alternative color scheme. This tree is decorated around an ocean-inspired teal green but still looks like a frosty gem thanks to the plentiful white and silver ornaments. Incorporating lots of icicle-shaped decor adds to the winter-like feeling. This same tree would have a totally different feeling if you substituted an alternate color. Doing this would make it more affordable to change color schemes every year by swapping out only the colored ornaments and reusing the others.


Snowflake ornaments are perfect for trees decorated in a frosty style. The lacy, intricate piece is accented with faceted jewels and will add lots of twinkle when illuminated by the little lights on the tree.


Blue may be the topic of a sad Christmas song, but it certainly makes for an elegant tree. A deep cobalt blue and gold theme is a refined choice for this generally traditional tree. The deep color and metallic accents give it a luxurious feeling, which is highlighted by the shine from the lights. This color scheme is a decorating option that does not sacrifice luxe style.


Themed Christmas Trees
Whether you have only one tree or several, themed trees are a fantastic way to express your love for a hobby or something your really like. Themed trees can focus on a hobby, sport, Hollywood idol, movie genre — literally any topic that makes you happy. This tree is decorated with a variety of ornaments, but the dominant number is farm animals. This would be perfect for a rustic or farmhouse theme.


If farm animals aren’t your thing, try focusing on your pets. This unusual tree features plenty of plush cats and dogs — along with the requisite fire hydrants!

Even general interests like music can be the theme for a tree, even if you only use one particular ornament, like this ball covered in sheet music. Just be sure to use multiples of the same ornament with an assortment of other general decorations.

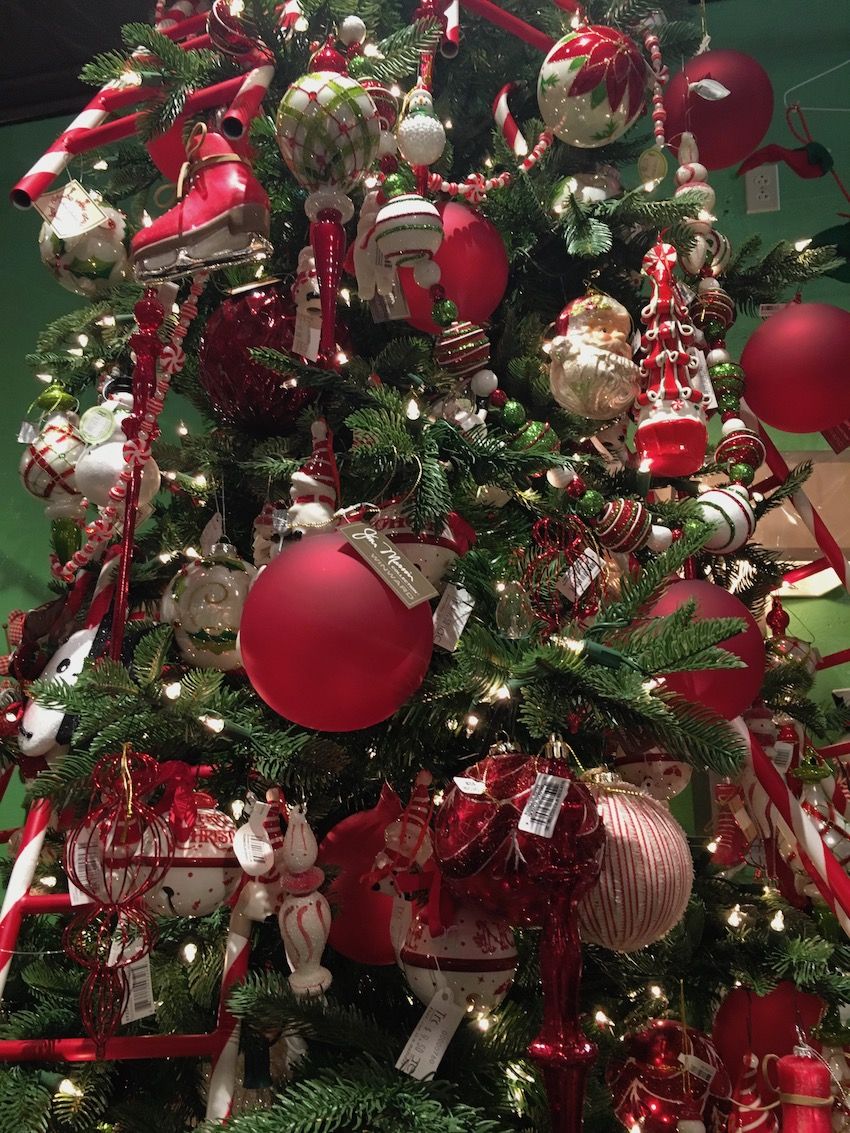
Traditional Red and Green
You can’t go wrong with a traditional red and green tree, especially when it is drenched in whimsical ornaments, giant candy canes and peppermint garlands. It is probably the easiest color combination to pull off because the colors are widely available and it immediately says “Christmas.” Of course, that doesn’t mean it can’t be whimsical, different or even themed.
This particular tree is generously decorated with all sorts of ornaments within the color scheme. Santas, snowmen and assorted Christmas tree decorations cover the boughs and large red and white striped ladders are positioned around the tree. It’s an explosion of color and a childhood dream come true.


Red trees don’t have to stick to a stereotypical assortment of decorations. This flocked tree is adorned with predominantly red and white ornaments and just a sprinkling of bright green glass balls. Elements that are typically done in white or crystal instead are rendered in red: Long icicle shapes and snowflakes join red spirals and elegant ornaments that feature cardinals.


A Natural Look
For those who prefer a neutral palette, a Christmas tree doesn’t have to bearing if it incorporates enough texture and understated shine. This beauty is a bounty of textile-covered ornaments in shades of beige, gray and silver. A hint of color comes from a modest number of knitted mitten ornaments that have a red pattern. It includes a little bit of sparkle from the snowflake ornaments and some whimsy from the stuffed reindeer.


Pretty in Pastels
Oversized ball ornaments in a range of pretty, pearly colors make for a spectacular pastel tree. Silver garlands and glittered branches with pale green accents add sparkle and icicles of crystal and pink yield a decidedly feminine tree. Large velvet bows make for colorful and textural accents around the tree. This color scheme would be wonderful in a living room that has a pale color palette.


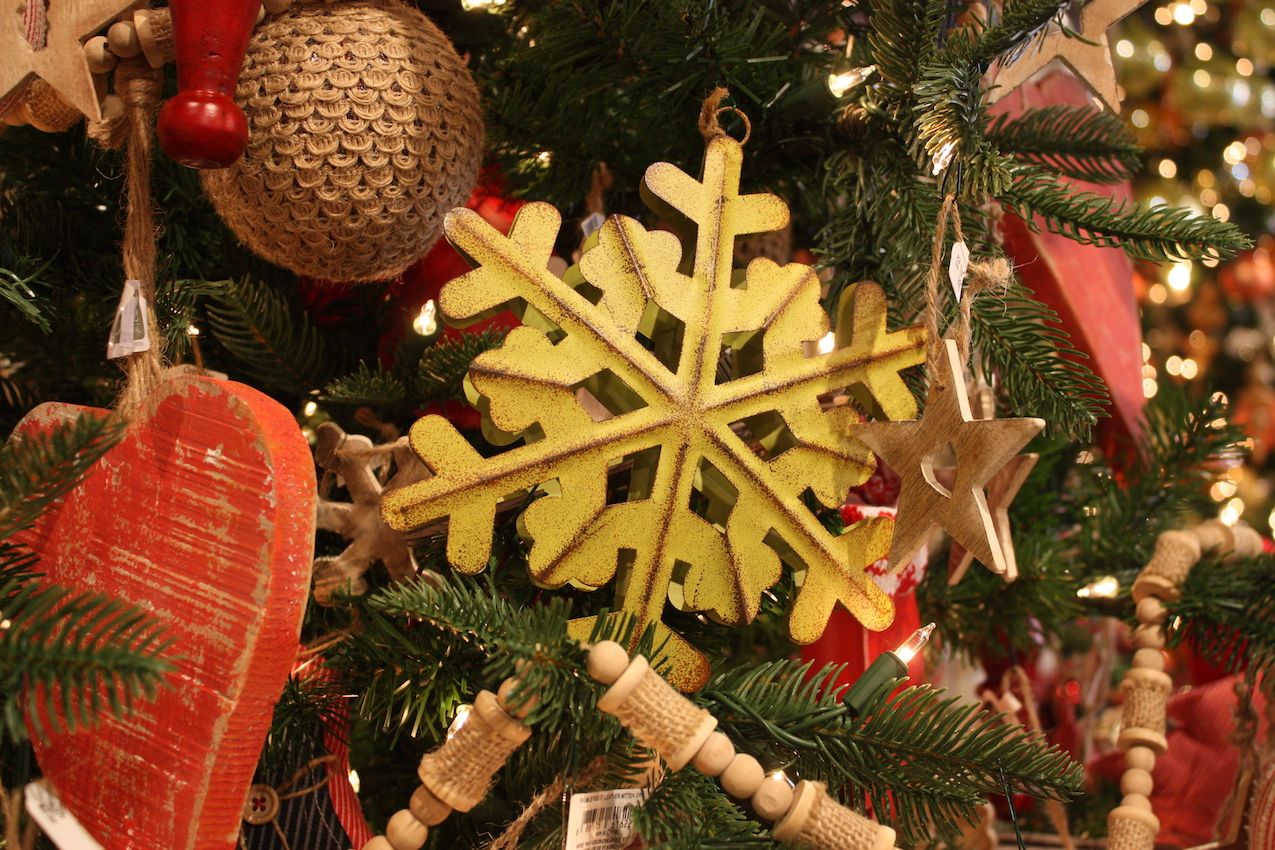
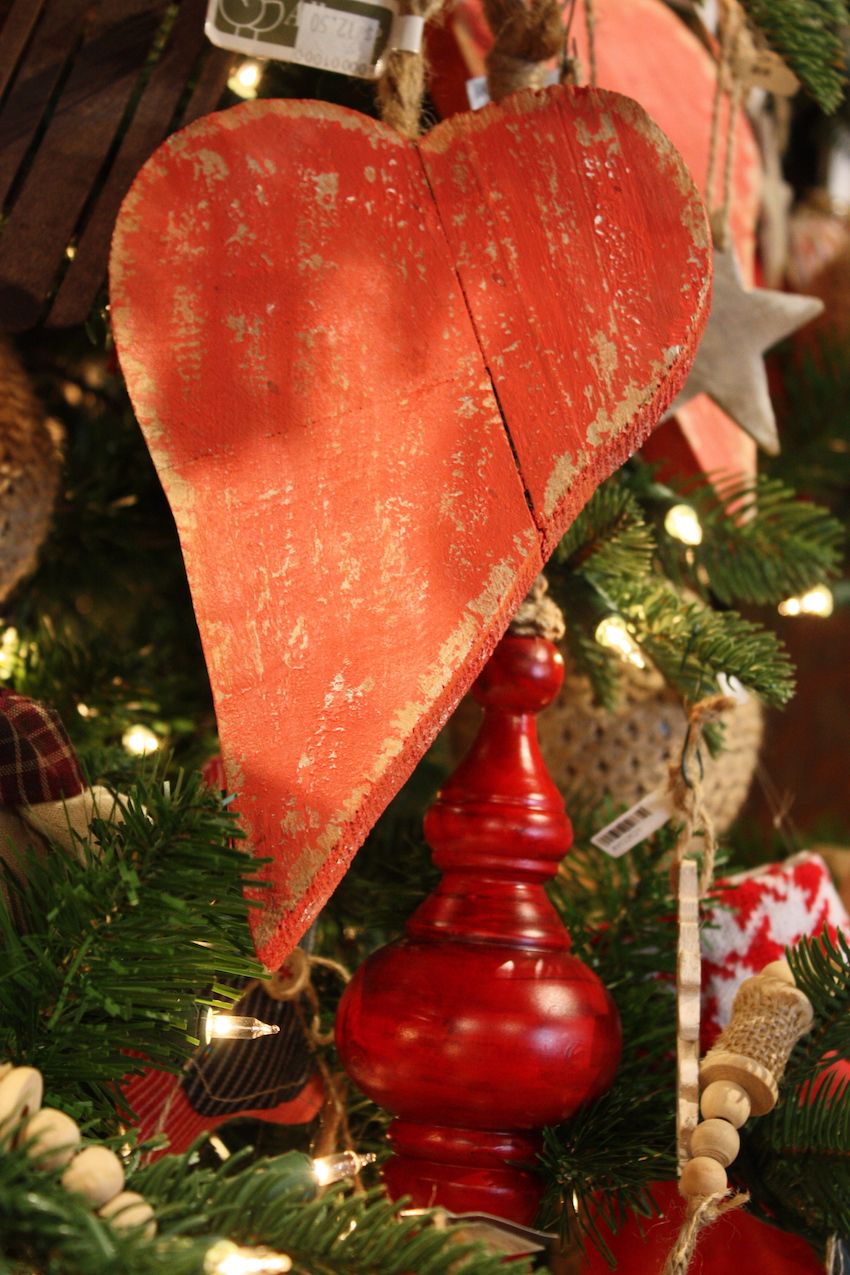
Homespun and rustic
The tree is chock full of ornaments that look like they might have been made by your grandparents — whether they really were or not. This style of tree can be a great option if you have a number of family heirloom ornaments that fit the theme. The accent color is red and the ornaments look textural and hand-crafted. It’s a casual style that is low on glitz and high on charm. The fabric covered, stuffed and carved wooden ornaments hark back to a simpler time.


Glammed up Nature
Love glitz but also love pine cones and leaves? Create your own hybrid by mixing up glittered natural elements like a garland of pine cones and grape leaves along with shiny ornaments on a totally white tree. The addition of hand-blown globes injects an artful and spectacular element to the decor scheme. The predominantly coppery colors really stand out against the white branches and help provide a warm glow.


Looking at all the options makes it pretty clear that almost anything goes when it comes to your Christmas tree. It all comes down to your preferences, budget and time allowance. While decorating for the holidays is great fun, you want to be sure to leave enough time so that you can relax and enjoy your spectacular Christmas tree!