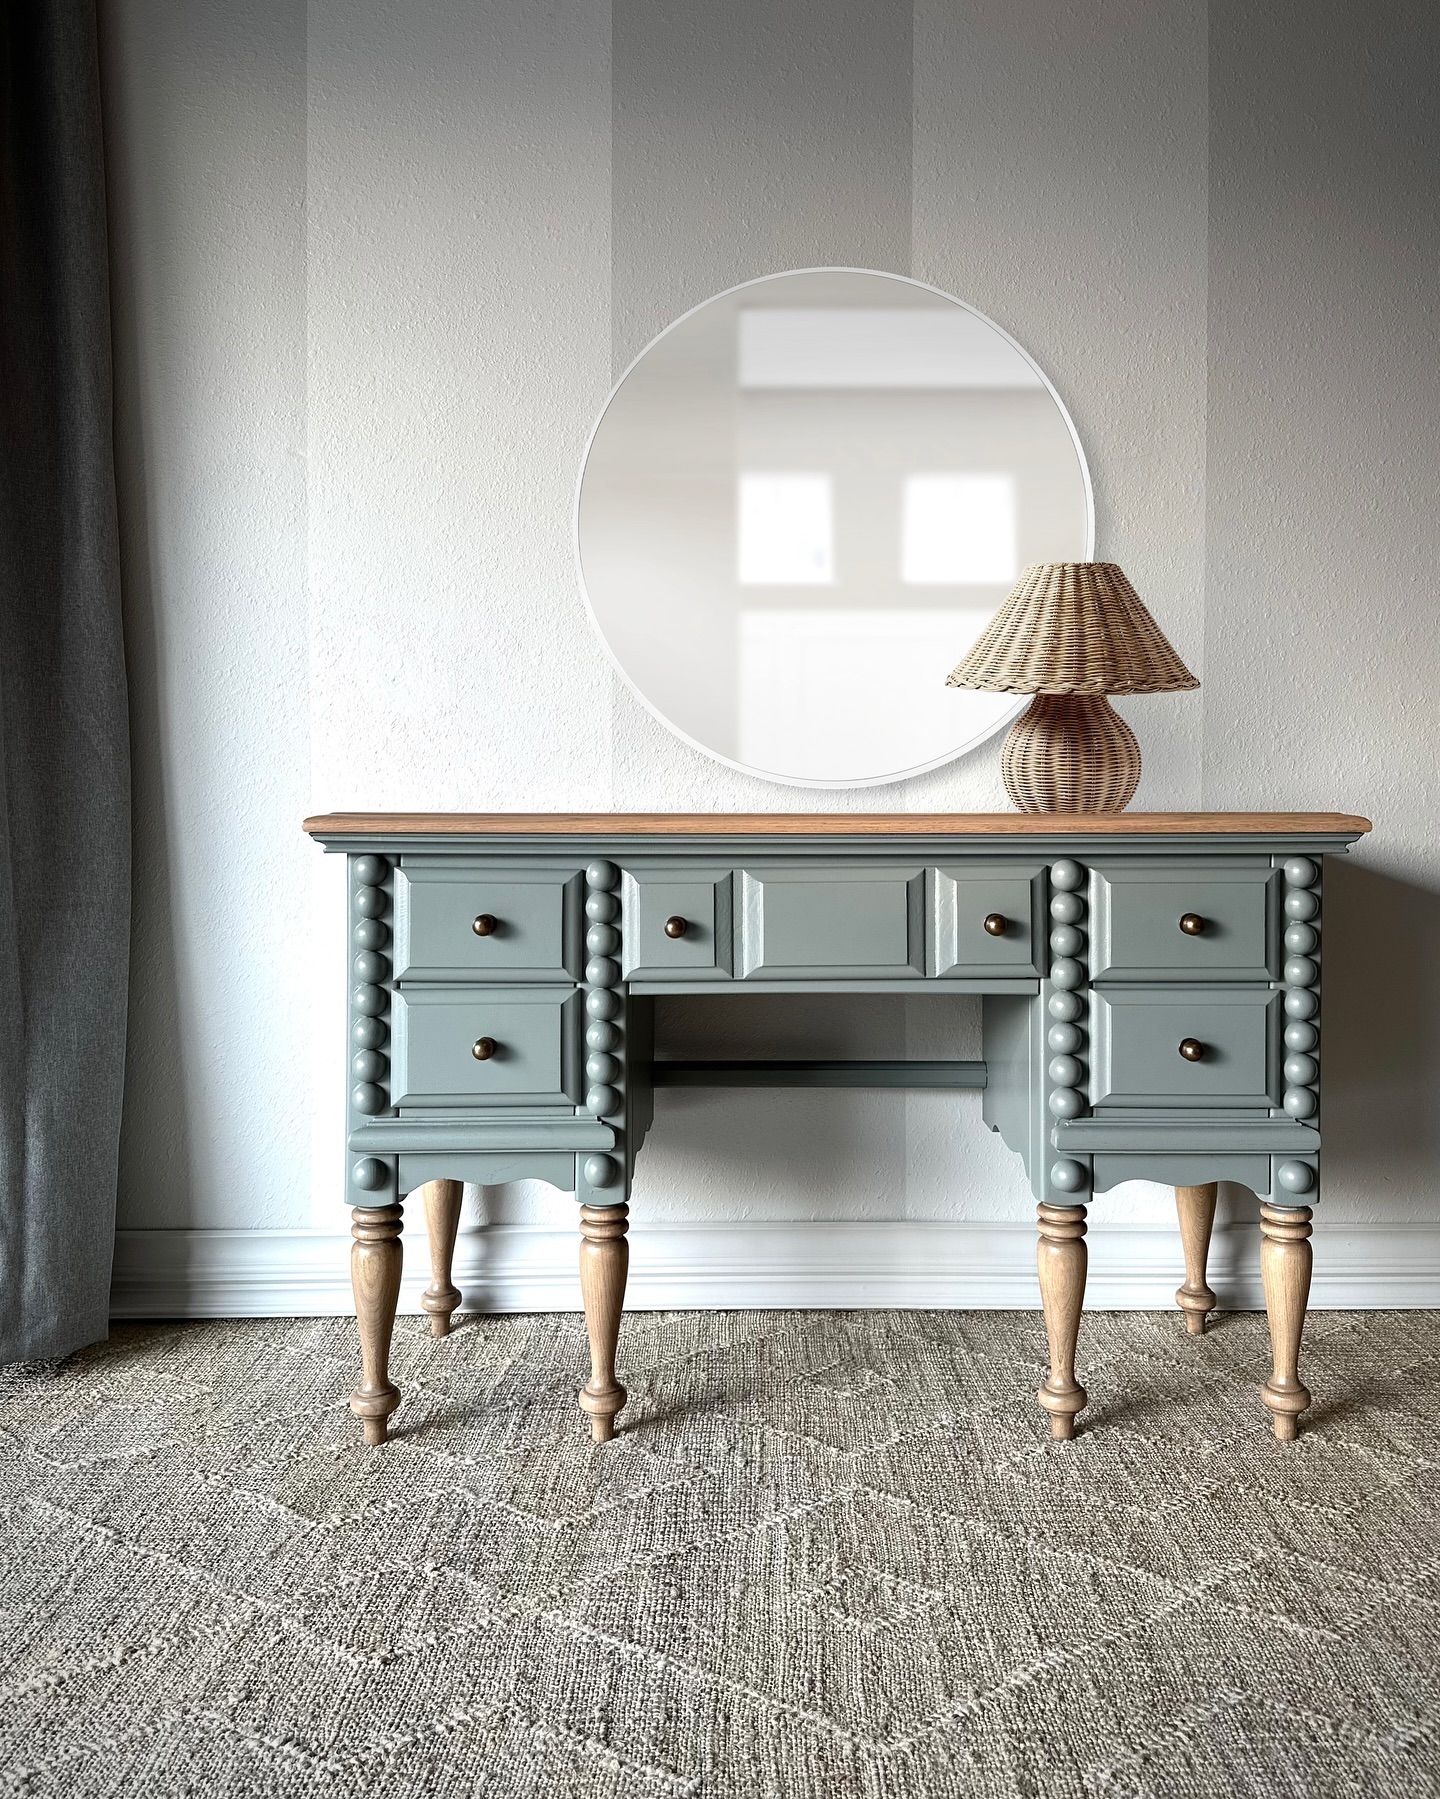
Instead of keeping this ’80s oak desk orange, she painted it My London Flat teal-gray


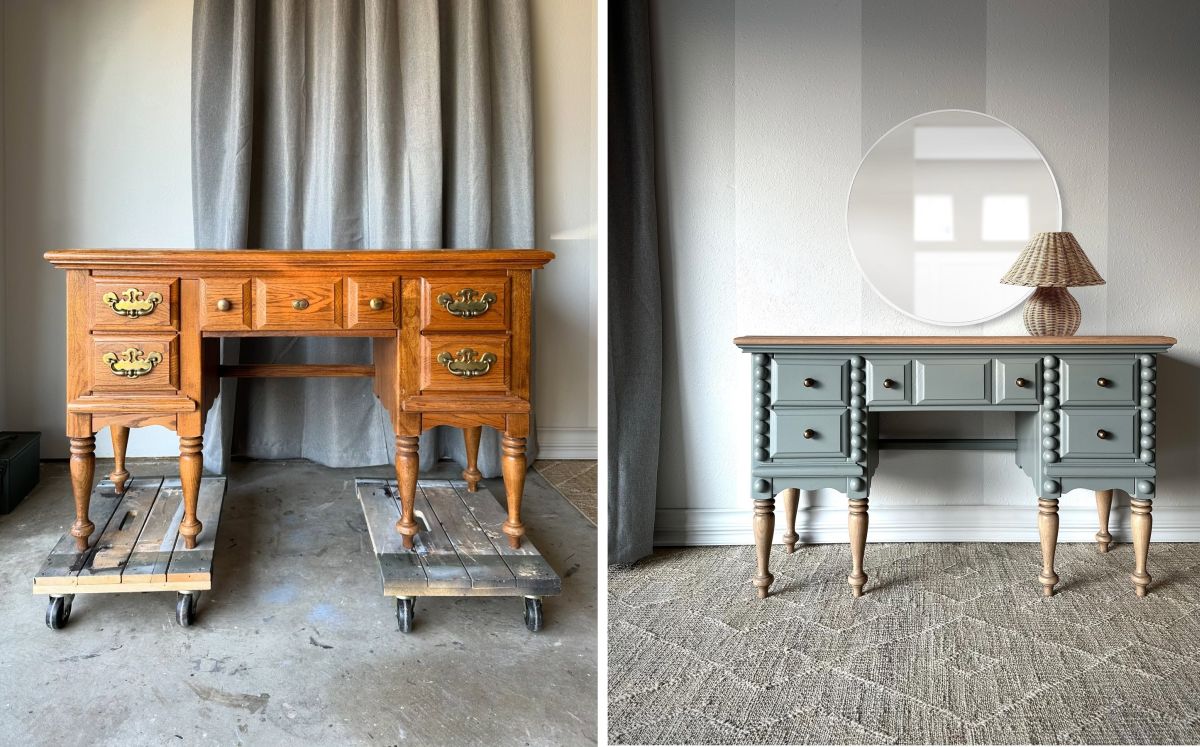
It’s the desk from every 1980s spare room: oak, a finish gone orange, and ornate pulls on every drawer. It still opens and closes perfectly. But it makes the whole room look stuck in another decade, and no new lamp or rug fixes that.
The desk wasn’t the problem, the finish was. Furniture flipper Sheri Abernathy, who posts as @brasswalnut, found a desk exactly like that, with what she calls a “very dated finish.” For about $100, she turned it into a piece that could work as a vanity as easily as a desk.
Why the orange finish dated the whole piece
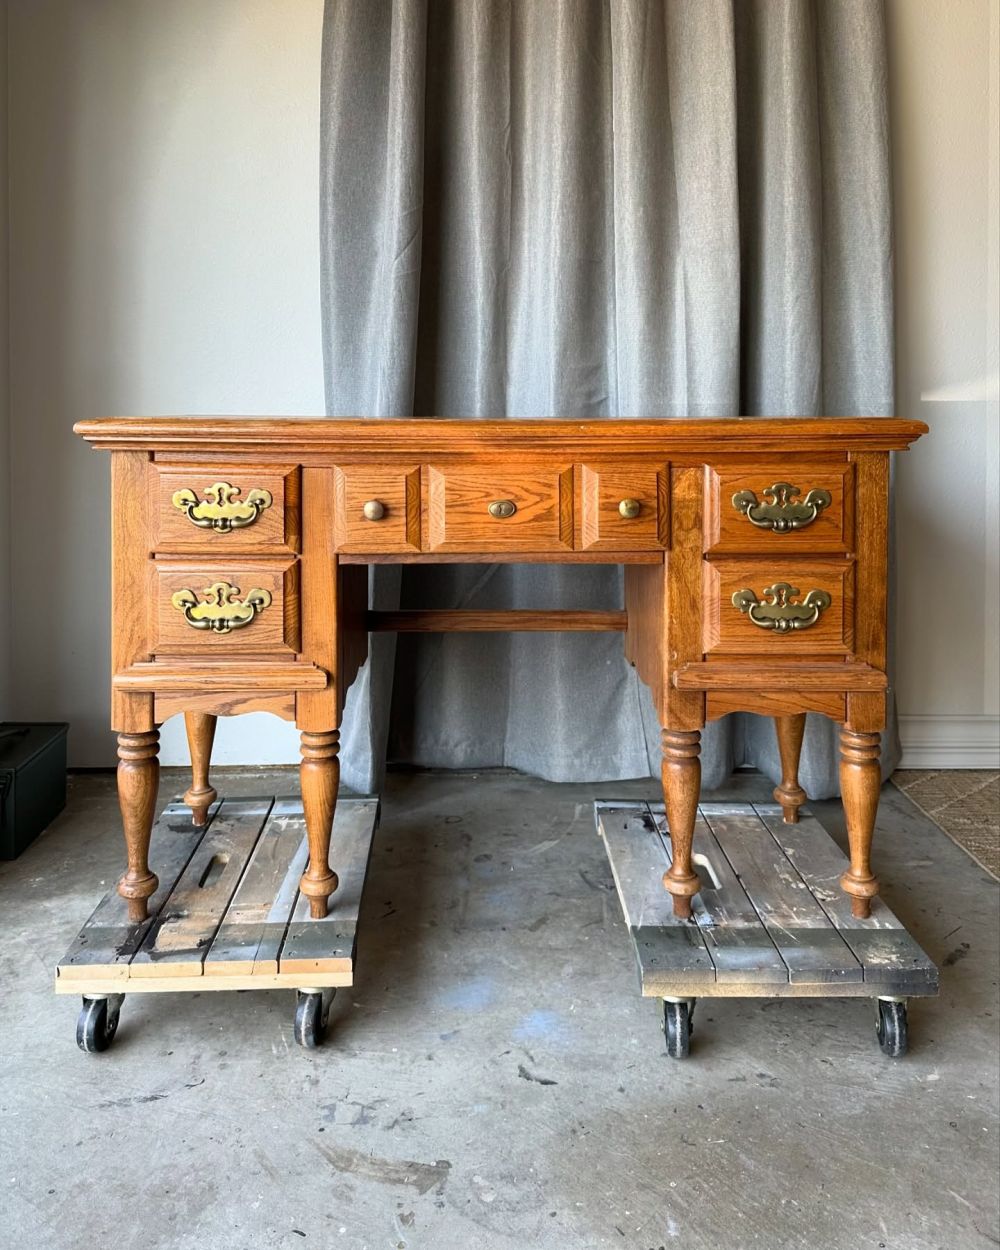
What dated this desk wasn’t the oak itself. It was the orange finish on top of it, plus the ornate pulls. Both can be changed without replacing anything, so Sheri started by scrubbing and sanding the old finish off. The same fix works on old brown desks too: a deep color like dark blue on the outside, and a second color hidden inside for a surprise when it opens.
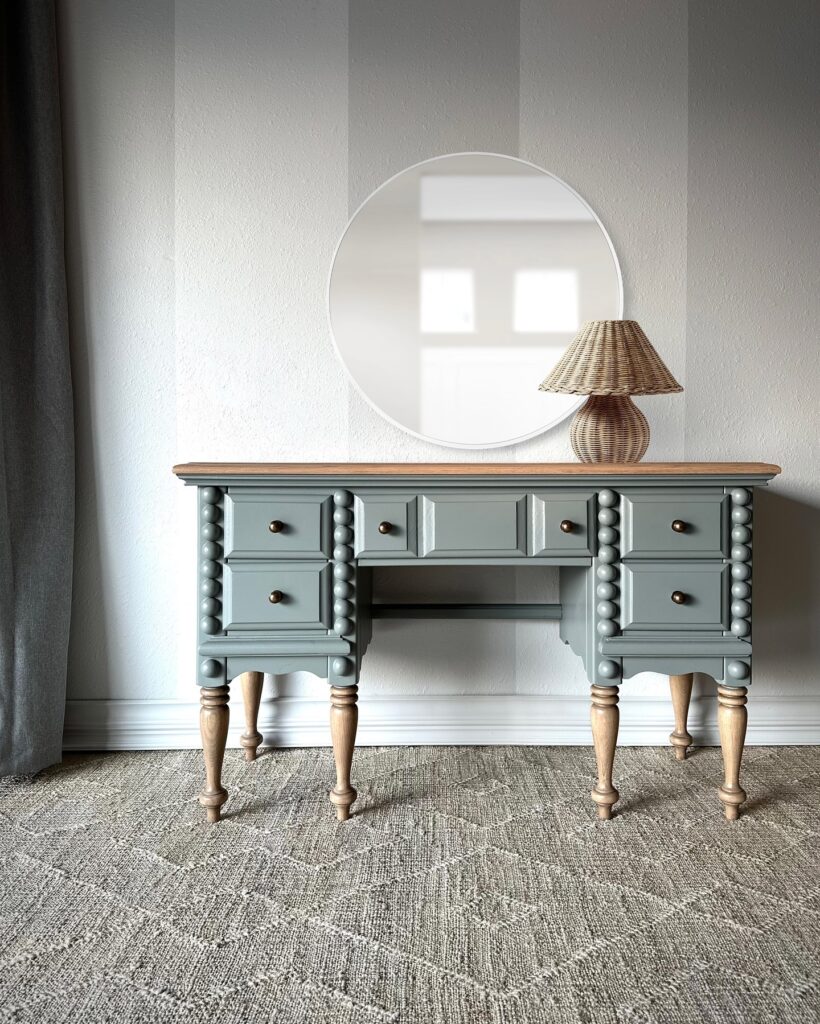
Then came color. Sheri painted the middle of the piece in My London Flat, an Amy Howard One Hour Miracle Paint that the brand describes as a muted blue-gray. On her desk it reads teal-gray, cool enough to cancel out the orange memory of the wood. “It looks so contemporary yet cute,” Sheri says.
The makeover, step by step
- Remove the dated finish. Sheri scrubbed and sanded it off. Amy Howard’s own prep list adds the basics: clean the surface, let it dry, fill holes or cracks, and remove anything loose or peeling.
- Paint thin. The brand calls for thin, even coats in long strokes with a nylon brush or short-nap roller, and two coats for a full, even finish. It’s dry to the touch in about 30 minutes, but wait at least two hours before the second coat.
- Add the ball trim. Instead of a strand of bobbin trim, she glued on individual wood half-spheres with wood glue, two packs for $20. “I added the ball trim to make the piece look more unique and custom,” she wrote on Instagram. “It also creates more of a flush front, level with the drawers.”
- Swap the hardware. She removed the ornate pulls, patched the holes and added antique-looking brass knobs.
- Let it cure. Amy Howard lists 7 to 14 days before heavy use or cleaning.
Plan B, if stripping the whole desk feels like too much: Amy Howard says this paint needs no sanding, priming or topcoat, although its prep section still advises sanding surfaces smooth as needed. Try it first on the back or a drawer side, then decide how far to take the sanding.
Where this finish has its limits
Temperature matters more than people expect. The brand says not to paint when the surface, the air or the paint is below 50°F, and it gives ideal drying conditions of 60°F to 90°F at 50% relative humidity, with good ventilation. A cold garage in November can ruin an otherwise careful job, and a closed room isn’t much better: the EPA notes that paints contain organic solvents and advises increasing ventilation while you use them.
Color is the second surprise. Some buyers say My London Flat looks grayer than the photos, and others see gray-green. Paint a test patch and look at it in daylight and lamplight before you commit.
Last, a desk gets daily wear. Because full cure takes 7 to 14 days, keep heavy objects, mugs and cleaners off the top until then, or the finish can mark before it hardens.
Lose the orange, keep the shape, and let one cool color and a row of wooden balls do the rest. That’s the trick.