How To Use Drywall Mud And Which Kind You Should Buy

Drywall mud is a joint compound made of gypsum. Contractors use it to cover tape and seams after they hang drywall panels.
When it comes to hanging drywall, there’s a big learning curve to taping and applying drywall mud. But it can be DIY-friendly after a little practice.
What Is Drywall Mud?

Drywall mud is a material used when hanging sheetrock or drywall. It covers the joints between drywall panels, makes indentions flat, and is useful on large drywall repairs.
Drywall mud has a thin, paste-like consistency. Without it, your walls would have cracks where sheets of drywall butt up next to each other, and you wouldn’t be able to get a smooth paint job. There are many different types of drywall mud, and all need tape to perform well.
Types Of Drywall Mud

The two primary types of drywall mud are premixed mud and powdered mud. The premixed mud is a paste that you don’t have to do anything to. The powdered mud requires water before use.
- All-purpose mud – this is a safe, premixed mud you can use for any drywall project. It is versatile, hence the name ‘all-purpose’ mud. Choose this mud if you’re a beginner.
- Topping mud – this mud is for the final top coating. It’s a thin topcoat that dries white and is easy to sand. Topping mud is pre-mixed.
- Powdered drywall mud – this mud is called hot mud, and it contains chemicals that react with water. It hardens quickly and shrinks less than all-purpose pre-mixed mud when it dries. Hot mud is best for experienced drywallers.
- Timed drywall mud – a type of mud that dries in five minutes, fifteen minutes, or longer. Timed mud allows you to control how fast the process goes.
- Sanding mud – a drywall mud that hardens fast and smoothly, used for finishing work and spackling. Sand mud is similar to topping mud but is specifically designed to look great when sanded.
Types Of Drywall Mud Tape

Although mud is the primary material needed for the mudding process, the tape is important too. Without it, the joints won’t be smooth. Tape goes over the joints after the first coat of mud, depending on the type of tape you use.
- Paper tape – this is the most common and cheapest type of drywall tape. The benefits of paper tape include the ability to cut, adjust, and fold it into fitted corners. Paper tape comes with a semi-steep learning curve and is not beginner-friendly.
- Mesh tape – this type of tape is made from fiberglass threads to create a mesh similar to what you’d see on a window screen. The thickness of this tape can make it difficult to use, but self-adhesive mesh tape is the most beginner friendly. Rather than applying a first coat of mud for adhesion, it sticks directly to the wall.
- Preformed tape – this type of tape is made of metal or plastic and sold in solid strips. Preformed tape is best for corners and outside walls to get a smooth transition.
How To Use Drywall Mud

Learning how to use drywall mud is harder than it looks. It may take several tries before you get the hang of it.
Step 1: Get Ready
Cover your floor with a drop cloth, and wear old clothing that you don’t mind getting messy.
It can also be helpful to wear goggles if you don’t want to get mud in your eyes. Gloves are not necessary as mud is easy to wash off after it dries. But protect your arms and eyes if you can.
Step 2: Mix Drywall Mud
If you are using premixed mud, lightly mix it to eliminate the top layer of liquid. You can add a bit of water if you feel it’s too thick.
If you are using a powder, follow the mixing instructions on the package.
Step 3: Start First Coat
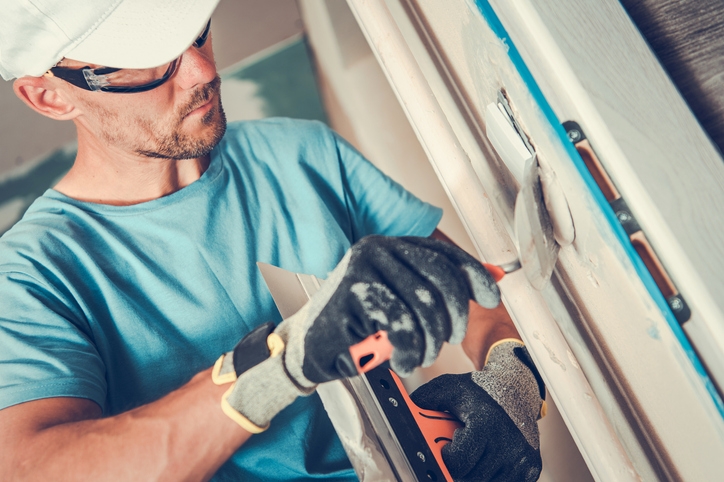
Apply mud to the joints and screw indentations. Start with the screw marks, adding a swatch of mud to each mark. Then, add a thin coat of mud to your first joint, making sure the mud is a bit wider than the tape you are using.
After you apply the mud, use your drywall knife to smooth it out. Use a firm, angled motion, but don’t press too hard, or you’ll remove some of the joint compound.
Step 4: Start Taping With Drywall Mud
Now, add tape to the first joint you mudded. Do one at a time – mudding, then taping. After you put the tape over the mud, smooth it out with your trowel or mudding knife. It should be flat when you finish.
Step 5: Tape Corners
Apply a thin coat of mud to both sides of the inside corners. Crease your tape and smooth it out to fit into the corner.
Then, smooth the paper tape carefully using your trowel. Do one side at a time, alternating as you go to get an even finish.
Step 6: Tape Protruding Corners
You can’t use standard paper tape for outside corners, you need preformed corners instead. Metal ones work well, and you can screw them into the drywall.
Step 7: Add More Mud

After your first coat is dry, apply a second coat of mud to everything. Yes, even the tape. When you get to the tape, add a very thin layer over top and smooth it out.
If you can’t see any tape or indentations after the mud is dry, move to the next step. But if things aren’t as smooth as you’d like, let everything dry and do one more coat.
Step 8: Sand
Now it’s time to put on your mask and goggles and start sanding. Sanding can get messy, so leave that drop cloth on the floor.
Using your chosen sander, lightly sand the surface until it is flat with the wall and there are no bumps. For manual sanding, stick with a 150-180 grit sanding sponge or piece of sandpaper. If you’re using a power sander, you can use anywhere from 150-220 grit sandpaper.
Be careful, if you over-sand, you’ll need to add more drywall mud, allow it to dry, and then resand.
Step 9: Stomping With Drywall Mud (Optional)
If this is your first time using drywall mud, you may want to stomp your walls instead of just painting them since stomping covers more mistakes
There are many drywall designs to choose from, and all are fairly easy to accomplish. The easiest way to stomp is to use stomping mud and a stomping brush. Then you lightly stomp the mud in a random pattern, covering the entire wall.
Hiring A Contractor
For best results, or if you’re nervous about DIY, hire a contractor to do your drywall mud project for you. It can be trying to make mistakes and have them show up. A contractor can make your walls seamless. The average cost for a drywall contractor is $1.50 – $3 per square foot, which includes hanging the drywall panels, taping, mudding, and sanding.