How To Make Homemade Drawer Dividers in 15 Minutes


DIY drawer dividers can be made at home in a matter of minutes and will solve your messy drawer woes. Our guide provides homemade step-by-step instructions on how to create drawer dividers.


Homemade adjustable drawer dividers step by step guide using cardboard
Materials needed for this project:
- Box Cutter
- A cardboard box
- Sharpie marker
Step 1: Determine which drawer needs organizing
First, determine which drawer needs organizing. For this example, it’s the sock drawer, which will need relatively small drawer dividers thanks to its purpose.
Dresser drawer dividers are pretty flexible and can be created based on your personal preferences.

Begin by completely emptying the drawer to prepare creation of the sock drawer dividers.
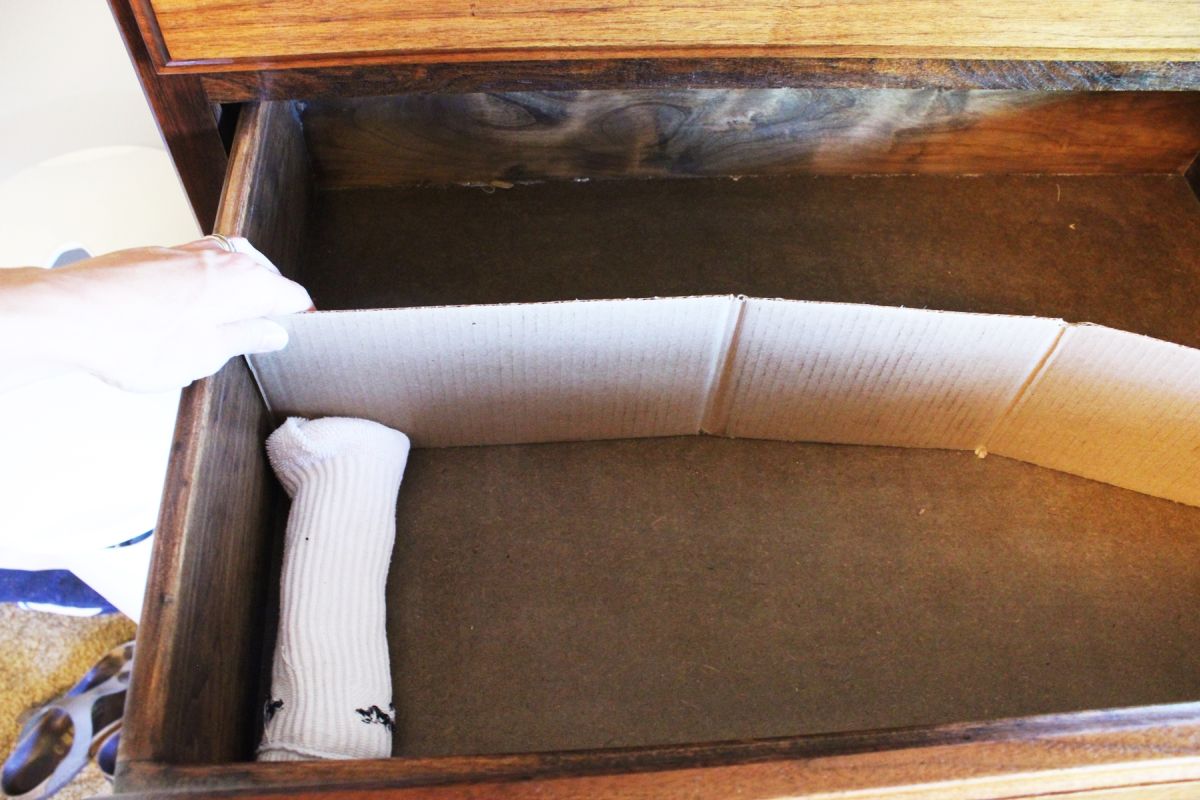
Step 2: Begin to cut fitted cardboard for dividing drawers

Cut four strips of cardboard that are precisely the height of the inner part of your drawer. Basically, you want the cardboard tall enough to thoroughly organize without impeding the open/close function of the drawer itself.
If you’re working with deep drawer dividers, be mindful of the depth needed for them.
Step 3: Create the layout of the cardboard inserts for drawer dividing
Determine the layout of your diy cardboard drawer dividers that will organize its contents most efficiently. In this instance, we took into account the size of the pairs of socks in length and width.

This became the plan for the diagonal drawer dividers: two horizontal dividers, with one dividing the back half of the drawer, and two vertical dividers spaced evenly.
Step 4: Use a box cutter and cut the cardboard
Measure the lengths you need, then cut the lengths of cardboard. In this example, you’ll need two “vertical” and two “horizontal” lengths.
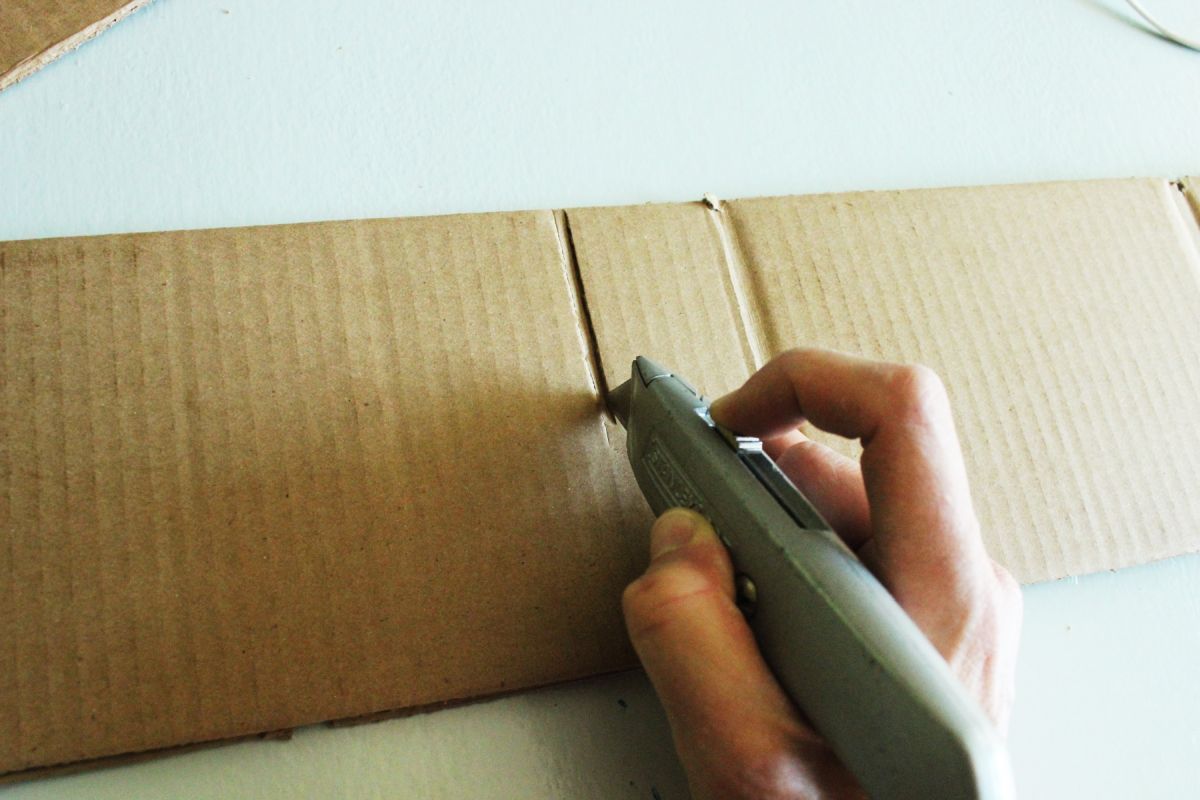
Step 5: Make insert cuts to intersect the dividers
On one of the longer (horizontal) cardboard strips, use the box cutter to cut thin strips halfway down the cardboard. These strips should be at the point of intersection, in your design, with the “vertical” dividers.

Lay the longer cardboard piece precisely on top of the other, then use the box cutter to cut two more thin strips halfway down at the exact same positions.
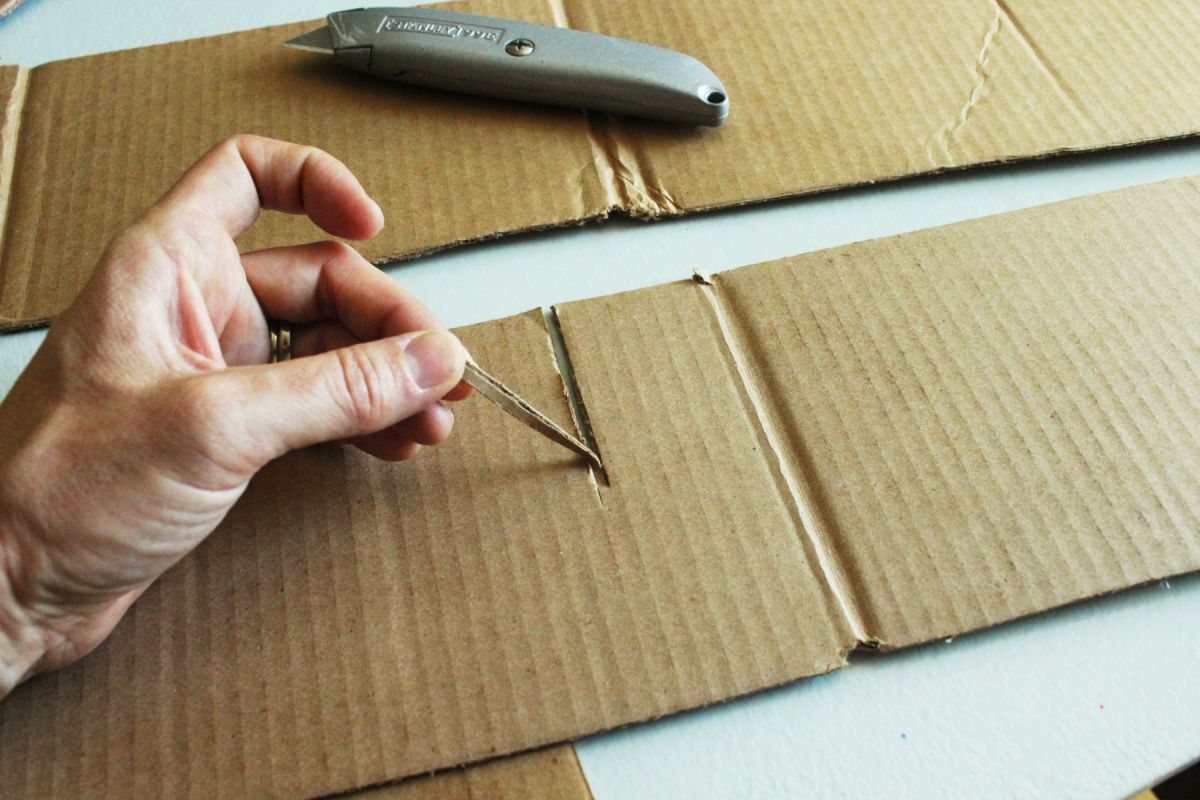
Step 6: Line up the shorter cardboard strips to cut evenly

Using this same method, cut two thin strips on one of the shorter (vertical) cardboard strips, but cut from the bottom up to the halfway point. Stack, match, then cut the second shorter cardboard in exactly the same places.

You should have cardboard strips (two of each) that look something like this.

Step 7: Fit the cardboard strips together
Slide the cardboard strips together at the cutout placements.

Flatten the cardboard grid to fit it into the drawer snugly.

Step 8: Finalize layout to ensure a fit
Straighten out the cardboard grid in your drawer.

Step 9: Add your items to the drawer dividers!
Replace the contents of the drawer into your new DIY drawer dividers. In this instance, the less-used winter socks are placed in the back so they don’t impede everyday access to the much more frequently used socks.
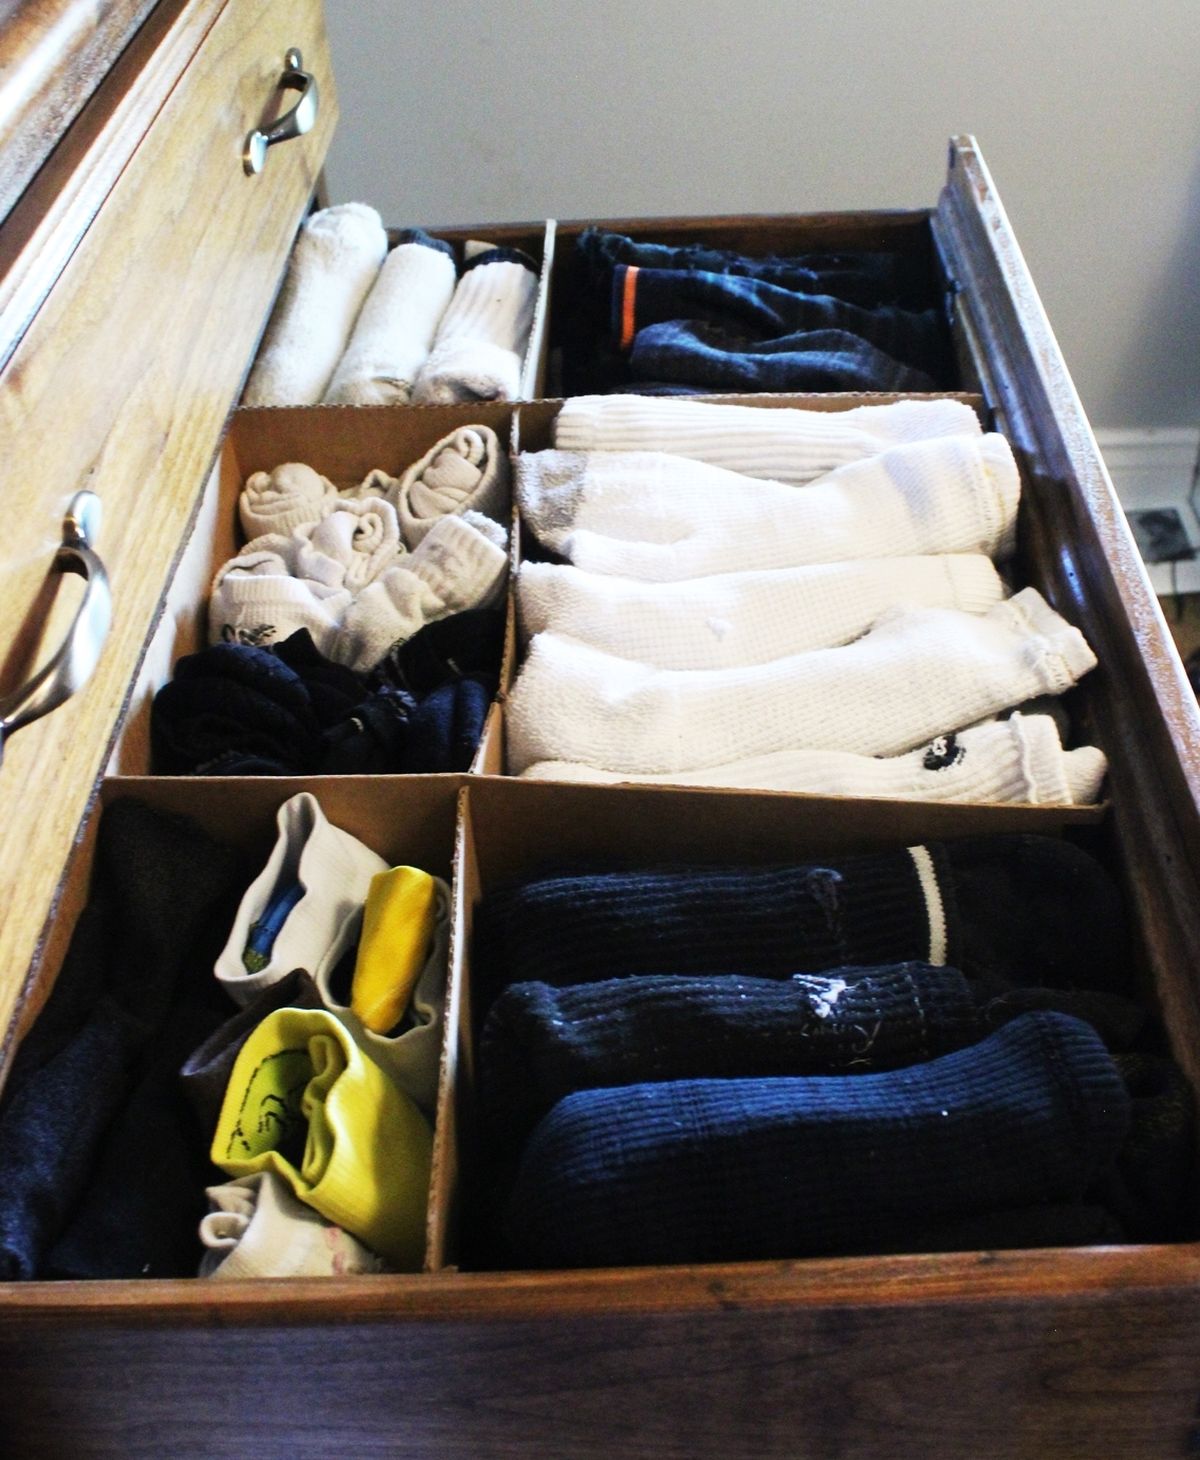
Pro tip: When it comes to organizing socks or clothes, is to store them vertically when possible. The second row involves this strategy to a greater extent because the socks themselves are much shorter and can be “stood” up within the divider.


More DIY Drawer Divider Ideas For Every Space
How To Make A DIY Desk Organizer

Desk drawers are almost always messy and the problem is there’s a lot of small and different items that get thrown in here all the time.
Some simple dividers made out of cardstock can solve this issue.
They’re more practical than standard drawer organizers because they don’t have fixed shapes and sizes and you can make them in any configuration you want based on the contents of your drawer.
Check out the instructions on thecraftingnook.
Organize a Junk Drawer with Dividers

Every kitchen has that one drawer that’s always full of all sorts of utensils and knick-knacks which is practical but often difficult to keep organized.
The solution, as you can probably guess, is to divider the drawer into multiple smaller sections so you can organize the contents into categories based on your own criteria.
You can make these dividers yourself out of wood once you’ve come up with a design.
On kevinandamanda you can find a detailed tutorial explaining how it’s all done.
Nursery Drawer Divider Idea

Being organized shouldn’t be costly. That’s what so great about drawer dividers. They can made out of all sorts of materials so just use what you have at your disposal. It can be wood, plastic, cardboard and other materials.
In all cases you can make dividers that you can then decorate using scrapbooking paper and other supplies just so they look nice and pretty.
It’s a lovely way to add some color to your drawers and to make these dividers also serve as decorations.
Head over to thehomesihavemade to see how it’s done.
Design Kitchen Drawer Dividers For Your Home

Sometimes cardboard dividers just don’t cut it. They’re ok for office drawers that hold paper clips and other small things but other drawers need something a bit more sturdy and durable.
Here’s a wood organizer designed to fit easily into a drawer and to create separate compartments for different items. Since you’re making this from scratch you can play with the dimensions and proportions and potentially modify the compartments based on your specific storage needs.
The details of the project can be found on build-basic.
Kitchen Utensil Drawer Organizer

The tutorial from curbly explains how to make two different types of kitchen drawer dividers. One is best for small drawers and it helps to divide it into several horizontal compartments. It’s a design that suits kitchen drawers that hold utensils.
The other types is meant for larger drawers like those can hold clothes and accessories and it divides them into larger vertical sections.
That way you can keep your shirts nice and stacked and separate from the socks and everything else. In both cases the organizers are made of wood.

Having the possibility to reconfigure your drawer dividers and organizers is amazing because it means you can adjust them based on your needs and you can improve your organization system in time.
This design from housefulofhandmade makes that possible with their adjustable drawer dividers thanks to wood clips. These hold together and boards the separate the different sections of the drawer and they come in three different styles: T, X, and end caps.
Get a bunch of these and have fun compartmentalizing.
At Home Office DIY Drawer Organizer

In case you prefer a more minimalistic design without any clips and visible connectors, you might like the desk drawer dividers featured on jenwoodhouse.
You can make plastic drawer dividers or clear drawer dividers so they match the inside of the drawers and you can come up with different patterns and configurations for each drawer based on the contents stored in it.
Larger compartments can be useful for notebooks and documents and smaller ones for tape rolls, paper clips and other office supplies.
This can also work as an option for file cabinet drawer dividers.
DIY Colorful Drawer Dividing Solution

On top of looking amazing, these drawer organizers from jennifermaker are really easy to make. They’re made out of cardstock and they each have a different color and a cute label marking what type of items go in it.
To make them you need tacky glue and you can use the pattern mentioned in the tutorial.
This design is particularly great for kids because they look fun and it tech them how to be organized through label suggestions so they can, later on, learn how to come up with their own storage and organization systems.
Small Kitchen Deep Drawer Dividers
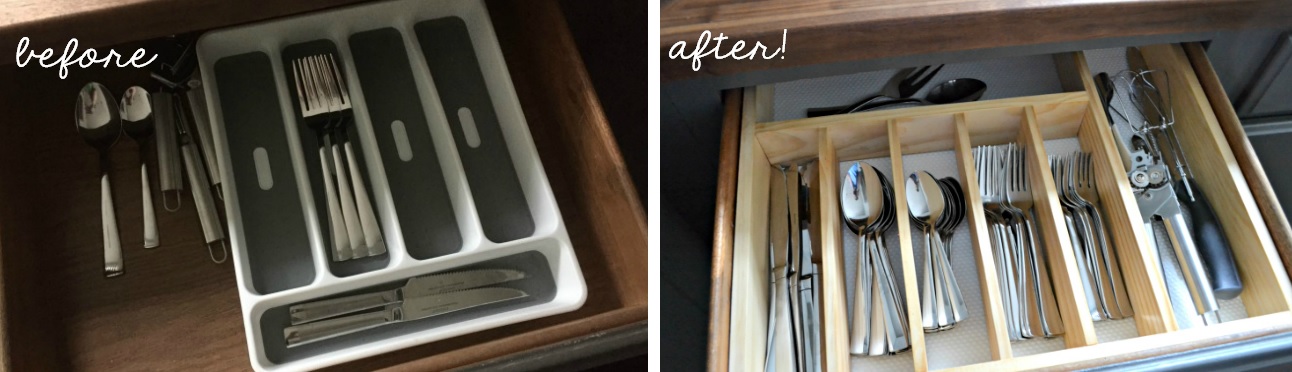
Although there are ready-made organizers for kitchen drawers, in particular ones designed to hold silverware, they don’t always fit your own drawers.
If you want to you can improve that by crafting utensil drawer dividers, that are perfectly sized and just the way you like them. You’ll need a few basic supplies for DIY kitchen drawer dividers such as craft wood, glue, some clamps, a tape measure and a miter saw.
Check out uglyducklinghouse for silverware drawer dividers instructions and, as always, don’t be afraid to make changes to the design or to use a different style.
Frequently Asked Questions (FAQ)FAQ
How to make drawer dividers?
As shown in our above DIY drawer divider tutorial, all you need is an empty drawer, a thoughtful layout, and some cardboard with an x-acto knife. Once you gather these materials, follow our step-by-step instruction guide to create your dream drawer dividers!
How do I organize my drawers?
You can organize your drawers however you like! Depending on the space that your drawer is located, you may find that you want to adjust accordingly. If you are making kitchen drawer dividers, then you’ll likely want more compartments to match the utensils that will be stored.
What can I use for drawer dividers?
The materials are totally up to you! While we used cardboard in the tutorial if you want to make them more unique, go for it! You can make: wooden drawer dividers, bamboo drawer dividers, or even trendy acrylic drawer dividers!
Are drawer organizers worth it?
A huge yes! DIY drawer divider organizers help keep your internal spaces tidy and allow you to save time by not searching around aimlessly.
How do you make drawers for clothes dividers?
The same way you would make desk draw dividers, or baby draw dividers! Simply scope your project out, gather your materials, and begin perfecting your craft!
Cardboard Drawer Dividers: Conclusion
Creating DIY drawer dividers is a fun, and easy project. It doesn’t require that much time, just 15 minutes at most, and you can end up with a well-organized drawer. This beats out spending money on an Ikea drawer divider or drawer divider from Target.