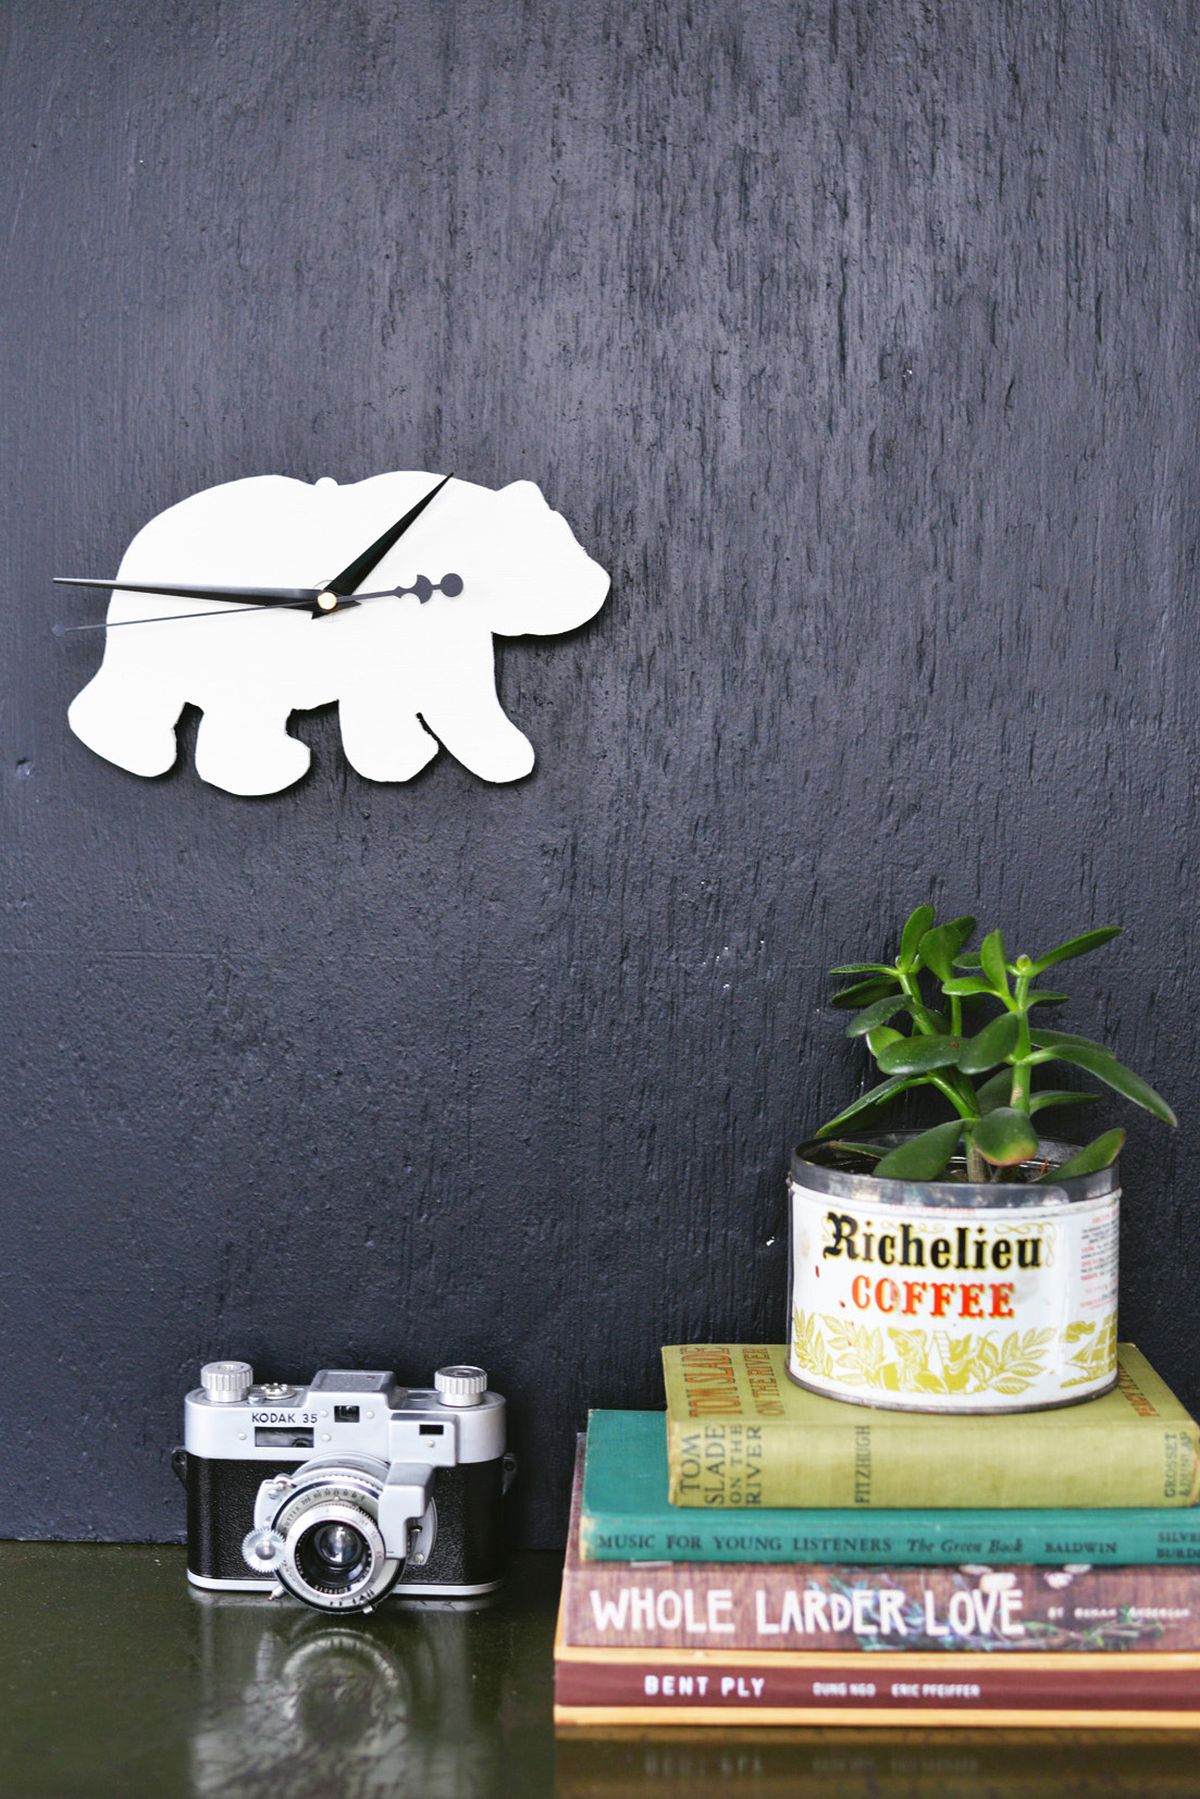
DIY Silhouette Animal Clock

Watch the time fly as you create your own custom clock. This simple and easy DIY project requires an inexpensive clock kit that can be easily found online or at your local hobby store. Get crafty with the shape of your animal clock and create just about any silhouette you desire for your space (perhaps a simple bird shape for the kitchen or an owl for the bedroom). Here we used a small bear shape perfect for a young kid’s space!
DIY Silhouette Animal Clock Supplies:
- thin plywood
- saw (band saw or jig saw)
- clock kit
- sand paper
- spray paint
- pencil
- scissors
- animal template print out (many easy shapes can be found online with a basic search- enhance to the desired size before printing)
- drill
- drill bit sized for your clock kit

Instructions for DIY Silhouette Animal Clock:
Step 1: Cut out animal clock template
Start by cutting out the animal template and tracing the shape on the you plywood with your pencil.
Step 2: Use saw to cut animal shape from plywood
Carefully cut out your animal shape from the plywood using your jig saw or band saw.
Step 3: Smooth edges of the animal clock cutout
Sand the edges of the animal cutout, front and back smooth with a piece of sandpaper.

Step 4: Measure for drill hole
Using your pencil, measure up the clock kit on the front and back of the animal silhouette and mark where you will need to drill for the clock. Make sure that your clock base and hanger will be hidden behind the whole silhouette of the animal. It is okay if the hands are larger than the clock.
Step 5: Drill a hole for the clock kit
Once marked, drill a hole through the animal with a drill bit sized appropriately for your clock kit’s center. If needed, use a larger drill bit to make a counter sink into the wood at the site of the first hole so that the clock kit will fit through the wood (this may be necessary if you use a thick piece of plywood).

Step 6: Coat animal clock with paint
Paint your clock with a few coats of spray paint and let dry.
Step 7: Assemble clock kit
Lastly, assemble your clock together using the instructions provided in your clock kit. The battery and hanger on the back should not be visible when looking straight on at the clock.
Your clock kit should also come with a hanger that allows you to hang the clock on the wall. Set your hands straight according to the appropriate time, place a battery in the back and hang up on the wall!
