DIY Black and White Planter

It’s my theory that you can never have enough plants in your home. If there’s a space that needs filling you can’t go wrong with a little greenery. It doesn’t matter whether you have ample space for a fiddle leaf fig or just a small corner for a spiky succulent introducing a little lushness into your dwelling will enhance your home tremendously.
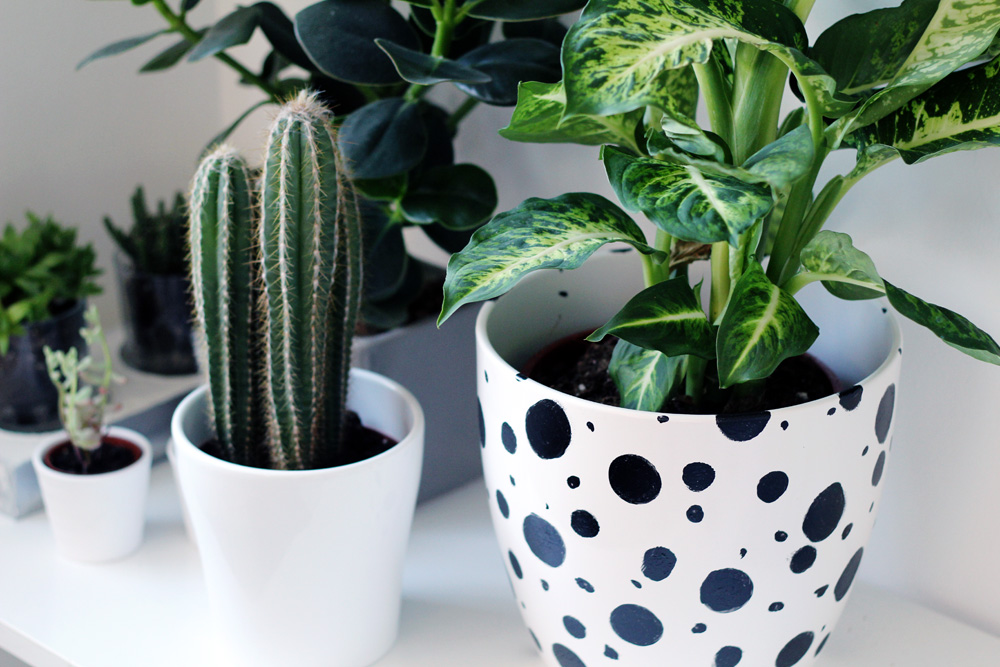
With all these plants knocking around, there’s a great opportunity to get creative and add contemporary, design-led details to bring a room up to date with the current interior trends. I’ve been seeing this black and white print on items ranging from curtains and wallpaper to upholstery and cushion covers. It’s the way to do monochrome this season and it’s the perfect way to give your planters a little makeover.
The monochrome spotted print contrasts perfectly with the striped patterns on the leaves and will go with any color or surface. Really you can’t go wrong!


Materials you’ll need for a black and white planter:
- White Plant Pot
- Black Acrylic Paint
- Sponge Daubers and brushes
- Clear Enamel Paint to Seal (Optional)
Instructions to paint a planter step by step:

Step 1: Cleaning
Clean the surface of you plant pot to ensure a smooth and dry surface for the paint cover.
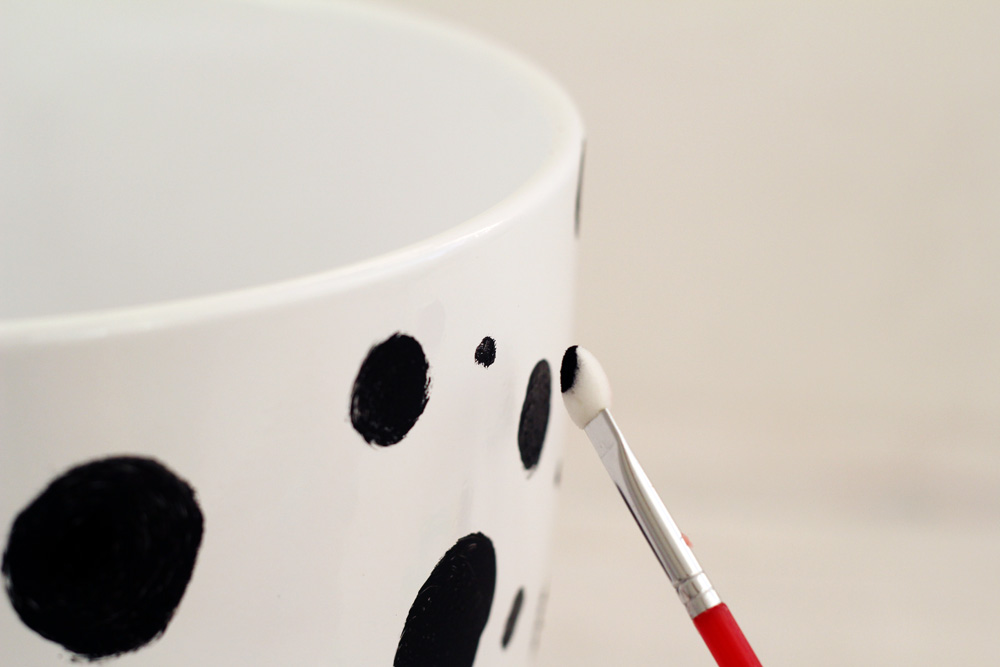
Step 2: The first dot
Squeeze the paint from the tube into a paint-ready container. Dab the smallest dauber into the paint completely covering the flat surface with paint. Roughly wipe off any excess onto a clean part of your container.

Step 3: Press on the dauber
Push the flat end of the dauber onto the plant pot evenly distributing the pressure over the surface. You don’t want to make perfect circles so freely move the dauber over the surface a little in irregular directions to create a rough dalmatian spot.

Step 4: Creating spots
Continue to create a few spots using this technique that are well spaced apart to begin with.

Step 5: Different size
Take a large dauber. Dip into and entirely cover the flat section in the paint. Use the same technique, slightly moving the dauber around the surface of the plant pot to create irregular spots.
Step 6: The smaller dots
Once you’ve covered the surface with larger and smaller spots using both daubers take a small sponge brush and dip into the paint. Dab this over the surface to create small blogs in the spaces between the larger spots.

Step 7: Continue the process
Continue to do this all the way around the planter. Create some spots that go over the top or under the bottom of the planter the keep the pattern consistent.

Step 8: Sponge brush
Use the smallest sponge brush to fill in any spots that are not completely black then leave to dry.
Step 9: Clear enamel
Once dry you can spray a layer of clear enamel or varnish to seal.

Fill with your favorite plants and enjoy!

