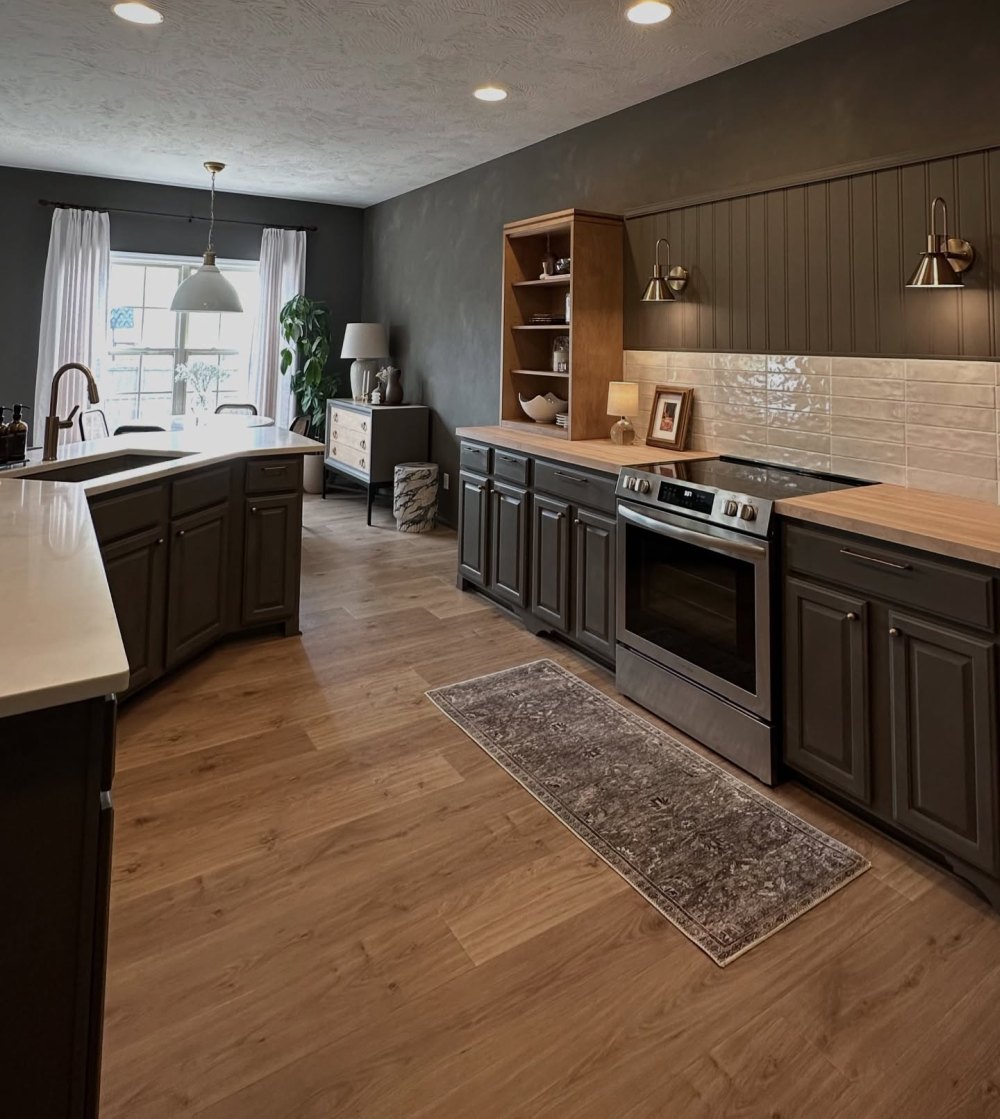
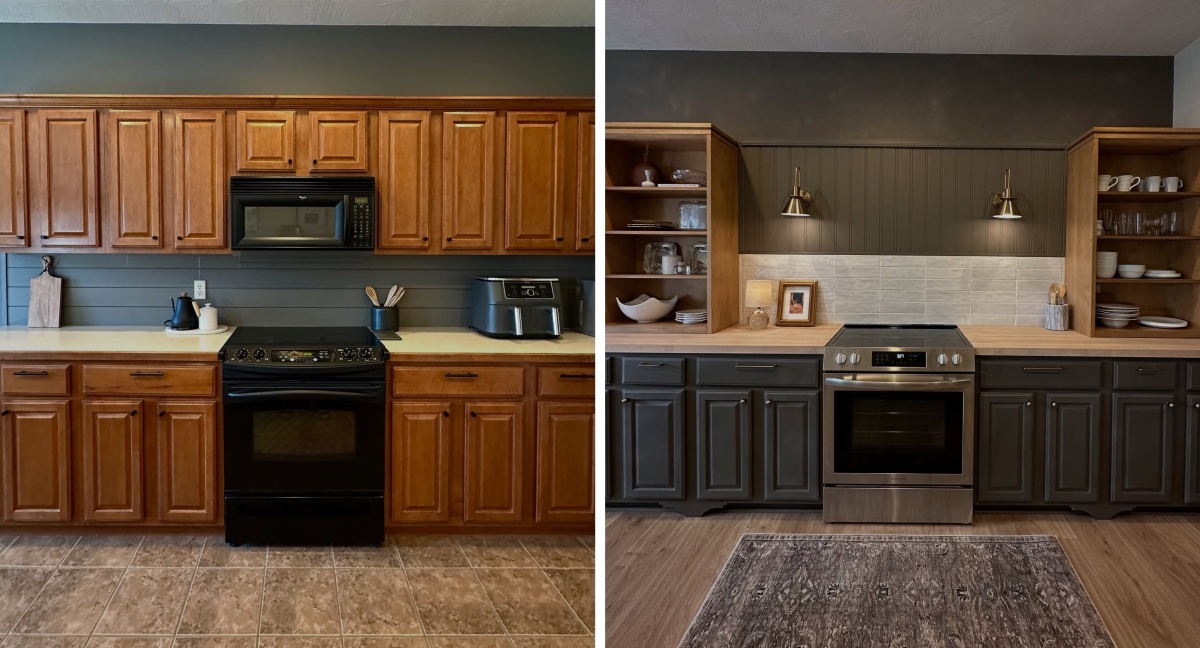
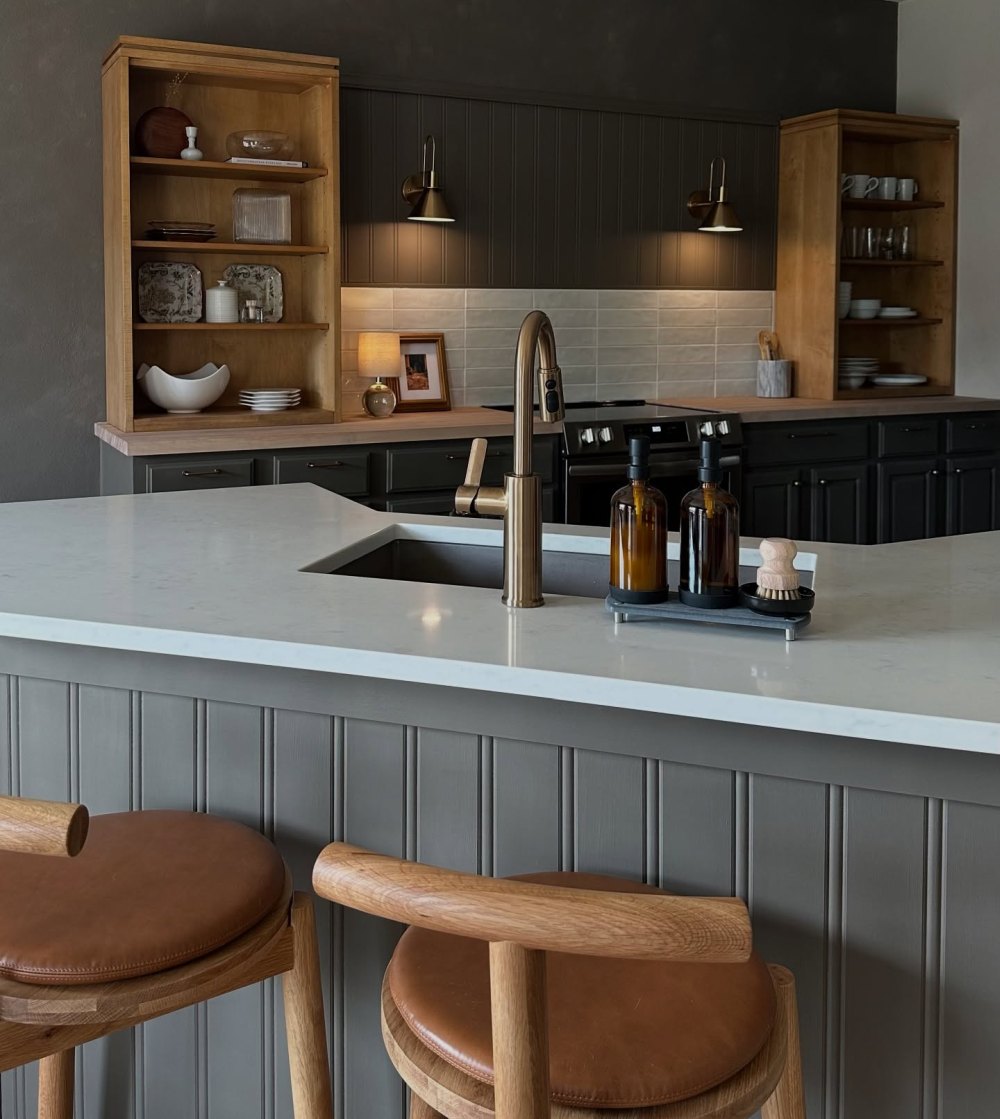
She painted the orange maple cabinets Graphite and the kitchen stopped feeling builder-grade


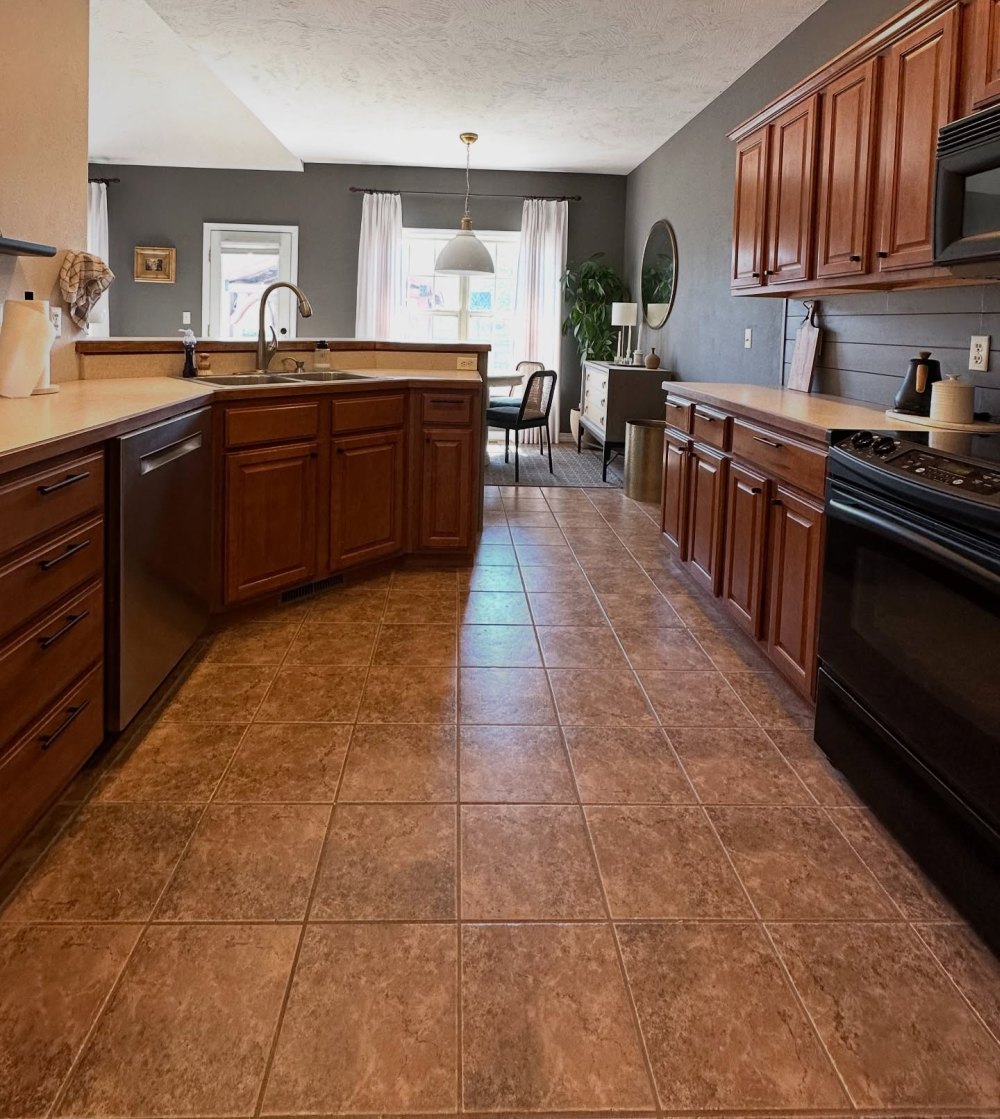
You know this kitchen: orange-toned maple cabinets, tan tile on the floor, laminate counters, and a microwave hung right over the stove, so you cook with your elbows tucked in. Nothing is broken. It just looks like every other 20-year-old house on the street.
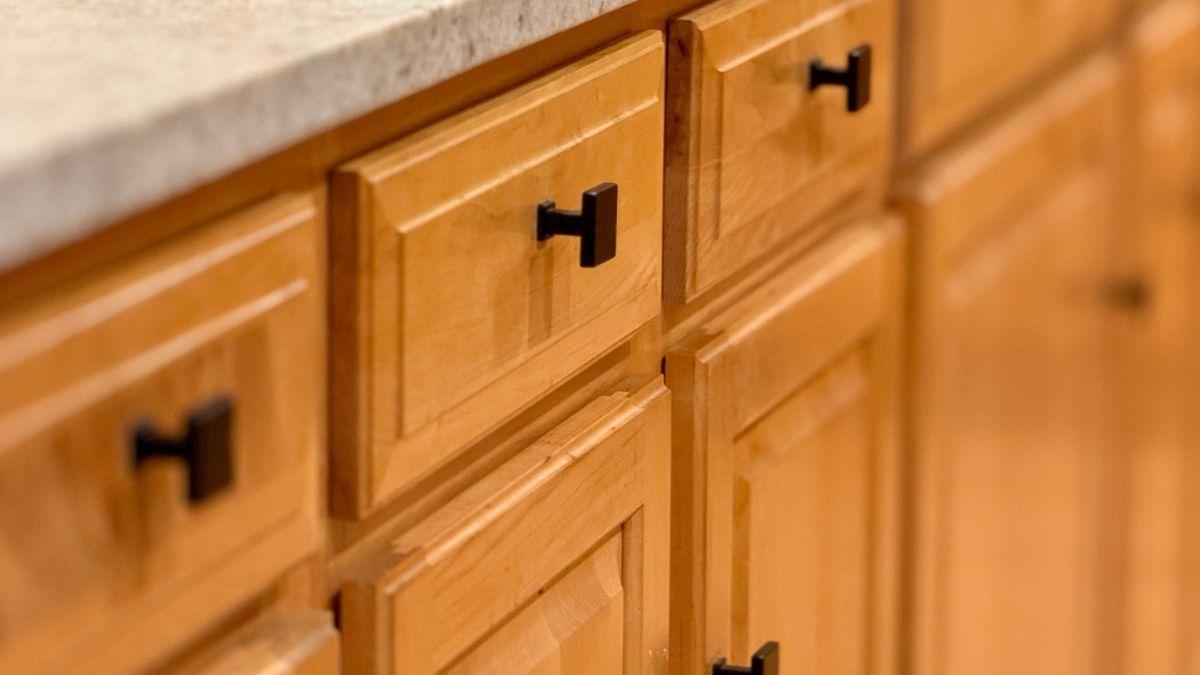
The cabinets weren’t the problem, the color was. That was Sheri Abernathy’s kitchen, which she calls a “20-year-old builder-grade kitchen in the suburbs.” She first looked at replacing the cabinet doors with Shaker-style ones. Instead she painted, and she says that choice saved her over $10,000.
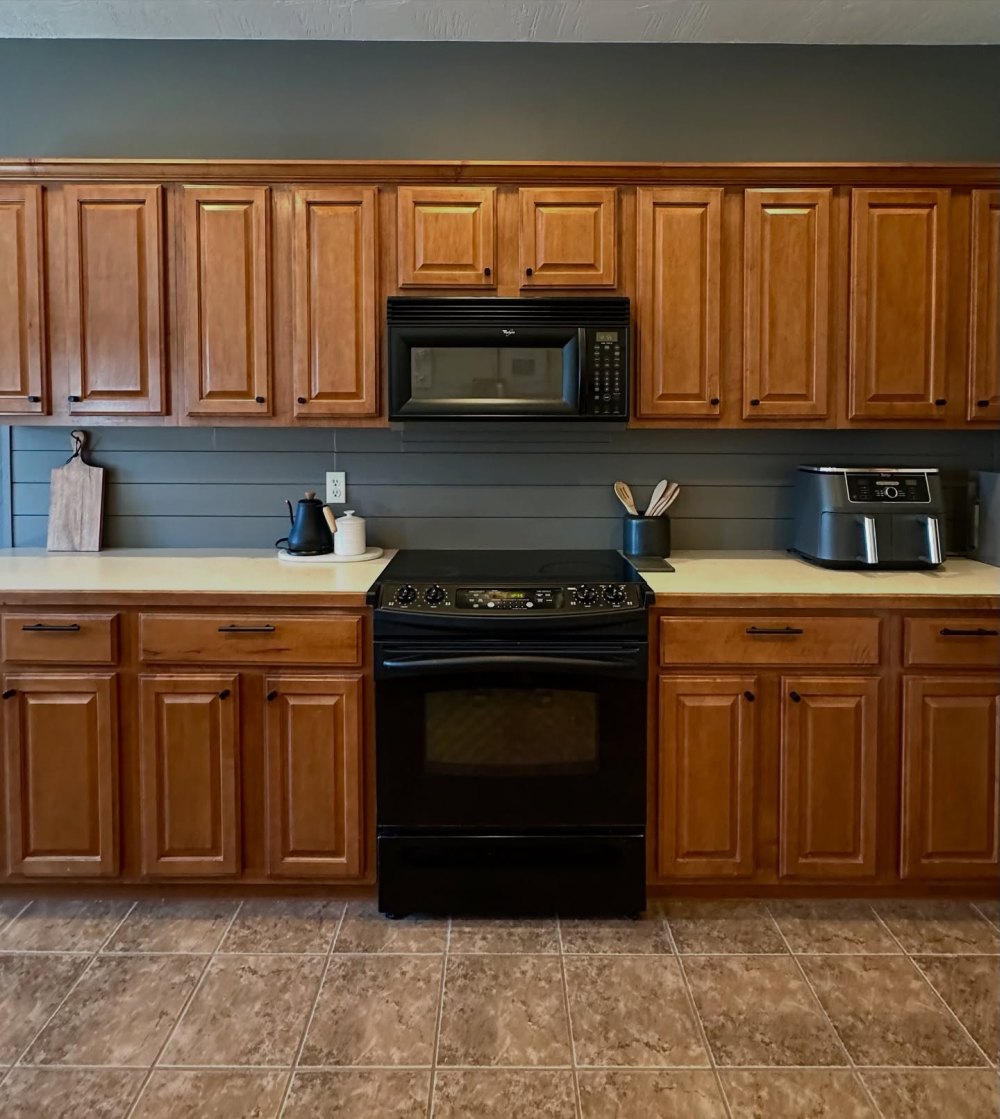
Why the orange maple made it feel builder-grade
“I did not like the floors, cabinet color, microwave, [and] basic closed-in feeling,” Sheri says. Of that list, the cabinets cover the most surface in the room. When every box, door and drawer carries the same orange tone, that tone becomes the kitchen’s personality.
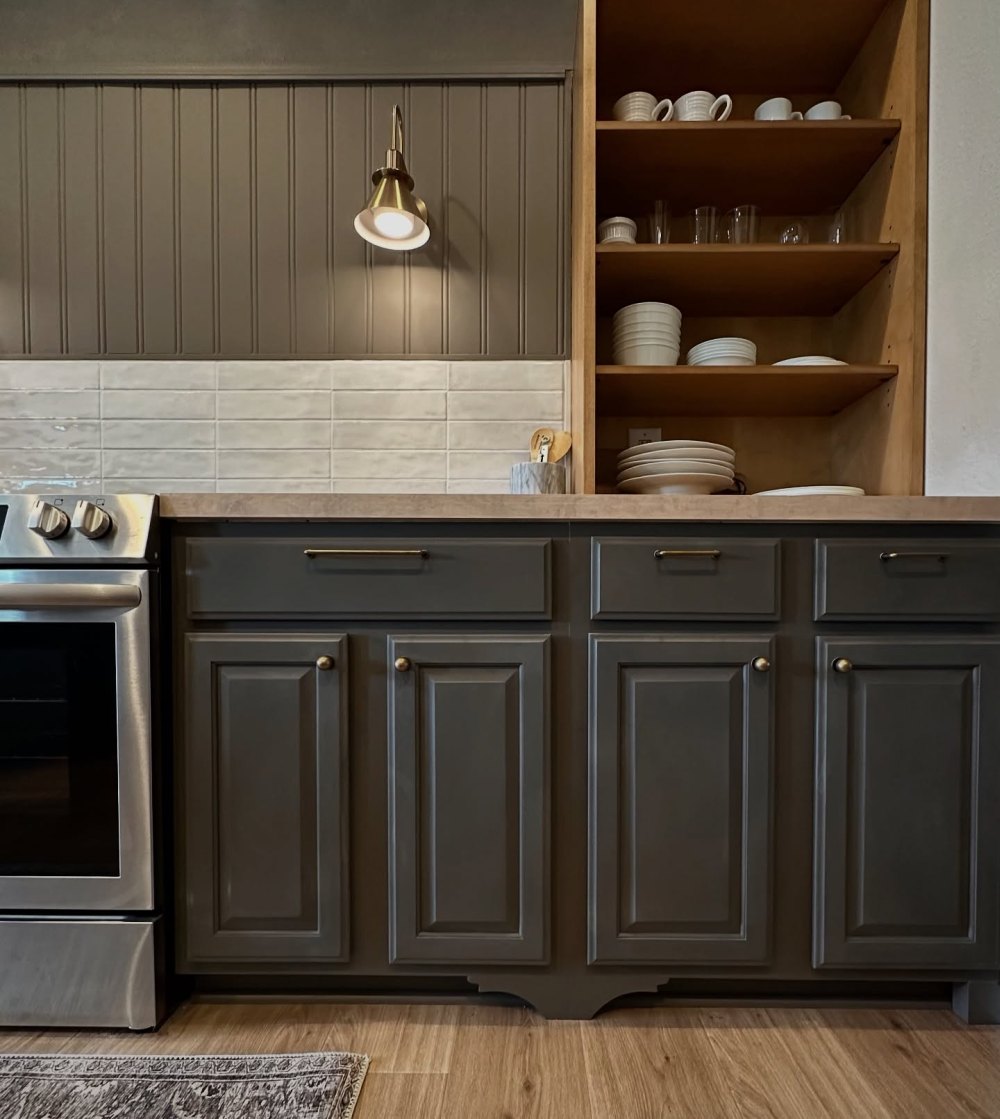
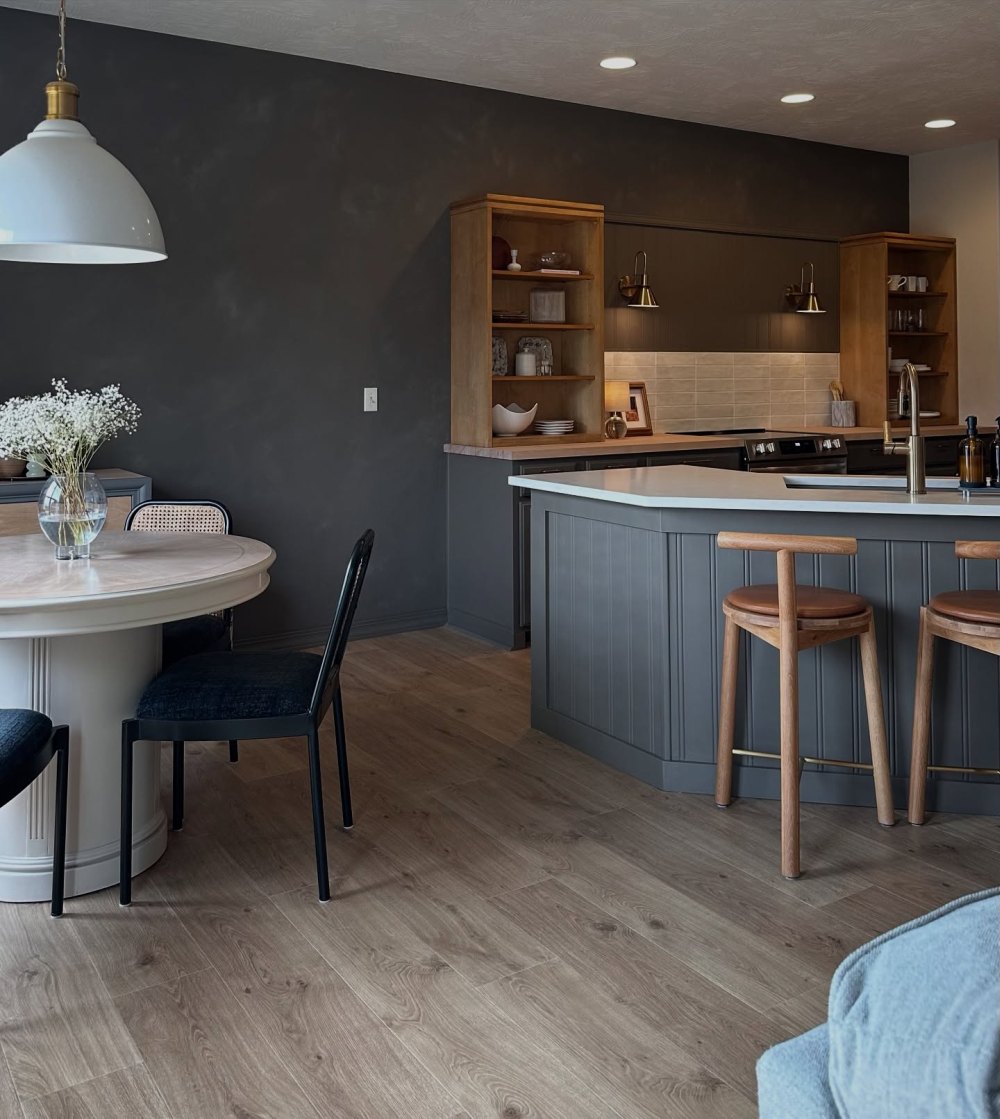
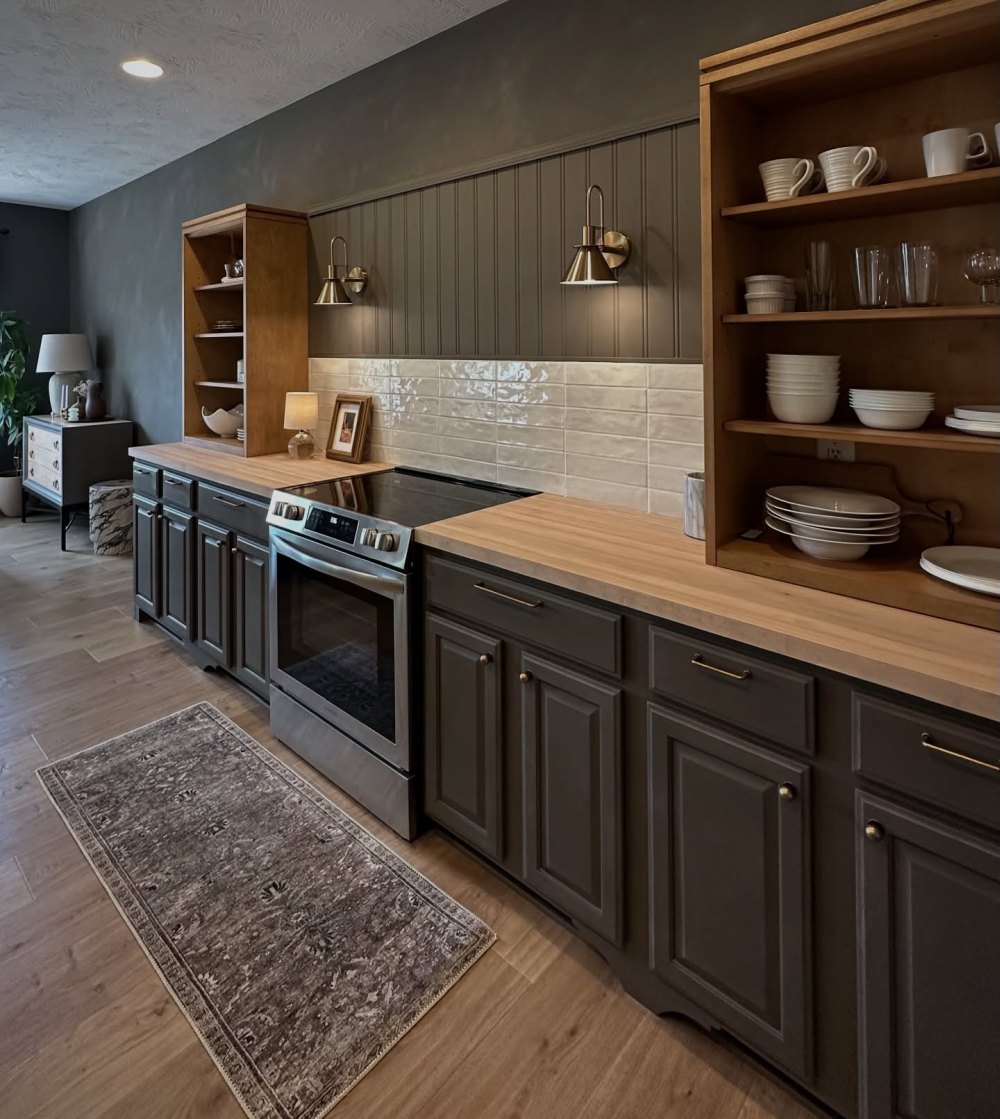
So she painted all of her cabinets in Amy Howard One-Step Paint in Graphite, the same color as her walls. The brand describes Graphite as a muted, earthy dark brown. Matching cabinets and walls lets the room read as one calm backdrop instead of orange boxes against paint. The same approach works on oak, where sage green on oak cabinets can make a builder-grade kitchen feel calmer and brighter.
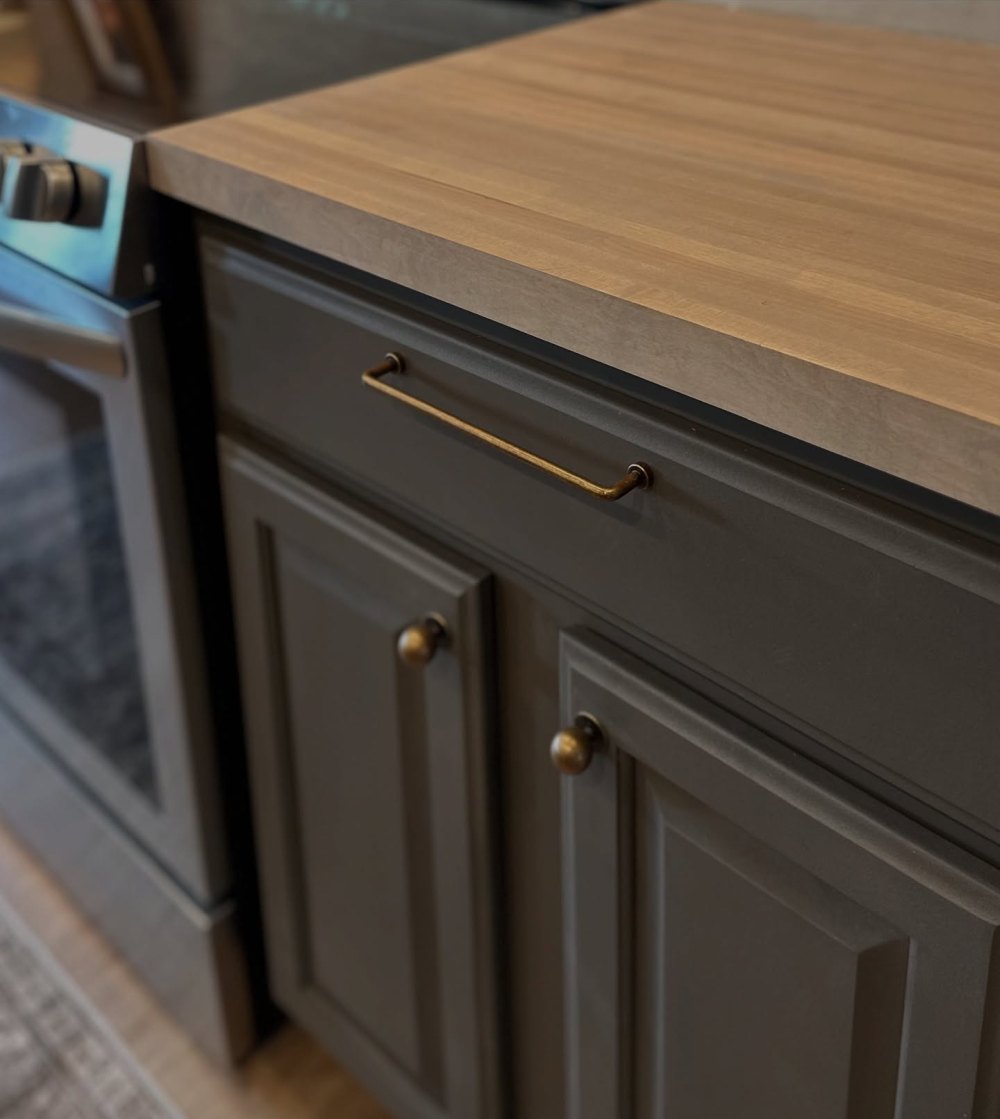
To be fair, paint wasn’t the only change. On a $7,000 budget, she also swapped the tan tile for laminate plank floors, put quartz on the bar and added $600 butcher block counters that she finished herself with tung oil. “I love how well all of the elements blend together to look classic, yet contemporary, yet cozy,” she says.
The cabinet paint job, step by step
- Empty and label. Take off doors, drawers and hardware, and label each piece with painter’s tape so everything goes back in the right spot.
- Clean, don’t sand. Amy Howard says One-Step needs no sanding, stripping or priming, but it does need a clean surface. The brand pairs it with its Clean Slate cleaner and suggests wood filler for cracks or holes.
- Go thin, twice. Brush, roll or spray a thin first coat with the grain. It’s dry to the touch in 30 to 45 minutes, and the brand advises about 1 hour between coats, with two coats for full coverage.
- Seal the high-traffic spots. The finish is a soft, chalky matte. Amy Howard calls a sealer or wax optional on decorative pieces but recommends it for high-use items like cabinets.
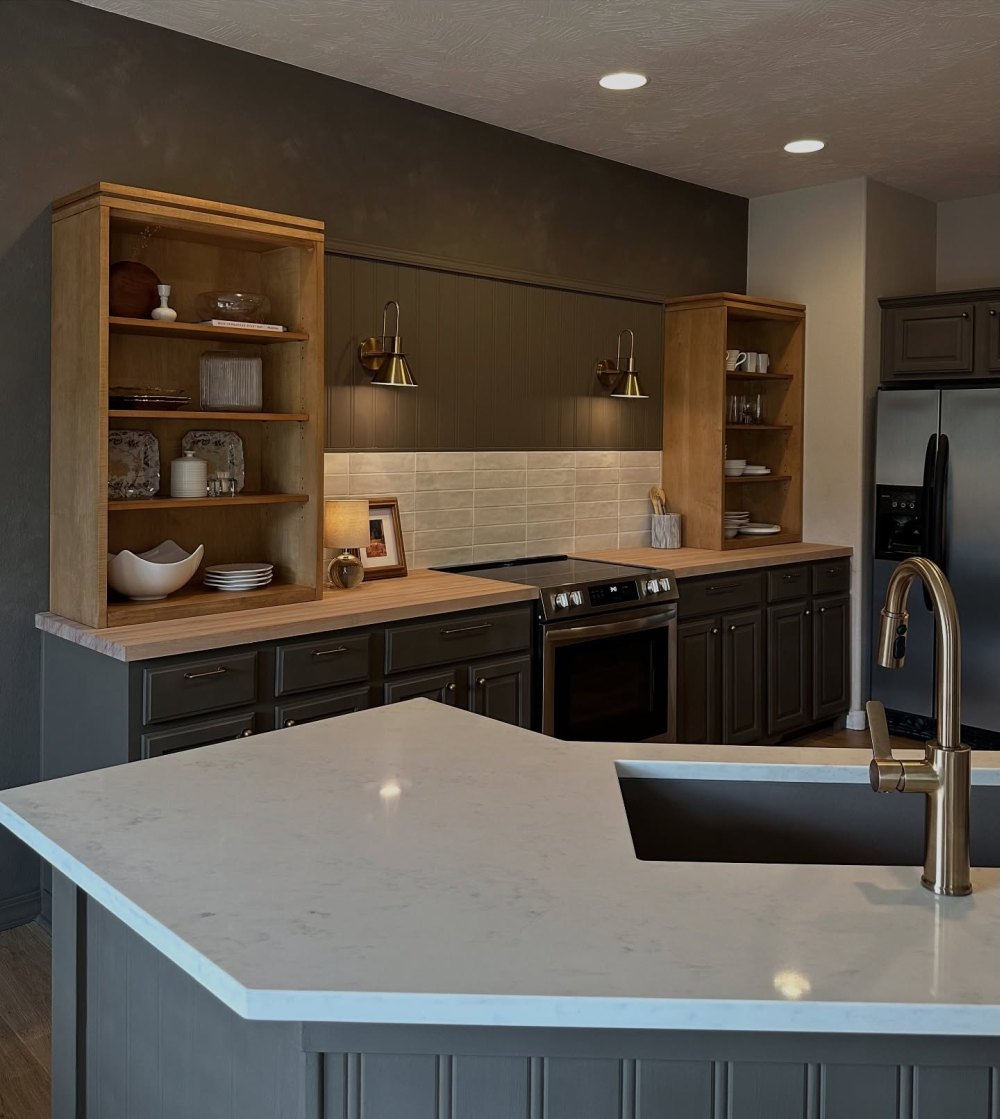
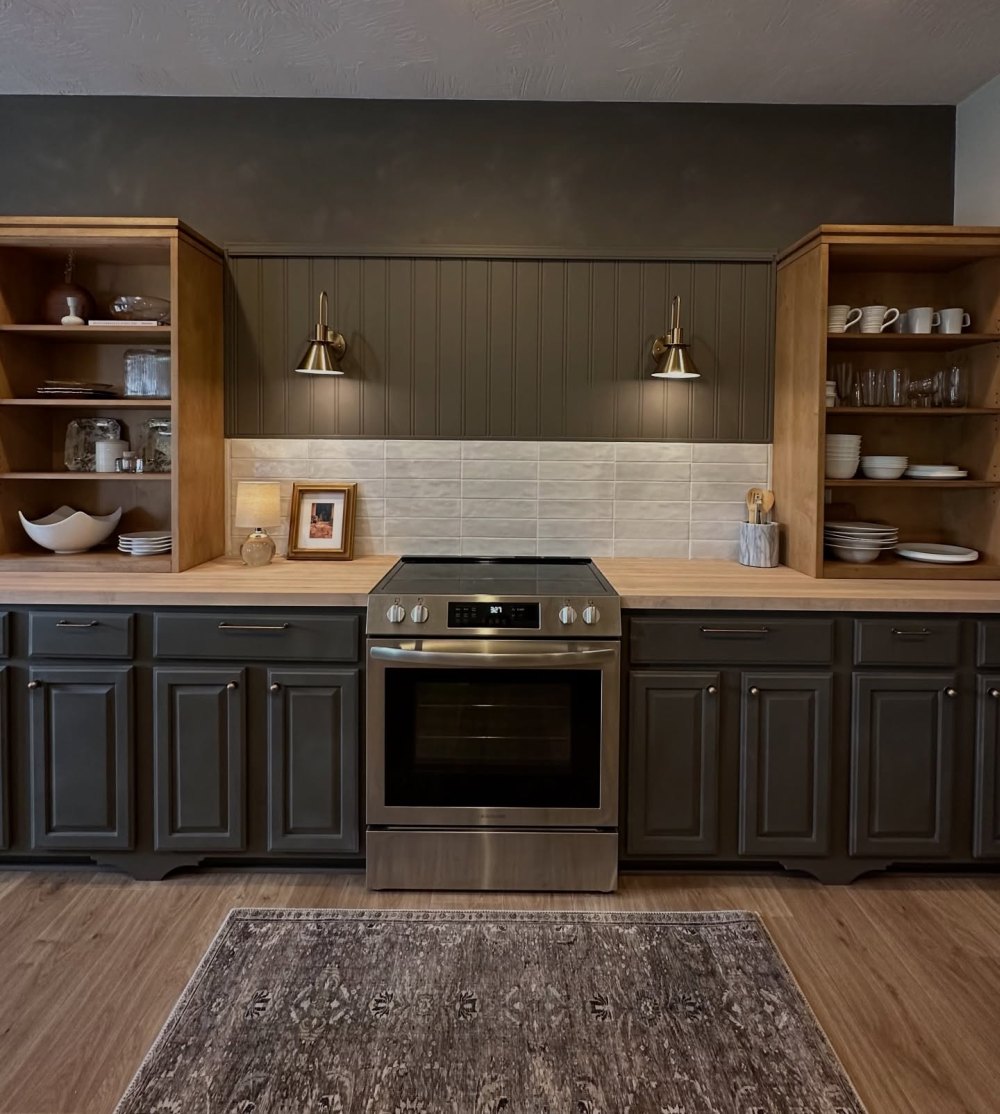
Plan B, if painting every cabinet is more than you want to take on: start with the wall that bothers you most. Sheri took down the upper cabinets on her stove wall and replaced them with two solid maple bookcases found on clearance for $200 apiece. “The open shelving is one of my favorite parts,” she says.
Where this paint job has its limits
A chalky matte finish and kitchen hands are not natural friends. Skip the sealer on cabinets you open ten times a day and you’ll see it, which is why the brand recommends protecting high-use pieces.
Color on a screen is a guess. Amy Howard warns that monitors may not match the real paint and suggests ordering a color card first. With a dark color on every cabinet, that small step is worth it.
Removing cabinets is rarely as quick as it looks. Taking down the uppers was harder than Sheri expected because of stripped screws. And she skipped a range hood for now, since her home isn’t vented for one, though she says she can add one later. A Department of Energy guide explains why a hood should vent to the outside rather than recirculate, and notes that the job can mean ductwork and an electrician.
Keep the cabinet boxes, paint them one deep color, and spend the savings where it shows. That’s the trick.