Putting Painter’s Tape on a Paint Roller Before Painting: What It’s For and Why People Recommend It


Applying painter’s tape along floors and baseboards can take more time than expected. Long strips twist, stick to themselves, or drift away from the edge when applied by hand. Covering floors with plastic sheeting adds another task, as the material needs to stay in place while the tape is attached.
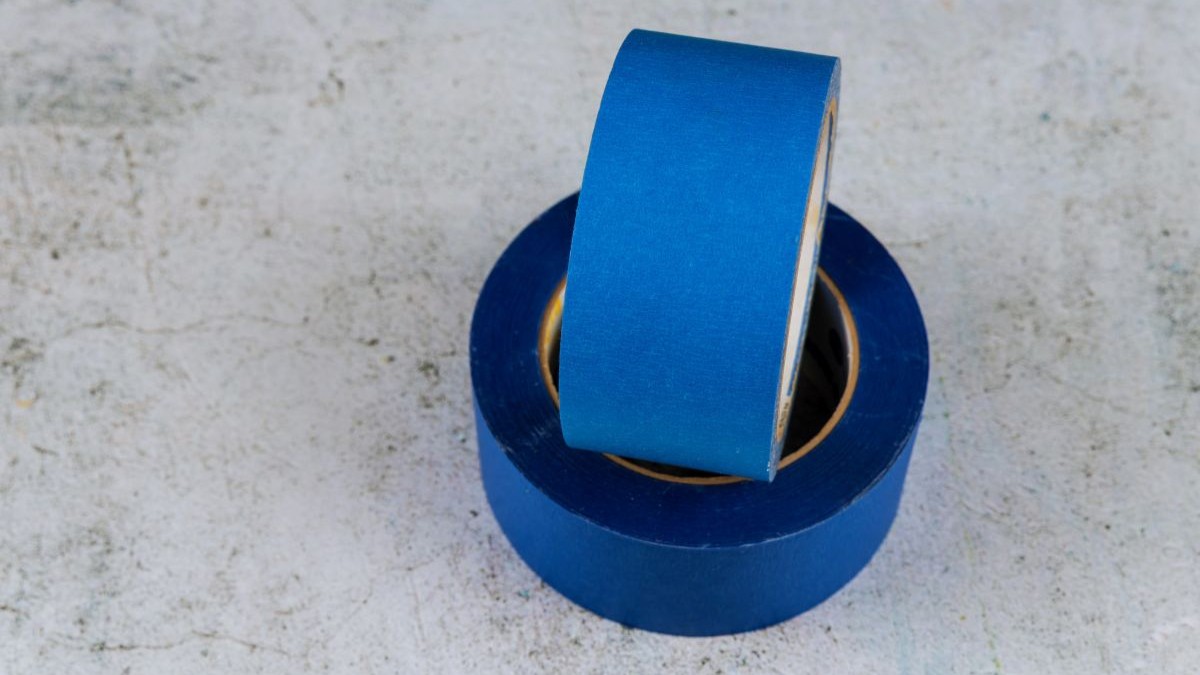
Some DIYers use a common painting tool to make that preparation easier: a paint roller. Instead of dipping it into paint, they attach a roll of painter’s tape to the frame and guide it across the floor.
One TikTok video demonstrates the setup using blue painter’s tape, a standard roller, and plastic floor covering. The tool serves a purpose that has nothing to do with applying paint.
Why Put Painter’s Tape on a Paint Roller?
The roller becomes a tape dispenser, feeding tape from the roll mounted on its metal frame. As the sleeve moves across the floor, it presses the adhesive against the surface.
In the video, the creator uses the setup to secure clear plastic sheeting across a wood-look floor. Instead of pulling out separate strips and positioning them by hand, the tape feeds from the roll as the tool moves forward.
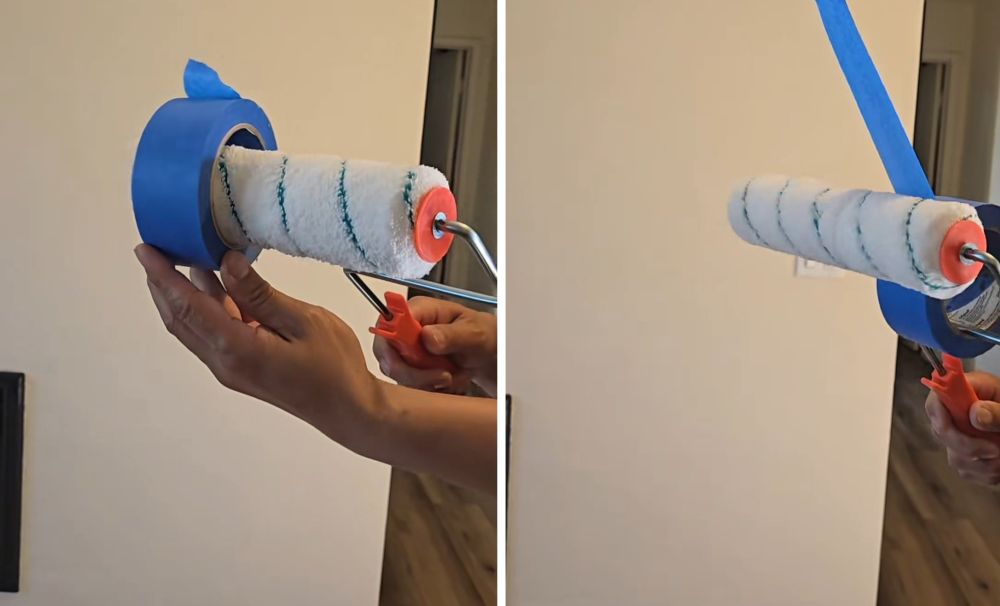
The method uses supplies found in most painting kits and requires no separate tape dispenser.
How to Use a Paint Roller to Apply Painter’s Tape
Start with a clean paint roller fitted with its sleeve. Slide the roll of painter’s tape onto the horizontal metal bar between the handle and the roller cover.
Pull the loose end of the tape from the roll and wrap it around the sleeve, positioning the adhesive side toward the floor.
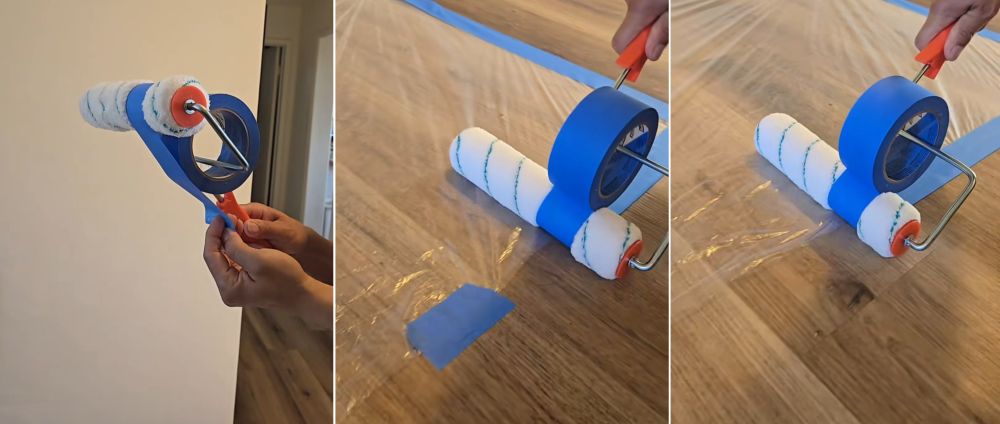
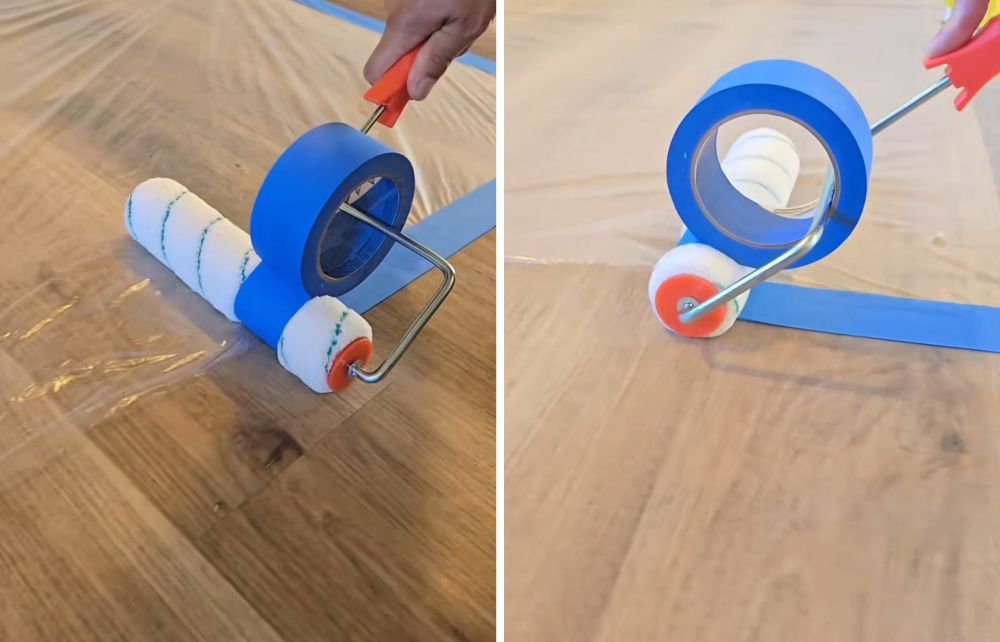
Place the loose end where the protective plastic meets the floor, then move the roller forward. The sleeve turns against the surface, pressing the tape down while feeding more from the roll.
Keep the tool aligned with the edge of the plastic and avoid pulling the tape too tight, which can cause it to stretch or shift.
What to Know Before Trying This Tape Trick
Painter’s tape needs a clean, dry surface to adhere. Dust, moisture, or loose plastic can prevent the adhesive from making contact.
According to 3M ScotchBlue’s tape application guide, tape should be pressed down with a smooth edge, such as a plastic card or putty knife. The manufacturer also recommends waiting 30 to 60 minutes before painting.
The roller can help position long strips, but it does not guarantee a straight paint line. Check the edges after application and press down any sections that have lifted.
Wood floors also require care. Some tapes can damage finishes when removed, so check whether the product is suitable for the surface before applying it. The roller sleeve may collect dust from the floor, making it worth checking before using it to paint.
Another painting trick uses a kitchen staple instead of a painting tool. See why some DIYers recommend putting aluminum foil under paint before starting a project and how it can reduce cleanup afterward.
Turning a standard paint roller into a tape dispenser is a brilliant DIY hack for securing floor coverings without buying another tool. Do you know any other clever painting hacks that make preparation or cleanup easier?
Images and video demonstration courtesy of TikTok creator @.pinoy69.