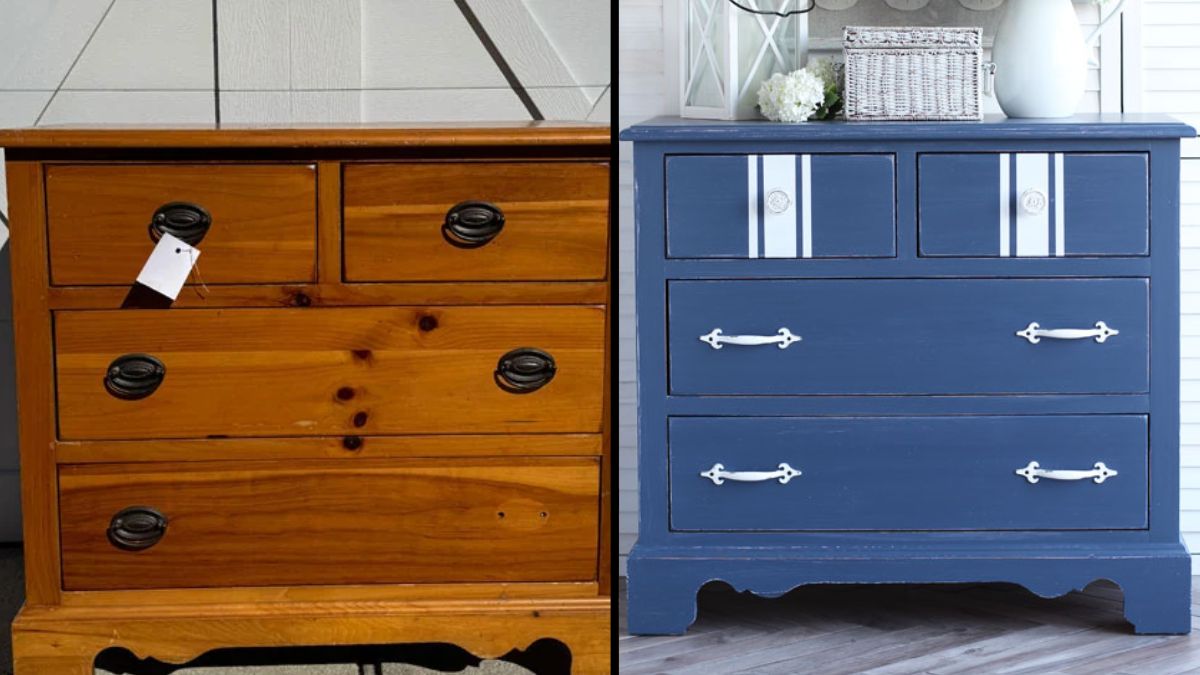
Instead of passing up this gouged pine dresser, she painted it Yankee Blue


The dresser is solid wood and the drawers still glide, but the top tells another story: dings, scratches, a few deep gouges and patches that feel sticky under your hand. Even marked down to under $25, it’s the kind of piece most shoppers walk right past.
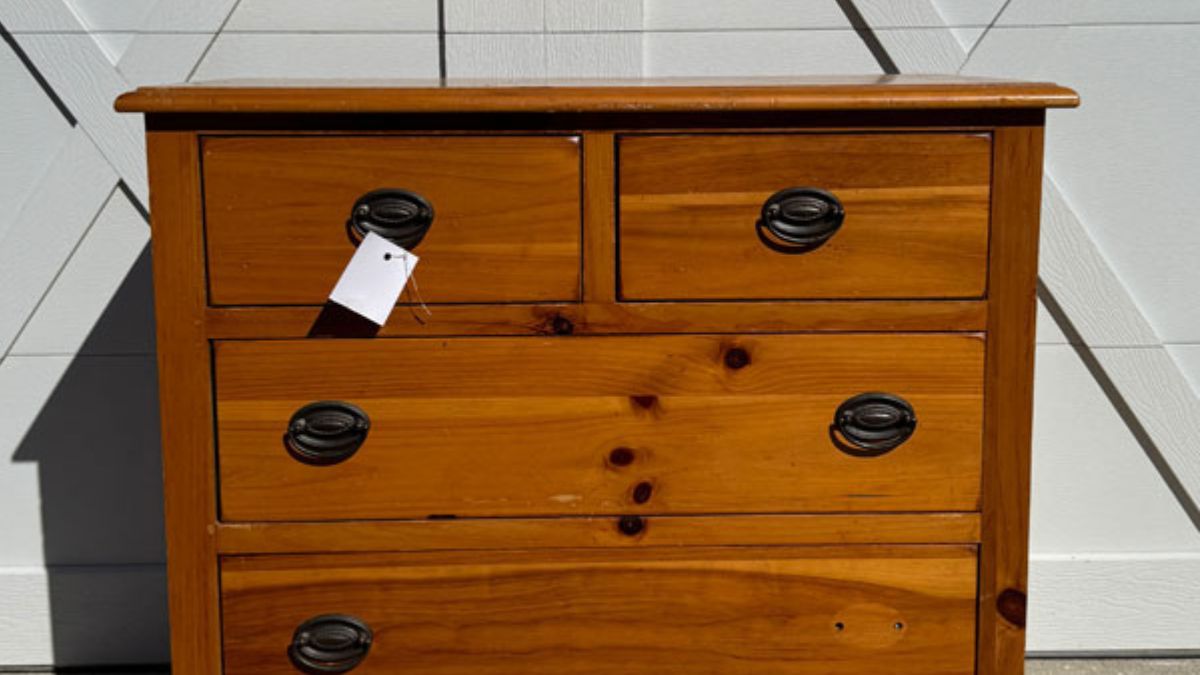
The dresser wasn’t the problem, its top was. Christy, who writes the blog Confessions of a Serial Do-it-Yourselfer, found a full-size American Drew dresser in solid pine just like that. It was first priced at $34.95, then marked down to $24.92, and she took it home.
What a sticky, gouged top really needs
The top is the part you see and touch every day, so every gouge catches the light. Sanding alone isn’t the first fix, though. “It was very sticky in places and although I planned to sand, I didn’t want to grind that into the surface,” Christy says. So she cleaned before anything else. The inside of the drawers was in pristine condition, so it only needed a cleaning.
A rough finish rarely ruins a solid piece. A French Provincial dresser left on the roadside, with a chipped dark finish and white paint marks, came back after sanding and two coats of a blue mineral paint called Nautical.
One coat of blue, on purpose
- Clean it twice. Christy mixed 1 tablespoon of White Lightning into a half gallon of warm water, scrubbed with applicator pads, then wiped everything again with clean water.
- Sand without the dust cloud. She used an orbital sander with 100 grit, then 220. “To contain the dust, I hooked my sander right up to my shop vac using a little Gorilla Tape,” she says. A University of Idaho Extension guide to refinishing furniture adds two habits worth keeping: sand with the grain and keep the surface wiped free of sawdust.
- Fill the gouges. Deep dings got Dixie Mud, sanded smooth with 100 grit once dry, then a final pass with the shop vac and a clean cloth.
- Prime the knots, then everything. White Bonding BOSS went on the pine knots first to stop bleed-through, then over the whole piece so white would show through later. It dried for 24 hours.
- Paint once, then distress. One coat of Dixie Belle Yankee Blue, then 220-grit sandpaper wrapped around an old sanding sponge on the raised areas. “I wanted a very relaxed coastal feel for this piece, so I only gave it ONE coat of paint,” she says.
- Add a stripe and seal. A grain sack stripe on the top two drawers, taped off with FrogTape for delicate surfaces: the wide center stripe first, fully dry, then a thin stripe on each side. Two coats of Dixie Belle Clear Coat in Satin and white pulls finished it.
“This was a bit more prep than expected, but it turned out pretty cute,” Christy says.
Plan B, if you prefer solid color to a worn look: add a second coat of blue and skip the distressing. The single coat is a style choice, not a shortcut.
What one coat of paint won’t protect
A thin coat over white primer is meant to wear, so the edges will keep softening with use. The two coats of clear coat matter more here than on a fully painted piece, especially on the top.
Distressing is easy to overdo. Christy felt she sanded one side a bit heavily, so work with a light hand and stop often to look.
Sanding makes fine dust even with a shop vac attached. Wear a dust mask, and if a secondhand piece has old painted layers, test them for lead before you sand. Once the dresser is in a bedroom, anchor it to the wall, especially if children are around.
Clean it, fill it, prime it, and let one coat of blue do the rest. That’s the trick.