DIY Wooden Framed Cork Board
January is a month that is all about getting your life on track in order to achieve specific goals. If you’re someone who is in the ”goal achieving boat”, then you may be trying to get organized as well.
Now, getting organized does not have to be an overwhelming task and it does not have to involve random desk organizers which are not pretty. In truth, organizing can be fun and can allow you to flex those creative muscles. To get you in the organizing mood, today I’m going to show how to create your own Wooden Framed Cork Board!

Making your own framed cork board is one of the easiest projects in the world! If you’re trying to get organized on budget and want to step your toe into the crafting world, then a framed cork board is a great place to start. However, instead of doing a traditional framed cork board, I thought I would show you how to turn a plain wooden frame into a cork board instead! By using a wooden framed instead of a normal picture frame, you now have the ability to decorate the frame in any way that you choose. Besides that fact, you also do not have to worry about storing the extra glass, since most wooden frames do not come with a glass piece.
So if you want to learn how to make your own Wooden Framed Cork Board, keep reading below!
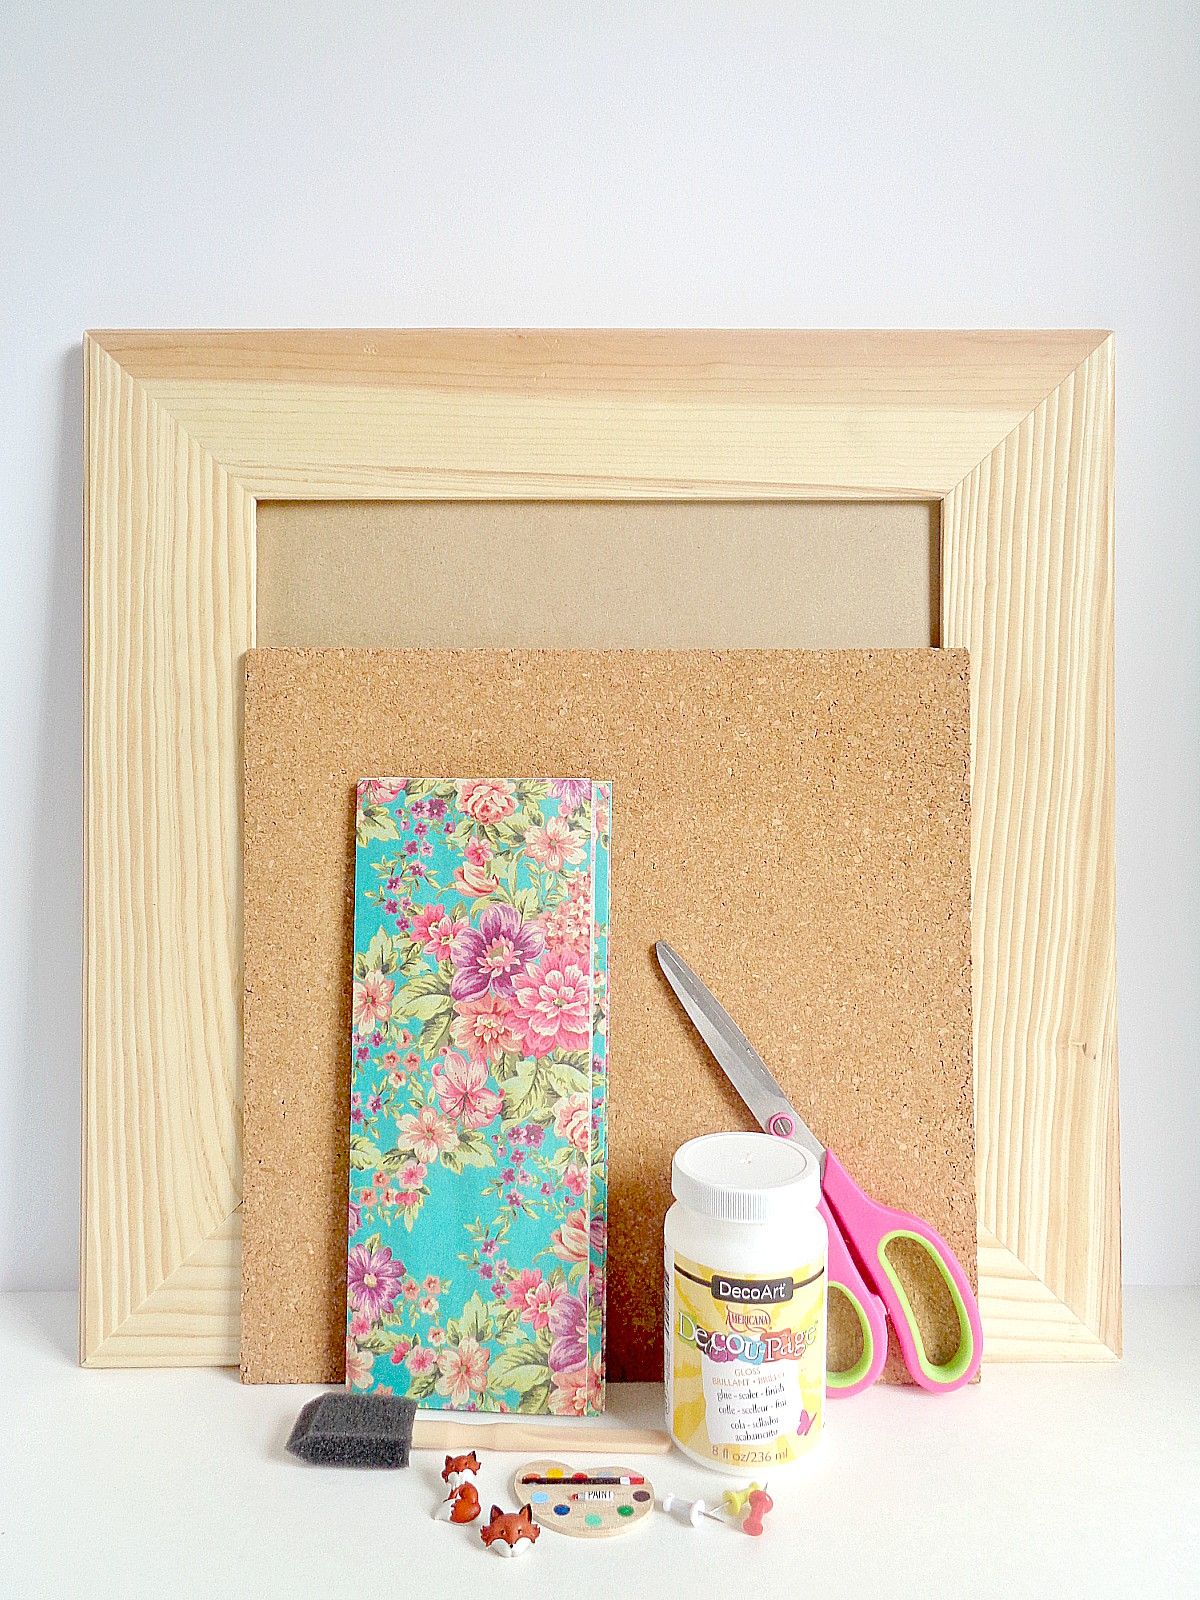
Supplies
- Wooden Frame
- Cork Board
- Decorative Tissue Paper
- Decoupage Glue
- Foam Brush
- Scissors
- Thumbtacks
- Decorative small objects (like buttons, pom-poms, etc)
- Hot Glue Gun (optional / not pictured)

Step 1: Cut your tissue paper into squares.

Step 2: Apply some decoupage glue to your wooden frame and begin adding your tissue paper. Don’t be afraid to use some extra decoupage glue because it will seal in the tissue paper and give it a nice protective coat. Keep repeating this step until your wooden frame is completely covered.

Step 3: While your wooden frame is drying, grab your small decorative objects and glue them to your thumbtacks. By doing this, you will now have fun decorative thumbtacks for your cork board!

Step 4: When you’re wooden frame is completely dry, pop in your piece of cork board into the frame.
Once your cork board is in your frame, you’re then ready to hang your new Wooden Framed Cork Board!

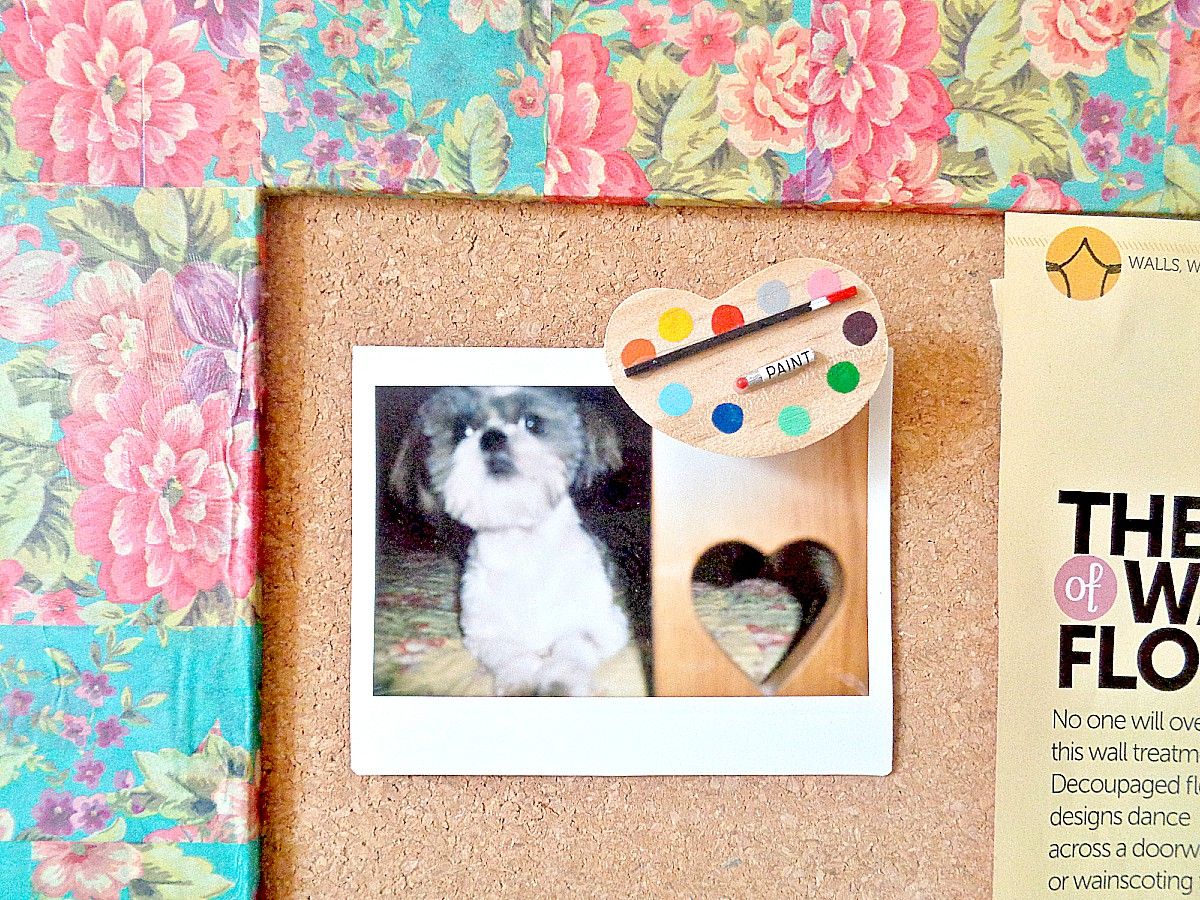
I just love how this Wooden Framed Cork Board turned out!
In this project, I used decorative tissue paper which I found at the craft store. However, if you didn’t have any decorative tissue paper on hand, or simply didn’t like the look, you can always paint your wooden frame instead. Along those same lines, if you did paint your wooden frame, you could then stamp around the frame or add a layered stencil!
If you made this Wooden Framed Cork Board, what style or color of decorative tissue paper would you use for the frame?