DIY Denim and Faux Fur Throw Blanket – Chic & Cozy for Fall!

With the change of the summer season to fall, so, too, does the style of our homes tend to change. If your weather is crisp and cool, if you find yourself dreaming about pumpkin spice everything, or if you dig out your coziest socks to wear around the house every morning, you might be interested in this tutorial. It’s for a denim +faux fur (or sheepskin, if you want) throw blanket.
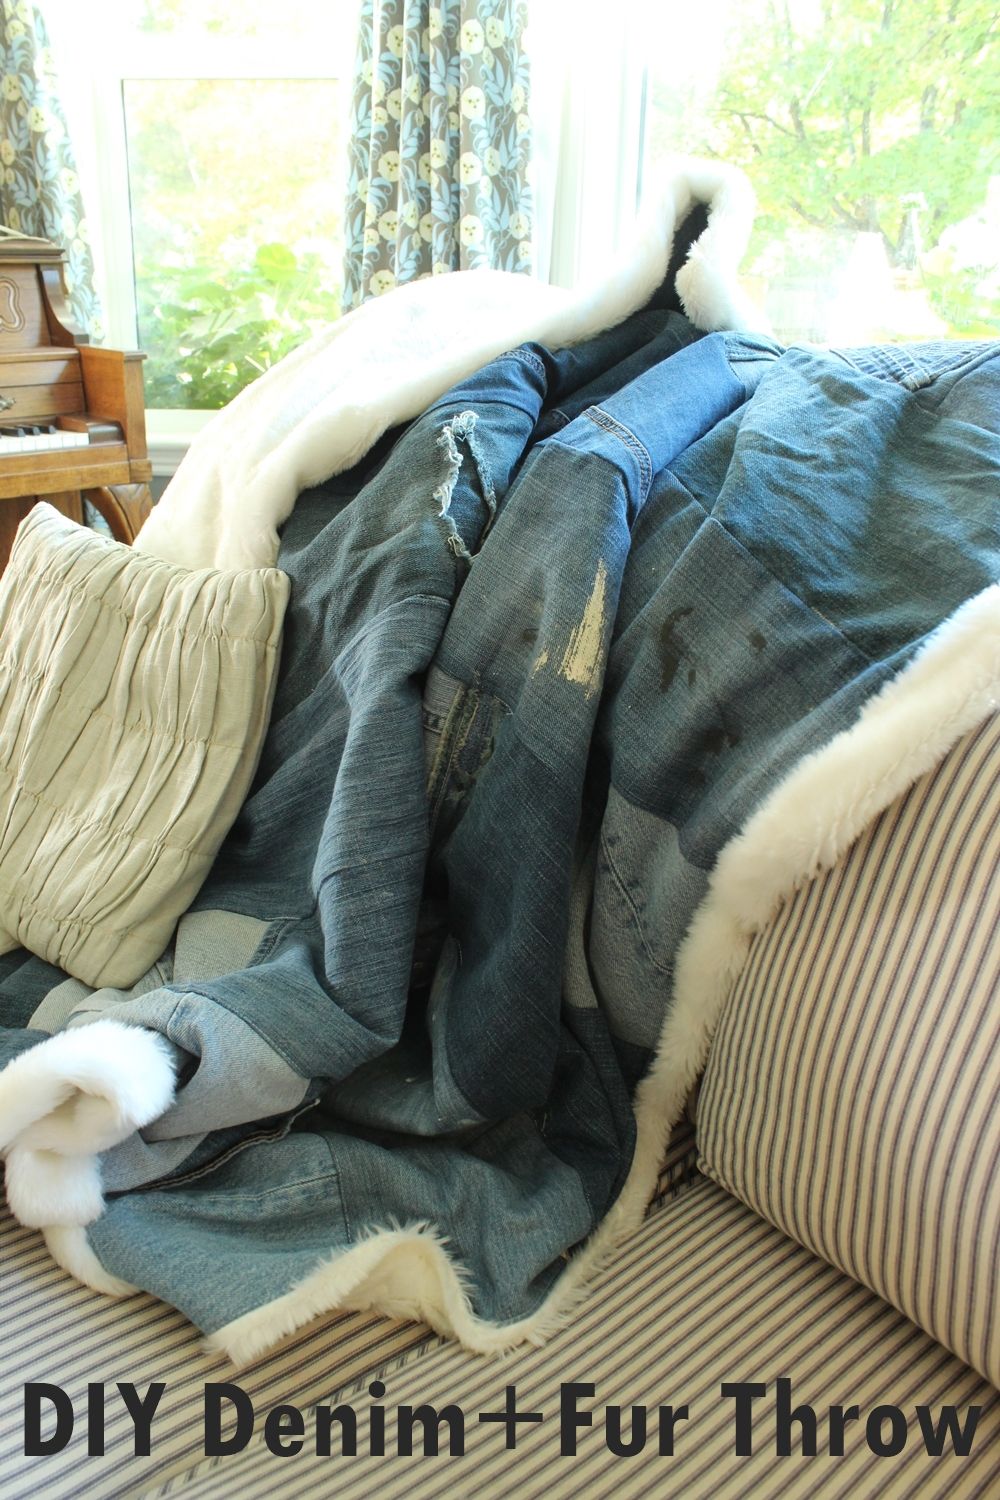

The denim is casual, comfy, and approachable. The faux fur is soft and snuggle-able. The combination of the two into a DIY throw blanket is utterly irresistible.

You don’t need to be an excellent seamstress (or seamster?) to create this piece, but there are a few tricks to help you along. Read on to find out more.
Materials Needed:
- Denim in the size of your choice (end result of denim piece in this example is 65”x56”)
- Faux Fur piece that’s cut the same as or 4” larger than the denim (example fur piece is 69”x60”)
- Thread
- Sewing machine, straight pins, safety pins, scissors

For the denim component, you can certainly purchase denim fabric at your local fabric store. Or you can reuse/upcycle your old jeans, which is what I did for this example.

You’ll be forming strips of denim, so to begin you need to determine a good width for your denim strips. This can be a practical decision, based upon the narrowest part of your jeans legs. This example uses a 7” width for the strips. Cut your denim into that width and a variety of lengths.

Lay out your denim in strips, placed close together. Figure out the placement of your jeans colors and what not until you get it how you like it.

Keep one side, either the top or bottom, of your strips even with each other. The other side will likely be similar in length but not exact. That’s okay, we’ll deal with that later.

Within each strip, pin the raw sides of your jeans pieces together so you can sew them.( Here is a tutorial that provides the photographic step-by-step process to implement a variety of the six most common basic hand stitches).

If you used the factory edges of any parts of your jeans (such as the hem), add a bit of personality to the throw blanket by keeping these edges exposed. Simply pin them on top of (rather than right-sides-together with) the raw edge of its adjacent strip piece.

If your jeans have holes, simply place a scrap piece of denim underneath the hole and do a zigzag stitch around the hole to hold the scrap denim in place. Then proceed to attach the holey piece into the strip as usual.

Lay each strip down in the order you picked it up, to maintain your original placement. It’s now time to sew the strips together. Take two adjacent strips and place them right sides together, then sew them up.

It’s important that you keep the same end of all your strips (either the top or bottom) even/straight with every strip seam.

The other end will likely be a little off, depending on how many seams each strip has, etc. Find the shortest strip length along that edge.

Trim all the other strip ends to be even with the shortest length. Now all sides of your denim throw top should be straight and even.

Lay out your piece of fur, right (fur) side up.

Lay your denim piece on top of the fur, centered, with its right side down. In other words, the two right sides are together.

The corners will be the trickiest part, but they’re not that bad. What you’ll be doing is leaving out what looks like a triangle of fur from the corner seams. In this photo, all the A points will be connected after sewing.
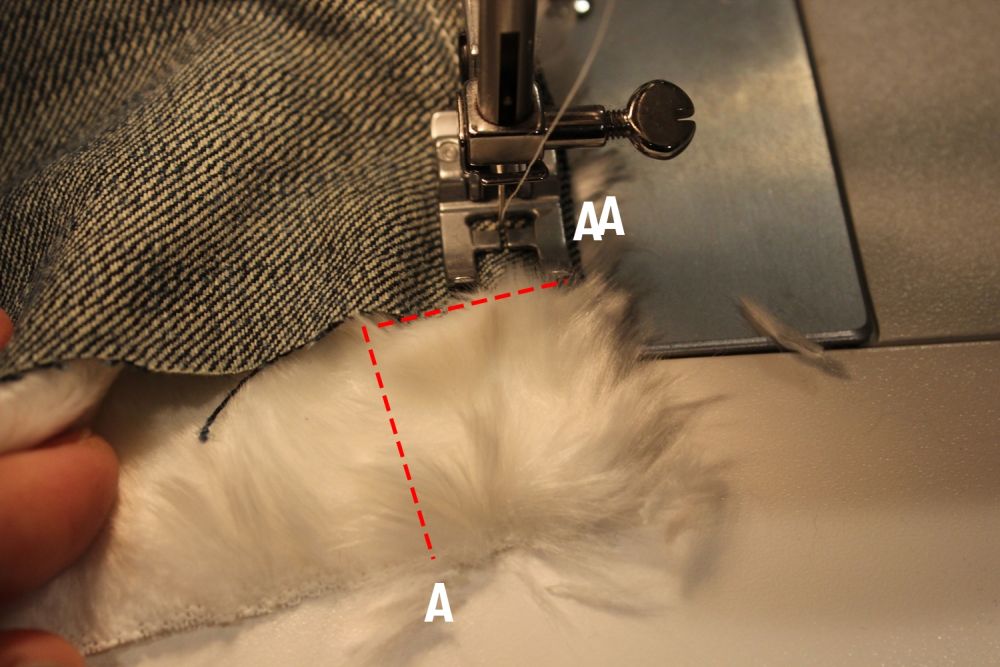
Approach each corner in a clockwise position. Along the “top” (approach to the corner) edge, match your denim A point up with the top fur A point. Sew these together. Lift your pressure foot and pull the corner of your throw away slightly from the sewing machine, but don’t cut your thread.

Bend the fur at a diagonal from the corner, bringing your denim A point to meet up with the side fur A point. (The denim and top fur A points have already been sewn together.)

Pinch or pin the corner so all three A points are touching; pivot your throw blanket 90 degrees, and sew downward to finish the corner.

Your corner will look a little like this. Continue sewing the edges of the fur and denim together along the side until you reach the next corner; repeat for the other three corners.

Before you finish off your last side seam, leave a gap about 12”-18” long, or however wide you need to be able to pull the right sides of the sewn blanket out of itself.

Pull out your blanket through this gap, taking care not to rip the unfinished gap-end seams.

Take your fingers on the inside of the blanket and adjust the corners as needed so they are as crisp and flat as possible.

Your throw blanket will look something like this.

Fold the raw edge of the gap fur over and pin it along the denim edge. Continue pinning the denim edge to the back of the fur (keeping your fur trim) all the way around your throw blanket’s perimeter.

Place safety pins every foot or so to hold everything in place as you’re sewing. These will be helpful when you make little seams in the center of your throw later on.

Stitch the gap closed right at the edge of the pinned fur; continue sewing all the way around your throw at the denim edge. This creates a kind of “trim” effect at the edge of your throw.

Along every seam, you’ll want to sew small seams, I call them “bits,” which are only about 1” in length every foot or so. This keeps your throw blanket together, similar to tying knots on a quilt. This “bits” method is just less visible and time-consuming.

Make sure your thread matches the fur; it’ll be less obvious on thepatchwork denim side than on the full fur side if the thread doesn’t match your fur.

When you’re done sewing bits on every strip seam, it’s time to trim all the excess thread. (Don’t cut your thread between bits; it’s much easier just to move the fabric from bit to bit and keep the thread seamless.)

Done!

Your DIY denim + faux fur throw blanket is complete.

I love the little bit of fur “trim” effect around the edge of the throw; it softens up the harsher denim quite a bit.
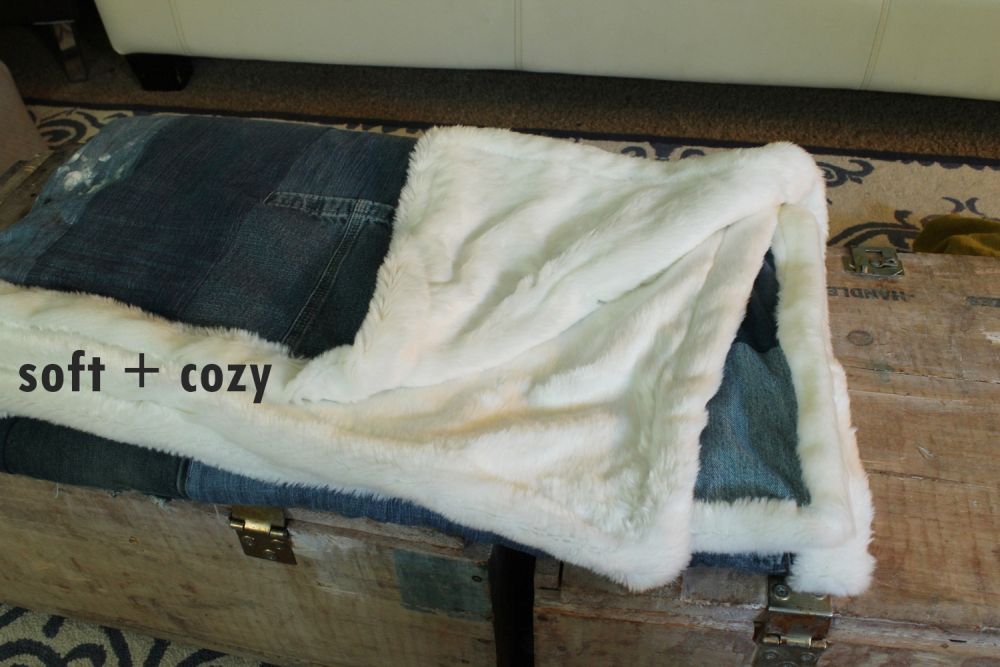
Depending on the type of fur you’ve chosen, your throw is likely to be irresistibly soft and cozy.

A throw as soft yet substantial as this one is required for an afternoon of snuggled-up book reading.

The best part is, it’s durable, too. This throw blanket can (and will!) find its way into the lives of any and all ages.

Plus, it’s unique. A little bit edgy, a little bit sweet.

Love it, especially all the fun details of the old denim.

We hope you enjoy creating your own denim + faux fur throw…but even more importantly, we hope you find lots of opportunity to curl up in it in the colder months.