DIY Board And Batten Wall


A board and batten wall is a budget-friendly DIY project that enhances any space with a custom, textured look that suits styles ranging from modern to farmhouse. In just nine steps, you can transform your wall—from cleaning and measuring to installing battens, caulking, and painting—for a timeless accent that adds depth and character to your home.

Materials:
- 1/2″ thick 1×4 boards (for horizontal sections)
- 1/4″ or 1/2″ thick battens (for vertical sections, depending on design preference)
- Brad nails (1-1/4″)
- Wood filler or spackling (for nail holes)
- Caulk (for seams and edges)
- Paint (in your desired color)
- Primer (if needed for better paint adhesion)
Step 1: Cleaning and Measuring

Start by cleaning the wall and removing any outlet covers, hooks, or decor. Next, measure the space to plan your board and batten layout for a precise installation.
Step 2: Measure, Mark, and Cut
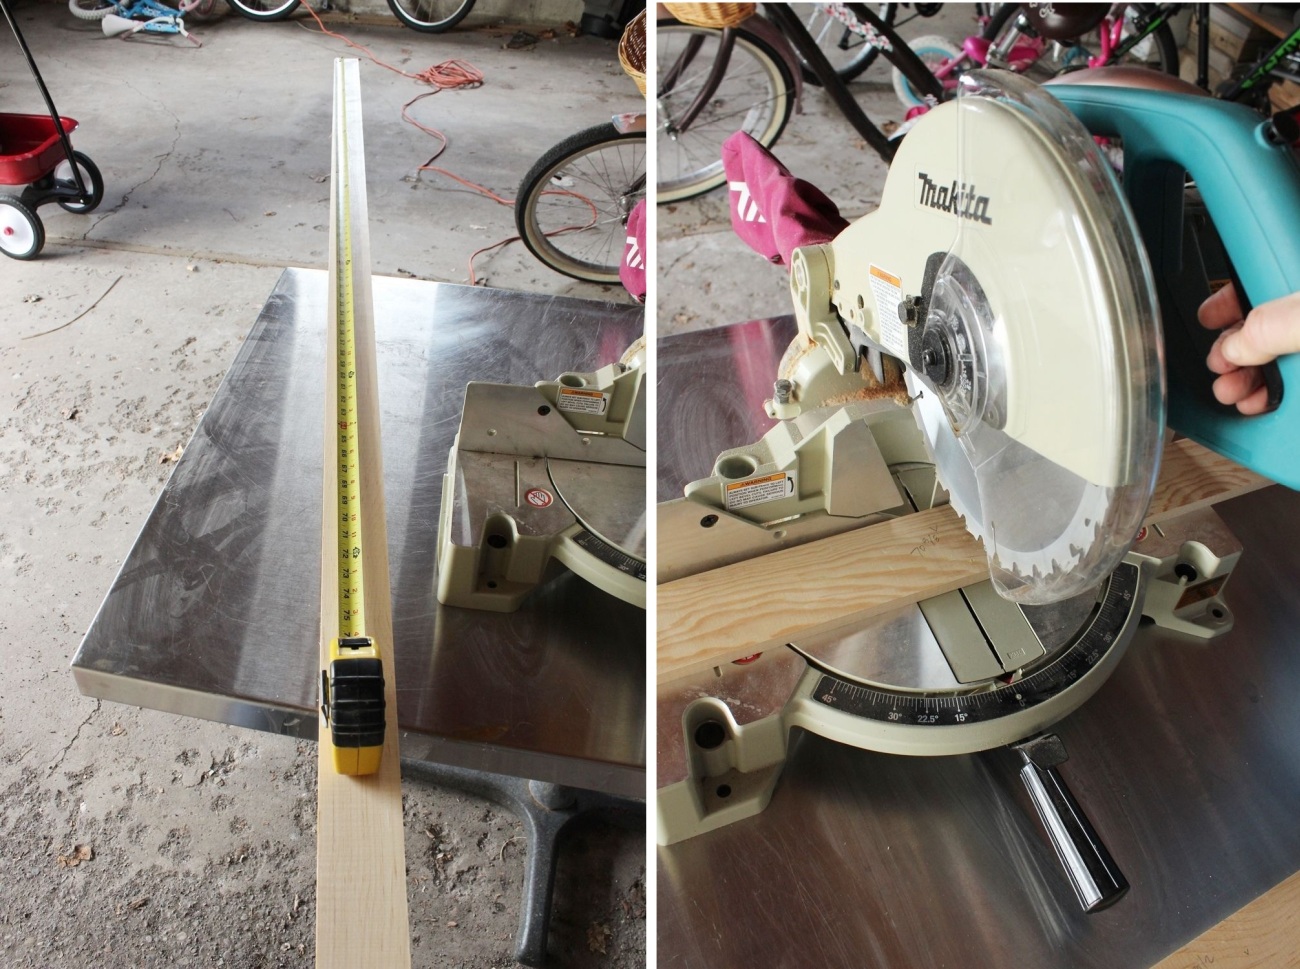
Choose a wall and measure the board length, using a board and batten calculator if needed. Mark your board with a “V” mark for precise cuts. This tutorial uses 1/2″ thick 1×4 boards for the horizontal section. Once marked, cut the boards to size, ensuring clean, accurate edges.
Step 3: Test, Mark, and Attach the Board’

Dry-fit the board against the wall, using a level or ceiling as a guide to ensure it’s perfectly horizontal. Before attaching, use a stud finder to locate studs for secure placement. Mark the stud positions on both the wall and the board. Once aligned, use a brad nailer to attach the board to the wall, securing it firmly to the studs.
Step 4: Repeat on All Walls

Continue installing the boards on all walls, ensuring they remain level and aligned. If not placing them at ceiling height, use a level and consistent vertical measurements to prevent any shifting up or down as you go.
Step 5: Install the First Batten

With the boards installed, it’s time to add the first vertical batten. Measure the height from the floor (or top of the baseboard) to the bottom edge of the horizontal board. Cut the batten to size, ensuring a precise fit. If placing next to tile or other features, consider using a slightly thicker batten for a seamless transition.
Step 6: Install the Remaining Battens

With the first batten in place, install the rest by determining your preferred spacing. Measure the width of the wall and either calculate equal spacing mathematically or adjust placement visually with spare battens for the best proportion.
Mark the batten positions at the bottom and just under the horizontal board, ensuring consistency. Measure the vertical length for each batten based on these markings, then cut accordingly.

To maintain even spacing, create a template using a scrap piece of wood. Move the template up between battens as you install, ensuring a uniform layout.
Continue installing and nailing battens along the entire wall, keeping each one aligned for a seamless board and batten look.
Step 7: Work Around Outlets and Switches

Not every wall will be straightforward—outlets and light switches may require adjustments. If necessary, loosely place the switch plates back on to help with alignment.
- Mark the Placement – Use a pencil to mark the top and bottom edges of the outlet or switch where the batten will fall.
- Remove the Cover – Take off the outlet or switch plate for easier access.
- Measure for Batten Cuts – Measure the space between the lower edge of the horizontal board and the top of the outlet, as well as from the bottom of the outlet to the baseboard or floor.
- Cut and Shape the Batten – Cut the batten to size. If necessary, use a 45° angle cut on one end to help it sit flush against the outlet or switch plate for a seamless look.
- Attach the Batten – Secure the batten in place, ensuring a professional and polished finish.
Step 8: Caulk and Fill for a Smooth Finish

With all boards and battens installed, it’s time to fill nail holes and seal gaps for a flawless look.
- Fill Nail Holes – Apply quick-drying, no-sanding-required spackling to brad nail holes using your finger. If excess is applied, wipe it away with your thumb for a smooth finish.
- Apply Caulk – Run a thin bead of caulk anywhere the board or battens meet another surface (ceiling, wall, baseboard, countertop).
- Moisten Your Fingers – Lightly wet your finger with plain water to help smooth the caulk.
- Smooth the Caulk Lines – Run your wet finger along the caulk bead to create a clean, seamless line.
- Check for Evenness – Ensure the caulk only fills the seam and doesn’t cover the wall or battens. The goal is a tight, gap-free look with minimal caulk.
Step 9: Paint the Board and Batten Wall
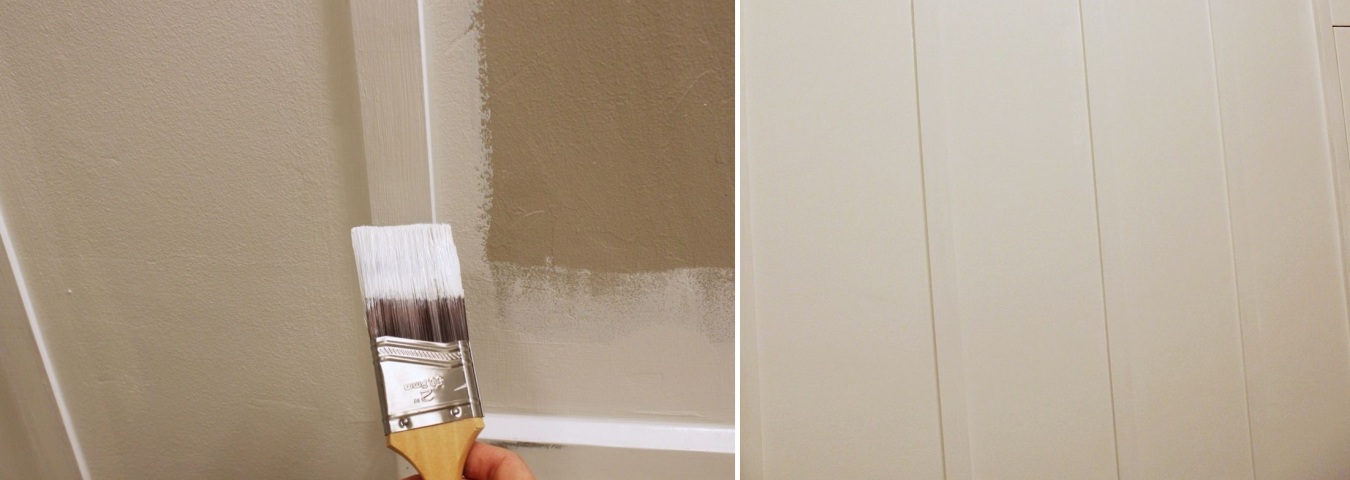
Once the spackling and caulk are dry, touch up pre-painted boards or paint everything in place. Use a brush for seams and a foam roller for smooth surfaces, then let it dry for a flawless finish.