DIY Aromatherapy Reed Diffuser

It’s at this time of year, when it’s cold and we haven’t been able to open our windows to air out the house for some months now, that smell starts to play a major factor in how we feel about our home. There are few ways to make as dramatic an impression in our homes as aroma, and this DIY oil reed diffuser might be just the thing your space needs to feel – and smell – fresh until springtime. Best of all, this DIY Aromatherapy project really couldn’t be easier. Truly.

DIY Level: Early beginner
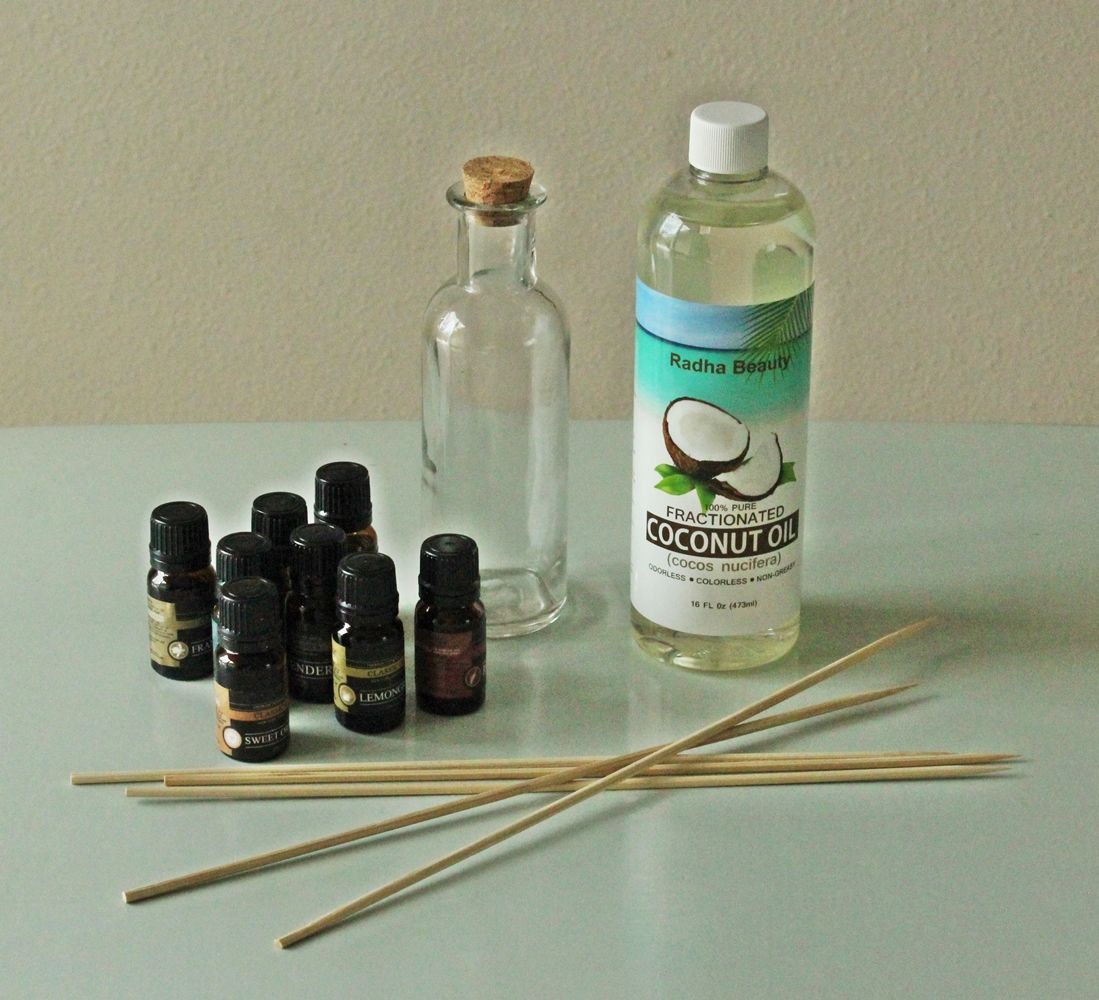
Materials Needed:
- A glass container with a narrow neck (these are available at any craft store or even many thrift stores). The narrow neck is important for minimizing evaporation.
- 1/4 C of some sort of light oil, otherwise known as “carrier oil.” Light oil options include fractionated coconut oil (shown here), sweet almond oil, or safflower oil.
- 20ish drops of essential oil(s) in the flavor of your choice. (Great essential oil combinations listed later on.)
- 5 reed diffuser sticks or bamboo skewers (shown here, available in most grocery stores).
- Narrow-mouthed funnel (recommended; not shown).

Pour 1/4 cup of your carrier oil into a measuring cup. The reason heavier oils, such as olive oil, are not recommended for diffusers is because of that – they are heavier, so it’s harder and takes much longer for them to travel up the skewers to diffuse the smell.

Place your funnel into the glass container and pour the carrier oil through the funnel into the glass container.

Add about 20 drops of essential oils of your choosing. This example uses lavender and eucalyptus for a soft yet earthy aroma. (Highly recommended if you like that kind of thing!)

Place your bamboo skewers into the bottle. Lightly swirl the essential oils around into the carrier oil.

Spread out the skewers, mostly so they look pretty. The oil will seep its way up the skewers; it is when the oil reaches the part of the skewer that’s out of the bottle that you’ll start to smell it. This will likely take a few hours. If you need your aroma faster, flip your skewers upside down after an hour or two. It should be noted, though, that this will smell fantastic but in a light, background way – it won’t be overpowering like many other room air fresheners.

And, really, that’s it. You’ve just created a lovely smelling oil red diffuser. I recommend flipping the sticks upside down every couple of days to keep the scent alive and well. When your reeds are completely saturated, it’s time to swap them out for fresh ones.
Note: A corked bottle is optional but recommended in two instances: (1) When the neck of your glass jar is wider than you’d like. You can drill or poke holes through the cork lid for your skewers in this case. (2) When you are wanting to give an oil reed diffuser as a gift.

If you love just one essential oil fragrance, don’t hesitate to go with that one! But if you’re feeling a little more ambitious, try out a combination. Essential oil combos really are limitless, which is part of the fun of working with these for fragrances in your home. Some combinations I’ve enjoyed with my basic essential oil starter set include:
- Lavender & eucalyptus
- Sweet orange & peppermint
- Lemongrass, lavender, & rosemary
- Lemongrass, lavender, & peppermint
- Eucalyptus, peppermint, lemongrass, & rosemary
- Frankincense & tea tree (melaleuca)
- Lavender & tea tree (melaleuca)
- Sweet orange & lemongrass

Over time, even with a narrow-necked glass container to slow evaporation, your oils will need to be replenished or replaced. Judge this by how strong the scent is and adjust it according to your preferences.

With those skewers sticking out the top of your oil-holding container, you’ll want to be sure to keep this well out of reach of children and pets. Just stating the obvious, but sometimes the obvious is important. Enjoy your newly fragrant home.