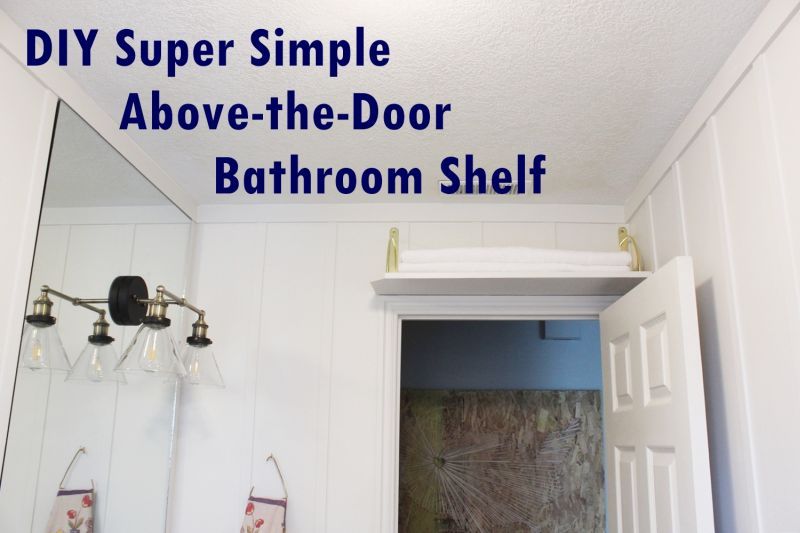
DIY Simple Above-the-Door Bathroom Storage Shelf

For the small bathrooms out there, it can be quite a challenge to find storage solutions. An often-overlooked area for storage is above the door. An above door shelf takes up no additional space, is hardly even noticeable, and yet offers a fantastic small-space storage solution, even though it’s a small bathroom shelf. This tutorial will show you a simple way to build and mount an above-door shelf to provide additional bathroom storage; however, this concept can of course be converted and used above virtually any door and even used for a floating bathroom hanging shelf.

What You Need
- x1 piece of plywood
- Set of shelf brackets
- L trim
- Paint or stain
- Power drill
- Level

Step One: Ready plywood
Begin with a piece of at least 1/2″ thick common board or plywood, cut to the size you want.

Here are a couple of tips for determining the size of your above-door shelf: When determining depth, stand directly below the door frame facing into the space. Look up and look straight ahead. How far out could a shelf come before your peripheral vision registers it?
You don’t want to feel like you’re walking into a tunnel, with a shelf out very far. Furthermore, if you happen to have a vent above your door (as is the case in this tutorial), you want the shelf to be narrow enough so as to allow for adequate airflow and ventilation. The width is probably easier to figure out – it can go from wall to wall, or just above the door frame, or somewhere else logical that your space’s architecture dictates.
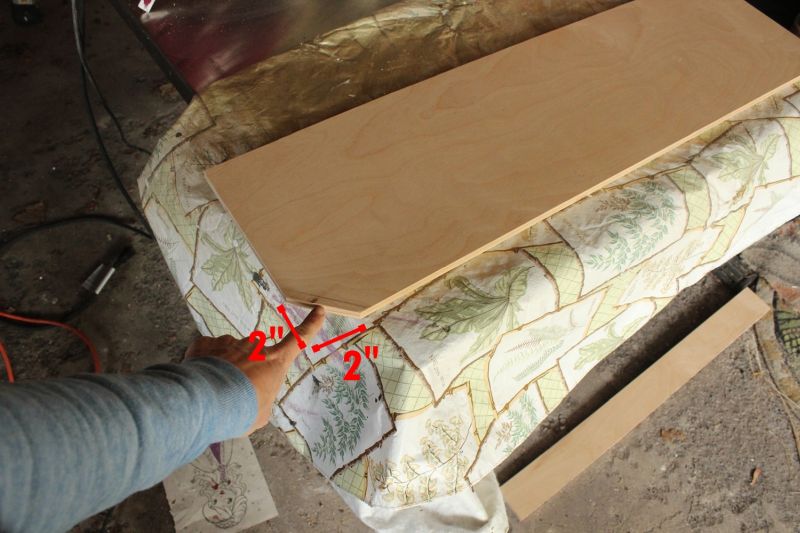
If your shelf isn’t traveling from wall to wall, consider cutting a 45-degree angled corner off the protruding corner. This is entirely optional, of course, and it does add some complication and effort in trimming out the shelf edge. But it makes for a nice, polished, and softer edge. (Particularly if your above-door shelf, like this one, is readily visible in a mirror or other reflective surface.)

Step Two: Paint shelf
Sand, prime, and paint the board. As long as you’ve properly sanded the surface, any application should work. I’d recommend using a Kitchen & Bath paint as it will stand up against the high humidity.

Let it dry.

Step Three: Adding trim
If your shelf is a solid wood board, you might be perfectly fine with the edges as they are. However, if you’ve chosen plywood as your shelf medium, you will need to trim out the edge. Grab some L-shaped corner trim, making sure that the inner depth is enough to cover the thickness of your shelf.

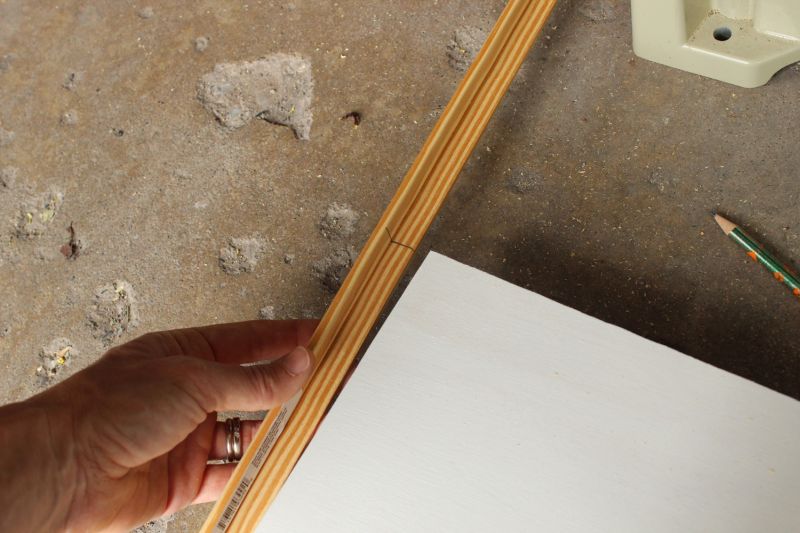
Orient your trim piece the way you want it – do you want the horizontal part visible on the underside of your shelf? Or “invisible” on the top of your shelf edge? (Because this shelf is so high, remember that the top of the shelf won’t be seen; the bottom side is your focus for making it look the way you want it.) With your trim oriented, cut a 22.5-degree angle off the end of your trim piece. Precisely align the trim’s inner corner with one corner of your 45-degree corner to make sure the angle is facing the correct direction.

Remove the trim piece and flip it over. Measure the exact distance from corner to corner of your 45-degree corner. Mark this distance on the inner corner of your trim piece. Tip: It’s helpful, when working with trim pieces that require specific orientation, to sketch out the direction your cut should go as you mark the trim.

Orient your trim piece onto your saw, which should be set at 22.5 degrees. You are lining up the marking on your trim’s inner corner with the edge of the saw blade.

Lay your cut trim piece over the 45-degree corner on your shelf. Both inner corners of the trim should line up precisely with the shelf’s cut corners.

When both sides align perfectly, it’s time to cut the trim for the two perpendicular shelf edges.

Make a 22.5-degree cut on the end of your remaining (correctly oriented) trim piece. Align the inner corner of the trim with the precise corner of your shelf.
Mark the shelf’s width on the end of your trim and cut it (a standard 0-degree cut) to fit the shelf. Tip: While working with a measuring tape is the generally preferred method of measurement for cutting, I find that when working with different angles in small areas, a bulky measuring tape causes more room for error than physically marking the trim. However, if you’re more comfortable with using a measuring tape, do that, of course.

Dry-fit the two trim pieces together at the corners to ensure their fit. If they look good, move onto the next shelf edge and repeat these steps.

Be sure to sketch the direction of the cuts you want to make; it’s easy to get mixed up.

When cutting L-shaped trim, hold the trim perpendicular while you’re cutting, or flip it over and lay it flat so it fits right up into the “corner” created by your saw’s mounting wall.
Dry fit all three pieces together to ensure their proper fit at the joints and also the lengths.

When you’re satisfied with the fit of the trim, place a bit of wood glue in the inner corner of your trim pieces.

Join the trim to the shelf, align the corners precisely, and hold in place for a minute or two.

When the glue has had time to tack up a little, grab your brad nailer and drive in several brad nails on the face of the trim.

You don’t need lots of these; maybe put in one brad nail every 6” or so.

Step Four: Sand trim
Sand any uneven parts, if you find them. Or just do a quick sanding for smoothness.

Step Five: Fill holes
This will be the underside of the shelf, which means it will be visible to anyone who enters our bathroom and looks up. There is a hole between the trim pieces, which will need to be filled.

I love using lightweight fast and final spackling for jobs like this.

I filled the hole on the underside of the trim, all the brad nail holes, and the connecting line between the trim lengths and the shelf itself on the shelf’s underside. This helps to create a seamless, solid final product.

As you can see after the spackling, the hole is filled. Once painted, this will look perfect.

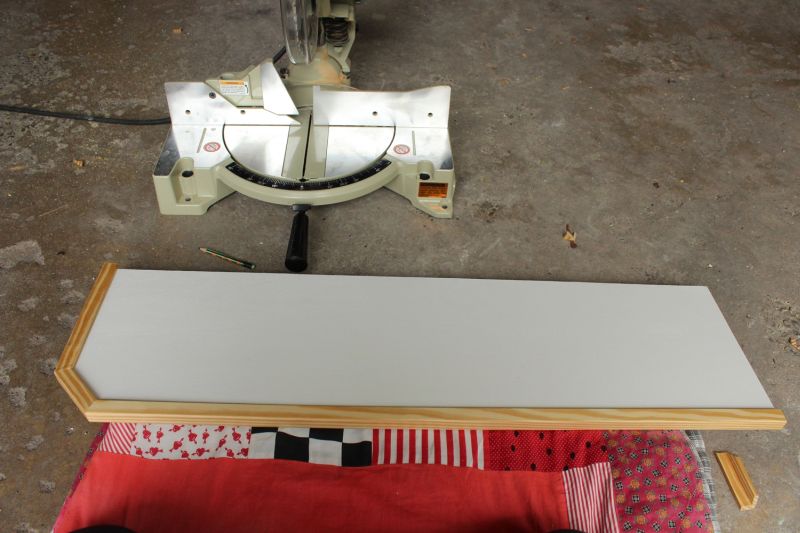
Step Six: Paint trim
Prime and paint your trim so it matches the shelf. This may take several coats.

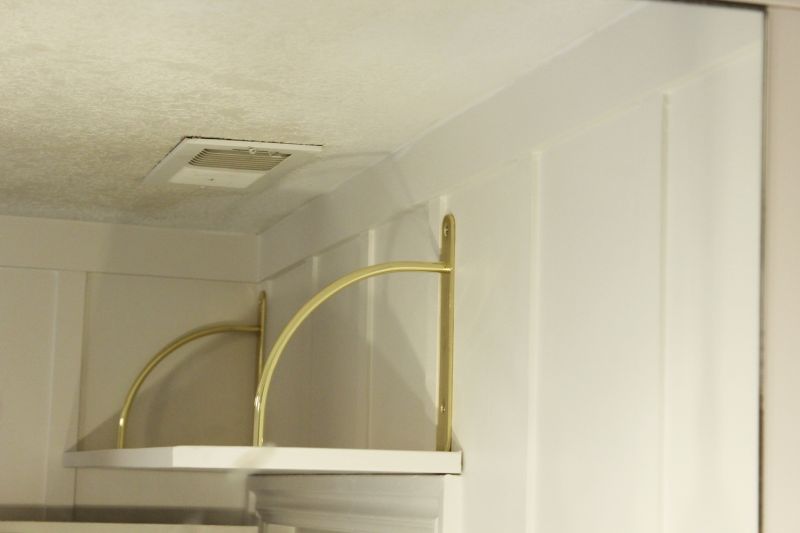
Step Seven: Find studs
Use a stud finder to locate the studs above the door, where your shelf will go. You’ll probably want to use the two studs closest to the ends of your shelf. Depending on your shelf’s length, using one in the middle isn’t a bad idea, either.

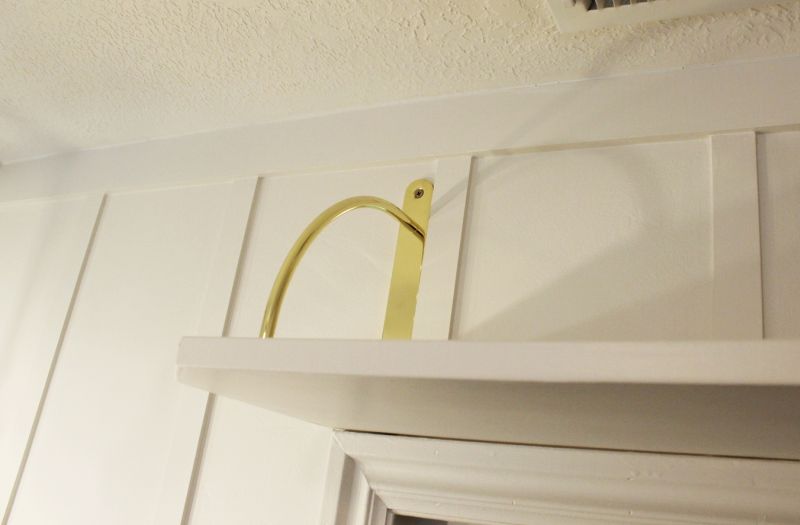
Step Eight: Attach brackets
Measure and mark the location of the studs on your shelf for your brackets. Attach your brackets to the TOP side of your shelf.

Have a helper hold the shelf level and straight while you screw in the mounting screws to your wall.
Viola! Done!

It’s a stylish, simple, and much-needed storage addition in a small bathroom. Very unobtrusive, although it’s quite pretty even when it is noticed. My husband actually didn’t realize it was there until I pointed it out to him; that’s the best compliment, I think.
Here is a view of the shelf from the bathroom vanity mirror. It was important that the shelf be simple yet beautiful, because it will be seen in the mirror’s reflection every time someone looks in the mirror.

This is a wonderful use of what would previously be considered non-space. It holds spare towels perfectly. I have plans to add spare toiletries (e.g., toilet paper, shampoo/conditioner, soap) up there as well.
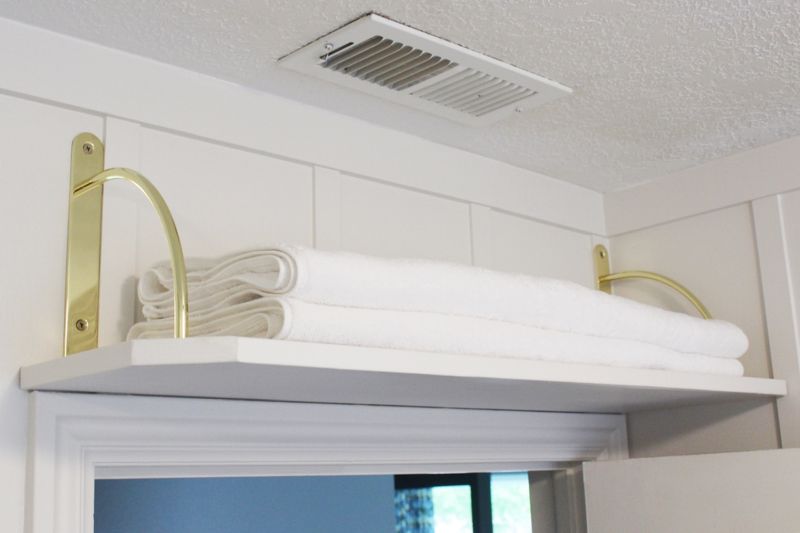
I love the shine of the brass brackets and the pretty curve of the support arc.

For a project that takes an hour or two, this DIY project is highly recommended.

We hope you give an above-the-door storage shelf a try, whether in your bathroom or another space!
Note: The author is an experienced, although not professional, DIYer. Neither the author nor Homedit is responsible for any injury or damage that may be a result of following this tutorial.