DIY IKEA Dresser Hack With Contact Paper

It is easy to update your bedroom with a DIY dresser hack, featuring a minimalistic geometric design. You can create a design that is as individual as you are and add a splash of colour to bland furniture!
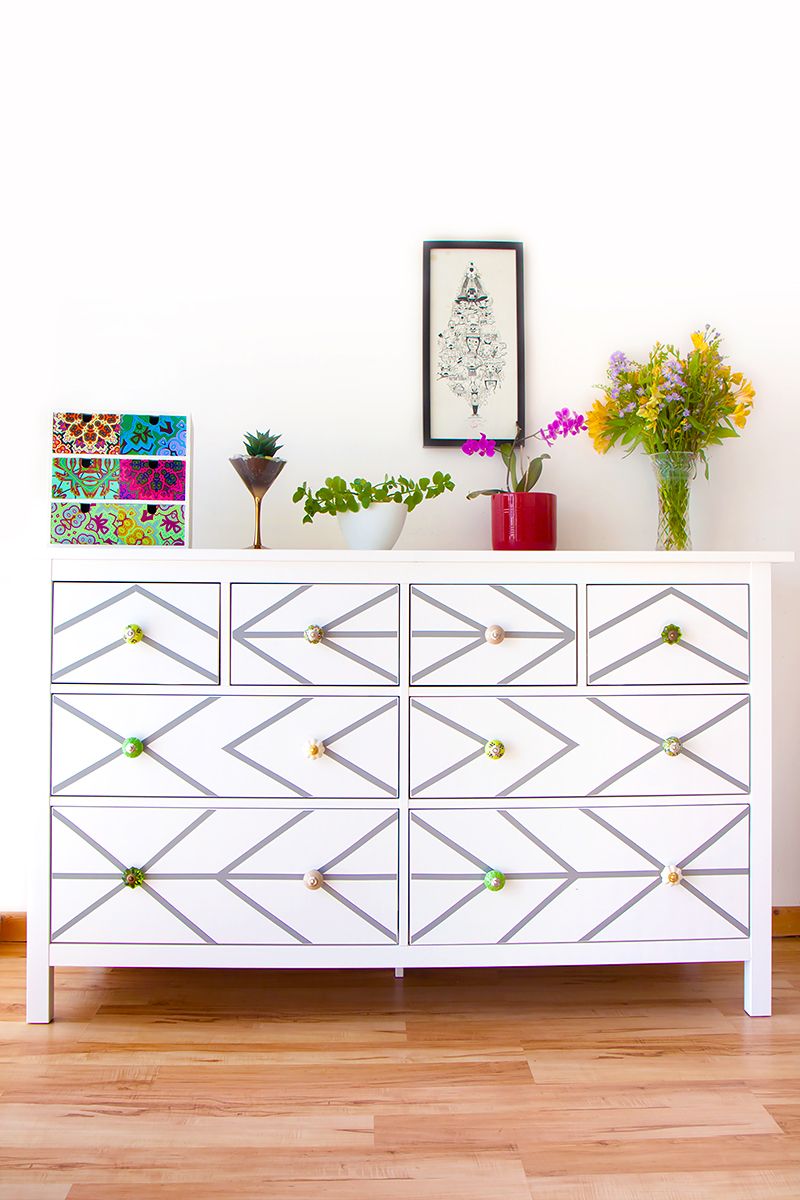
A really great way to update your home décor is to give your furniture a new look by replacing hardware and using contact paper. Rather than purchasing a one off piece of unique furniture, a budget conscious way to achieve this look is by using artisanal ceramic or glass handles with beautiful patterns or rich hues.

Supplies
- New handles
- Craft knife/scissors
- Pencil
- Contact paper
- Self-healing mat*
- Smoother tool*

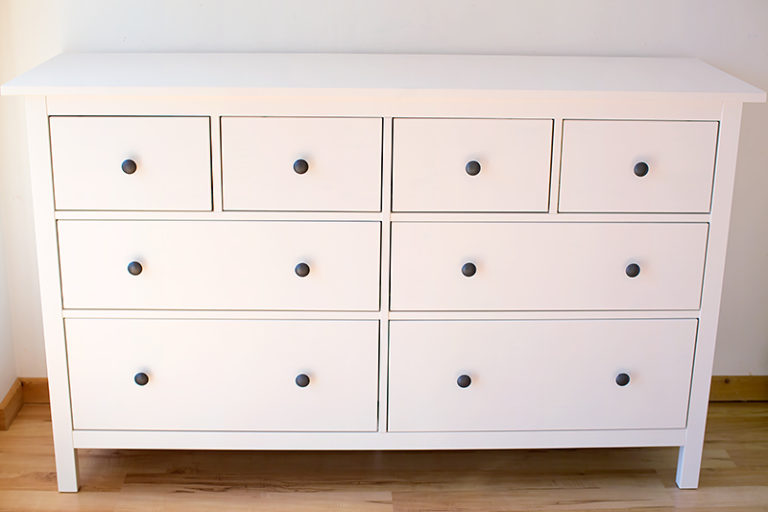
Step 1: Remove any handles on your dresser. Even if you don’t want to replace the hardware, it gives you a really great blank canvas to create your geometric design on. It makes it a lot easier to apply the contact paper as well!

Step 2: Cut 1/2″ strips of contact paper using the craft knife and a self healing mat or a pair of scissors. You can adjust the width of the contact paper strips you cut, depending upon the design you wish to create. You can also mix it up with solid shapes cut from contact paper as well
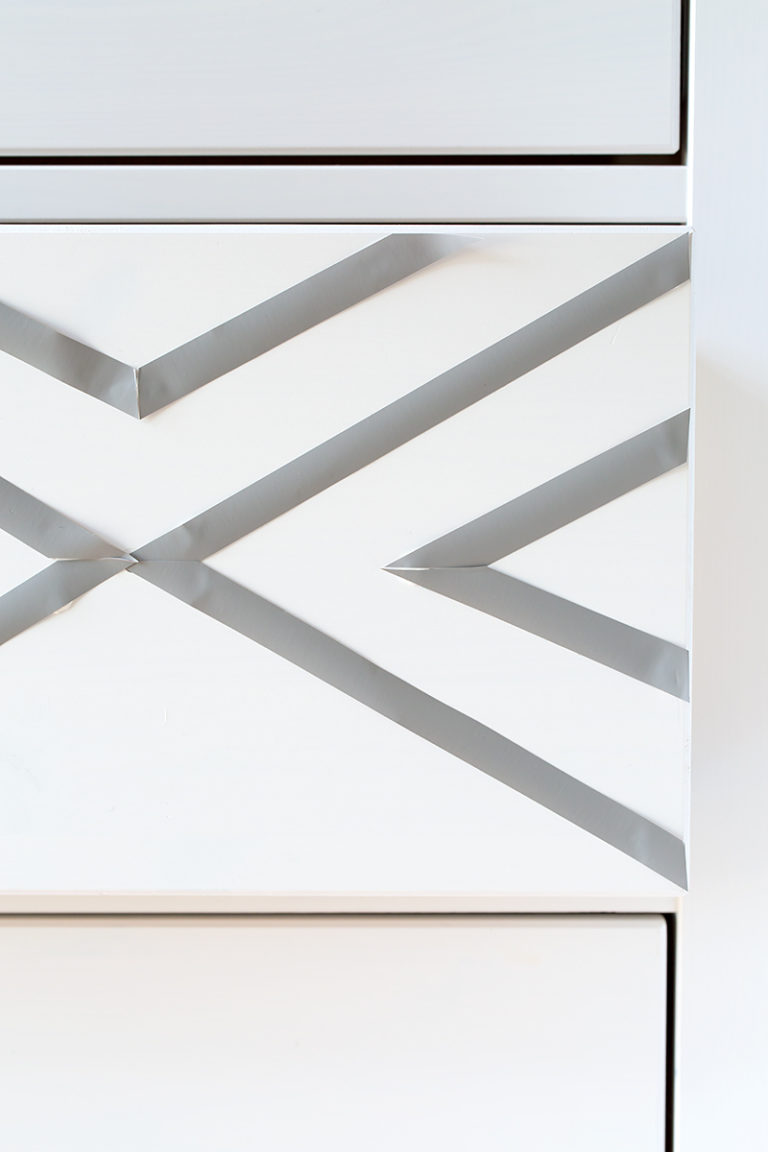
Step 3: Experiment with your geometric design by laying out the strips of contact paper on the front of dresser. Whilst contact paper is easy to re-position; using blue tack to temporarily fix the contact paper in place (with the backing paper still attached) makes it much easier to play around with designs. You can also sketch out a design on paper first or reference a design you find online.

Step 4: Take a step back from your dresser to evaluate the overall look and once you are happy with your design, remove the backing paper from the contact paper and apply it to the dresser.

Step 5: Smooth over the contact paper to create an even finish and ensure it is fixed into place. A smoother tool can be useful here, but isn’t vital.

Step 6: With your design in place, now is the time to fit any new hardware, and finish off your new look!
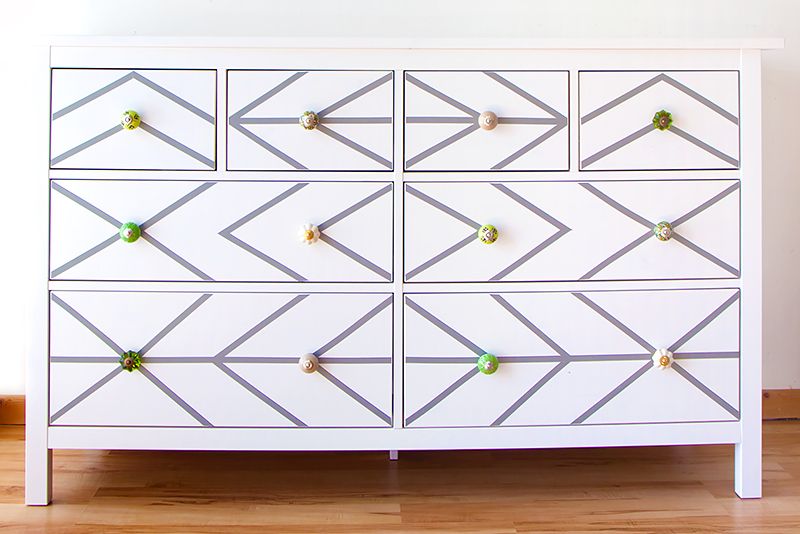
The beauty of contact paper is that you can easily switch around your look and style by removing and replacing the design.