How to Arrange Flowers in Floral Foam

Who doesn’t love the look of a fresh flower centerpiece? (Answer: No one. Everyone loves them.) Flower bouquets look beautiful, they smell lovely, and they can be customized to fit nearly any color scheme for any occasion. The only drawback might be that they seem so, well, intimidating.


This tutorial will break down the flower bouquet arranging process, step-by-step, and illustrate how to create a beautiful centerpiece that you’ll love for a long while.

Materials you’ll need to arrange flowers in Floral Foam:
- Floral foam
- Floral scissors
- Floral tape
- Sharp razor blade (optional for cutting stems)
- Shallow dish or container for holding floral foam
- Serrated knife
Step by step guide to using floral foam:
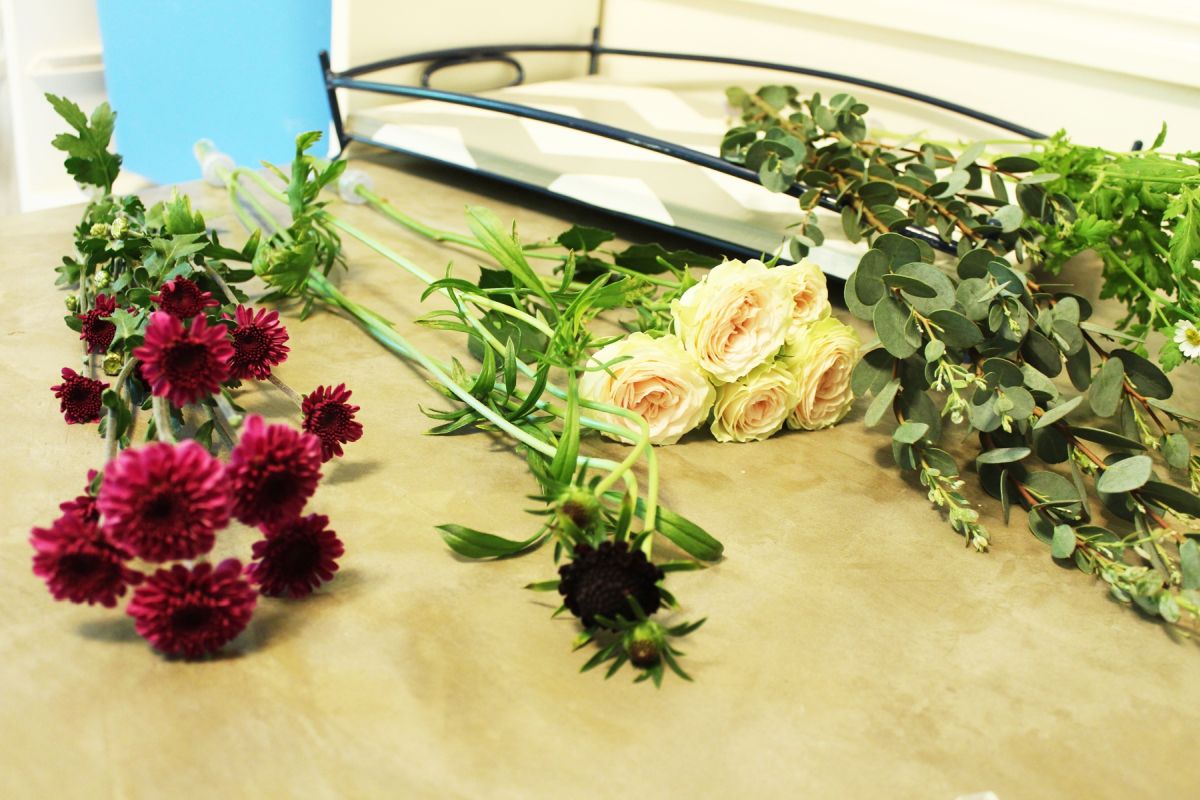
- Fresh floral stems

- We recommend using two types of foliage, two or three larger flower types (5-12 blooms each), and two filler/smaller flowers

- Some stems go a long way for your flower bouquet because you can cut off individual “branches.” These seeded eucalyptus leaves only required one stem for the entire flower bouquet because it had so many “branches.”

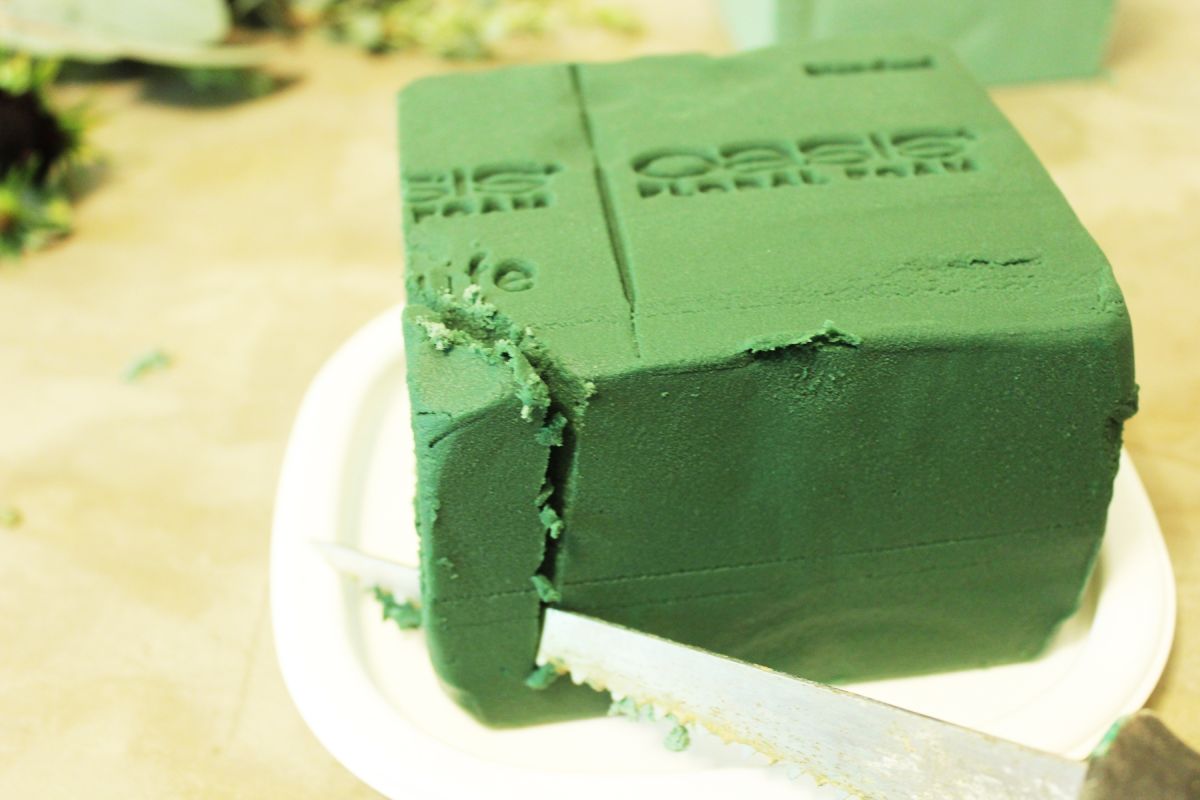
Begin by cutting the floral foam to size with a serrated knife. You could use an old bread knife or a drywall saw or something else similar. The foam cuts pretty easily. Don’t do other trimming at this point; you’ll do that in a minute.

Place the floral foam in water.

If your container of water is flat, wait until the foam gets saturated about halfway up. You can tell by the dark color that the foam is saturated.

Flip the floral foam over. Refill the water container if needed. Wait until the foam is saturated, but don’t leave it in the water too long because it will start to disintegrate.

Set the saturated floral foam into your shallow bowl or other shallow rimmed container. You want this container to be as close to the floral foam perimeter as possible, so it isn’t visible in your fresh flower bouquets arrangement.
Use the serrated knife to take the side corners off of your foam block.

Then cut the top corners off of each side.

I don’t know what shape this is now; it’s something like a gem shape. Essentially, you want your floral foam to loosely replicate the end shape of your centerpiece. In this case, we’re going for compact and relatively round…while still looking loose and natural.

Secure the floral foam to your shallow bowl with floral tape. Cut your tape to be about twice as long as the length of the tape’s drape over both sides.

Pull the floral tape evenly and fairly taut over your foam, then run the ends underneath your shallow dish so the tape end comes up on the other side. Wrap this tape end around the floral tape on that corner. Repeat for all four floral tape ends.

Take your largest foliage and cut to about 4”-6” long. Place near the bottom-middle of your floral foam on each corner.

Like so.

With that same foliage, place three “branches” over the top of your floral foam.

Place two more branches on the other top sides of your floral foam, so the top branches form somewhat of an X (or T) shape. You should still be able to see plenty of floral foam at this point.

It’s time to move onto your second type of foliage (in this tutorial, regular eucalyptus leaves). Again, cut branches off the stem to maximize the foliage on your flower bouquet.

When you insert the stems into your floral foam, you don’t want leaves shoved in there. Trim off any leaves so that there’s about 3/4″ bare stem at the base of your branch. Similarly, you don’t need to push in much more than 3/4″ of any stem into your floral foam.
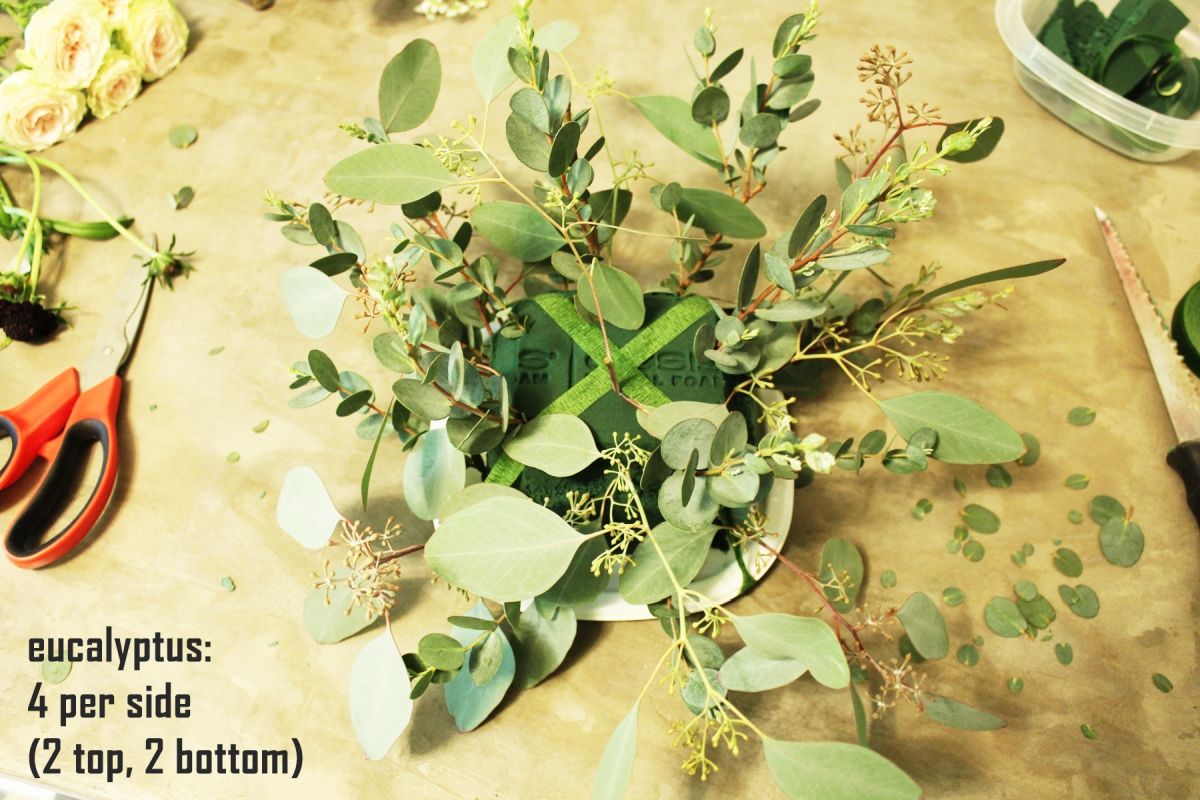
With this second, slightly smaller, foliage, place about two stems per lower side of your floral foam, then two more per side on the upper sides. A good rule of thumb in creating a flower bouquet is to angle the lower stems downward (or outward) and point the upper stems upward.

Then beef up the top of your floral foam a little by adding about four more of your second foliage around the top.

Space the foliage evenly, but don’t fill it in too tightly in this step.

Even after adding all the foliage, you’ll still want to be able to see plenty of your floral foam. You need to be able to place your flowers strategically, with plenty of options.

Now it’s time to start adding your flowers. Choose your largest blooms first. Trim the stem to about 4”.

Always cut the stems with sharp, clean floral scissors or razor blade, and always cut them at an angle.

Depending on how many of the first (largest) flower you have, evenly space these around the base and top of your floral foam.

Then move onto your next largest flower and do the same. You’ll get a feel for balance as you go, but try to rotate your shallow bowl to see the flower bouquet from all angles as you arrange it. Remember that this needs to look good from every side.

Mist the flowers and floral foam occasionally, depending on how quickly you get to them. They wilt quickly without water (which makes the stems very hard to insert into the floral foam).
Finish placing your main flowers, then move onto your filler flowers.

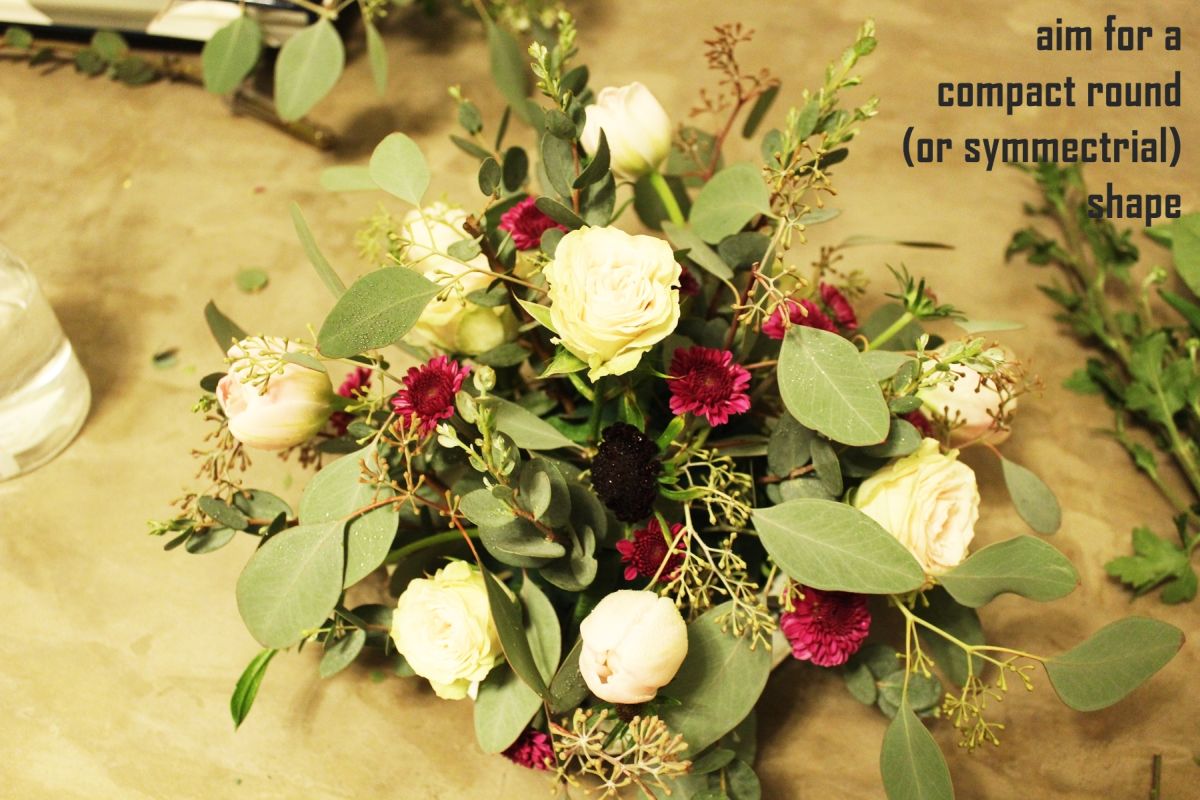
Remember to view your arrangement from all possible angles (even above and below), aiming for balance and tight symmetry.
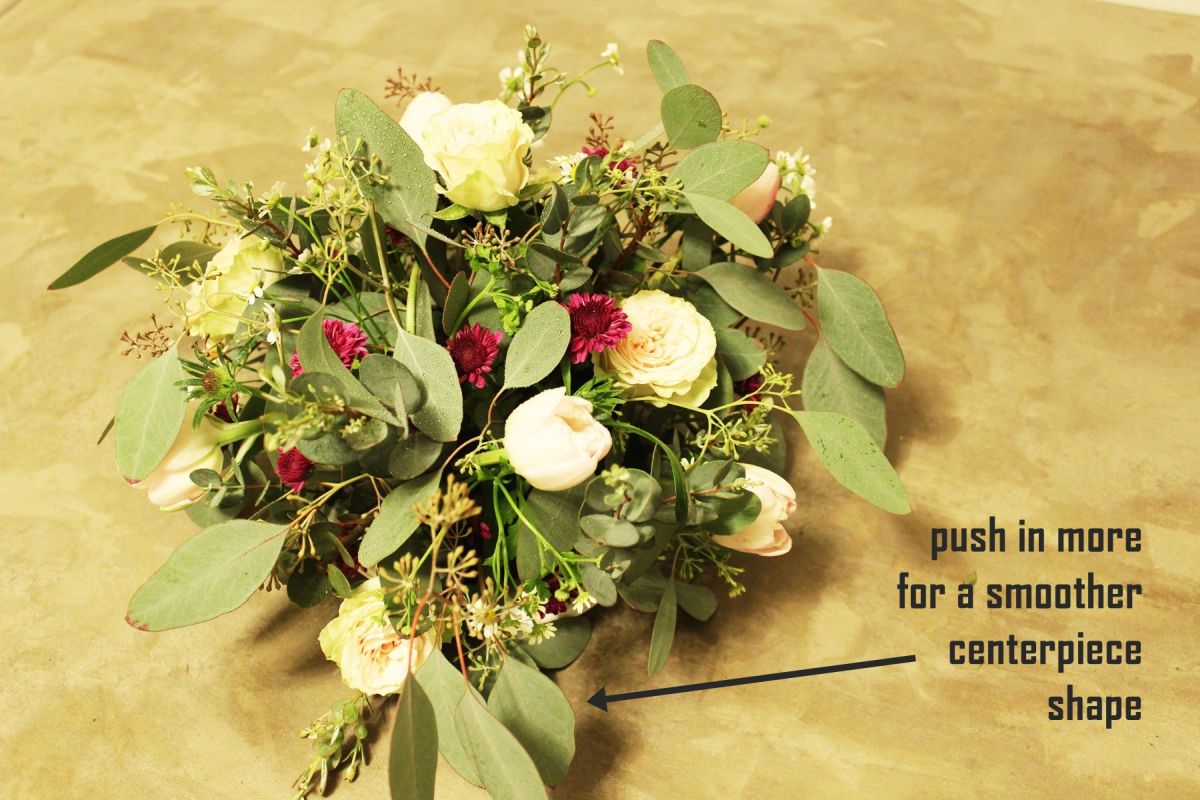
This seeded eucalyptus foliage creates a bit too much variation from the desired shape, so it was pushed in about an inch, which changed the look nicely.

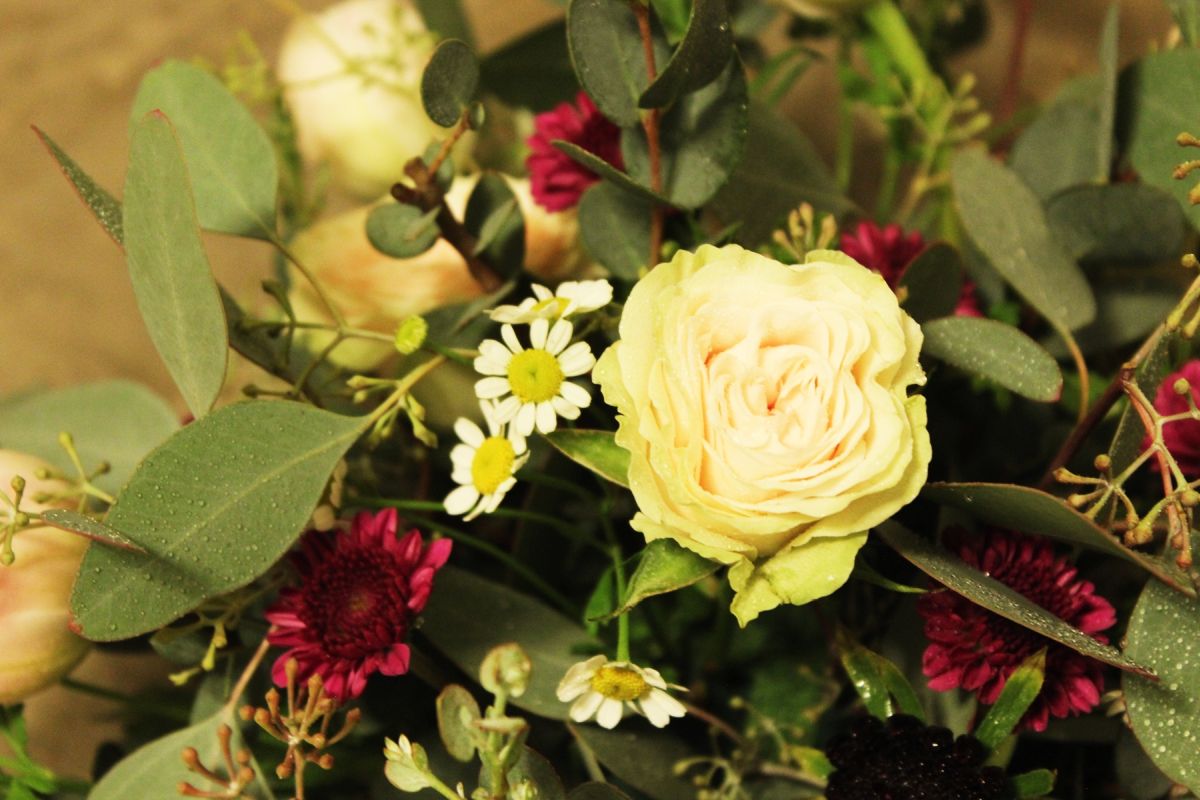
Even with tight symmetry in your flower bouquet, if you like a slightly more natural look, consider choosing filler flowers that are quite delicate and a little wispy. Keep the color scheme contained, but vary the size and texture of your flowers in order to achieve au natural.

Also, even with a pretty tight color scheme, it’s always good to provide a little bit of contrast. Go much lighter or much darker with just a couple of your blooms for some beautiful floral contrast.
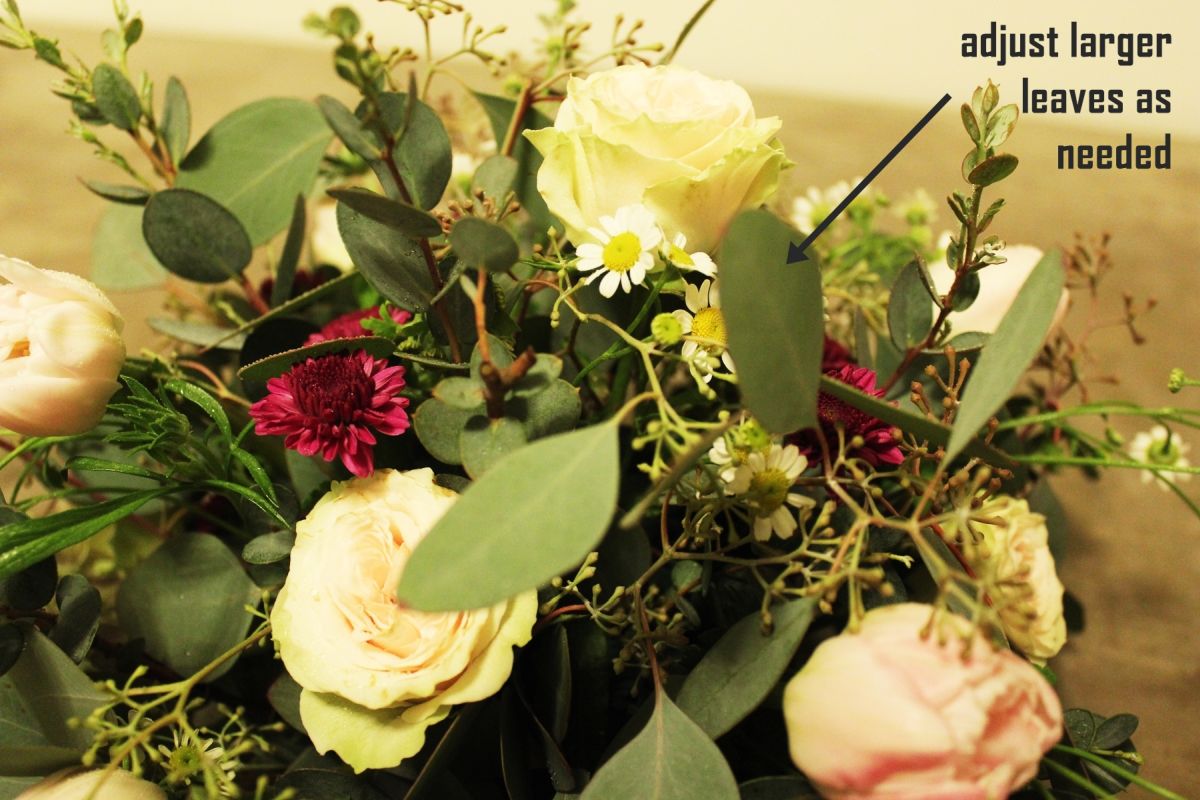
While you might not want to precisely place every single component (or, at least, you don’t want it to look like you’ve placed them precisely), you probably want to emphasize the beautiful blooms in your flower bouquet. This might mean strategically moving or removing some of the foliage as you go. Keep in mind, however that it is not recommended that you reuse the same stem hole in the floral foam more than once.

Don’t be afraid to trim your foliage as you see fit. You can also use the lower parts of your eucalyptus stems (and other foliage types), even if you’ve cut off the tops, because of the fulness of the leaves. Eucalyptus is the best.

When you’ve got your flower bouquets how you want them, be sure to mist again and set the piece out to be seen! That’s the best part of a DIY project like this; enjoy it completely while you can.
Fresh flowers don’t last forever, obviously, but they are absolutely lovely while they’re out. Happy DIYing!