Faux Painting 101: Tips, Tricks, and Inspiring Ideas for Faux Finishes

Faux painting can be a tricky business. The idea of “faux” in front of anything means that it’s a fake, a copy, a tacky-ish version of the real thing. While it’s untrue that “faux” things are always inferior to the real deal, it’s important to take care in creating a beautiful finished product. Faux painting finishes in home décor are no exception to this rule. Do it the right way to get results you’ll be proud of.

Ultimately, faux painting (or faux finishing) is a term used to describe a decorative paint finish that replicates the appearance of another material. Marble, wood, and stone are common materials to be replicated with faux finishing.

We’ve put together this general guide to faux painting and faux finishes on the interior surfaces of your home. In most cases, paint or glaze is used for a unique, stand-out effect. We hope you find the information useful.
Concrete-ing.

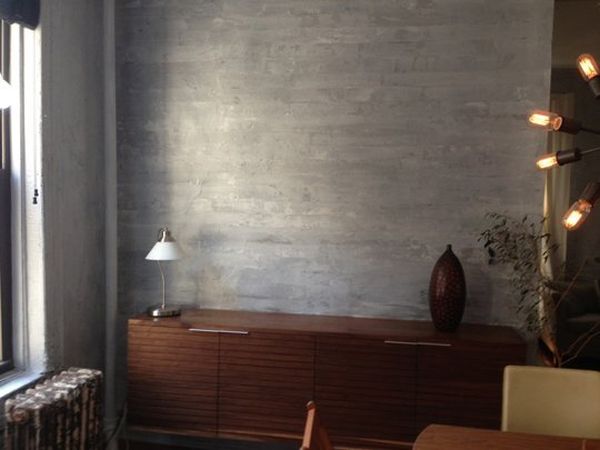
(Yes, that is a made-up word. It means, “Painting a Concrete Faux Finish.”) For a soft, contemporary look and feel to your faux-finished walls, consider replicating the look of concrete by following this full tutorial. In a nutshell, the process involves random yet strategic incorporations of white, grey, and black paint and glazing with a 9-inch plaster blade.
Graining.

With faux bois being a recent hot trend in interiors, graining might be the way to go in faux finishes. Purchase a graining tool (specially designed for creating a wood-grain finish), then drag it gently down or across a wet glazed or painted surface. Be sure to rock the graining tool as you go in random, varied spots, to mimic the natural course of wood grain.
Strie Painting.

Strie is a faux finish painting technique that is used to create soft streaks of color. When the streaks are drawn onto the wall paint, the final effect is something soft that resembles fabric. Apply a paint/glaze combo using a roller and vertical strokes, then drag a long-bristled brush carefully down through the paint/glaze.
Sponging.

The use of a sponge in faux painting has been around for years; it’s a staple in the faux finishing world. Lightly dip a dry sponge into the paint and gently push it onto the surface you’re working with. The key to sponging is to do multiple layers, each very light, to build up to the color density you’re after. You want the sponged colors to be as even as possible across the entire surface. Consider using slightly different shades of the same color for a subtle depth in your finished faux surface.
Denim Painting.

Use the shade of indigo that speaks to you (read: your favorite jeans color) or similar to create a denim effect on your walls. Brush in vertical and horizontal strokes to mimic the cross-stitching of denim for a funky, modern twist on faux finish painting.
Bricking.

Create the illusion of bricks on any surfaces by faux painting them on. (This technique could come in handy for a charming patio finish or an “exposed” brick wall, if that’s your thing.) Use a serrated kitchen knife to cut a few synthetic sponges into a brick shape and size, then space and glue them onto plywood. Use a roller to paint brick-colored paint onto the stamp sponges, the press onto surface. Repeat until surface is covered in “bricks.”
Ragging.

Crumple a damp cloth (or a plastic or paper bag), then press it randomly into the wet glaze or paint on your wall to create a streaked faux effect. Be sure to rinse or swap out the glaze-soaked rag regularly.
Rag-rolling.

Crumple a rag, then roll it into a worm-like shape. Roll it down the painted or glazed wall surface for a subtle faux effect. For more drama, try adding the paint or glaze onto the rag itself before rolling on the wall. (Note: In this photo, shale blue was rag-rolled on top of a Baltic green base, then antique glaze was sponge-rolled over both.)
Marbleizing.

Real marble is the crème de la crème, of course, but if you aren’t in a position to have Carrera marble or something equally beautiful, consider painting a realistic faux version. This step-by-step tutorial provides photos and tips for achieving a high-end look with just a few careful strokes of paint.
Leathering.

Similar to rag-rolling, recreate the luxe look of leather on your walls with chamois. Start by painting the base color on the walls, then roll and tie several pieces of chamois together. Apply glaze onto the wall over the base coat by rolling the chamois gently. The soft texture of chamois results in the soft, mottled look reminiscent of distressed leather.
Stippling.

Get your hands on a stippling brush (it’s a brush that’s specially designed for faux finishing, typically with stiff, short bristles), then push the ends of it onto your wet glazed or painted surface. This creates a very subtle, finely textured, almost soft faux finish. Be sure you don’t drag the stippling brush; only use an up-down movement for best results.
Stenciling.
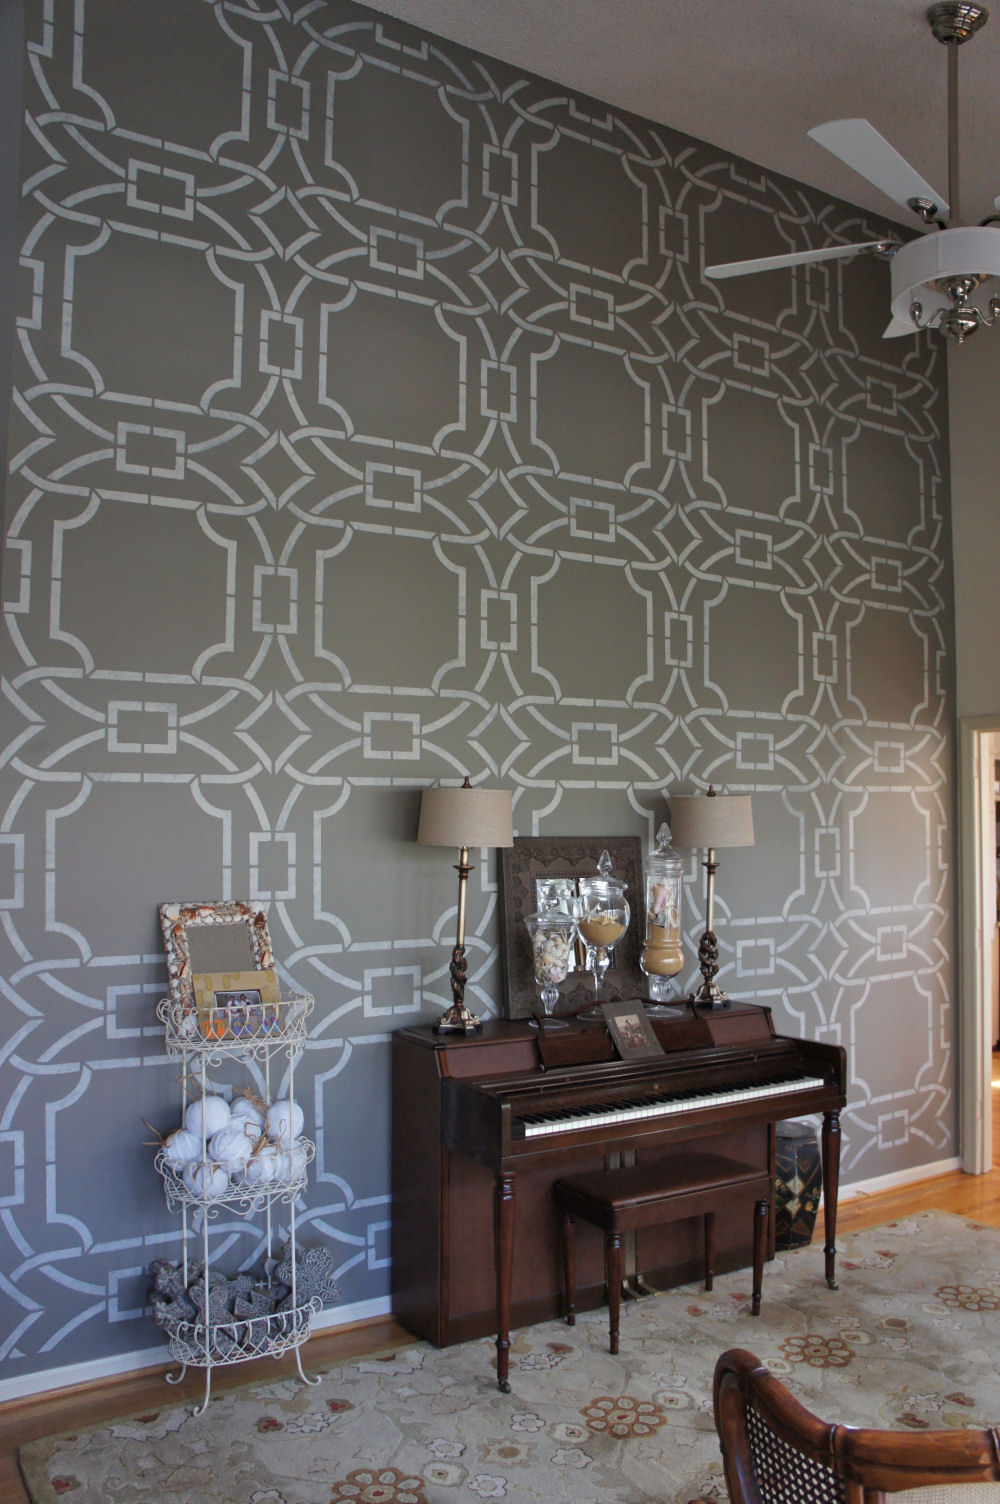
Use painter’s tape to attach the stencil of your choice to the surface you’re faux finishing. Using an up-down (or, rather, in-out for a wall) motion, apply your paint with a stenciling brush. Remove the stencil when paint is still wet, and attach it to the next spot, using a level if necessary to keep things squared up. Repeat.
Plastering.
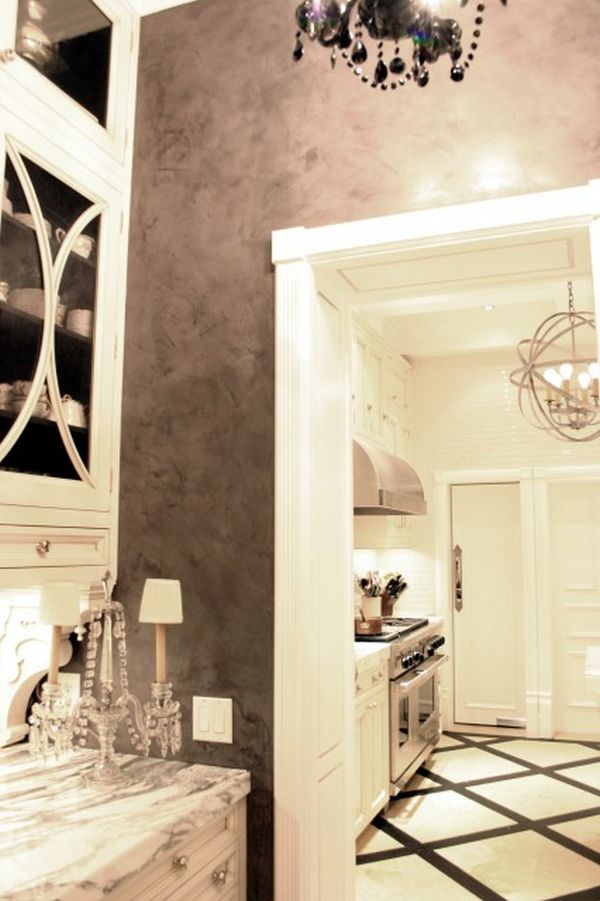
Spread plaster of Paris (or Venetian plaster) with a putty knife over your surface to create thicker texture, then use paint and/or glaze to emphasize the texture gradients. This is a lovely way to recreate an Old World feel on walls and ceilings.
Distressing.

Also known as “shabby chic,” distressed finishes have had quite a loyal following over the past several years. When you’re looking to use distressing in your faux finish, consider where the natural wear and tear would be on the space. Often, the edges, sides, or handled areas would see the most distressing over time. After painting in your chosen color(s), lightly sand these areas down until you achieve the desired effect. Finish it off with stain, wax, or another protective coating.
Dragging.

If you like the look of seagrass wallpaper, you might have good luck with the faux finish dragging technique. Hold a dragging brush (specially designed with long bristles) at a low angle, then pull it down or across the glazed or painted surface in long, smooth strokes. The final result is a horizontal or vertical coarse-lined, textured finish.

Have you seen any other faux finishes that you’ve loved? How about this faux finish on painted silver leaf paper?