How To Build A Mason Jar Lamp


In the spirit of saving our planet, let’s talk about how to make a mason jar lamp using only recycled materials.

Whether you’re looking for a new addition to your bedroom’s decor or want to save the planet one mason jar at a time, this guide will walk you through each step of the process of how to make a lamp out of a mason jar.
The best part: it doesn’t require any special equipment or skills— with a few key materials close at hand and a little elbow grease you’ll be lighting up your mason jar in no time!


Materials you’ll need for your DIY mason jar lamp:
- 1/2 Gallon Mason Jar
- Painter’s Tape
- Pen
- Electric Drill
- 1/4″ or 1/2″ Glass Drill Bit
- Pocket Knife
- Acrylic Paint
- Paintbrush
- Make-A-Lamp Kit
- Screw Driver
- Lampshade
- All purpose Glue (Optional)
How To Make A Lamp Out of a Mason Jar: Step-by-Step Guide
There are actually tons of ways to make a lamp out of a mason jar. You can make a mason jar oil lamp, mason jar floor lamp, or even simply put a candle inside of it.
But in this project, we’re going to deep dive into how to make a DIY mason jar table lamp.
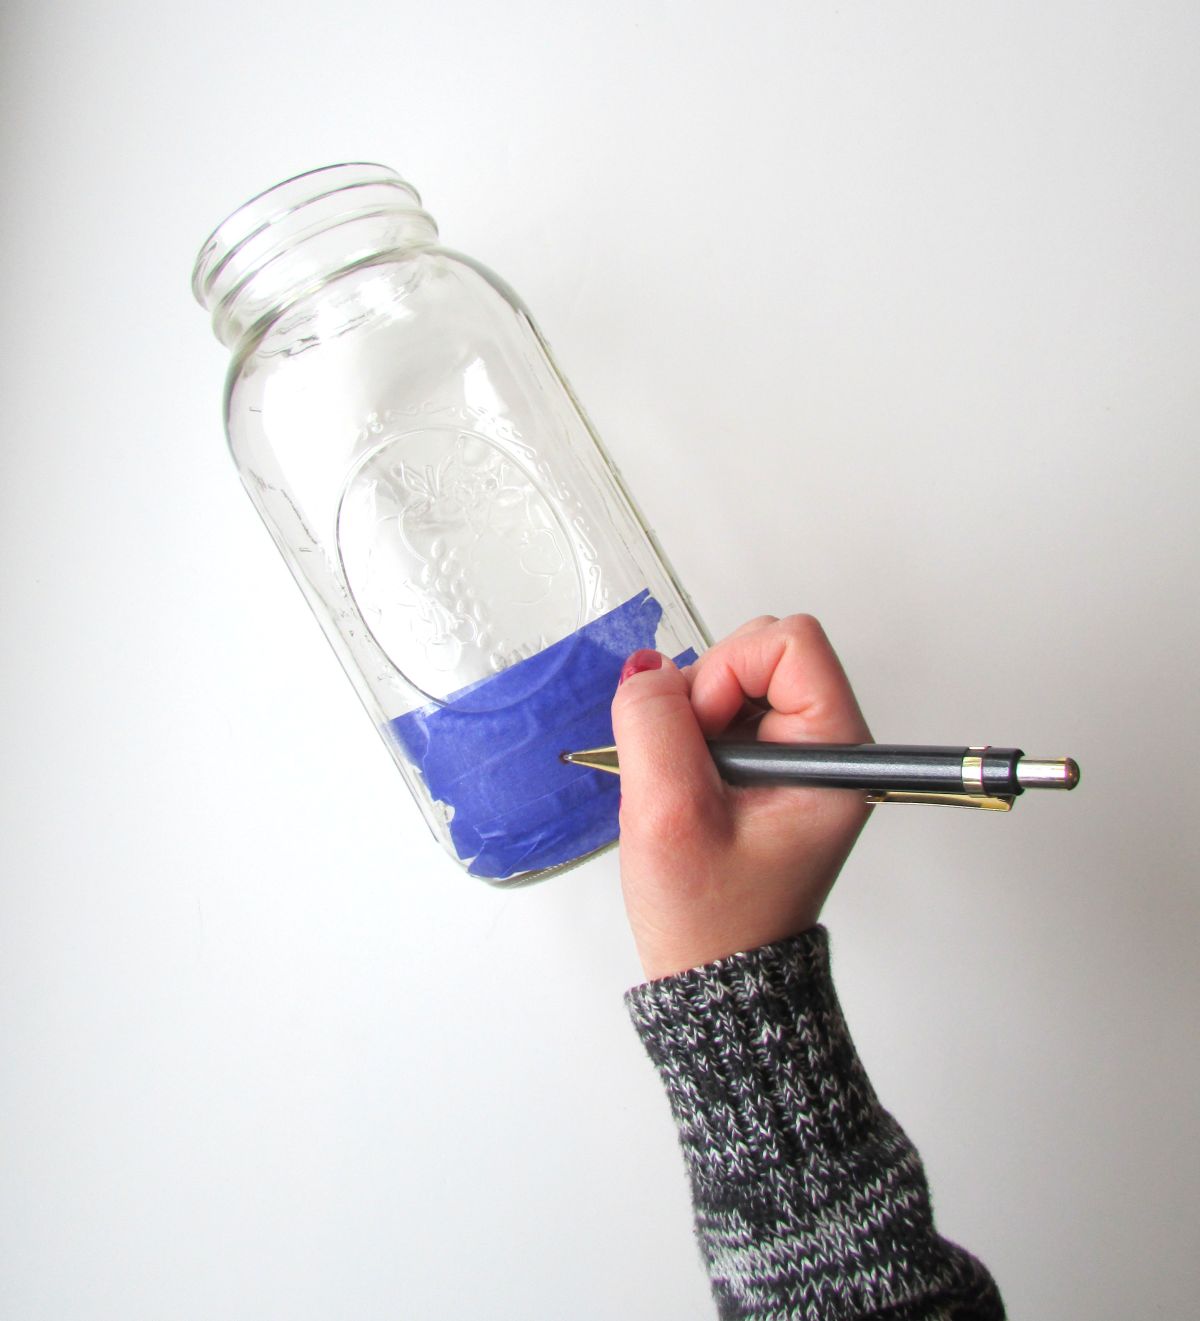
Step 1: Wasi tape and paint
Apply painter’s tape to both the inside and outside of the Mason Jar on what will be the backside of your lamp.
Mark the location where you’d like the cord to protrude from.
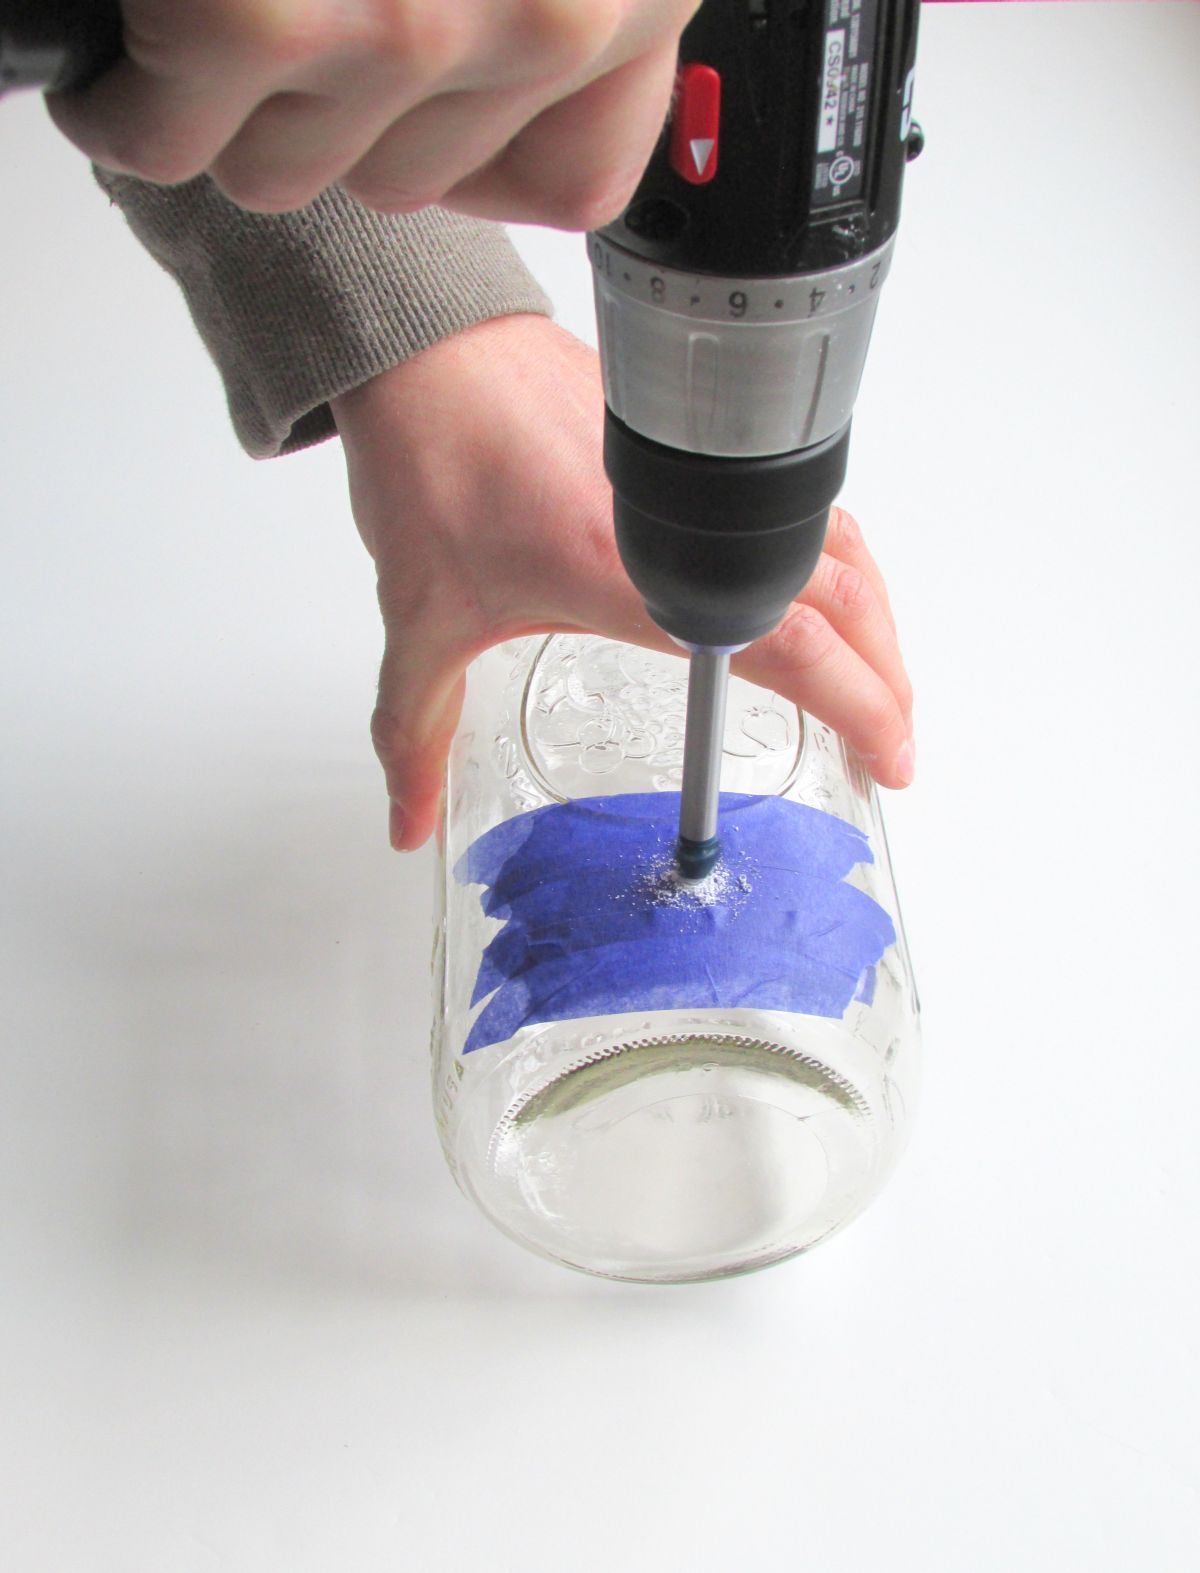
Step 2: Glass drilling
Using an electric drill fitted with a glass drill bit, drill a hole in the location you marked in step 1.
The trick is not to apply too much pressure while drilling down, just let the drill do the work.
Related: 19 Ingenious and Practical Mason Jar Crafts and Transformations

Step 3: Apply a fresh piece of painter’s tape
Once the hole is drilled, remove the painter’s tape on both the inside and outside of the jar, and apply a fresh piece of tape over the hole.


Step 4: Acrylic paint inside
Paint the inside of the jar with acrylic paint and allow it to dry thoroughly.

Step 5: Lid hole
Use a pocket knife to create a rough opening on the center of the lid just large enough to fit the threaded “nipple” (that comes with your DIY mason jar lamp kit).

Step 6: Prepare Wire
Thread the wire end of the lamp cord through the hole drilled in step 2.
Pull through the mouth of the jar.
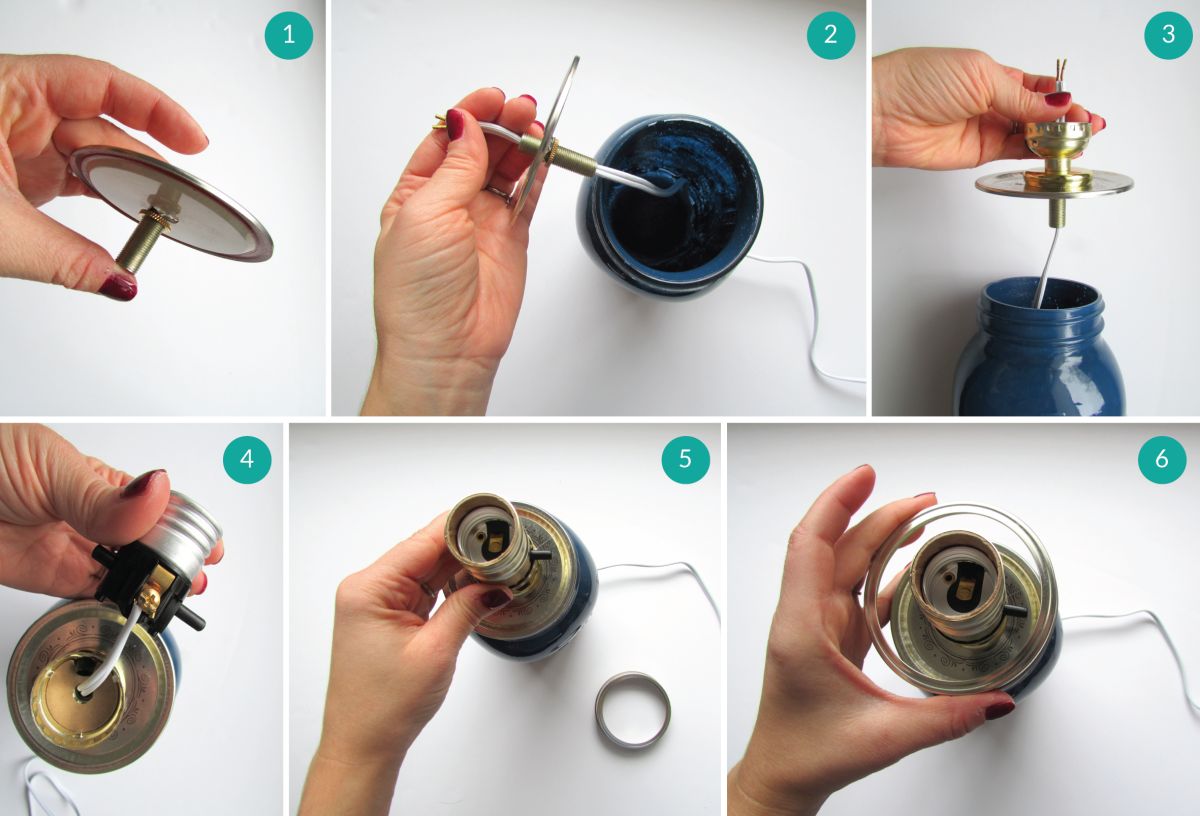
Step 7: How to assemble the mason jar lamp parts/hardware
Assemble the lamp hardware according to the manufacturer’s instructions. Here’s a quick rundown:
- Push the threaded “nipple” through the underside of the jar lid until the lid rests on the locknut. If desired, secure on the underside of the lid with a ring of all-purpose glue (optional).
- Thread wire through the “nipple”.
- Thread the check ring onto the wire, followed by the socket cap, placing them on top of the jar lid.
- Connect the ribbed wire to the silver screw and the non-ribbed wire to the gold screw on either side of the socket, by wrapping the exposed portion of the wire around the neck of the screw, and tightening the screw into the socket to secure.
- Place the socket shell onto the socket and secure it into the socket cap.
- Place jar ring onto the jar and tighten.

Step 8: Add socket
Screw a lightbulb into the socket and plug the lamp in to make sure it works (!!).
Top with a small- to medium-sized lampshade and voila!


Frequently Asked Questions (FAQ)FAQ
Can you use a mason jar as a light fixture?
You sure can! And it’s easier than you might think.
Mason jars are one of the easiest things to re-purpose and recycle. You can use them for basically any kind of project. You can actually turn those used mason jars into pendant lights, lamps, chandeliers, and lots of other great things like a DIY mason jar oil lamp.
What kind of lights can I put in a mason jar?
You can put all kinds of lights into a mason jar, but the most common are fairy lights, small LED light bulbs that resemble the original Edison light bulb, glow-in-the-dark LEDs, and twinkle lights.
And if you’re looking for something that adds a little bit more calming vibes, you can also put small candles inside your mason jar or even create mason jar oil lamps if you don’t have any candles or lights available at hand.
What size lampshade do I need for a mason jar lamp?
The size of the lampshade you need depends on the size of your mason jar lamp, and vice versa. A jar with a wide opening will look best with a wider mason jar lamp shade. But if you’re working in a small space, or if your DIY mason jar lamp is fairly small, you may want to choose something more narrow.
How do I make a mason jar lampshade?
There are a variety of ways to create a mason jar lamp shade and some of the common shade materials being used include paper, plastic, and metal. The easiest way to create one is by covering a lampshade frame with your choice of fabric. You just need to have sturdy lampshade rings, molding stick, tacky lampshade glue, and your fabric of choice lined with styrene on the inside.
How much do mason jar cost?
The average cost of an 8-ounce mason jar is $1.00 but if you want to save money, you can just opt for used mason jars.
Are Ball jars and mason jars the same thing?
Ball jars and mason jars are essentially the same thing. They’re just different names for the same thing—specifically, canning jars.
Conclusion
Did you enjoy making your own mason jar lamp? We sure hope so!
We know that working on a DIY project can sometimes be frustrating and messy. But when you’re done, it’s so satisfying to look at your work of art and say, “Yes! I did it!”
This is the feeling that we want you to have after working on our projects.
So go ahead, and make a couple more mason jar lamps. Or better yet, try all the other DIY projects we have here on our site. We hope you had fun with this one.