Custom Picture Frames For Standout Memories
Nearly every frame in my house is secondhand. It’s not hard to find solid timber frames with intact glass panes. And even if the glass is broken or missing — there’s a fix for that.

If you’ve got a mantel that needs a few framed prints, or if you’re wanting to create a gallery wall or a salon-style living area, learning how to frame your own artwork could save you some serious cash.

I found three of these matching brass frames and knew they’d be perfect for hanging up a few small prints. This long-stitch embroidery kit image is cute, in a kitschy Australiana kind of way, so I might end up holding onto it after all! But the brass frame is the real star for me.

If you need a frame to fit a specific paper size (eg. A3 or 11” x 17”), or if you need several frames that match, it’s worth buying new. But if you’d like to learn about fixing up an old frame with new backing and matting, then come with me.
Materials you’ll need for custom picture frames:
- Old frame
- Print, poster or photo that will fit in the frame
- Matboard
- Backing board (extra matboard, archival foam-core, masonite, etc)
- Clear acetate OR a clear acrylic sheet
- X-acto knife
- Cutting mat
- Self-adhesive linen tape
- Straight-edge ruler
- Pencil
How to make custom picture frames:
Everything on this list — in particular, the matboard, clear acrylic, and linen tape — can be found at an art supply store. They’re quite useful for future crafty projects.

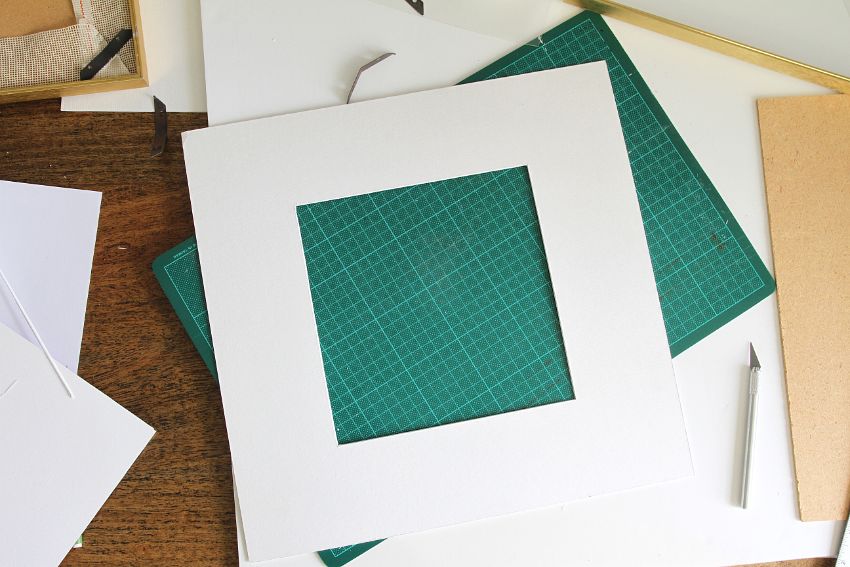
First things first: carefully remove the backing board and all other contents of the frame, including the glass. Measure the inner dimensions of the frame, mark them onto the matboard (with the straight-edge and a pencil) and carefully cut out the matboard with an x-acto knife.
Tip #1: Firmly hold down the straight edge to get a clean cut. The cleaner, the better. It may take a couple of passes to cut through the board all the way.
Tip #2: Make all your markings and cuts on the back side of the matboard.

So now you’ve got a piece of matboard cut to fit inside the frame. Great! Time to cut out the inner section, which the artwork will sit behind.

Measure the size of the artwork, and take off an inch from the horizontal and vertical measurements. This will be the size of the center hole cut into the mat. Subtract those measurements from the outer edges of the mat and divide that figure in half; this will tell you where to place your marks.

Measure and draw marks so that the artwork will be in the center, with a 1/2″ overlap from the surrounding mat.
Again, carefully cut out the matboard with the x-acto knife, running it along the straight-edge. Hooray! There’s the inner mat.

Linen tape is the standard used for archival-quality framing and conservation. It leaves artwork undamaged. It’s more costly than good old masking tape, but it’s worth it for the sake of art. You can find it at an art supply shop or anywhere with framing supplies.

I used a few pieces of linen tape to affix my print to the mat. This artwork is a screenprint by Mexican artists Niños Salvajes — I really didn’t want to wreck it with low-quality masking tape.

If you have an intact pane of glass for your frame — awesome! Give it a clean on both sides and you’re good to go.
If you don’t have glass, or want a more child-safe option, you can use clear acrylic sheeting or thinner acetate. I used thin acetate for mine because I didn’t need anything heavy-duty. Again: measure the inner dimensions of the frame, mark it onto your acrylic/acetate and carefully cut it out.
Tip #3: For acrylic sheeting, you’ll want a utility knife instead of a thin x-acto. Score the acrylic, bend it in the opposite direction and it’ll snap cleanly.

Layer everything into the frame, secure the backing board into place and that’s it! Now go forth and dress up all your decorative prints you hadn’t gotten around to framing yet — I know I’ve got some waiting for me.

The Niños Salvajes print is looking awesome in its brass frame. It’s fun to set up and switch out prints on this long timber mantel as I like.
As I said earlier, this option could be the go if you’re planning a gallery wall, or otherwise have lots of artwork you want to frame and show off!