DIY Natural and Homemade Oven Cleaner With Baking Soda And Vinegar

For many people, the thought of cleaning the oven is a bit intimidating. Even if your oven has a self-clean feature, it can be time-consuming and quite smelly. Spraying chemicals into a major food prep area may not fill your heart with joy, either.
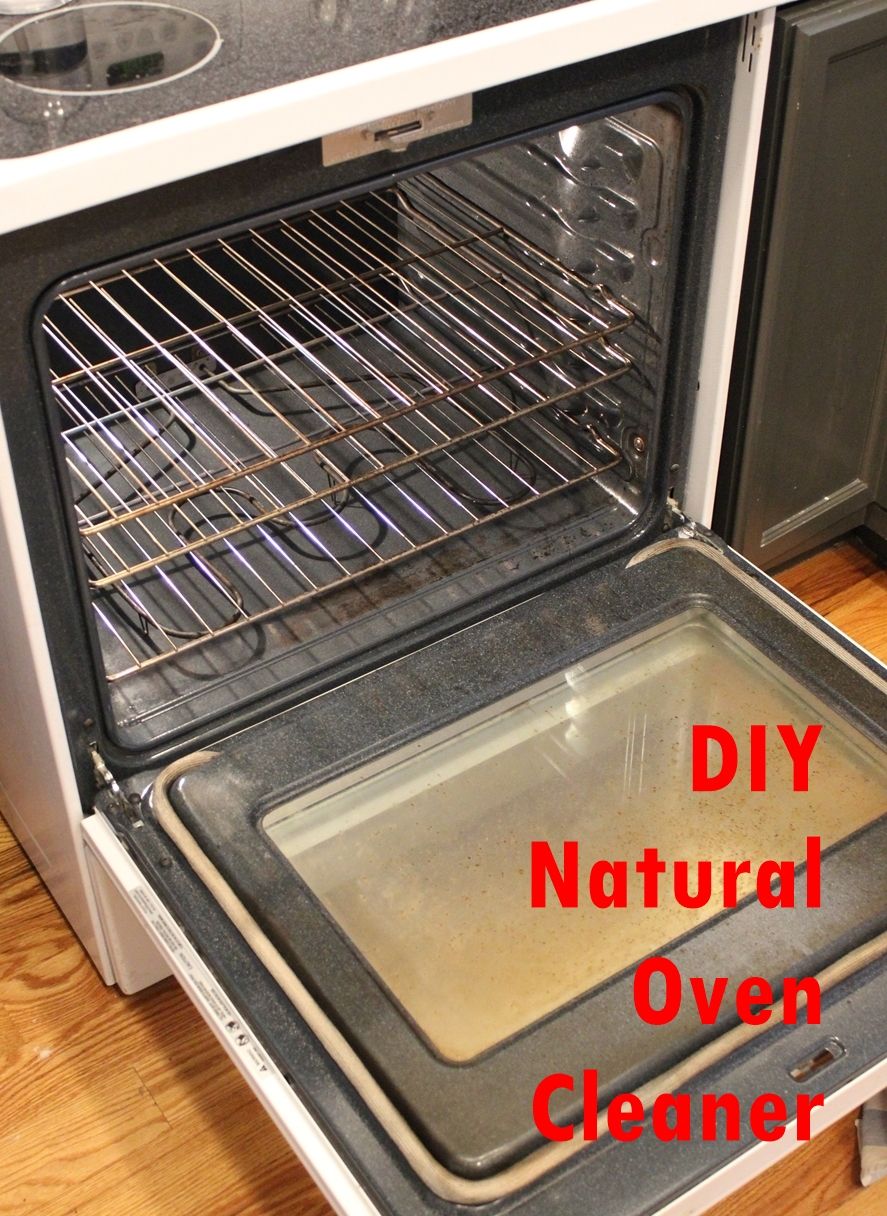
Forget about self-cleaning, and check this DIY natural and homemade oven cleaning method to get rid of unrecognizable black charred bits all around the inside of your oven. Not only is it super simple to make and food-safe, but it’s also quite an easy task. In no time at all, your grimy oven is going to sparkle.
DIY Homemade oven cleaner level: Beginner

Materials you’ll need for the oven cleaner:
- Baking soda
- Distilled white vinegar, undiluted (in a spray bottle)
- Rubber gloves
- Paper towels
The step-by-step process to prepare the homemade oven cleaner:

Step 1: Remove racks
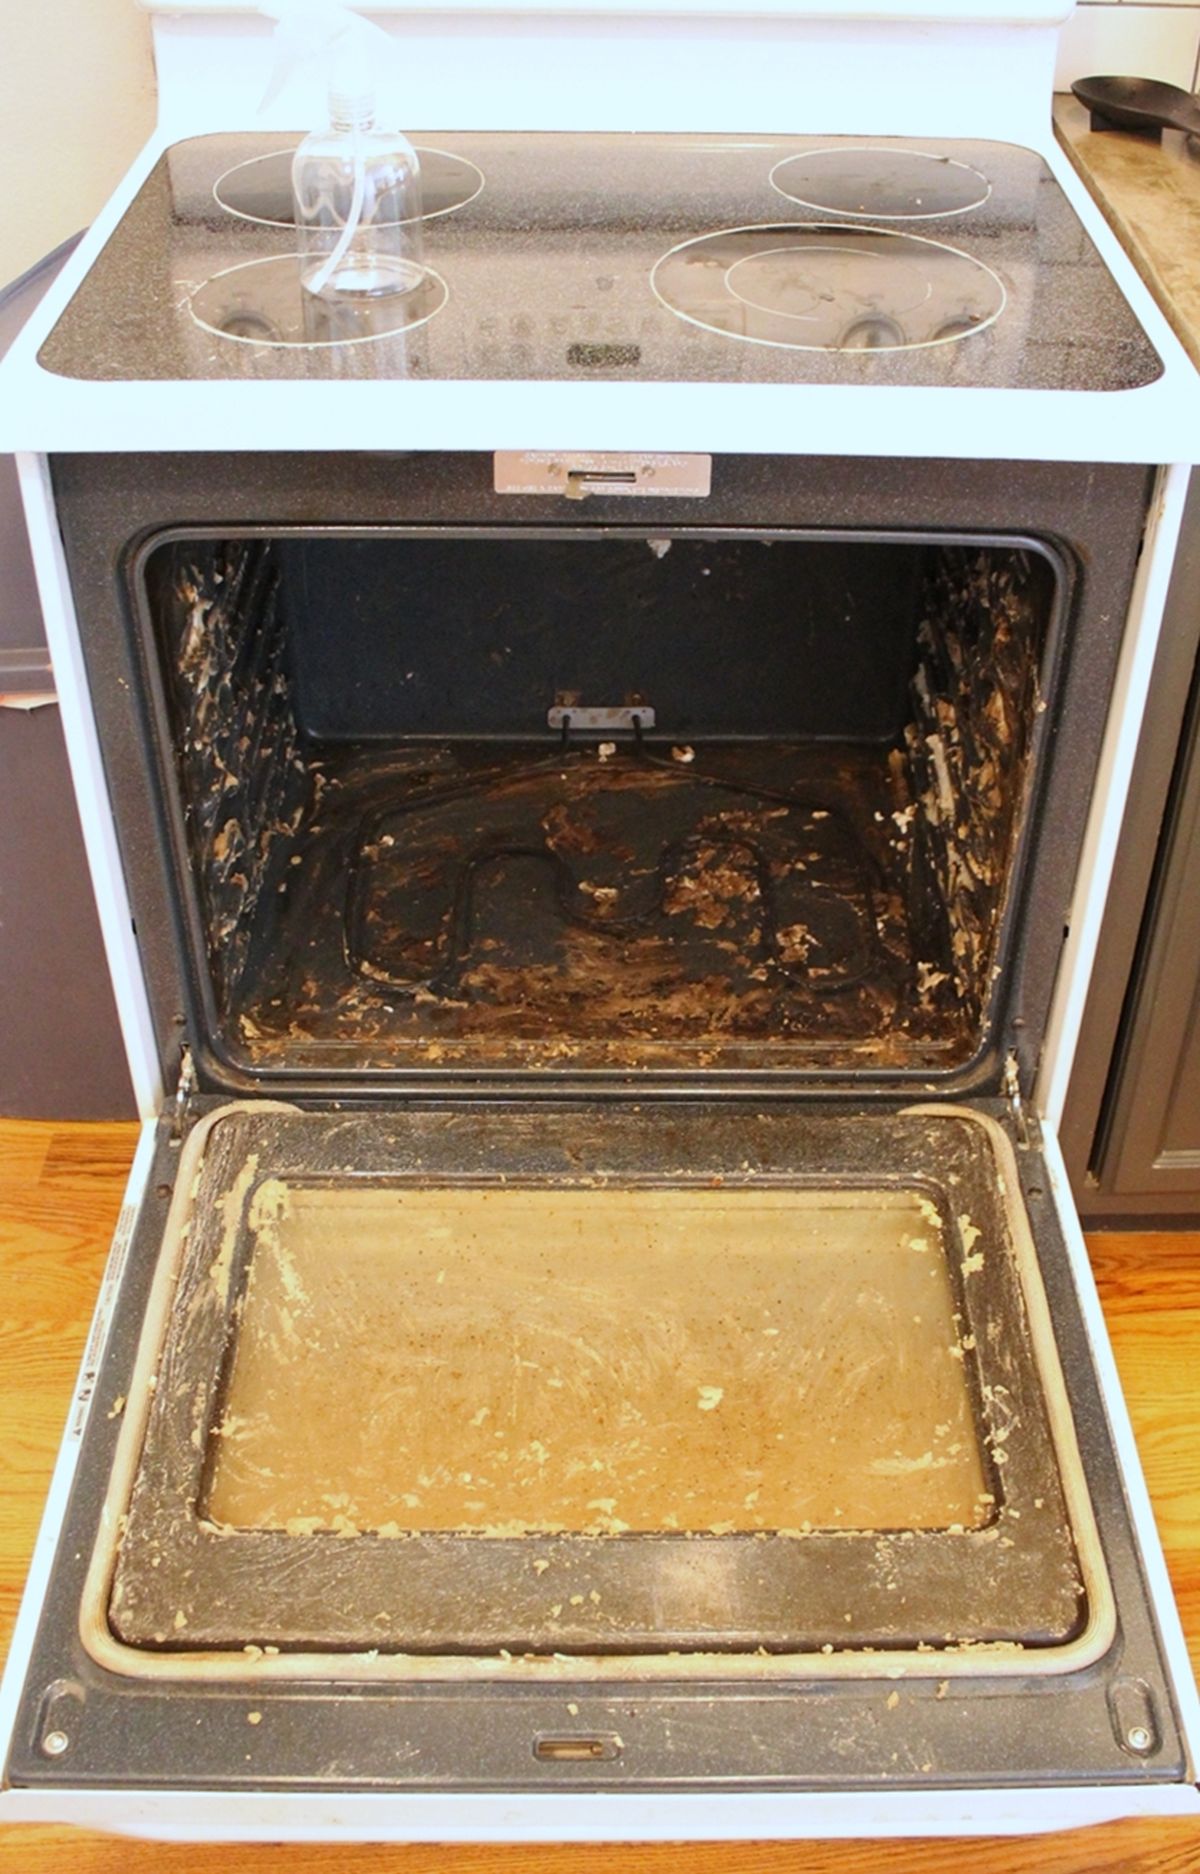
Start with a gross, grimy oven. *Note: Before you begin, recognize that your oven will be unusable for about 12 hours during this process. Plan accordingly. We recommend starting this cleaning regimen after dinner when the oven will not be needed through the night, then finish the cleaning off the next morning.

Remove the oven racks and/or any removable items that you keep inside your oven. The only things left should be the heating elements.

Removing the racks will enable you to reach all the way into your oven to apply the oven cleaner. It will also reveal just how grateful your oven is to be getting cleaned.

Step 2: wipe the oven
Wipe away excess charred bits from the oven floor. You don’t need to work hard at this; just a quick swipe of a dry paper towel to gather whatever crumbs or loose bits will suffice.

Step 3: Cleaning oven with baking soda
After you’ve “swept” the bottom of your oven, you’re ready to mix your natural oven cleaner.

Step 4: add baking soda
In a small bowl, pour in 1 cup of baking soda.

Step 5: add water
Into that soda, pour in about 3/8 cups of water, adding it tablespoon by tablespoon until you reach a spreadable paste-like consistency.

Step 6: Stir well
Stir. Adjust the soda/water by small increments as needed.

Step 7: Use rubber glove
Glob some of the soda-water paste mix onto your rubber gloved fingers, and begin spreading it all around the inside surface of your oven. (Avoid the heating elements, thought.) The paste will start to turn brown; don’t worry about this.
Step 8: Let it for 12h
Spread the soda-water paste on the interior oven sides, bottom, and door. Then close the oven door and let it sit for 12 hours, or overnight. Do NOT turn your oven on during this curing time. You could use any leftover baking soda paste to scrub your oven racks at this time if you want.

Step 9: Clean
When the 12 hours of curing time are up, grab a clean, damp (disposable) washcloth and begin wiping the paste chunks off your interior oven surfaces.
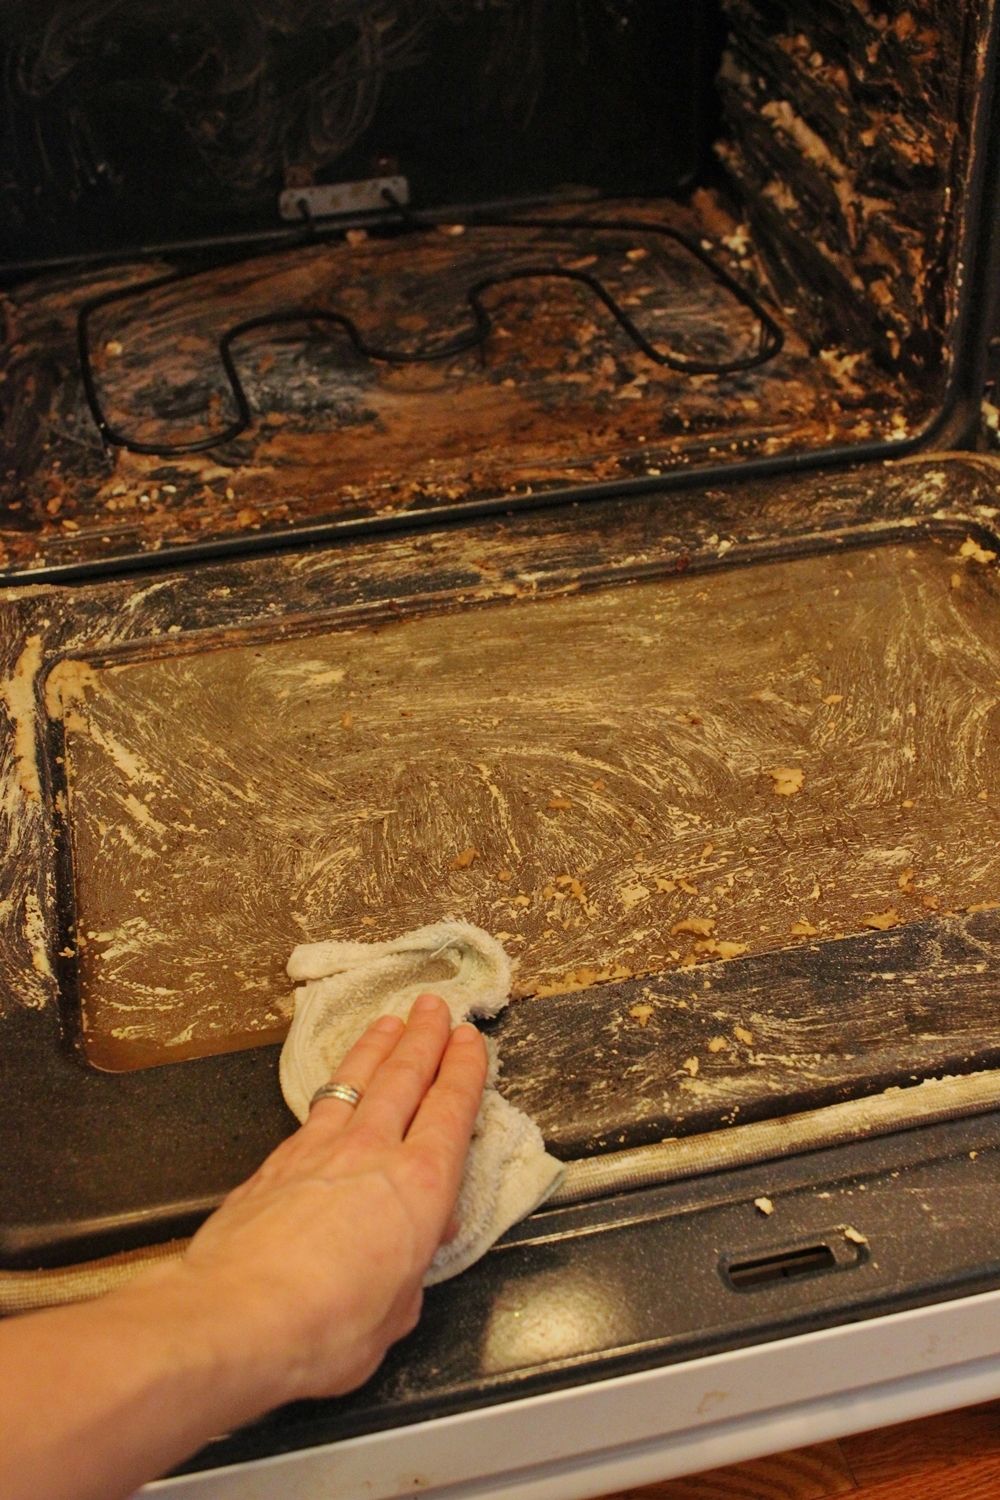
Don’t worry yet about getting things super clean; just wipe away whatever will come off easily during this first pass.

This is what the oven might look like after your first wipe down. There will still be swipes of soda-water paste, which is great for the next step.

Step 10: Add vinegar
Fill a spray bottle with undiluted distilled white vinegar.

Begin spraying, small sections at a time, the interior of the oven and door. Wipe away the vinegar and leave the area clean and residue-free this time.
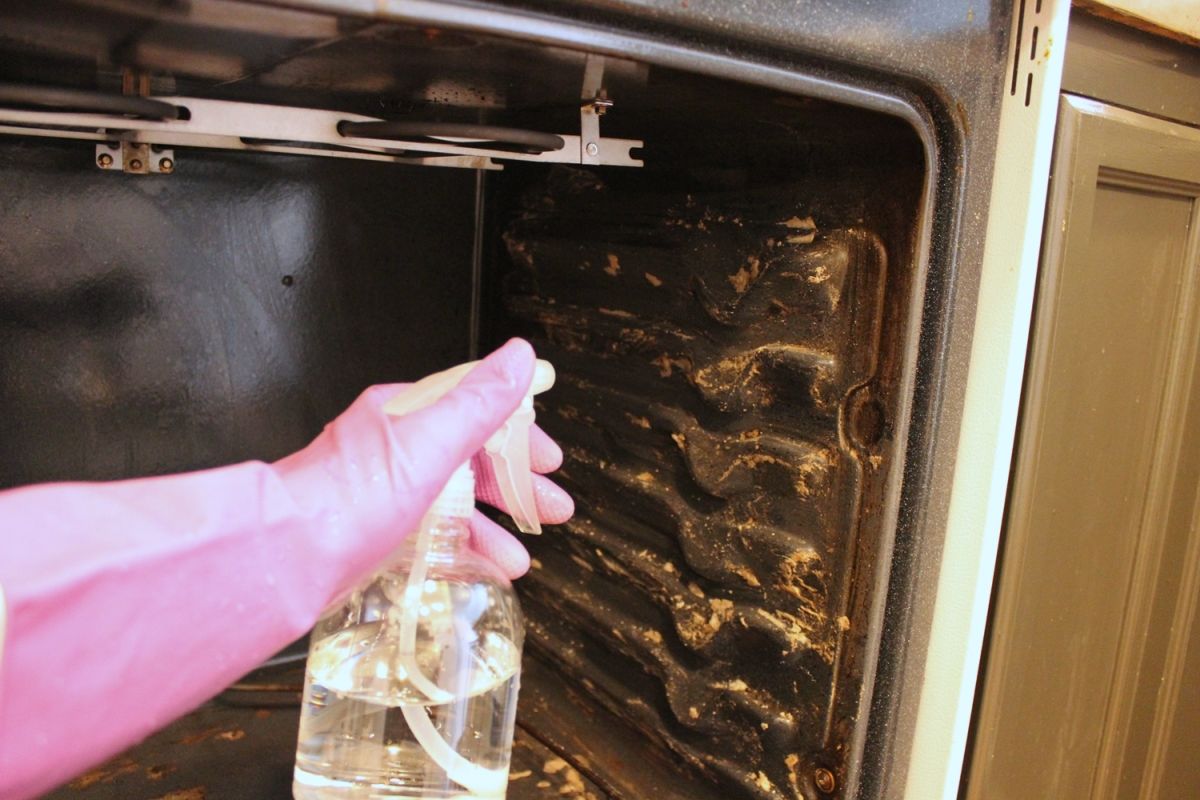
Work section by section until the oven interior is clean.

Step 11: The vinegar react
Wherever there is still soda-water paste, the vinegar will react with the soda and foam a bit. This is a great sign, you should be happy when you see this because it means the vinegar and soda are doing much of the cleaning for you!

Step 12: Remove excess of soda-water
It may take several passes with a freshly rinsed washcloth to fully remove the excess soda-water paste and vinegar, but it shouldn’t be hard to do.

And when you’re done, put the oven racks back into your now-clean oven.

Stand back to admire your handiwork. If your oven hasn’t been cleaned in a while (like the one shown in this example), some of the staining might stick around even after this cleaning. But every time you do this, every month or two, your oven will get cleaner and cleaner.

You’ve easily cleaned your oven with a non-toxic, totally food safe method…and it’s now suitable to cook and bake your delicious food items.