DIY Retro Rainbow Wooden Dresser

If you need a specific size, style, or color of dresser but are having a hard time finding it, did you know you can make one yourself? You don’t even need a bunch of fancy tools (although, I’m not going to lie, they’d sure make this project easier!). In this tutorial, I’ll show you how to build a DIY modern wooden dresser that will last for ages. You’ll need plenty of patience and precision, but once the project is done, my hope is that you absolutely love it.


DIY Level: Intermediate to Advanced

Materials Needed (all pieces were cut with a miter saw and circular saw with kreg rip cut, although a table saw would be helpful for the larger plywood cuts):
FRAME:
- 3/4″ thick project panels or 3/4″ plywood: Two (2) 16” x 50-1/4” for the sides. Three (3) 16” x 29-3/4” for the interior horizontal supports. Two (2) 16” x 8-1/4” for the interior vertical supports. Two (2) 16” x 31-1/4” for the top and bottom.
- 1×2 lumber: Four (4) cut to 29-3/4”. Four (4) cut to 21-1/2”.
DRAWERS:
- 1×6 lumber: Twelve (12) cut to 14”. Four (4) cut to 5”. Eight (8) cut to 27-1/4”.
- 1×3 lumber: Eight (8) cut to 14”. Eight (8) cut to 19”.
- 1/4″ plywood: Four (4) cut to 14” x 20-1/2”. Four (4) cut to 14” x 28-3/4”. Two (2) cut to 14” x 6-1/2”.
DRAWER FACES:
- 1×4 lumber: Four (4) cut to 21-1/4”.
- 1×8 lumber: Two (2) cut to 8”. Four (4) cut to 29-1/2”.
OTHER:
- Right angle clamp + regular clamps
- 1-1/4” pocket screws
- Ten (10) sets of 14” European style bottom corner mount drawer slides
- Wood glue
- 5/8” and 1-1/4” brad nails + nailer
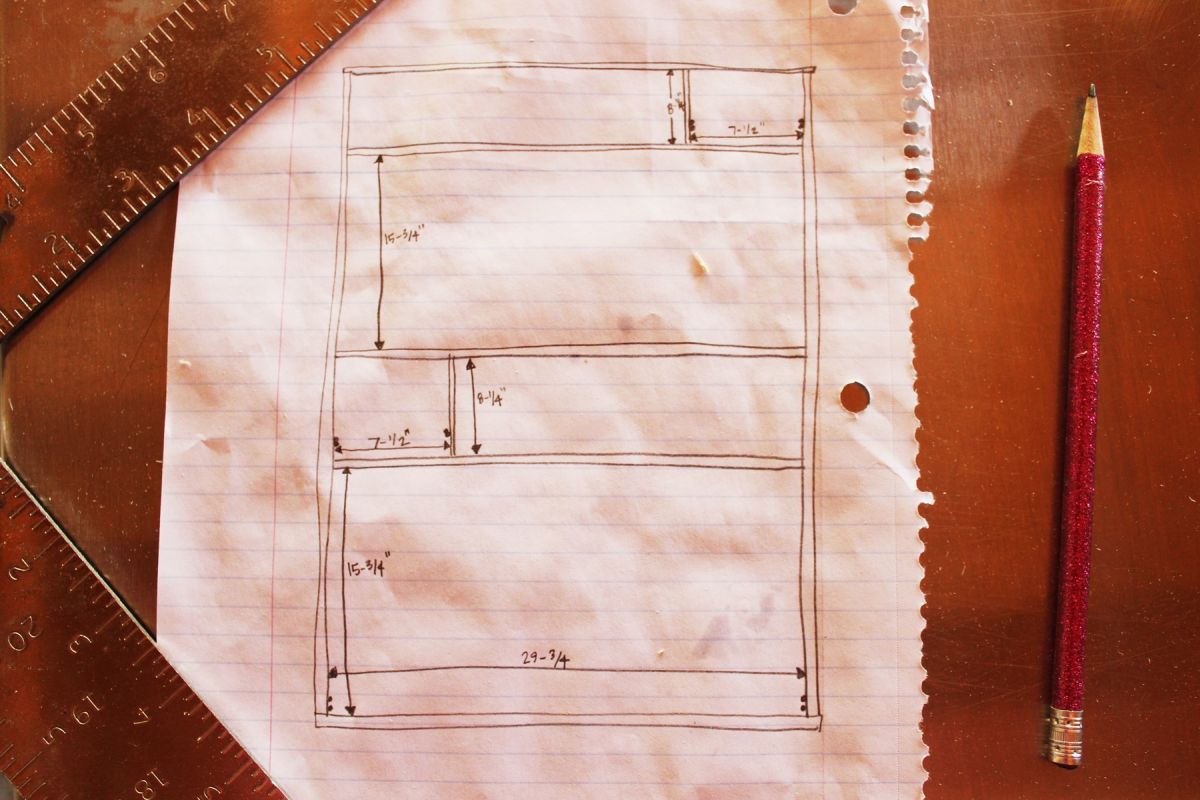
This is a sketch of the dresser frame, complete with all measurements. Use these numbers to measure and mark your dresser frame.

Take a 50-1/4” project panel, which will be one of your sides. Determine which face you want as the outside of your dresser, and which end you want to be the top. Label the corners accordingly. I promise you, it might feel silly, but the more you label, the easier (and more accurate) things will be as you begin to really get into the building process.

Now it’s time to measure and mark all the lines on your inside side panel for horizontal supports. Start from the bottom end of your side panel, and use the sketch to mark your measurements.

Tip: Be sure to measure and mark both sides of the side panel AND use a square while you draw these lines, so your drawers and supports will be level.

Make some “X”s on the top side of your line. This is to designate which side of the line to position your horizontal slabs when the time comes. Get into the habit of doing this. Measure and mark 3/4″ up from your line, which is the thickness of the panel you’ll be attaching, then measure and mark 8-1/4” up from that line. Place your Xs, then measure and mark 3/4″ up to designate placement of the panel. Measure and mark 15-3/4” up from this top line, and another 3/4″ up from that (place your Xs inside these two lines). You should have precisely 8-1/4” from your last line to the top of your side panel. If you don’t, go back and measure to figure out where the difference is. Exactness is key for building a dresser. Repeat this entire process on the inside of your second side (50-1/4”) panel.

Now take your three project panels that are 29-3/4” in length. These will be the horizontal supports for your dresser frame.
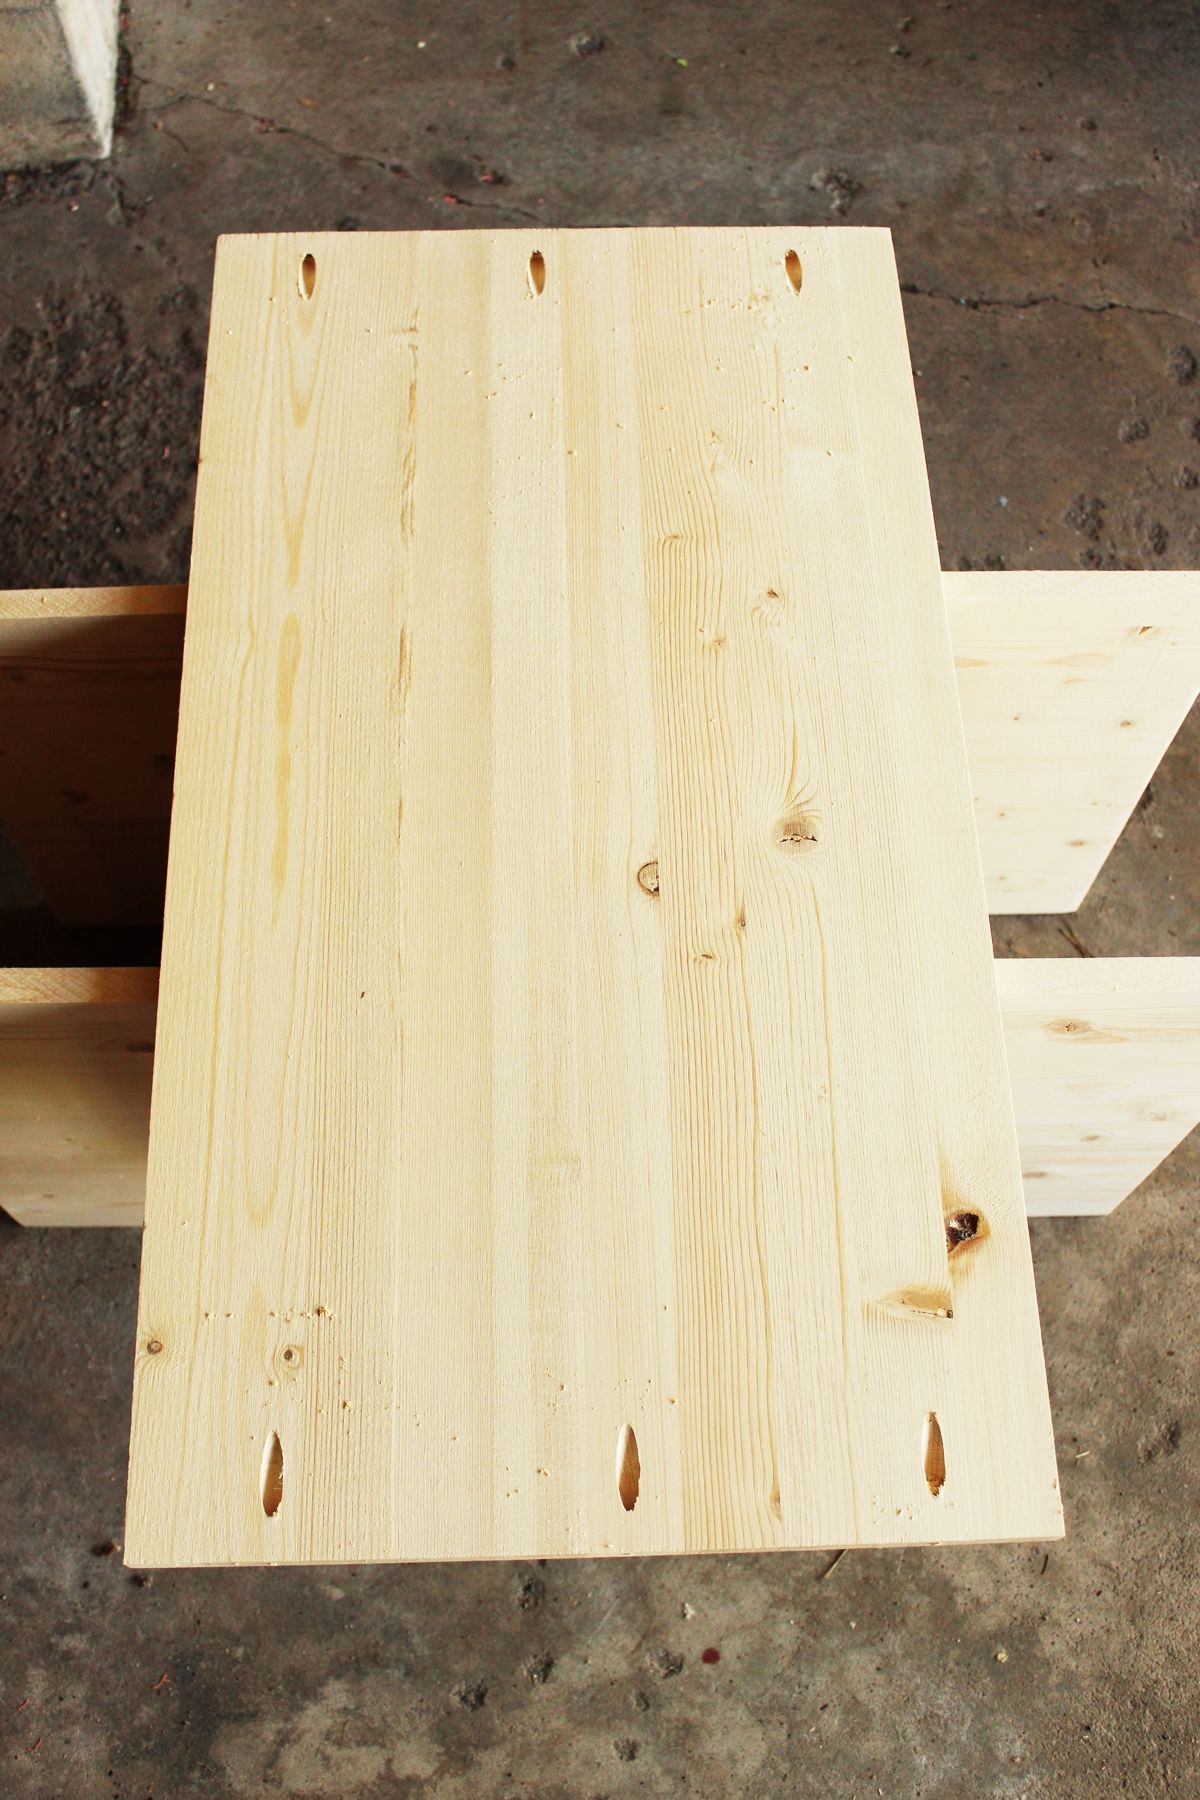
Using your jig set to 3/4″, drill three pocket holes along each end of your three panels.

Take your two smallest (8-1/4”) project panels, and repeat the pocket hole process. You’ll want the holes along the 16” side, though, NOT the shorter side on these panels.

Take one of your 29-3/4” slabs and place it pocket-hole-side-down. Measure and draw a line at 7-1/2” from one side. Mark your Xs on the far side of your line, and label which side of the board will be the front. Repeat for your other 29-3/4” slab, making sure that the two boards are mirror images when the “front” is labeled.

With the pocket holes facing the short end and with front ends aligned, position an 8-1/4” panel onto the line of your 29-3/4” slab.

The two should be perpendicular. Place a big of wood glue on the end of your small panel, then reposition.

Secure with a right-angle clamp, then attach the boards together with 1-1/4” pocket screws.

Pause everything for a minute. This next step is going to feel completely out of place, but trust me. It’s the way to go. Grab a set of your 14” European bottom corner mount drawer slides. We’re going to install a couple of the pieces now, before we move on to the rest of our dresser frame. That’s because, once the 8-1/4” square box is completely formed, it will be hard (if not impossible) to install the slides. So we’re doing it now.

Place a scrap piece of 3/4″ thick lumber at the short corner of your joint, at the front edge. Mark the 3/4” position from the front edge. This allows for your drawer faces to retract into your dresser, rather than protrude out, giving the entire dresser face a flat, contemporary look.

Using the instructions on your drawer slides, pick up the correct piece (right side) and loosely position it against the 3/4″ board or your 3/4″ line, keeping all “front” aspects in mind (on your frame and the drawer slide).

Screw drawer slide place. Tip: Keep the front end of your slide perfectly flush with your line, or 1/16” behind it. It’s better to err slightly on the side of being too far in than too far out, although I recommend precision whenever possible.

Set that aside for a minute, and take your left side (50-1/4”) panel. Remember how you marked 15-3/4” up from the bottom of the panel, and then another 3/4″ up from that line? You’re now going to use this second line (the 3/4″ one) to install the left side of your drawer slide. Place your 3/4″ scrap wood at the front end of your side panel, and mark the line.

Position the front of your drawer slide directly against the two 3/4″ lines. Screw into place.

The left side project panel will look something like this.

This next part is tricky, and admittedly not super professional. There’s no way you can attach the top horizontal support slab to the short slab with a drill at this point, because there’s just not enough head space. Instead, you can do what I did: Place the second (mirror image) 29-3/4” project panel on your workspace, pocket holes facing down. Run a little wood glue on the cut end of your short (and now attached) 8-1/4” slab. Position the gluey end onto the Xs of your 29-3/4” piece. Clamp into place with your right-angle clamp, and use a drill bit to secure 1-1/4” pocket screws by hand. Use pliers toward the end to tighten them up if you need.

Tip: Use the spare 8-1/4” slab to prop up the other end of your 29-3/4” slabs while you attach the first one.

On the non-pocket-hole side of the third 29-3/4” slab, measure and mark 7-1/2” in from the right side (after determining which side will be front). Draw your Xs on the far side of the line. Glue, then attach the second 8-1/4” slab onto the Xs. Install your left bottom drawer slide on this 8-1/4” slab (don’t forget to install it 3/4″ from the front). Your primary horizontal supports are done!

On your right side (50-1/4”) slab, on the very top line that should be 8-1/4” from the top, place your 3/4″ scrap board on the front side, draw your line, then install the right drawer slide. The interior of your two side slabs should look something like this.

(Note: If you forgot to do pocket holes on your 29-3/4” slabs, or if they accidentally ended up on the wrong side, never fear. It’s awkward, but you can drill new pocket holes onto these boards, even after they’ve been attached.)

Dill three pocket holes onto each interior end (top and bottom) of your two side panels. Be sure these are the interiors!

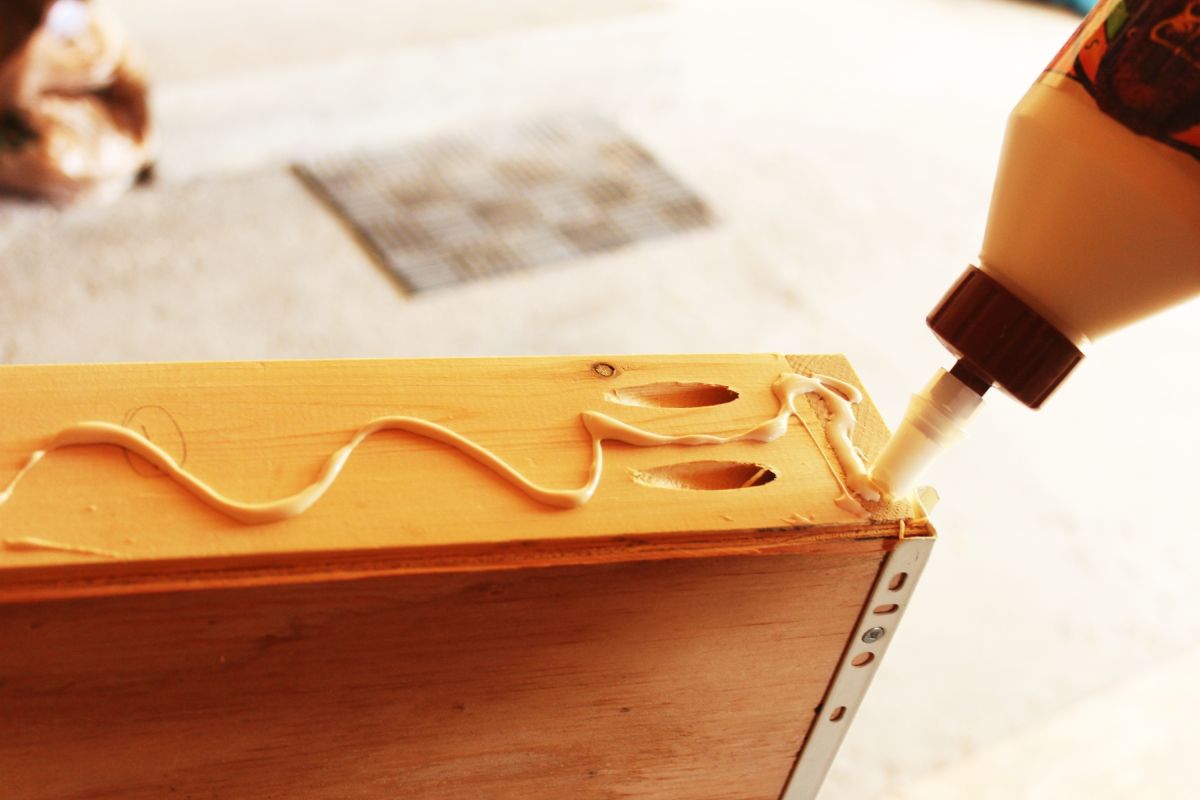
It’s time to attach the top and bottom slabs to the sides. Grab your wood glue (you can use what you’d like, but I really love Gorilla wood glue).

Run a bead of wood glue on the bottom edge of a side slab. No, it doesn’t have to be so much that it drips off the end – I was slow getting this photo snapped. Apologies.

Use the right-angle clamp to secure the side slabs on top of the bottom project panel (keeping front edges in mind, always). Attach with 1-1/4” pocket screws. Repeat for the second side panel. Tip: It’s best/easiest to have a helper with this step, to hold the larger side panels upright while you attach them.

Use a square to check for 90 degree corners, then attach the top slab onto the top edges of your (gluey) side panels in the same way.

Use a 3/4″ scrap piece of lumber to mark a 3/4″ line all the way up the front ends of both your side panels. This will make it much easier when it’s time to install all the drawer slides.

If you forgot to add Xs or mark the 3/4″ lines on your side panels, do so now.
Loosely slide your horizontal support boards into the frame, keeping in mind front ends with everything (frame and supports). Position them along your marked Xs and between your 3/4″ line spaces. You can try to glue these if you want, but I didn’t.

Align precisely, then attach all horizontal support boards through the pocket holes with 1-1/4” pocket screws. Use your right-angle clamp to hold things into place. You’ll need to repeat the hand-tightening technique for the top right square hole. Sorry.

With your support boards solidly and precisely in place, it’s time to attach the “faux” support boards. These are the 1x2s that run horizontally, in front and in back, between the drawers everywhere there’s not an actual support board.

Drill a pocket hole into the ends of each of your 1×2 boards.

Glue, position, then attach each 1×2 board in place, aligned with the front and back ends of your frame within the measured and marked 3/4″ spaces.

Pocket holes can face up or down, it doesn’t really matter because they won’t be visible once the drawers are installed.

Check for 90 degrees and level after every install; it’s much easier to change something now than it is later on, when everything’s intact and in place.

Carefully flip your frame up or down or sideways when you’re installing the 1x2s. I found it easiest and more reliable to be screwing downward, so I chose to lay the frame on its side when installing the pocket screws.

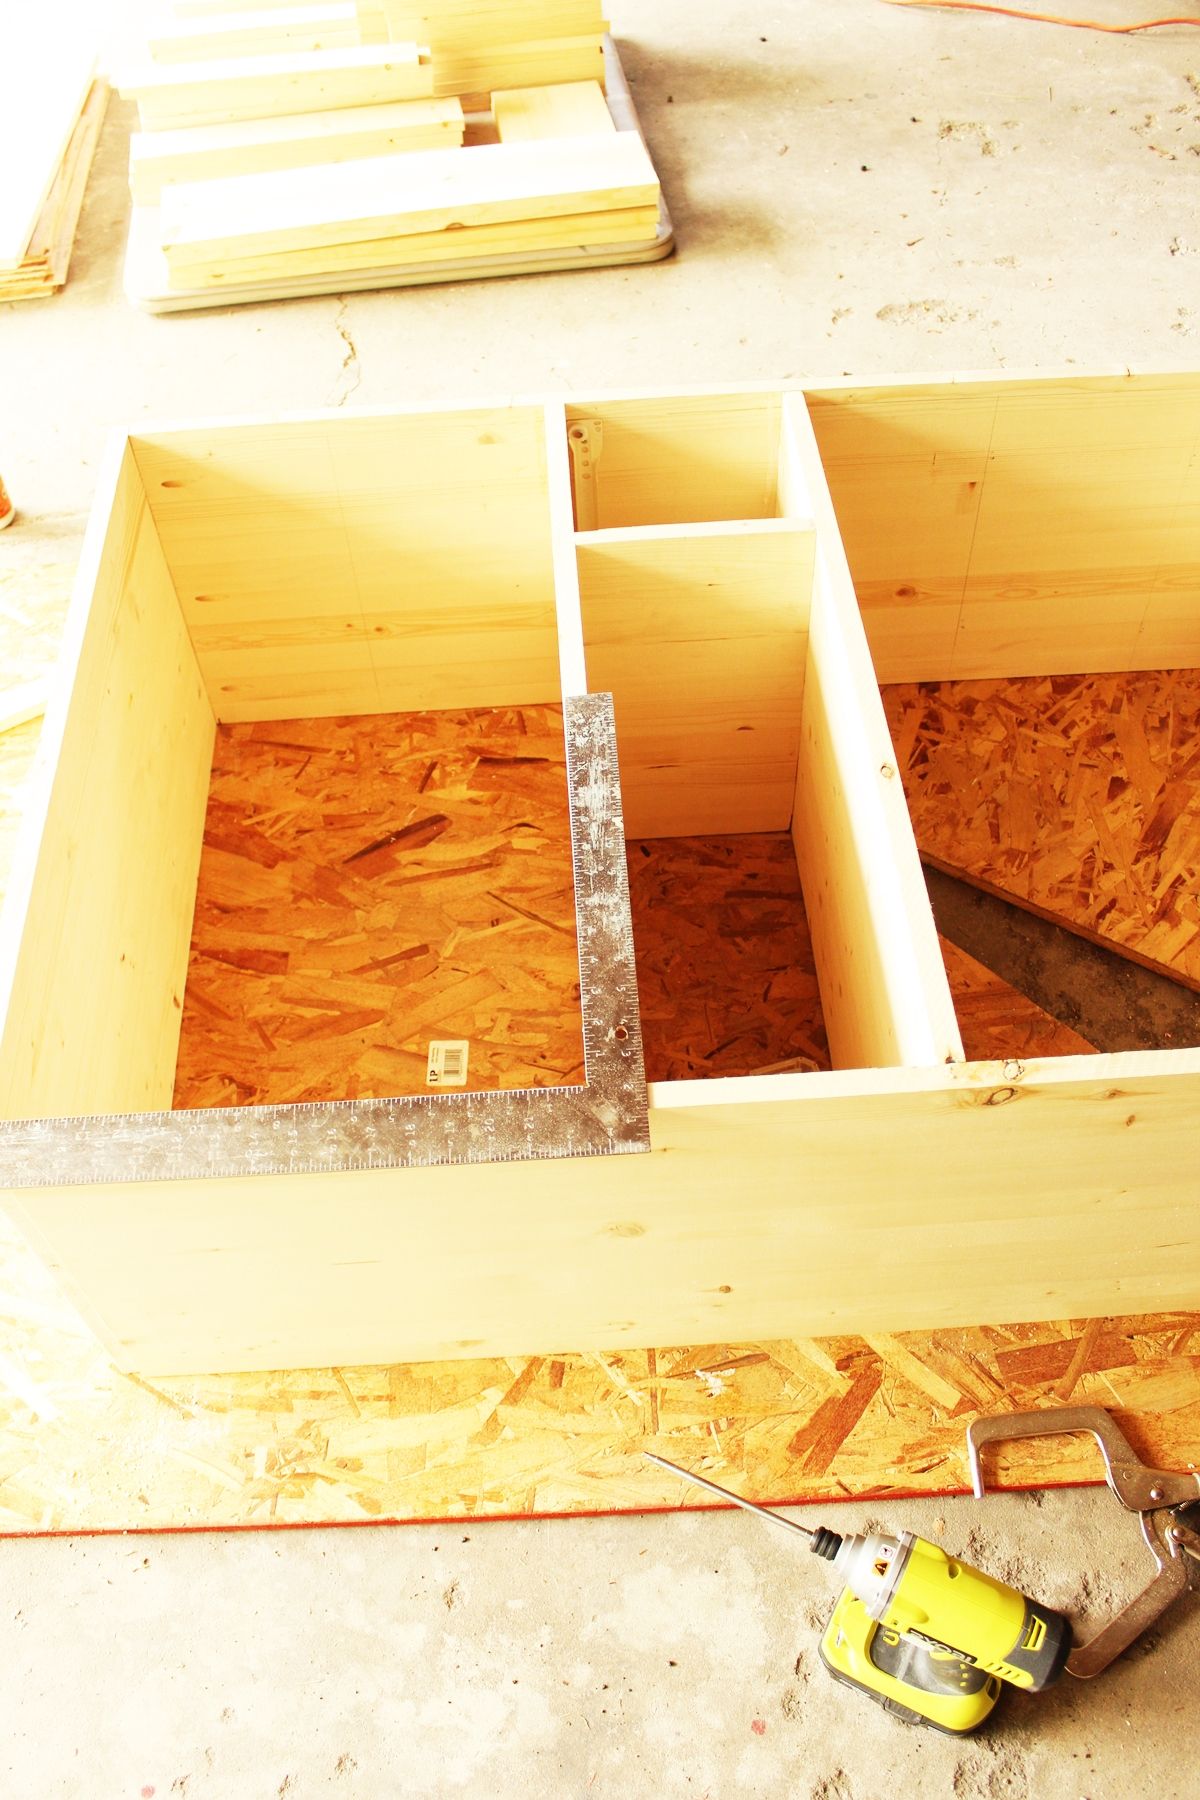
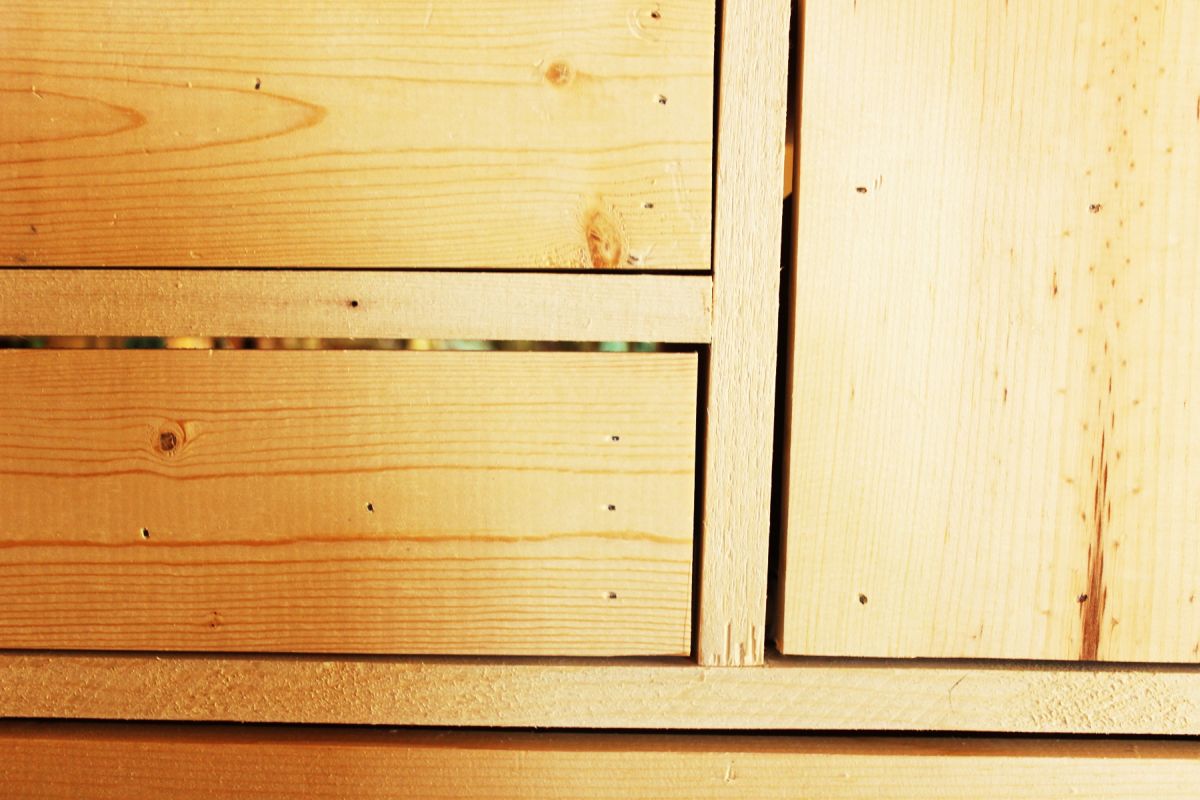
This is what your dresser frame will look like at this point. Notice the 1×2 “faux” support boards on both the front and back sides of your dresser.

Aren’t we glad we already installed those drawer slides into the tiny squares? (Answer: Yes, we are ecstatic about that.)

Before moving on, you might choose to fill your pocket holes with some pocket hole plugs.

After doing a dry fit to make sure they’re the right size (I had to trim mine), lay a large drop of glue into the pocket hole.

Slide the pocket hole plug into the hole.

Smooth it out, removing any excess glue that squeezed out as needed. Repeat for any pocket holes you want to fill.

Use your 3/4″ scrap wood to mark the 3/4″ lines from the front edge on any horizontal support boards that might need marking.

It’s now time to install all the drawer slides on your frame. Use a straight edge to draw lines from the top and bottom edges of your 1×2 supports; these will serve as a guideline for your drawer slides.

Keeping in mind the front end (always), choose the right and left slides accurately.

Use three screws per drawer slide to install along the top line of each 1×2 support board. Be sure each slide is installed at the 3/4″ mark (3/4” away from the front edge).

With all the drawer slides mounted onto your dresser frame, it’s time to build the actual drawers. Each drawer, no matter the size, will be attached with the front and back faces sandwiched between the ends of the 14” side boards. Drill two pocket holes per side of each front and back board. These are all the 1×6 and 1×3 boards that are NOT 14” long. You should have twenty (20) total.

Use glue, your right-angle clamp, and 1-1/4” pocket screws to build your drawers. Check for 90 degrees after every attachment so your drawer is perfectly squared off.

Tip: Place the pocket holes outward. The drawer face will cover them up in front, and it doesn’t matter they show on the back of your drawer. Plus, you don’t want pocket holes snagging your clothes inside your drawer, right?

Do one drawer at a time, so it’s perfectly customized to the drawer space. If you find a drawer is a bit tight, shave a little off the front and back board ends before you build the drawer.

Label each drawer to match the position in the dresser.

With the drawers built, it’s time to install your drawer-mounted drawer slides. Holding the slides up against the bottom of your drawer, push the drawer into its position in the dresser.

The drawer should slide in and out with ease. If there are any modifications you need to make, do so now. Hopefully, you won’t need to change anything because you’ve built each drawer custom to its slot in the dresser.

Place the 1/4″ plywood piece that has been cut to fit that particular drawer on your workspace, along with the two drawer slides and the drawer itself.

Determine which side of the drawer you want to be the top and the front. Set on the plywood to make sure the drawer bottom fits.

Run a bead of wood glue along the bottom edge of your drawer.

Place the drawer bottom on the glue.

Square up and hold in place while you nail the drawer bottom to the drawer walls.

Position the front ends of your drawer slides against the furthest point out on the front end of your drawer. (In a perfect world, the entire front end would be perfectly aligned with all pieces. This was not precisely the case with me, but it was close. I’m calling that a victory.)

The back end of the drawer slide can hit anywhere; don’t worry about aligning that with anything.

Attach the drawer slide with screws.

Roll the drawer into its rightful slot.

Hooray. Now, you might notice that, in this instance, the right side of the drawer itself is about 1/8” higher than the left side. While not ideal, this is not anything to worry too much about, because you’ll be attaching a drawer face to the front of the drawer, and you can adjust that to fit the slot perfectly.

Continue mounting all drawer slides to the bottom of the drawers, one at a time, customizing the fit of each drawer as you go.

When all drawers are built and rolling, it’s time to attach their drawer faces. After verifying that the face fits perfectly into the slot (there should be about a 1/8” gap around all sides), lay the face down below the drawer so the back, bottom end of the face aligns with the installed drawer.

Use a pencil to mark the position of the vertical part of the drawer slide. This will help you align the drawer face perfectly onto the drawer itself. Also, holding the drawer face in place up against the drawer itself, look through the gap at the bottom of the drawer face toward the drawer slides. Take note of where, vertically speaking, the bottom edge of the drawer face hits the drawer itself. Like, does it hit halfway up the drawer slide metal, or does it cover it completely, or whatever. This will help the drawer face install with precision.
Pull out the drawer, then run some glue along the front.

Using your pencil markings as a guide, align and then position the drawer face onto the gluey drawer.

When it’s aligned, clamp the drawer face into place.

Use 1” or 1-1/4” brad nails to attach the drawer face to the drawer.

Slide back into its slot, and move onto the next drawer. Customize each drawer face, making modifications (sand/shave off sides if needed) as you go so each drawer fits squarely and beautifully.
It makes a huge difference in the look of the dresser when the drawer faces are on, doesn’t it?

I especially like how the faces create a flat surface on the front of the dresser, because they are inset 3/4″ from the front edge. Beautiful!

Remember how you’ve labeled each drawer and its correlating slot in the dresser? That comes in handy now that it’s time to sand and paint.

Use fine-grit sandpaper, and sand all the surfaces of each drawer, particularly the face. Take care to not sand too much off the corners of your boards, though, to keep them squared off and modern.

Sand the sides and edges, too, keeping in mind that these interior drawer surfaces won’t be treated with anything, so they need to be extra smooth.

Before we paint, we’ll need to fill some holes. Wherever your wood itself has holes, or where there’s a gap in a joint, or whatever, you’ll want to spend a few minutes and fill the holes now.

Use a putty knife to spread the wood filler into the holes. This includes the holes from the brad nails on the drawer faces.

Smooth it out, and let it dry.

When the wood filler is dry, sand it smooth.

You can see where the wood filler was applied (splotchy brown), but to the touch, the surface is smooth.

After sanding, wipe everything clean.
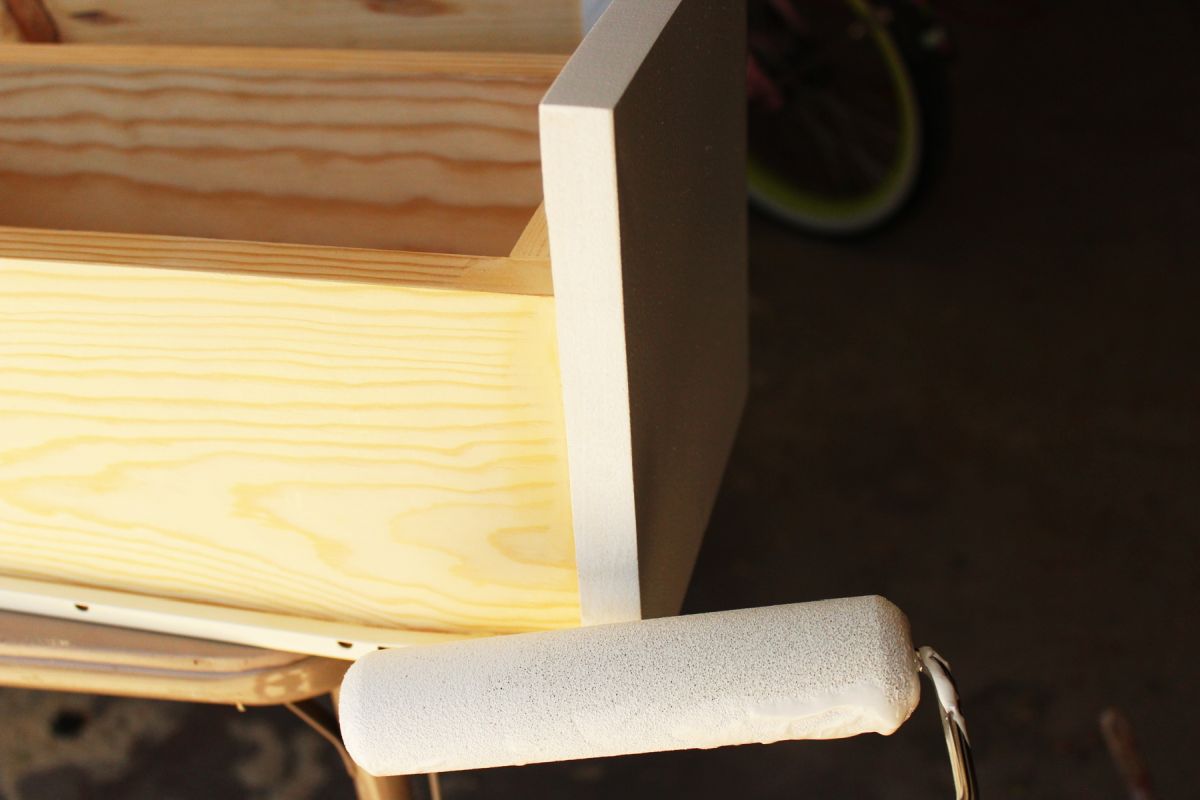
Prime, then paint everything. The frame is painted Benjamin Moore’s Strong White.

These are the colors used for this particular dresser. They are all Benjamin Moore paints. From top of the dresser to the bottom, they are called: Starburst Orange, Hydrangea Flowers, Melon Popsicle, Fresh Air, Acadia Green, Bahaman Sea Blue, Blue Lapis, and Symphony Blue. You can mix up sample paints at your local paint store for a less expensive way to get a rainbow of colors.

Paint the sides of your drawer faces.

Paint the faces of your drawer faces, then double check all the sides to make sure there aren’t drips or bumps. Keep brush strokes all going in the same direction. Tip: I used a brush on the drawer faces because I didn’t want to use eight different foam roller pads. You could definitely use foam rollers for a smoother look.

Give all the drawer faces two or three coats, letting them dry completely between each coat.

Tip: I used eight colors and painted the two sets of slimmer drawers the same color. This color blocking worked well, keeping all colors at the same verticality.

When the frame paint is dry, you can install the dresser legs. This example uses capita legs from Ikea. These are a little more than 4” tall.

Install the leg plates into the corners of the bottom of your dresser.

Screw the capita legs onto the leg plates. Adjust for level, if necessary.

When your drawer faces have dried completely, install your hardware. Use a template, predrill, and attach the handles.

Tip: If you’re installing handles (versus pulls), install the drawers into your leveled dresser, then use a level to mark the predrill holes. Because each drawer face was customized to the drawer slot, it might not be precisely level on its own. If you don’t want to deal with level hardware, choose pulls instead.

Position the frame in your space, then install the drawers.

One thing I love about capita legs is that they are adjustable, so no matter how uneven or slanted your floor is, your furniture piece can be level.

Congratulations! Done!

You just built a beautiful, contemporary dresser with plenty of style and functionality.

One of my favorite aspects of this dresser is the retro rainbow color palette.

I think ombre would look really great on the drawers, too, if you didn’t want to bother with buying a bunch of different colors. Either way, I hope you enjoy building your own dresser, and that you love the end result for years to come. Happy DIYing!