DIY Charging Dock

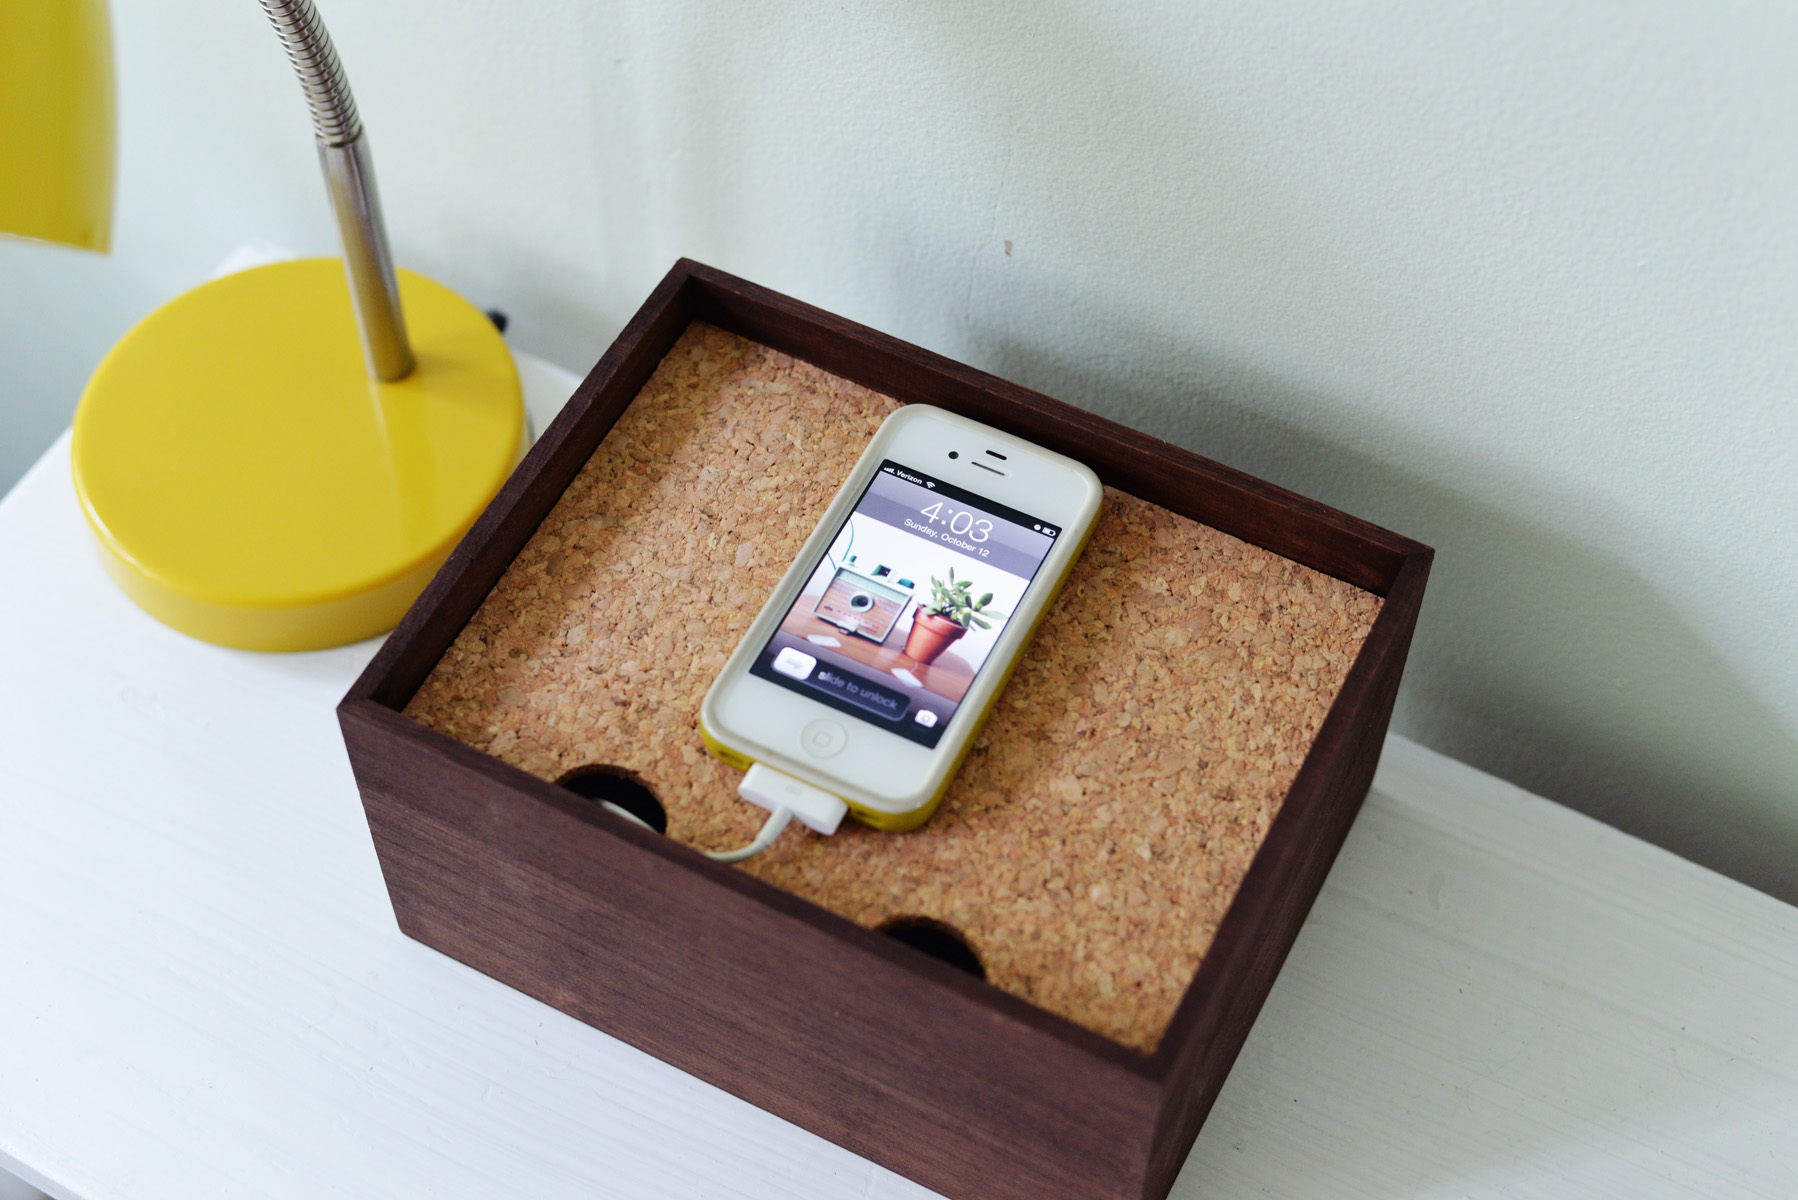


Getting bogged down with cords? This little DIY charging dock not only helps to organize your devices but also provides the perfect spot to charge your phone. It makes a great addition to your night stand or office!

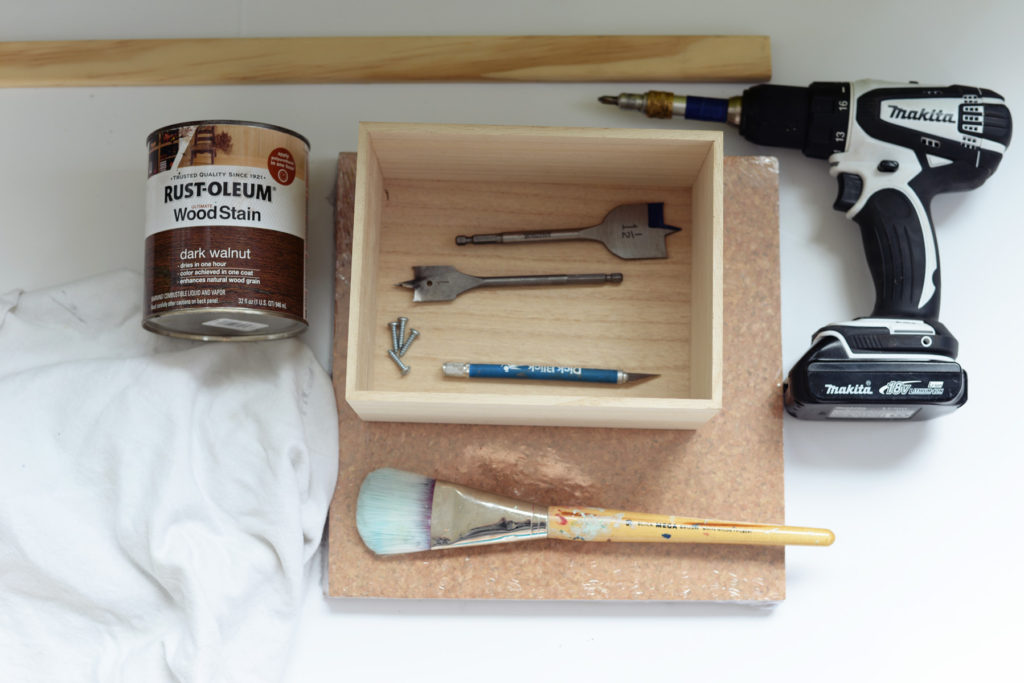
Supplies you’ll need for Charging Dock:
- wooden box
- thick piece of cork
- xacto knife
- piece of corner bead or square dowel rod
- stain or paint
- drill
- saw
- 1 1/2 inch drill bit
- wood glue or screws
- brush or rag to apply stain or paint

DIY Charging Dock Instructions:
Step 1: Begin to make a ledge
Start by creating the ledge for your cork to rest on. Measure and mark on your corner bead or dowel rod (either will work for this), your dimensions for the interior of the box, and cut with the saw.
Step 2: Create the ledge
Measure down 1 inch inside the box and use wood glue or screws to attach the wood to the inside of the box. Repeat steps 1 and 2 for all 4 sides of the box until you have created a ledge.

Step 3: Measure and cut cork
Once the ledge is complete and dry (should take about 15 minutes with the wood glue), measure and cut the cork that will be the top of the dock. Use an xacto knife and a straight edge for a nice even cut. Place inside the box to ensure that it fits. If not then you can cut down more or sand down to fit. Make sure to use a nice thick cork that will support the weight or a few devices.
Step 4: Drill a cord hole in the back of the box
Next drill a hole in the back of the box with your large drill bit (this is where you will feed cords in and out of).
Step 5: Make cord holes on the top of the box
To make the cord holes for the top of the box, use a circular shape (like a piece of PVC pipe) to trace and cut two semi-circles in the cork, evenly spaced. Set this aside for the end.
Step 6: Stain or paint the box
Lastly, stain or paint the wood box. Here we used a nice dark walnut stain to compliment the lighter-colored cork. Get colorful with bright paint for this part or natural with a clear varnish if you prefer.


Once the stain is dry, assemble your docking station by placing the cork back on the ledge and feeding your cords in through the back and up through the slots in the cork. Since the cork is just resting on the ledge and doesn’t need to be glued in, you can easily pull it up to maneuver even larger cords and cables through your new DIY charging dock.