Install a Corner Shower Shelf With Tiles


Adding a corner shower shelf to any bathroom is a quick, effective way to add more storage space and stylish touch.

Below is a tutorial to show one way you can easily install a functional and beautiful tile corner shelf for little cost and time as you’re tiling your tub surround/shower.
How to build a tile corner shower shelf
Materials you’ll need for free standing corner shower shelf:
- Measuring tape
- 12×12 Marble tile
- Subway tiles
- A tile cutter
- Epoxy glue
- Grout
- Thinset
- Mosaic tiles of choice (for decorative touch)
Step 1: How to choose the best corner
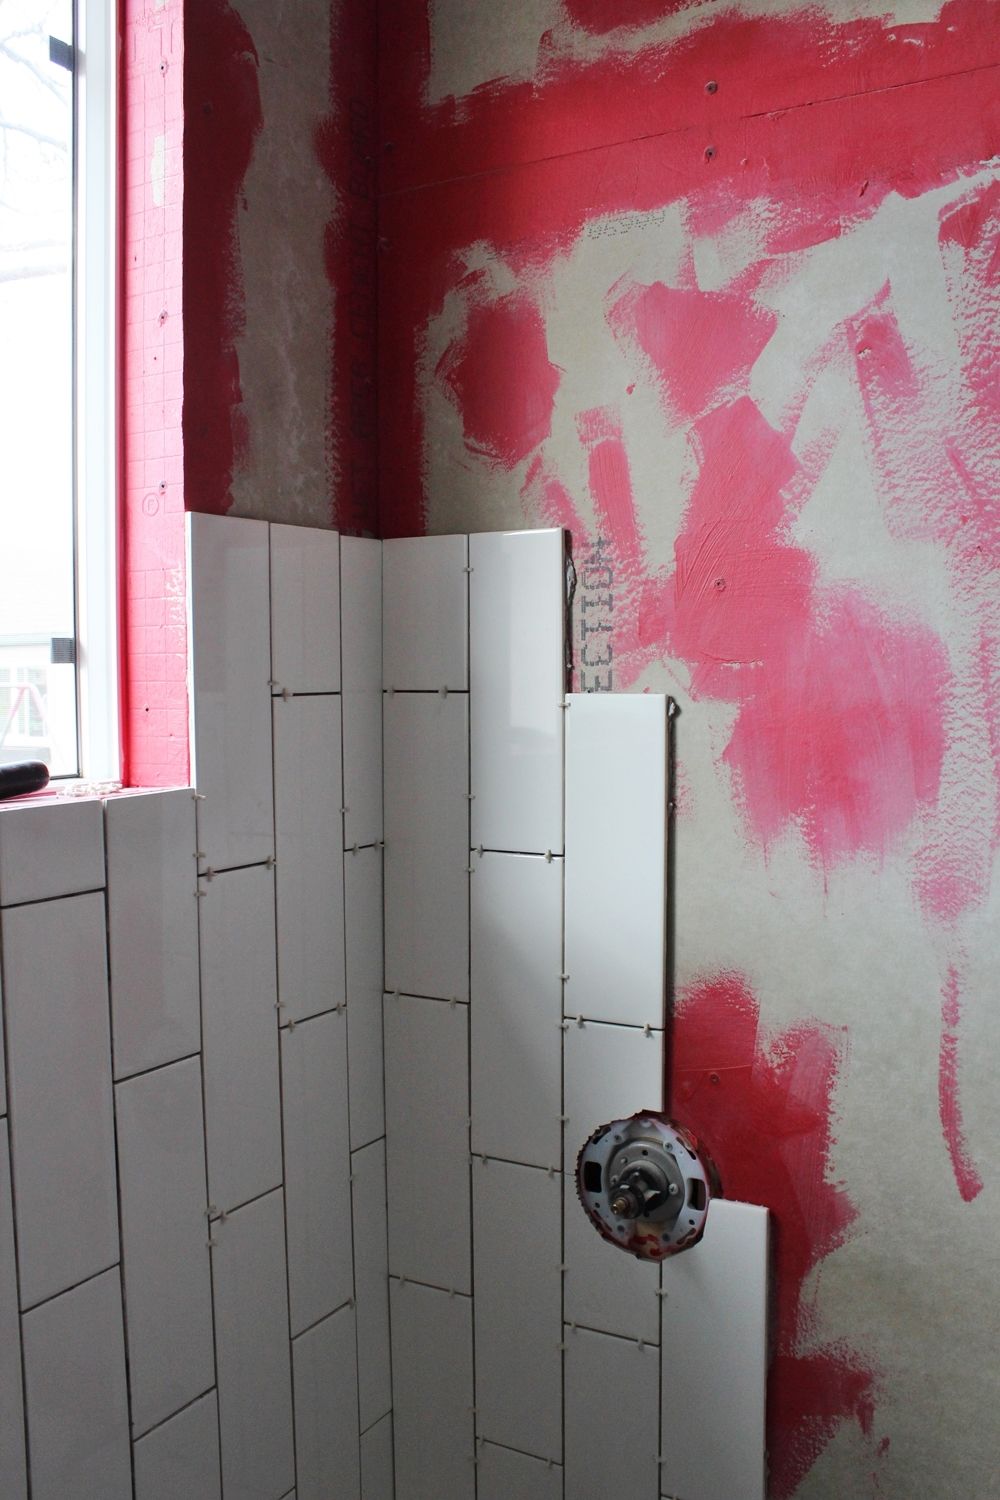
Begin by choosing the corner that would be most beneficial for your corner shower shelf. Tile, vertically, up to the level where you want your shelf to be.
Pro Tip: A good rule of thumb is to place a shower corner shelf at about the chest-height of the average user of the shower, although you should choose the height that makes the most sense for you and your space.
Step 2: Begin the tiling process

Tile enough columns, horizontally, up to that height so that the corner shelf piece can rest levelly and securely when placed.
Step 3: Measure and cut your white marble tile for corner
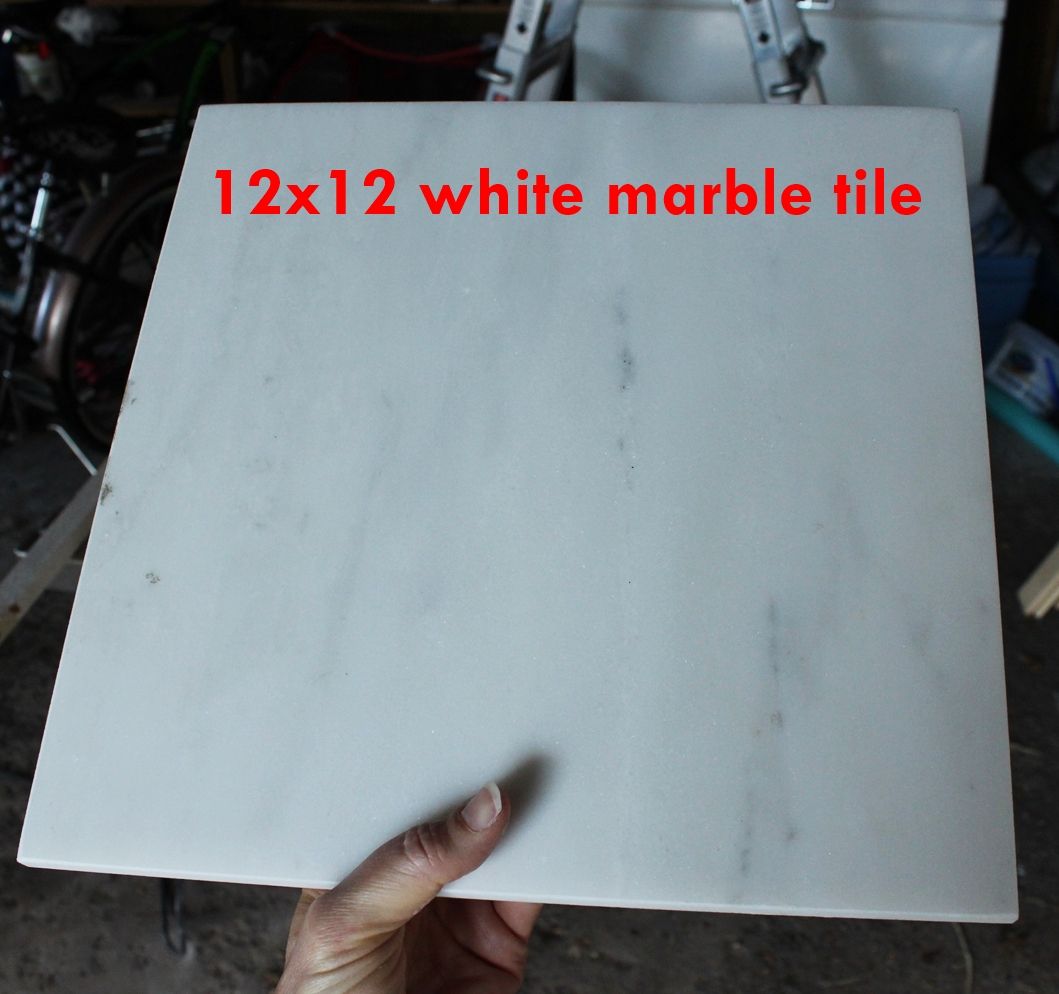
Secure your 12×12 white marble tile to create the marble corner shelf in shower.
Note: While you could opt for a premade glass corner shelf for shower or even design a glass corner shelf shower yourself, marble is sophisticated and will leave a lasting impression.

Measure 1” to 2” (depending on the size of your tile and the size of your desired drainage hole) from each side of one corner.

Connect the two dots with a diagonal line.

Use your wet tile saw to slowly and carefully cut the notch section off your tile.
Repeat on the opposite corner.
Reference: Here are more tips on using a tile wet saw.

Holding your tile with the newly cut notches on the sides, measure 1” down each edge from the two now-center corners.
Draw two parallel lines connecting the dots (parallel with each other and also with your notches).

Carefully use your wet tile saw to make the two longer cuts. You should now have two identical (almost) triangles.

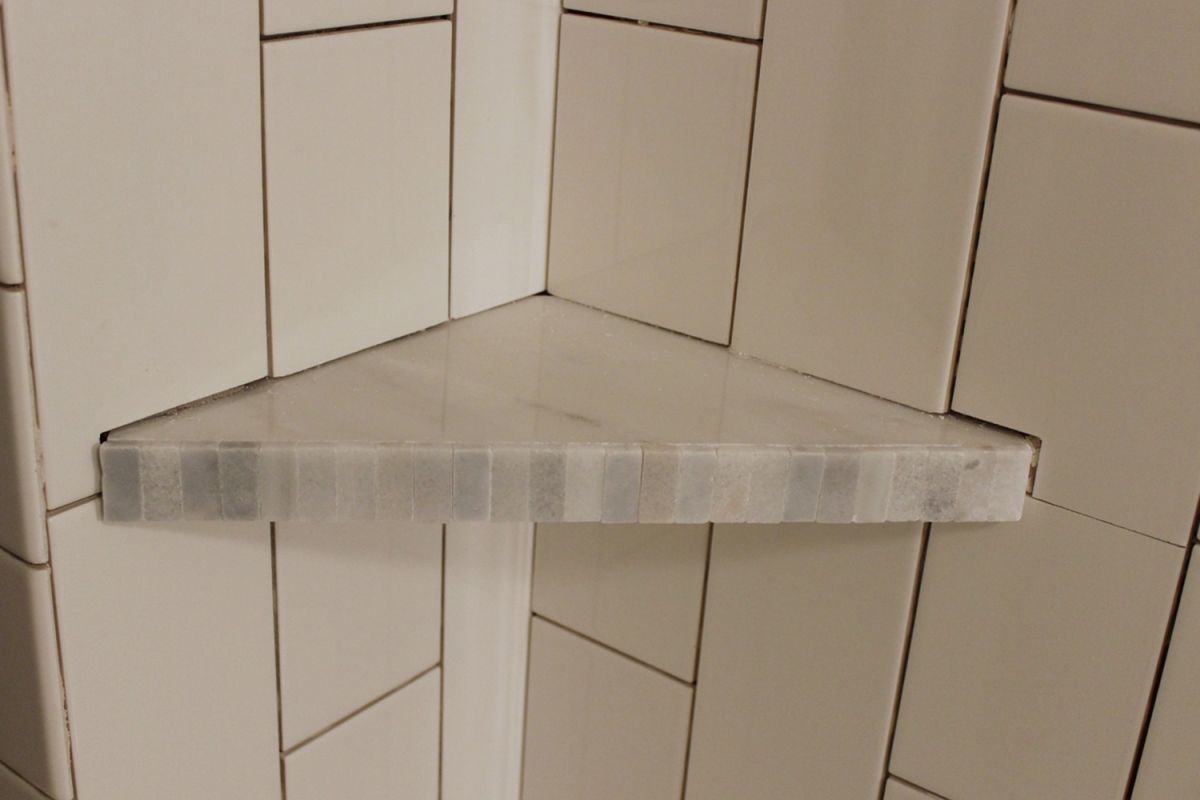
Ensure that the pieces are, in fact, identical by placing them with raw faces together, polished sides out.
This is important so that the polished sides will be exposed as the top and bottom faces of your shower corner shelf.
Step 4: Apply thin-set and sandwich diagonal marble tile pieces together

Apply a layer of thin-set to the raw face of one of your white corner shower shelf tiles.
Use a trowel to score it.

Place the other tile triangle, raw side down, onto your thinset so it’s like a tile sandwich.

Squeeze the two tile corner shower shelf pieces together firmly, making sure that all edges align perfectly but paying particular attention to the front diagonal edges (the longest ones).
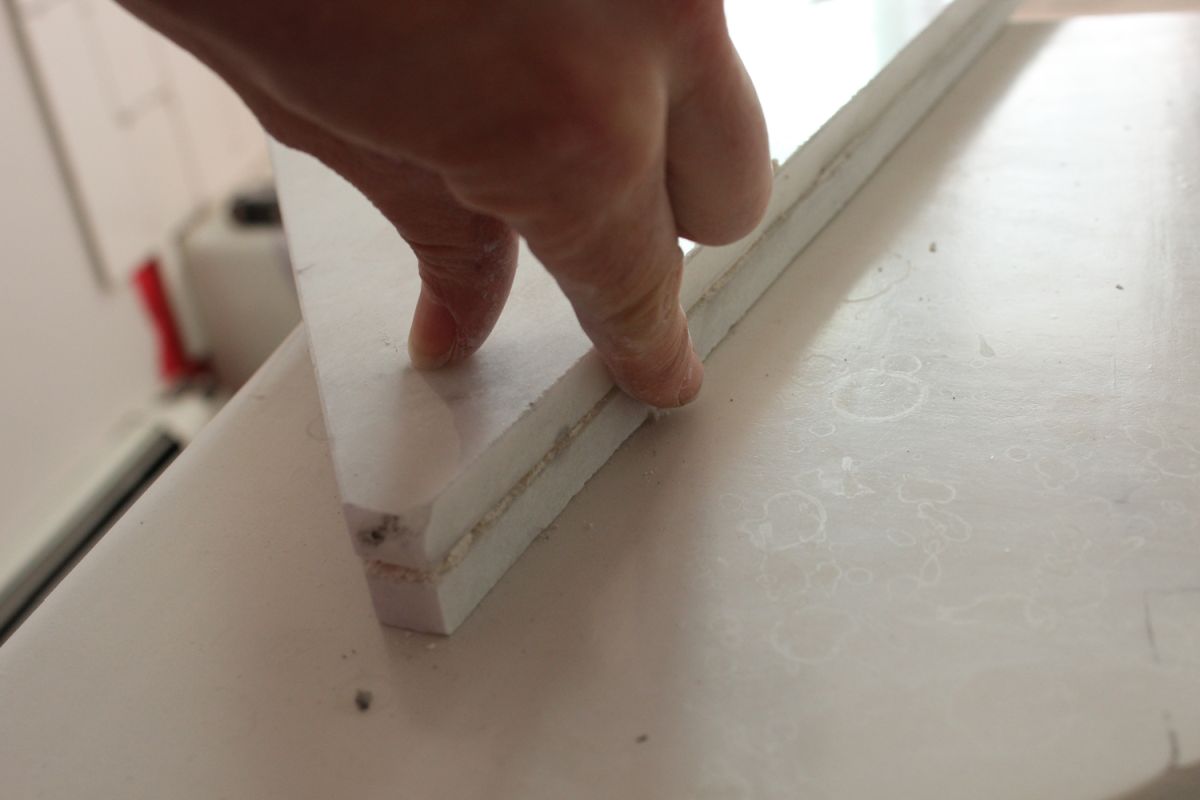
Taking care not to cut yourself, carefully run your finger along the front line of thinset to wipe away any protruding thinset.
Step 5: Prepare the wall for triangle shelf

Set your sandwiched shelf aside momentarily while you apply thinset to the hardibacker directly above your predetermined shelf tile line.

Score the thinset of your corner tile shower shelf with your trowel teeth.

Set your shelf directly into the troweled thinset at the level of your tile tops.
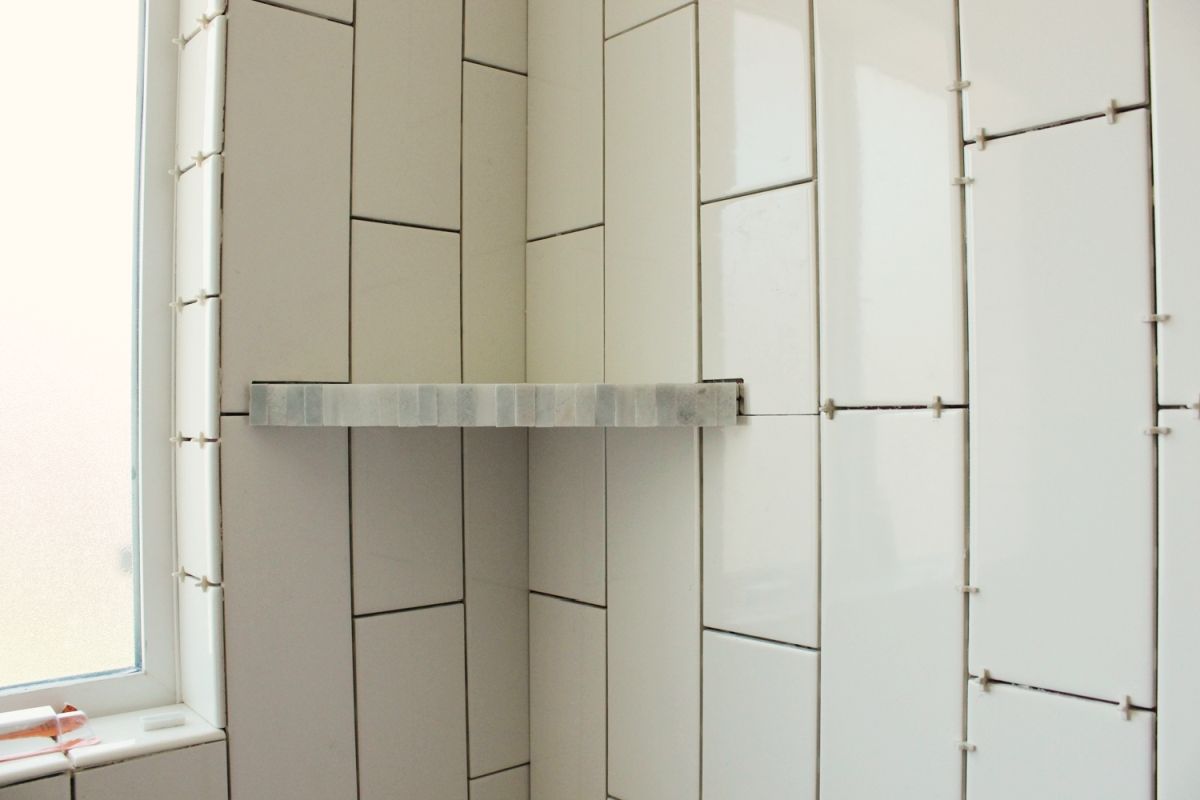
Step 6: Setting the corner shower shelf

Push the shelf firmly into the troweled thin-set, wiggling it in securely.
When you are certain that it’s adequately supported by the tiles below, push it inward toward the walls and downward onto the tiles.
Note: If you decided not to create a notch at the back of your tile, you will want to angle your shelf ever so slightly so the back corner is elevated so water will run off the front of the shelf into the shower.

Wipe away any excess thinset under the shelf with your finger.
Step 7: Continue with tiling

Measure, cut, and install tiles above the shower corner tile shelf.
Simply keep the same pattern of tiles going as though the shelf wasn’t there.
To do this, subtract the height of the shelf sandwich from the tiles you’re applying.
For reference:
In our photo, the next tile to be installed (placed next to the shown notched full-length tile) needs to reach exactly to the half-height of the adjacent full tile’s height to maintain the pattern; thus, its actual height will be a half-height tile MINUS the height of the shelf. (The tile under the shelf is a true half-height tile.)
Mathematically, this would look like:
lower tile height + shelf height/thickness + upper tile height = full tile height

Continue installing the above-shelf tiles using that same mathematical equation, so that the grout line pattern remains consistent above and below the shelf (almost as though the corner shelf for bathroom shower wasn’t even there).

Let everything dry completely before we tackle the front of the shelf.
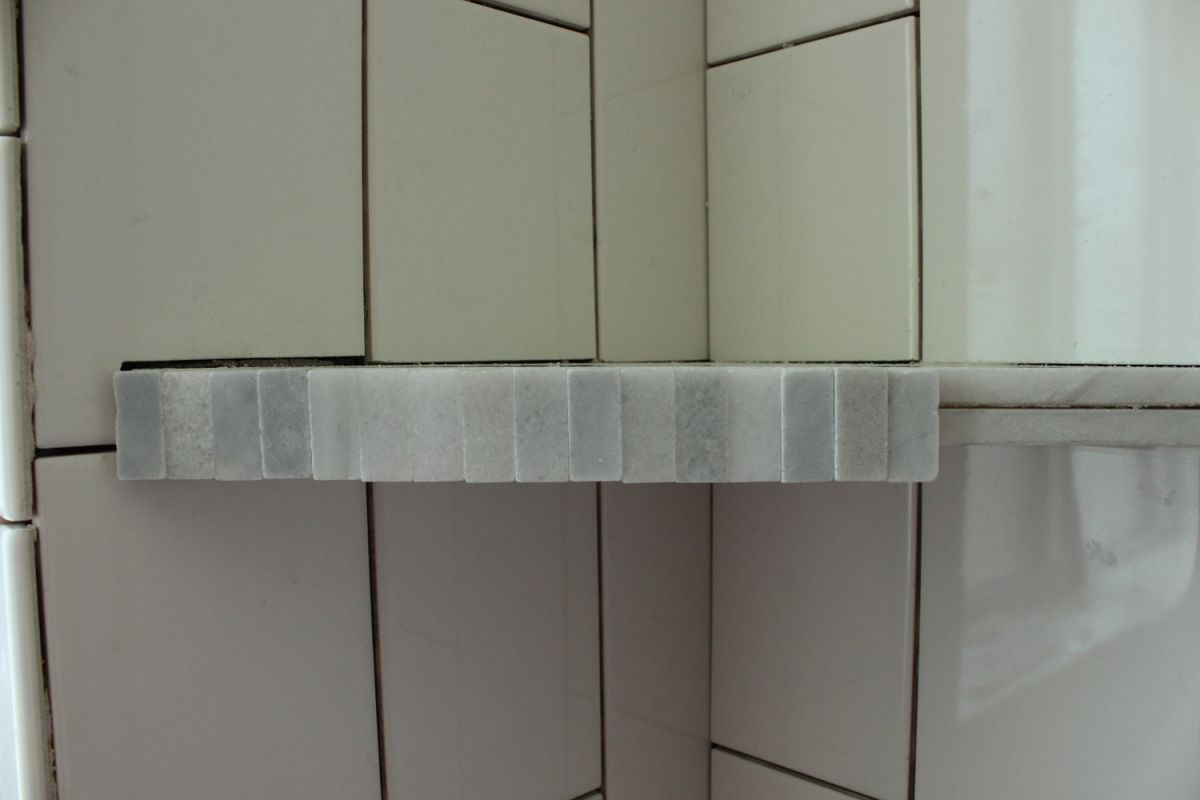
Step 8: Add a mosaic tile touch

The corner shower shelf is stable and secure at this point. You can add a decorative mosaic tile touch.

Grab a mosaic tile sheet that matches your design color scheme.
Step 9: How to apply the small mosaic tiles
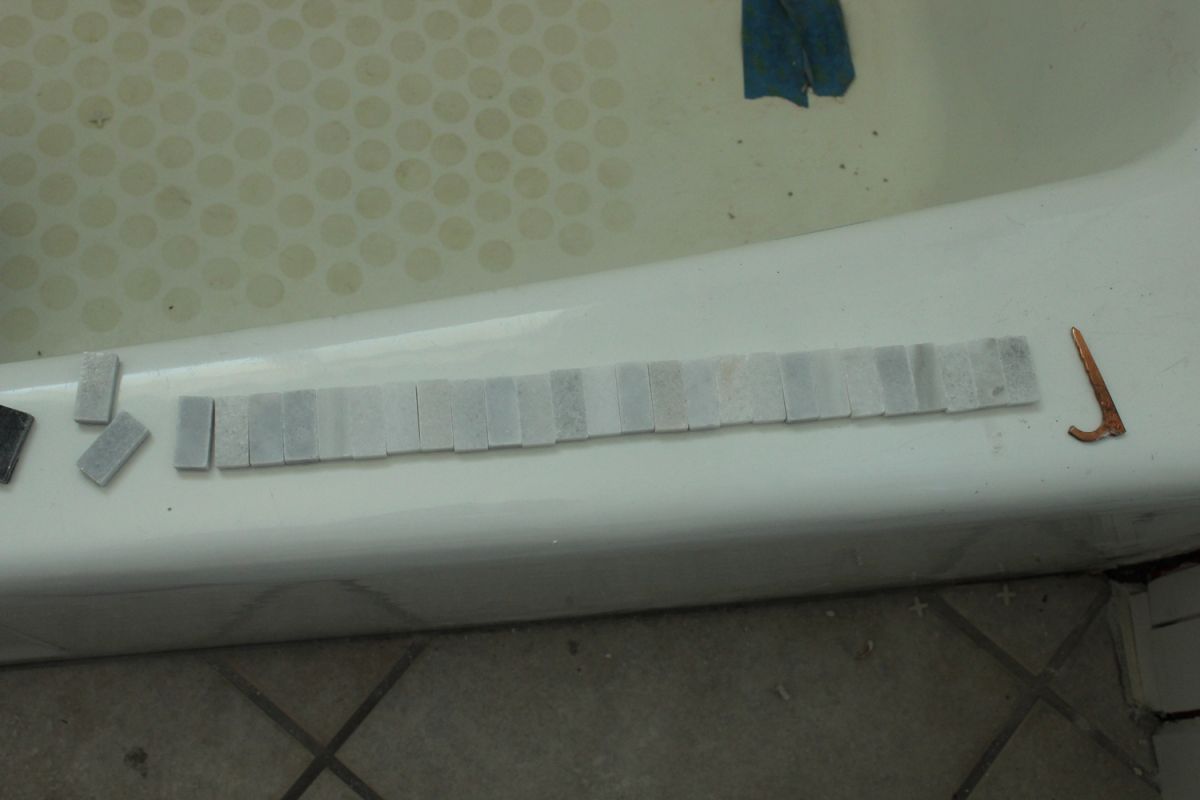
Peel each tile from the backing and lay them out in a straight line the same length as your corner shelf face.
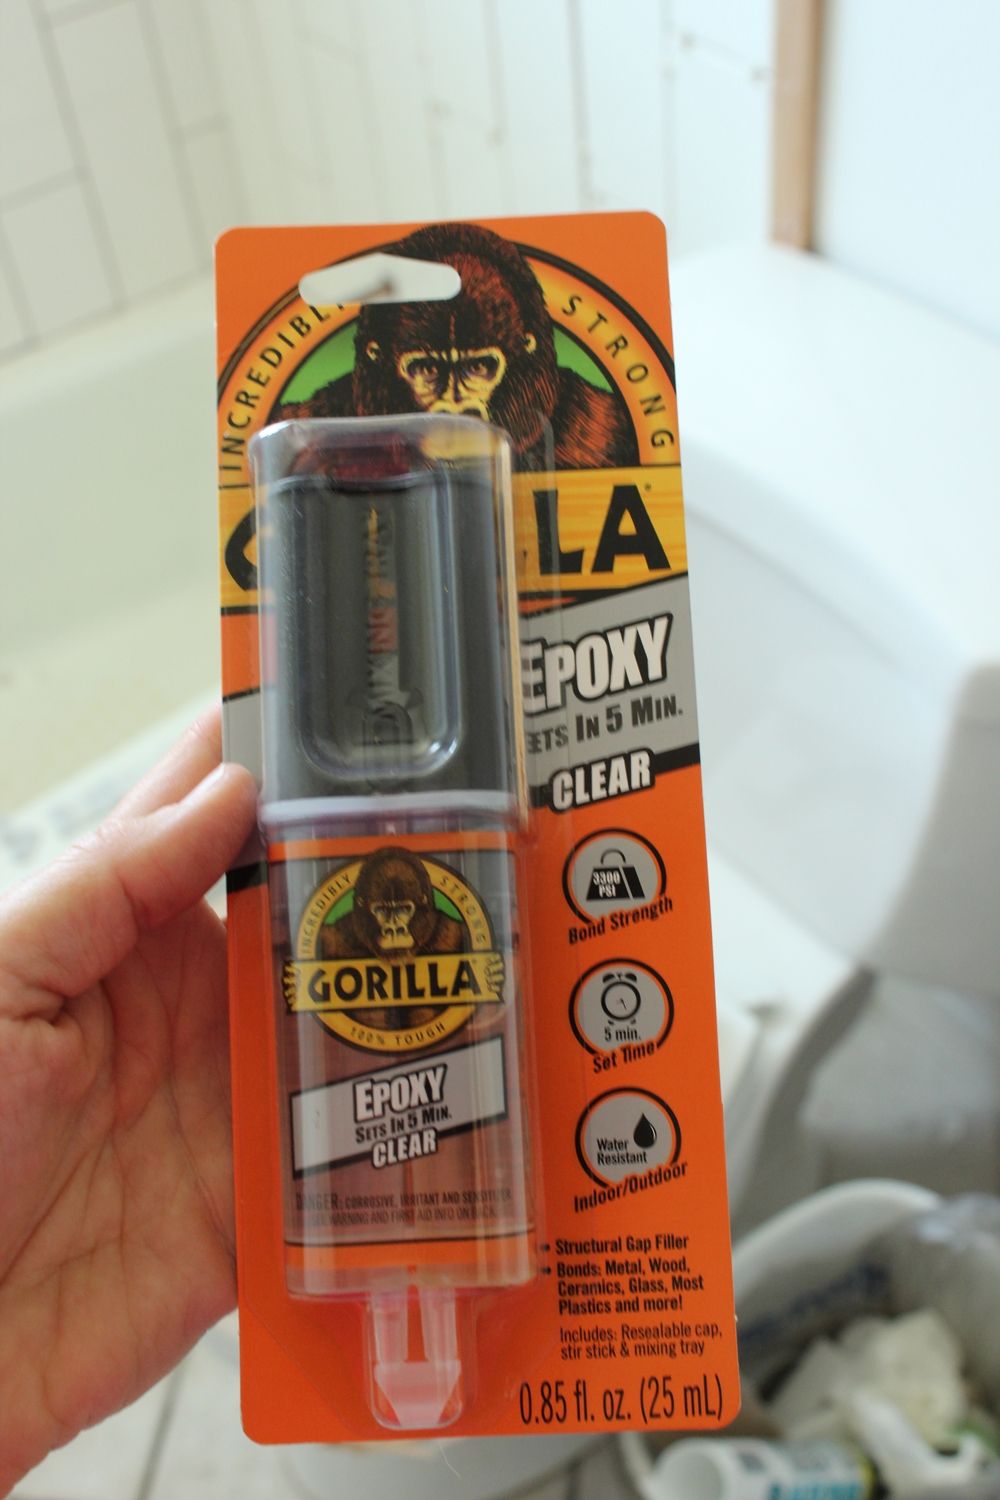
Step 10: Apply the water-resistant epoxy
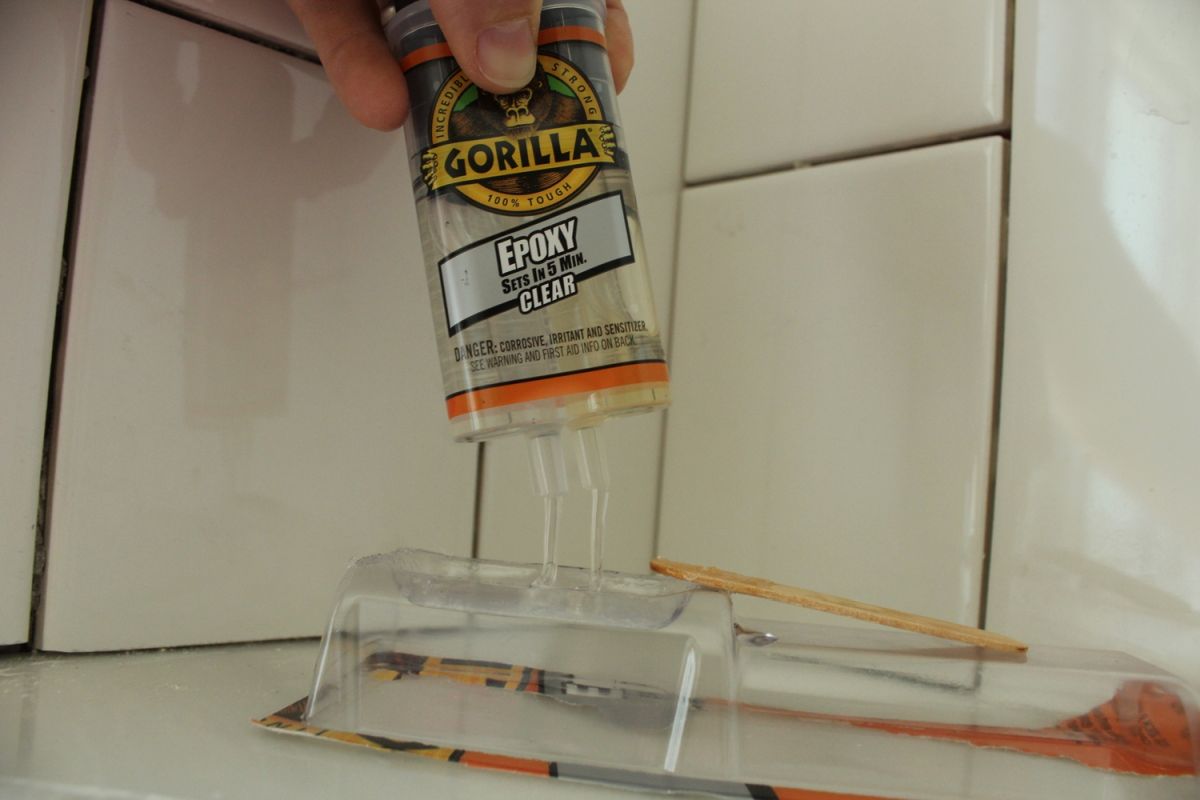
Pour the epoxy components, in equal amounts, into a disposable mixing tray.
Just a small amount will do for now – the stuff begins to set in about 5 minutes, and you’ll have to throw out anything you don’t use within those minutes.

Stir carefully and completely.
Epoxy will only work when the two parts are together, so if you miss stirring in any sections, the bond strength will be significantly decreased, if not altogether nonexistent.

Dab just a bit onto the back of your first tile.
Epoxy has a tendency to expand, so a little bit goes a long way. Keep the adhesive away from the edges of your tile to minimize an oozing effect.

Press your epoxy-backed tile onto the shelf face, keeping the top end of your face tile exactly even with (or very slightly lower) than the top edge of your shelf.
Note: You want water to be able to run off your shelf freely and not pool there.
Move along quickly while also taking your time to make sure each tile is placed perfectly.
Check back along your lineup every 30 seconds or so to make sure your tiles aren’t slipping or sliding.
If they are, immediately adjust them to be precisely lined up and press them toward your shelf again.
Step 11: Applying all the mosaic tiles

Continue this process until your new tiles cover the front of your shelf.
Keep watching and checking for the next 5-10 minutes for sliding tiles and adjust accordingly. This epoxy doesn’t set immediately like some adhesives, and even when you think everything is secure, it could slide a minute later.

When the epoxy has completely set (24-72 hours later), apply a thin layer of sealant to the untreated edges. This includes the tops, bottoms, and exposed backs if any, of your small marble fact tiles.
Pro Tip: A recommended sealant is 511 Impregnator, which is the same sealant to be used on the grout for the tub surround itself.
Step 12: Enjoy the corner shelf design!

All set! Simple, straightforward, and highly functional. This corner shelf is an excellent way to incorporate storage into a shower space for very little cost or effort.
Frequently Asked Questions (FAQ)FAQ
how to install corner shelf in shower?
Whether you want to install a plastic corner shelf, stainless steel corner shower shelf, or a ceramic tile shower corner shelf, all steps remain the same: First, you will tile your shower wall, then you will size and fit your corner shelf, and finally, you will grout the tiles to keep them in place.
how to build shelf in shower?
To build a floating corner shower shelf, you will need to have basic tools and equipment: tiles, measuring tape, tile cutter, epoxy, thinset, and grout. The overall work can take a full weekend or a few days.
How big should a shower shelf be?
This is dependent on the size of the shower itself! To know the best corner shower shelf for your space, it’s important to measure the area first and then continue with the DIY tutorial provided.
What is the standard size for a shower niche?
The standard size for a shower niche is 12″ wide x 28″ high x 3-1/2″ deep. The next is 12” x 12”.
How do you measure a shower niche?
To measure a shower niche, measure from left to right. You want to make sure to align your niche edges with the studs.
How tall should niches be?
There’s no hard and fast rule for how tall shower niches should be. It is dependant on your personal preference and the size of your shower / bathroom.
Are shower niches a good idea?
Definitely a good idea! Shower niches help to organize your bathroom and offer additional storage space for shampoo, soaps, and razors.
Corner Shower Shelf: Conclusion
It’s easy to install a tile shower corner shelf in your bathroom! With some dedication and a bit of time put aside, you can have a corner shower shelf of your dreams done in a weekend. We hope you found this tutorial helpful!