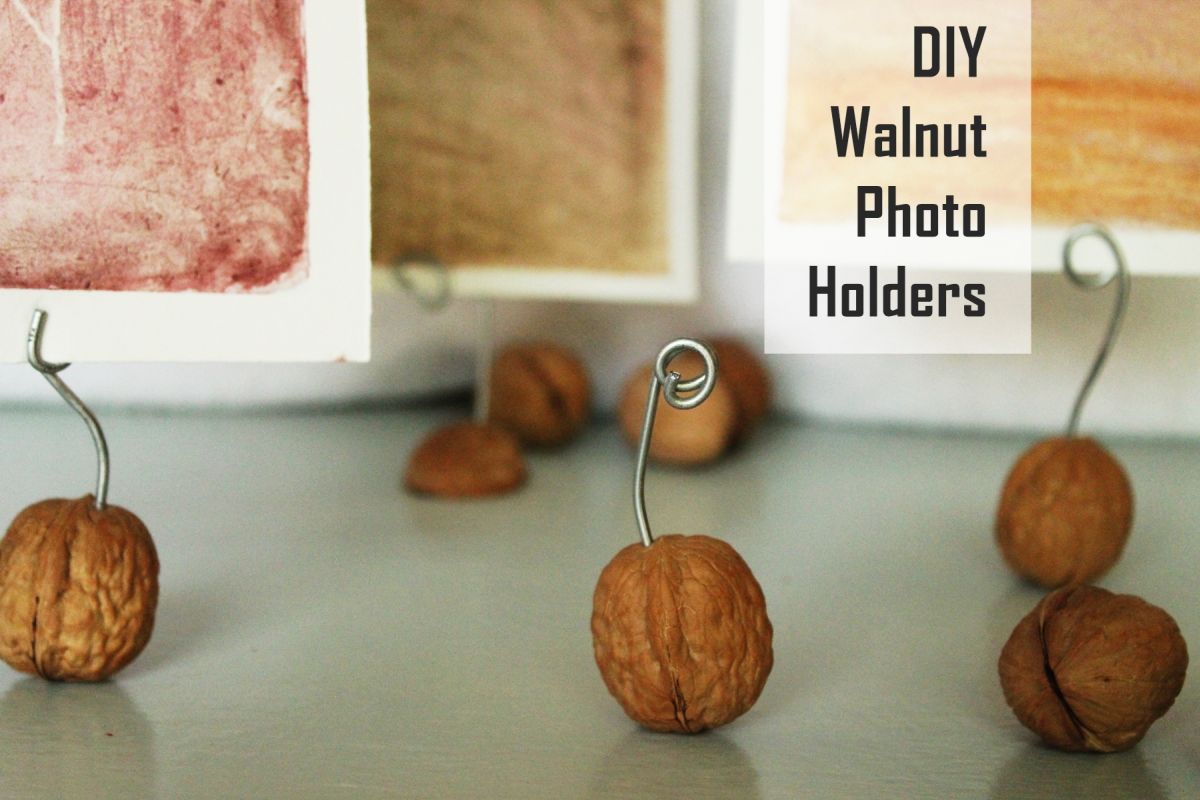
DIY Walnut Photo Holders

For displaying small artwork or photos, there is nothing sweeter than these DIY walnut photo holders. They are perfect for the fall season and just as sweet as can be. As a bonus, they’re incredibly easy to create.
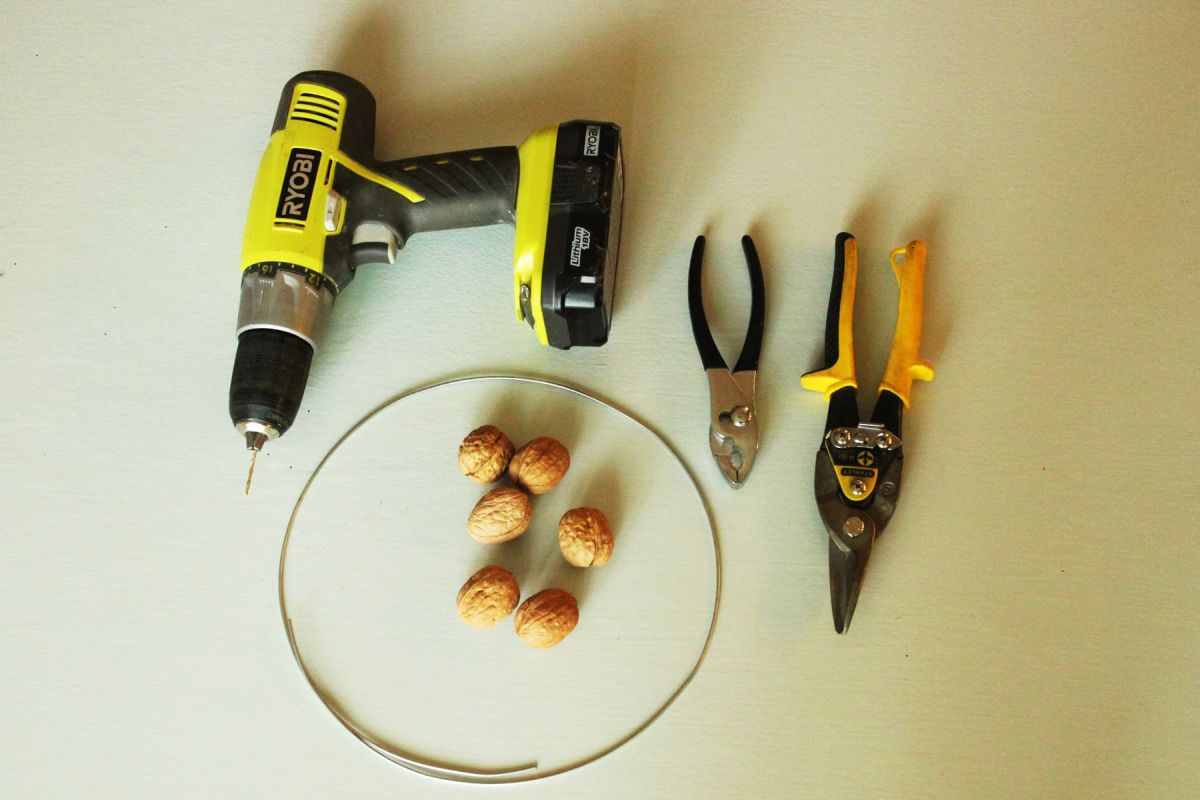
Materials Needed:
- Walnuts in shells
- Wire
- Drill, pliers, tin snips

To begin, you need to select the walnuts with the flattest bottom sides that you can.

Make sure the walnuts you choose can stand on their own, and pretty securely, too. When you add in the extra weight and balance-displacing factors of the wire and photo, the walnuts’ stability is lessened.

Once you’ve chosen the best (flattest) walnuts, it’s time to choose your drill bit. Match it precisely to your wire thickness.

Carefully drill a hole into your walnut, all the way through the flesh but NOT through the other side of your walnut.

Keep the drilled hole precise so that it fits your wire snugly.
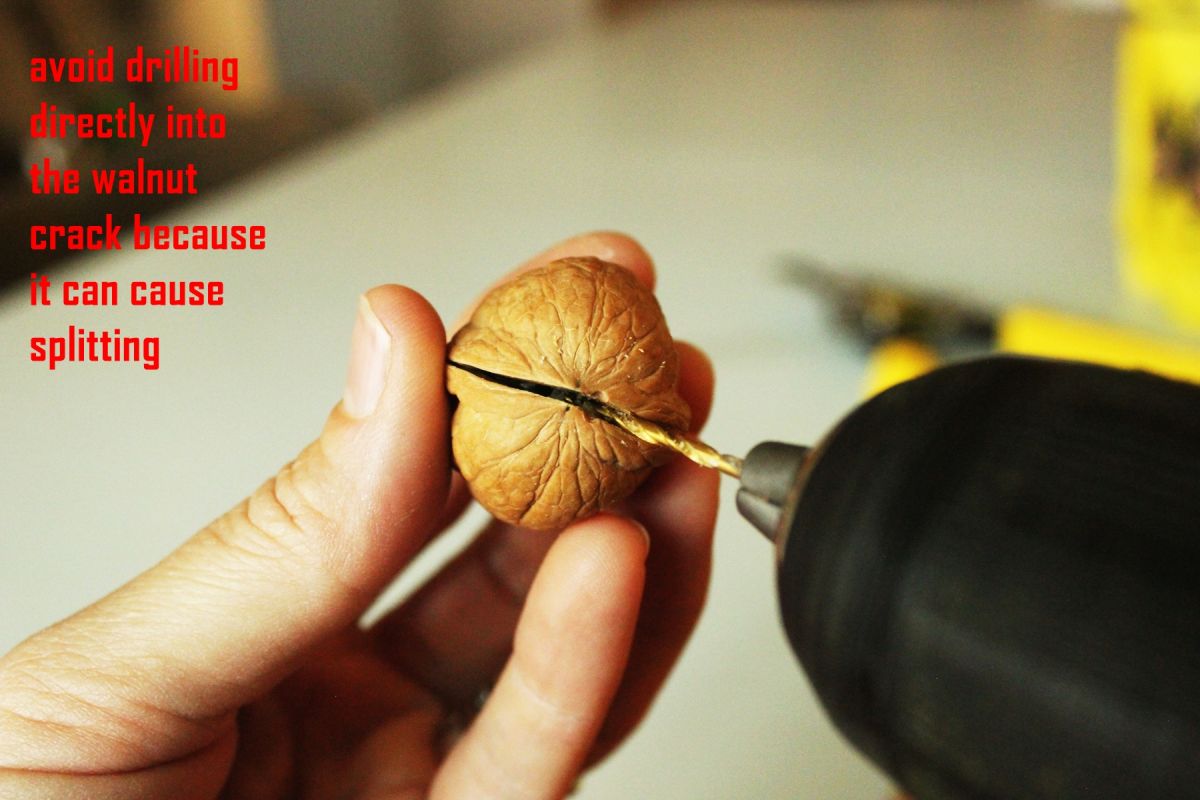
(Tip: Despite the photos you see previously, it is not best to drill your hole into the walnut’s crack because it tends to split. Drill just off to the side of the crack for consistently best results.)

Trim 4”-6” of wire with your tin snips. The thicker (e.g., heavier) your wire, the less length you will want because your walnut won’t be strong enough to hold too much weight.

Use pliers or needlenose pliers to bend one end of your wire into a circle.
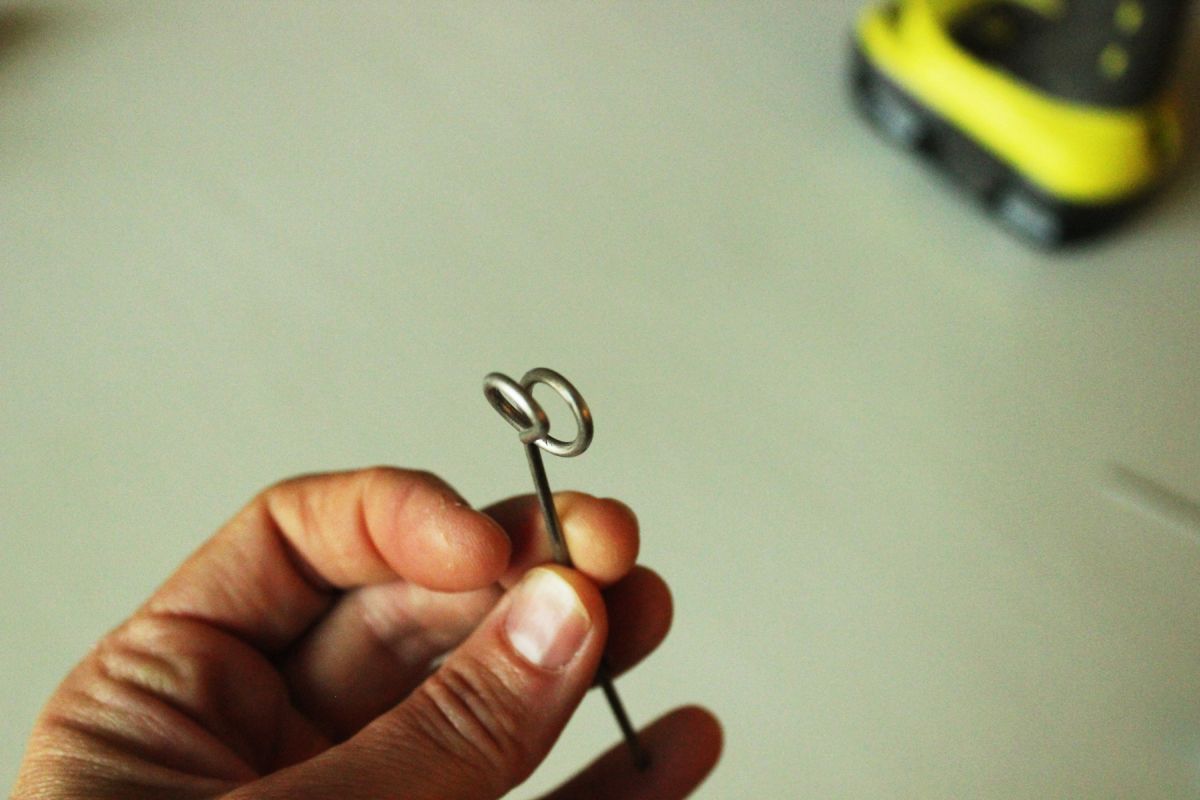
Your circle should wrap around itself enough that a photo can fit in there securely.

Use pliers to clamp the wire arcs together so they are just wide enough for a photo to stay between them. This photo shows the wires touching, but they will later be separated slightly to accommodate the artwork.

Screw your wire carefully into the drilled hole in the walnut. I say “screw” it in there because you’ll want the hole to be tight enough that a twisting motion is required to get the wire to stay. If your wire is slightly loose, consider adding in super glue and letting it dry to secure the wire better.

Stand your walnut upright. If it tips over, bend or move the wire around until you achieve a better balance.
Your walnut needs to be able to stand securely on its own with the wire in it before adding the photo or artwork. If it just doesn’t, consider removing the wire and snipping off an inch or two. Or glue a coin to the bottom of your walnut to help flatten it out. Those methods were not used for this tutorial, so I’m not sure how well they would work, but they are ideas.

Remember how that one walnut split down the middle? You can use the halves for photo holders as well, if you’d like. Drill a hole in the same way, and insert the wire.

The truth is, this half-walnut was the sturdiest walnut photo holder of all of them.

Insert your artwork and/or photos into your new DIY walnut photo holders.

These are absolutely charming and perfectly textural and thematic for fall décor.

Small watercolor artwork, done by a 5-year-old, looks almost professional with such distinct displaying mechanisms.

We hope you enjoy creating your own DIY walnut photo holders for the fall season. Happy DIYing!