How To Update Your Bathroom Floor Tiles – 6 DIY ideas

Part of making a bathroom look as beautiful as possible is choosing the right floor tiles. The floor is actually one of the few surfaces where you can get pretty creative with the design without worrying too much about negative effects from a functional or practical point of view. There are obviously a lot of different options and lots of different elements to consider before actually making a final decision. Then of course once you’ve chosen the bathroom floor tiles comes the installation process which is easier than you might think. You can turn this into a DIY project and with a little bit of guidance it can be a massive success. Here are some tips and ideas that can hopefully teach you how to tile a bathroom floor successfully.

If you want to give your bathroom a more warm and inviting sort of look it can be a very good idea to use floor tiles that mimic the look of wooden boards. These right here are natural timber ash porcelain tiles and they look fantastic, creating a very homely vibe and complementing this small bathroom and the areas adjacent to it. Before you start permanently installing all the tiles it’s a good idea to just lay them all on the floor and come up with a pattern that you like. You might have to cut some of the tiles and make some holes for the pipes to fit through. Once you’re happy with the layout you can actually put each tile in place. Check out happihomemade for additional details on this particular project.
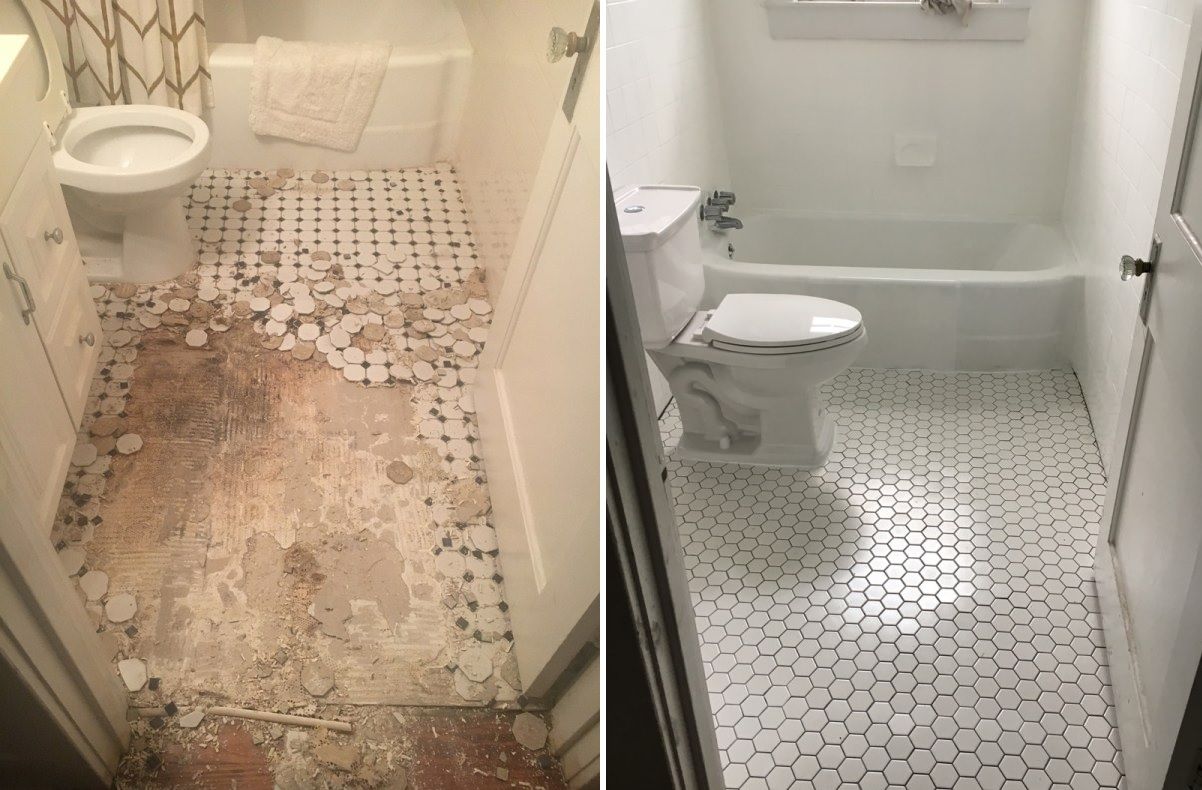
The floor tiles can totally change the way a bathroom looks so if you ever want to make a change this can be a really good makeover idea. Everything else can remain the same but even so, when the new tiles are in place, the whole room will look totally different than it did before. Anyway, if you want to go for a modern yet also a bit vintage look, consider hexagon floor tiles similar to these ones. They form a lovely honeycomb pattern that looks beautiful without being too busy. As far as the actual installation process goes, you’re going to need a few tools, the most important one of all being a tile saw. You can rent this one and everything else should be pretty easy to find at any local store. Check out elkinsandcompany to find out more about this remodel project.

There’s also a really nice remodel project described on create-enjoy which also involves hexagon tiles. It’s the same honeycomb pattern we described earlier but this time with lighter-colored grout which gives the bathroom a more uniform and clean look, better-suited for a modern home. The tools and supplies used throughout this project are more or less the standard ones and include tile cement board, cement board screws and a special scoring knife, mortar, grout, a trowel, a tile cutter, a bunch of grout-related accessories and an oscillating tool for cutting the door frames in case you need to. The bathroom floor tiles fit in like puzzle pieces for the most part. Once the big pieces are in place you can finish the project off by cutting and adding the little edges and corner pieces.

Marble bathroom tiles look really beautiful, retaining that classic and timeless look and elevating the entire space. If you’re a marble fan you should definitely consider doing this for your own bathroom. The tricky part in this case is that you might not be able to find the tiles in the right size or shape but that’s entirely ok because you can cut them yourself. Start with large rectangular tiles which are easy to find and quite cheap. You can cut 12 x 12 tiles into thirds and they’d be the perfect size and shape for a herringbone-patterned floor. Check out shineyourlightblog to see how this entire process goes.

Painted stencil idea – no retiling required

If you want to refresh your bathroom floor tiles without actually replacing them that’s totally understandable too. There’s a way to do that without having to remove or replace any of the tiles. The trick is to use a stencil. You’d basically be painting over your existing floor tiles giving them a whole new look. This works best if you have plain white tiles or just a solid color as a background as opposed to a pattern. Naturally, you need to first clean the tiles before you start applying the stencil. If you’re interesting in doing something similar for your own bathroom floor tiles and you want to find out more details you can check out lifeonshadylane.