DIY: Last Minute Halloween Coasters
With Halloween almost here, you may be gathering those final items for that Halloween party you might be throwing! If so, then you may have overlooked a small detail in your party shopping. That small detail, being coasters!
Now, you may be thinking that coasters (of all things), do not scream party. However, they can add a nice little décor touch to any plain table which is lacking that Halloween spirit. In this case, making Halloween coasters is a great way to not only protect your tables but add that extra touch of Halloween décor in an inexpensive way.

Today I’m going to be showing you how to make a simple set of last minute Halloween coasters! These coasters are really easy to make and are a great project for someone who wants to dip their toe into crafting. With that being said, the project only requires a few supplies which can all be found at your local craft store. In this DIY I used wooden coasters as my based, but you could easily use other plain coasters set (which are not wood) for this project as well.

Supplies
- Wooden Coasters
- Halloween Scrapbooking Paper
- Xyron Creative Station Lite + Permanent Refills
- Dimensional Magic
- Paint (matching the color of your scrapbooking paper)
- Foam Brush
- Scissors

Step 1: Paint your coasters and set them aside to dry.

Step 2: Cut out your scrapbooking paper that is the same size as your wooden coasters.

Step 3: Grab your scrapbooking paper piece and slide it through your Xyron Creative Station Lite. Keep repeating this process until you have run each piece of paper through your Xyron Creative Station Lite.

Step 4: Add your scrapbooking paper piece to the front of your wooden coaster. Before adding it though, make sure you rub each scrapbooking paper piece while it’s on the Xyron Sticker paper. That way, you’ll be creating a really strong adhesives backing.
When your scrapbooking paper piece is on your wooden coaster, trim around the edges with some scissors, to get a nice clean edge.

Step 5: Now apply a thin coat of Dimensional Magic to the top of your wooden coaster. When applying the Dimensional Magic you may want to have a toothpick handy so you can pop any air bubbles. At first, the top of your wooden coaster may look ”cloudy” but that’s ok because it will dry completely clear. After you finish applying the Dimensional Magic set your wooden coaster aside to dry for 24 hours.
Once each of your coasters are covered with Dimensional Magic and are dry, your ready to start using your new set of coasters!

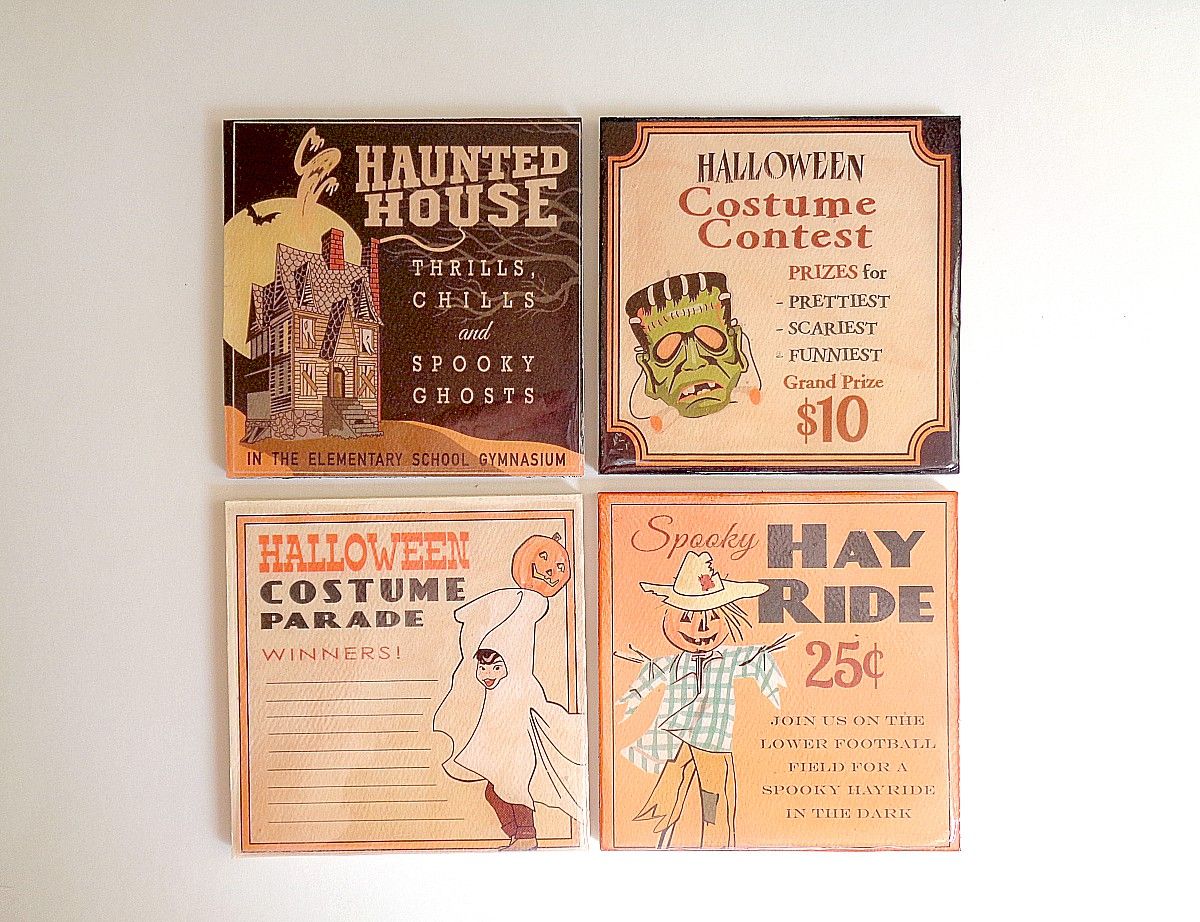
I loved how these coasters turned out, and (overall) they really do look like a professional set of coasters!
Besides Halloween, you could easily switch out the paper in this DIY for another theme or holiday. By doing this, you can now create coasters for any time of the year! Along those same lines, you could always make a set of these coasters and either give them away as a housewarming gift or as a Christmas gift.
If you made these coasters what theme or holiday would you make them for?
Hope your Halloween is fun and spooky. Eat, drink and be scary!