How To Cover A Lampshade With Fabric


Want to add a little personality to a room? Adding a fun fabric to a lampshade creates a great focal point to the room. Match the fabric of your favorite pillow or complement the lamp base for a bold look. Totally customizable and original- this project is a way to put your mark on a room! The concept is pretty simple but we provide detailed instructions here so that even the beginning DIYer can succeed!

Fabric Covered Lampshade Supplies:
- Drum Lampshade
- Approximately 1 yard of fabric (measure based on the size of your shade)
- Spray adhesive
- Erasable Fabric pen
- Pinking shears
Step by step guide to cover a lampshade:

Step 1: Prepare fabric
Start by laying our your fabric and ironing flat if needed to get rid of wrinkles and fold lines. Roll the drum shade across the fabric to pick the direction that provides adequate fabric coverage of the shade. You may have to roll diagonally across the fabric depending on the size of the shade you are trying to cover. Make sure to account for enough to cover the entire shade plus some as the start of the fabric will probably be at an angle.

Step 2: Trace and meassure
Trace the shade on the fabric with the erasable marker. Follow the shade all the way across the fabric marking along the top and bottom of the shade for your measurements. Then measure another parallel line approximately 2 inches up from the first mark (this will provide for the seam and cover some of the inside of the shade). The lines you draw for the shade will most likely be slightly curved so make sure that your second lines (one line above the top shade line and one line below the bottom shade line), match up evenly.
Step 3: Cutting Process
Cut the fabric with pinking shears. This provides a nice edge to the fabric that is wrapped on the inside.

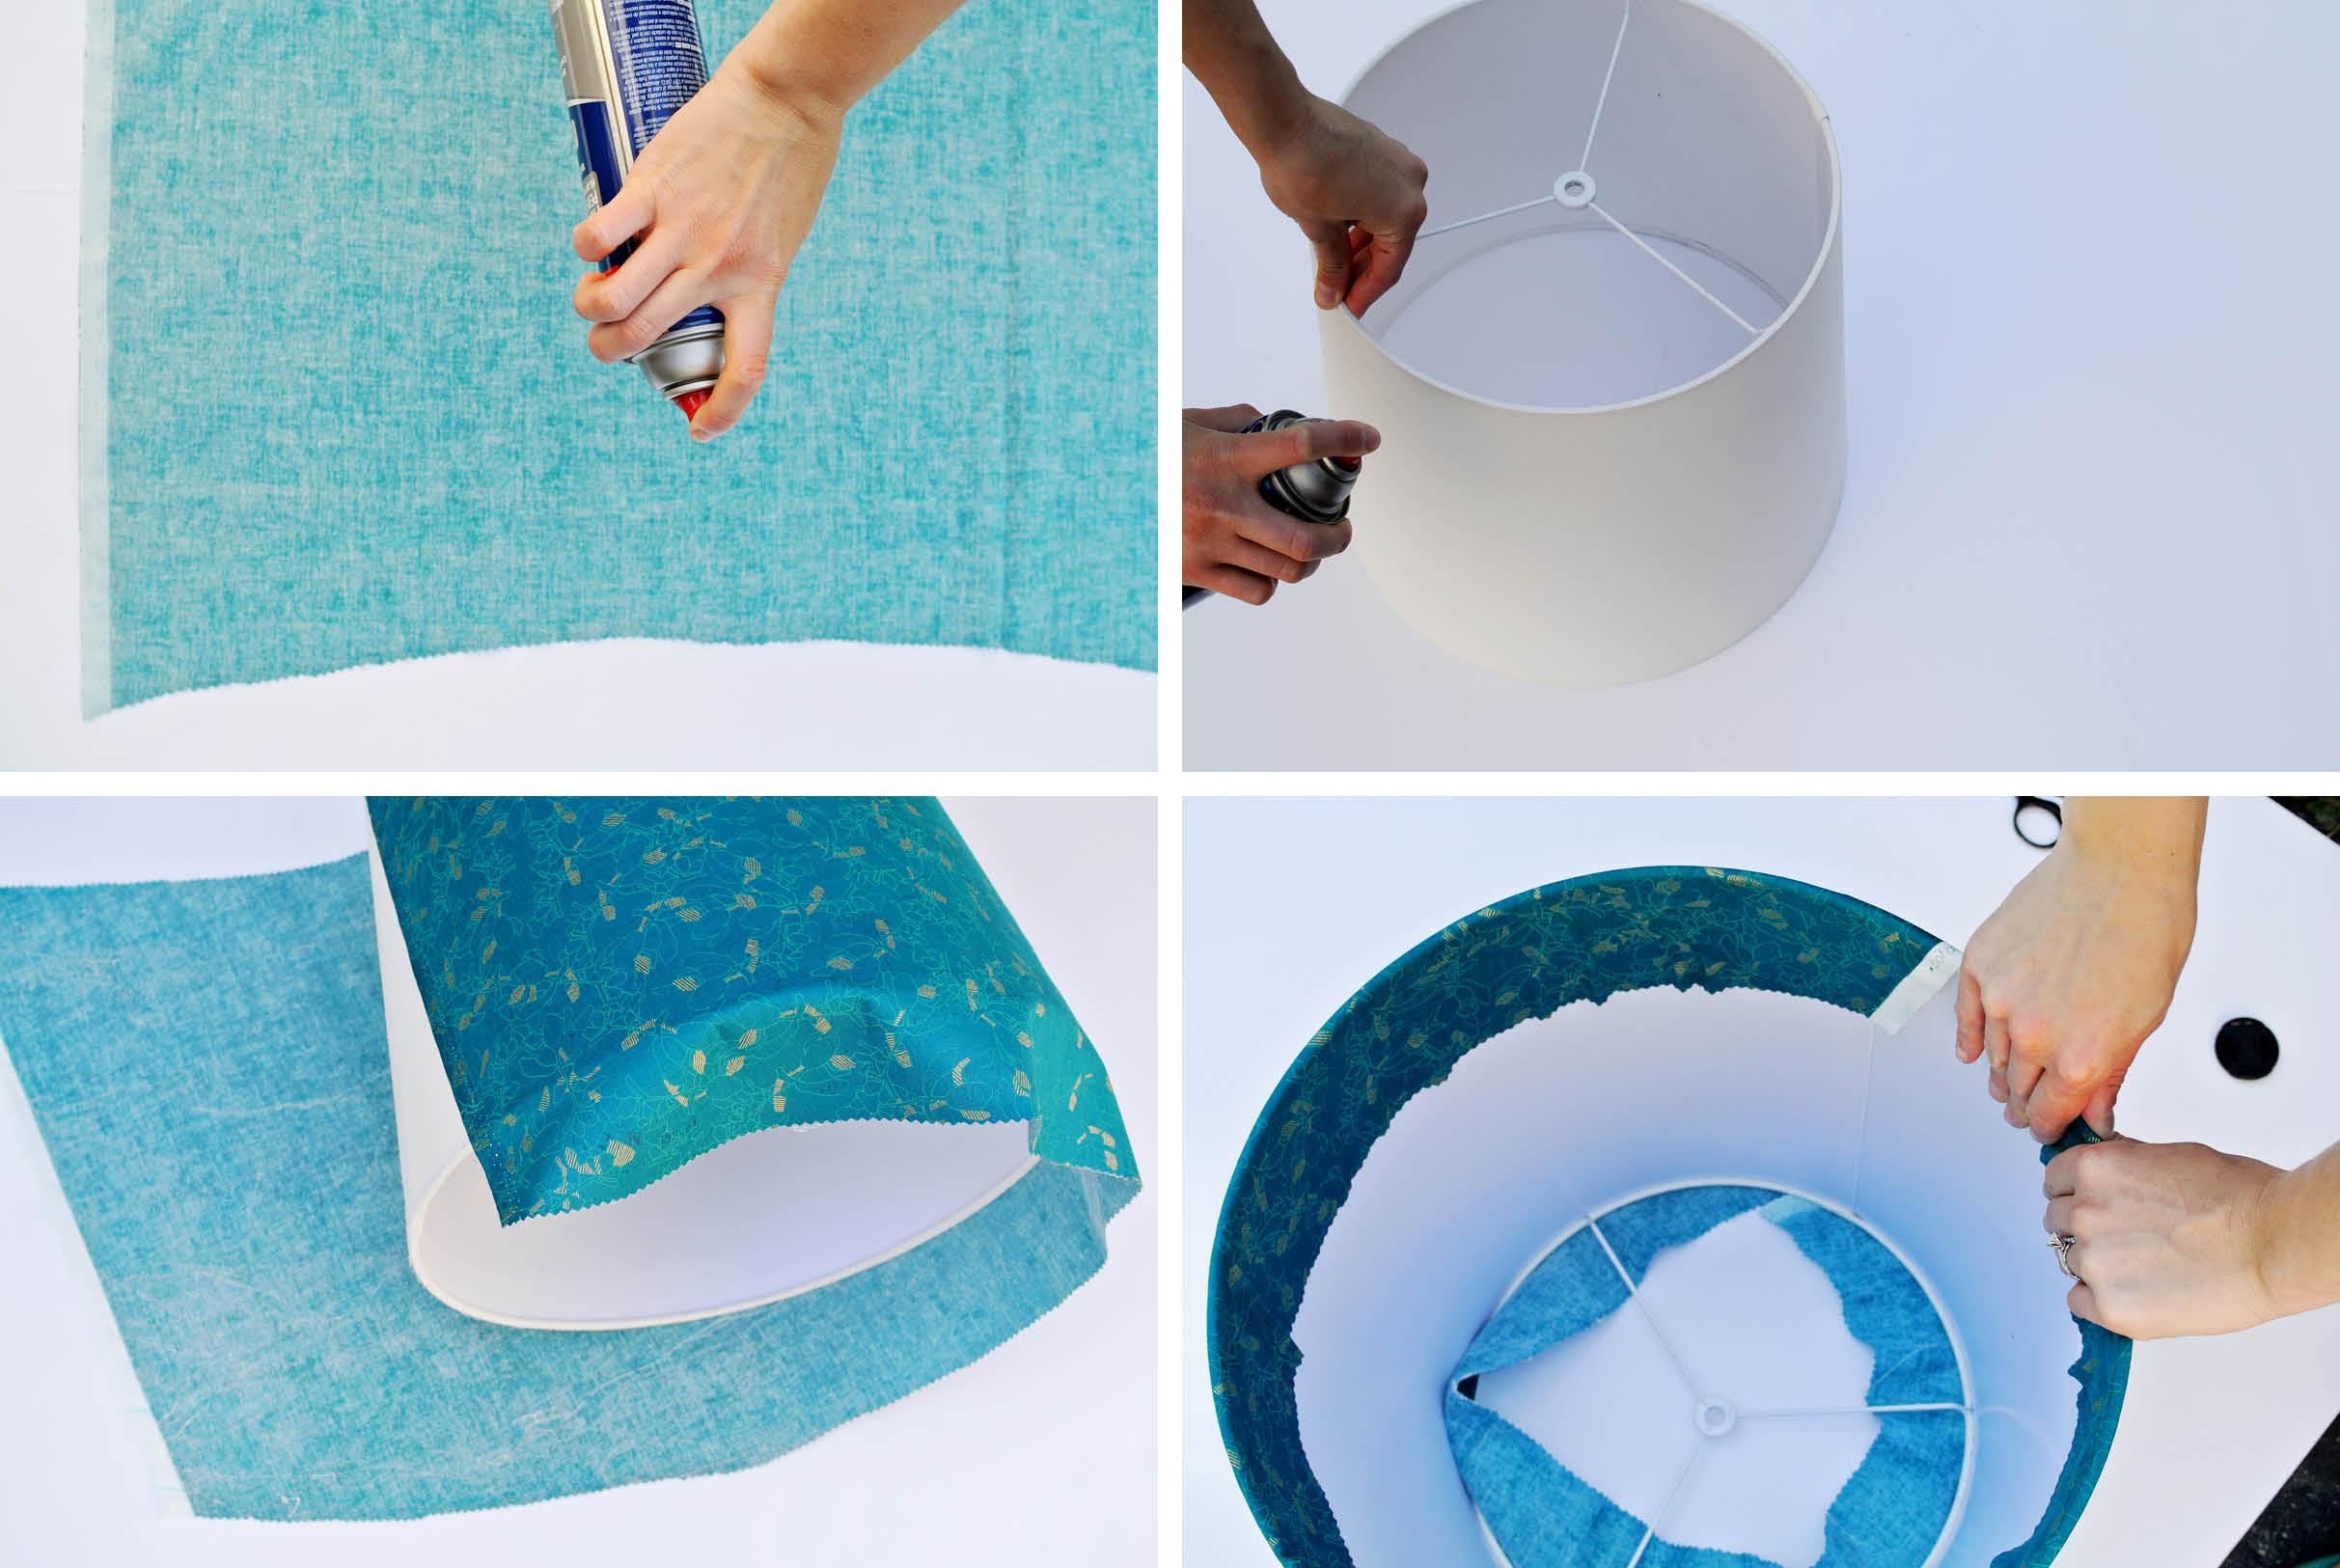
Step 4: Spray the adhesive
Once the fabric has been cut out, use spray adhesive to attach the fabric to the shade. Spray both the fabric and the shade with the adhesive to ensure the best seal. Roll the shade along the fabric at the same angle that you measured originally. Using your hands, attach the excess fabric on the bottom to the inside of the shade. Use extra spray adhesive on the inside of the shade if needed.

Step 5: Cutting excess
There will most likely be an extra fabric that overlaps the fabric at the other end where you started wrapping the shade. To attach the excess fabric, spray adhesive over the fabric that was already laid and use a piece of cardboard or paper to measure off the area in which you need to spray (as shown above). Seal down the top fabric to the bottom.
Step 6: Sealing edges
Seal the edges at the top of the shade around the wire by cutting a line down the center of the seam allowance with your pinking shears. Press down to the inside of the shade to seal. Once this is done the entire shade should be sealed. Allow time for all the spray adhesive to dry.
Place your shade on the lamp base and enjoy your new statement piece!


