DIY Wooden Candle Holder – Candelabra with High Style at Low Cost

A stylish wooden candlestick holder is a functional centerpiece that doesn’t have to cost a bundle. This DIY version in wood is an easily constructed project that can be can be a conversation piece as well as a useful accessory.
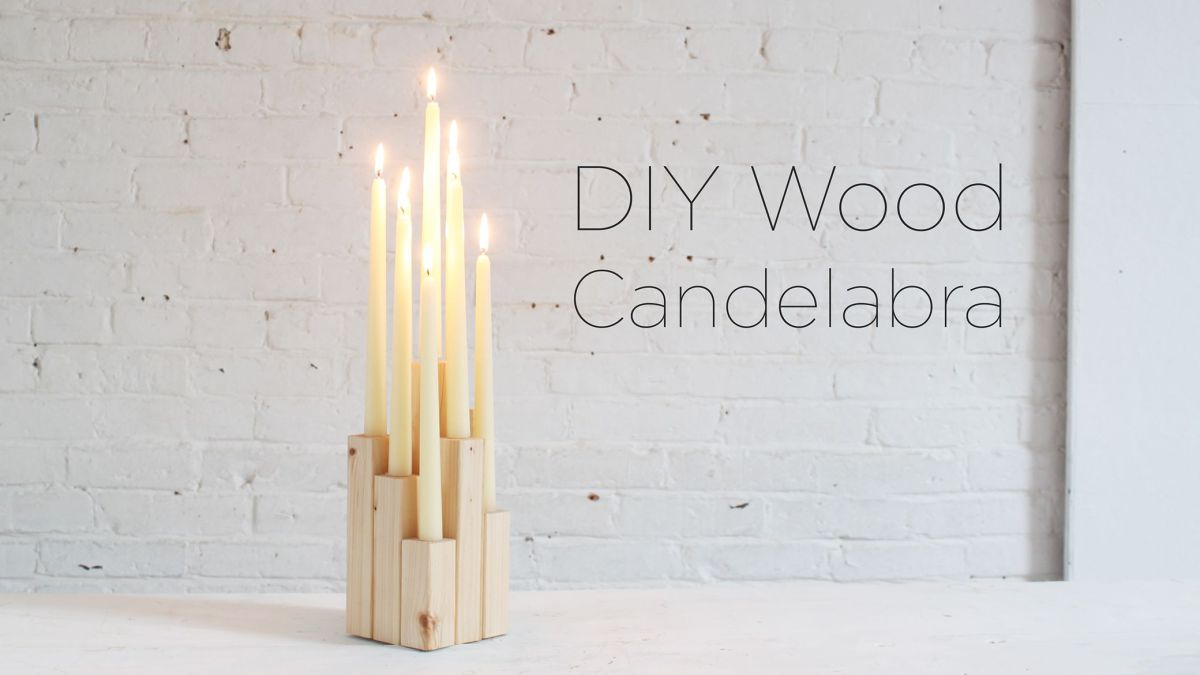
This particular wood candelabra is made out of different lengths of 2×2 lumber. It is an easy and affordable woodworking project that has a nice art deco style. It makes a great centerpiece for a table or is an eye-catching addition to a mantle. The design concept is scalable, meaning that you could make a bigger more complex version by simply cutting and adding more pieces of 2×2. All of the materials used in the project can be purchased at Home Depot or at your local hardware store.
Project supplies for wooden candlestick holder:
- 2” x 2” x 8’ wood
*I cut the 2×2 into nine pieces to make up the body of the candelabra - 2” drywall screws to attach the pieces of 2×2 into sets
- Gorilla® Wood Glue to affix the screwed-together sets of 2×2
- Danish oil
Tools you’ll need for the project:
- Chop saw or circular saw
- Orbital sander or sandpaper
- 18 volt cordless drill
- Drill press (optional)
- Foam paintbrush
- C clamps
Instructions to build the candlestick holder:
Step 1: Prepare the wood
I used my chop saw to cut nine pieces of 2×2 into varying lengths. If you don’t have a chop saw, a circular saw works just as well. Once I settled on the tallest piece ( 10 ½” ) and the shortest piece ( 3 ¾” ) I cut the other seven pieces at different lengths between those two points.


Step 2: Smooth corners
I used my orbital sander to smooth every side of each piece and round the edges and corners. If you don’t have an orbital sander, you can sand the wood by hand with sandpaper.

Step 2: Add holes
Next, you have to create the holes for the candles in one end of each wood piece. Before you drill into the wood, measure some taper candles to determine how big you should make the hole. While standard taper candles can vary slightly in girth, an average measurement should work well for most.
You can use a cordless drill and a boring bit to drill into the end of the 2×2. Be extra careful because it is easy for the bit to jump from the wood. Boring bits are usually pretty long and can be difficult to control if you aren’t very tall. I found it easier to clamp the woodpiece to a block, which gave me more control of the drill. It is also a safer option. If you have a drill press, this part is even easier


Step 4: Clean for dust
After I made the holes, I wiped off the wood pieces to make sure they were clean and dust-free. I then applied one coat of Danish Oil using a foam paintbrush.

Step 5: Screw them together
I didn’t want any of the screws to be visible on the finished candelabra, so I first attached the pieces into sets: one set of three, one set of five, and the last piece on it’s own. It’s a good idea to predrill all the holes before screwing the pieces together.


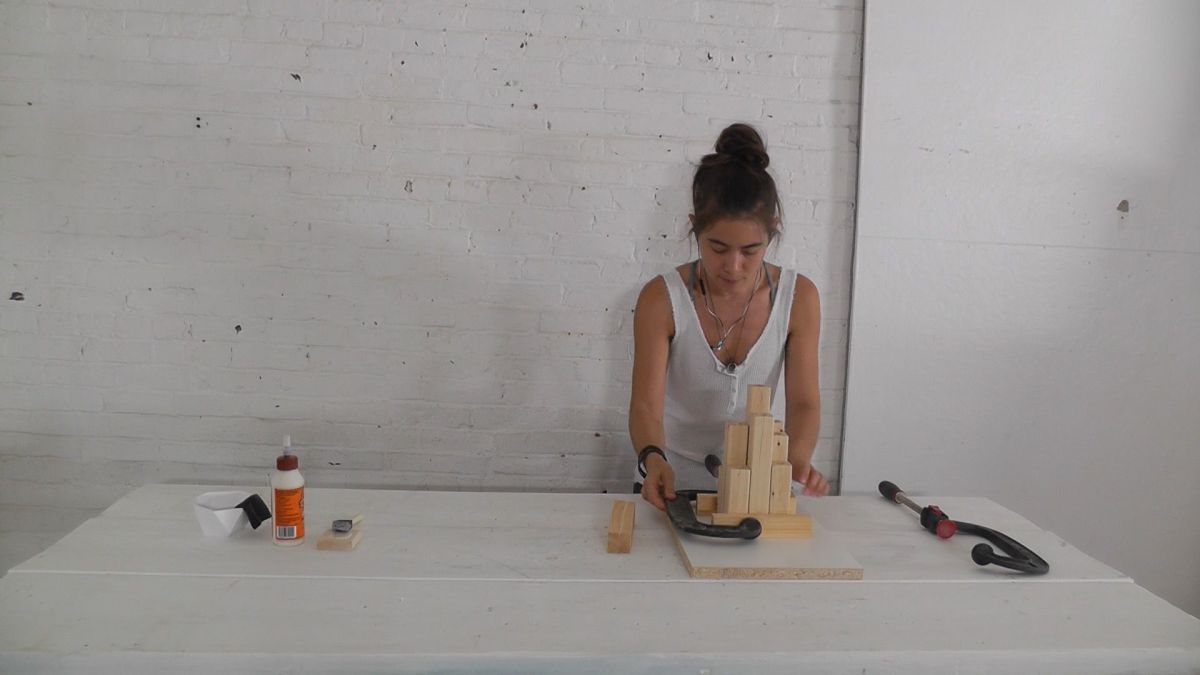
Step 6: Add wood glue
Once the sets were complete, I used wood glue to adhere the three sections together, making sure that the screws were turned to the inside of the candelabra.

Step 7: Clamp
To make sure that the construction dries securely, I clamped all the pieces together with two large C clamps. I used four scrap wood pieces to keep from bruising the wood and to disperse the pressure evenly.

Once the glue has set, you can remove the clamps. Gorilla® Wood Glue instructions indicate that you can remove the clamps after just 20 minutes, but should let the piece dry overnight for the maximum bond. It develops roughly 80% of its total bond strength in 1 to 2 hours.


After you have removed the clamps and the glue has dried sufficiently, you can insert the candles of your choice and place the candelabra on the table or mantel — or wherever you wish.


Lit or unlit, this DIY wood candelabra is a striking home accessory. I opted for a natural wood look, but your imagination is the only limiting factor. The wood for the piece can be stained or painted in any tone or color to work with your home’s decor.


High style at a low cost — It’s the perfect piece for a candlelit dinner with friends or a romantic evening at home.