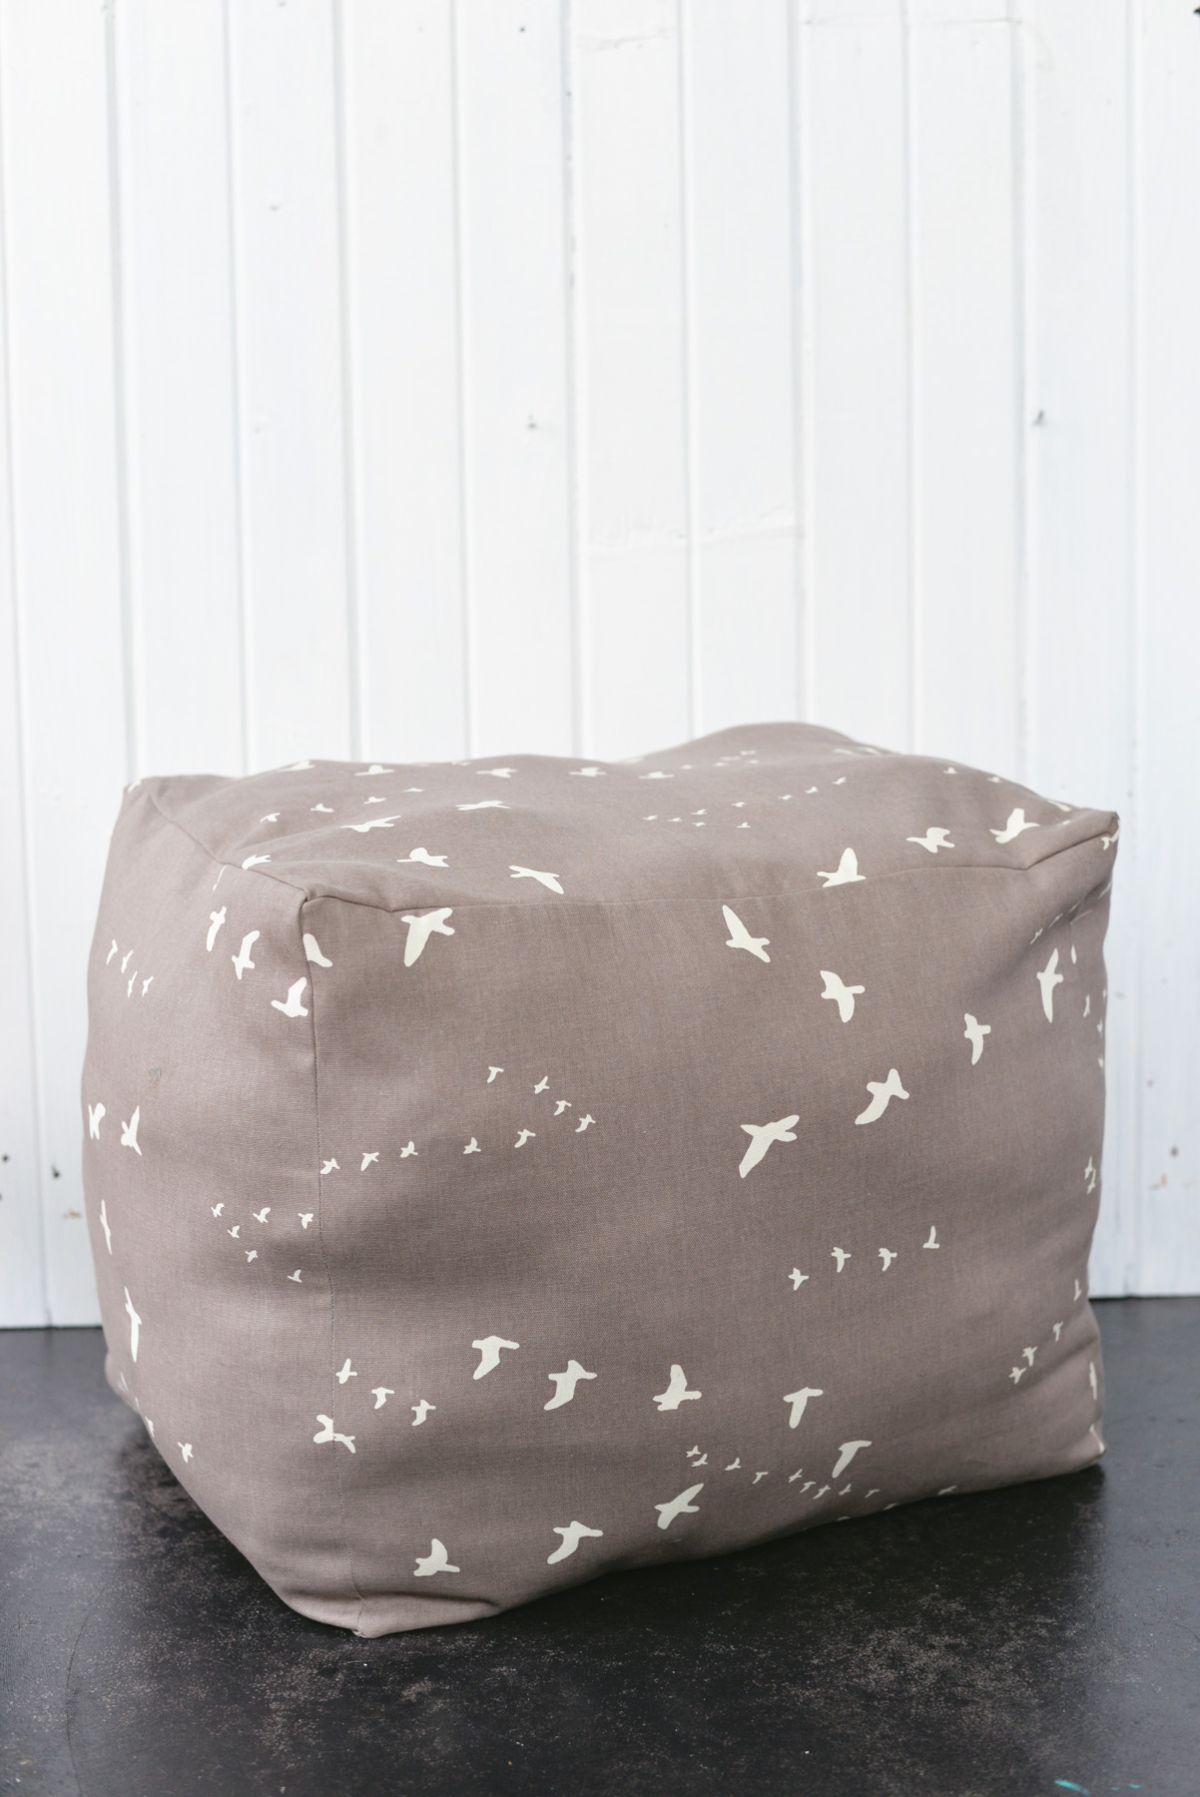
DIY Pouf Ottoman Table – How To Make An Easy Extra Seating

Floor pillows are a great accessory for any room. With multiple functions such as a pouf ottoman table for your feet or an impromptu side table, these versatile pillows can be custom made in various sizes or even shapes for your space! This project can be completed even by a beginner sewer and can be made in less than an hour!

Supplies you’ll need to DIY pouf ottoman:
- upholstery or home dec fabric (1.5 yards)
- straight edge ruler
- rotary cutter
- cutting mat
- large zipper
- scissors
- foam
- batting
- pins

Instructions step by step to DIY a large pouf ottoman:
Step 1: Cutting fabric
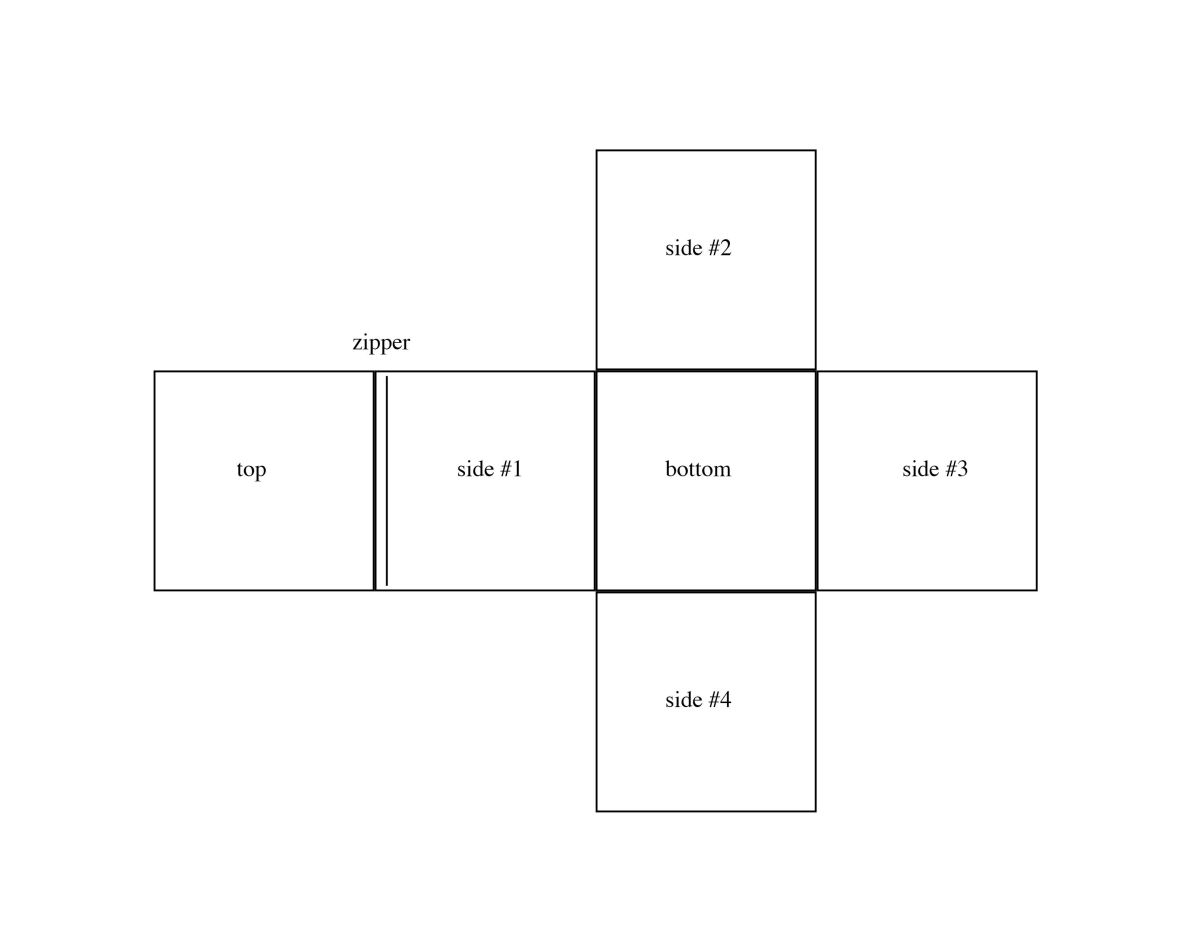
Start by measuring out and cutting your fabric. For a cube, you can cut 6 equal sized squares. For this sized pouf we used 18″ x 18″ squares (which makes for an approximately 16″ high and wide cube once you allow for the seams).
Step 2: Add zipper
Sew your zipper in first. Do this by unzipping the zipper and pinning each side to one of your squares.
Step 3: Continue sewing
Sew your zipper in place with the zipper open. When finished zip the zipper back up.
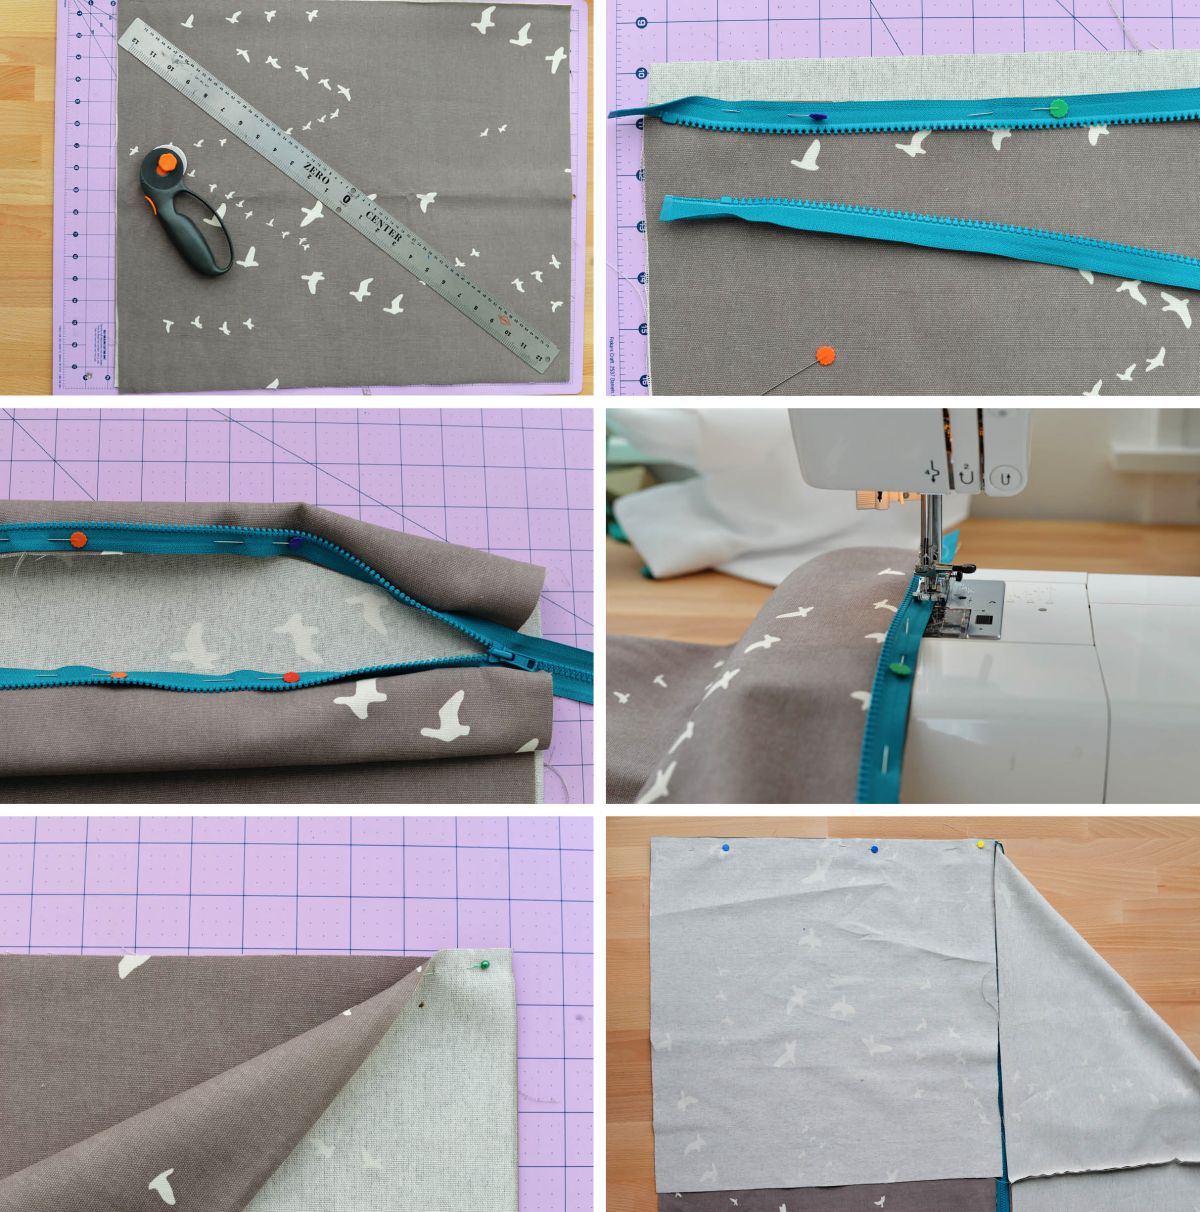
Step 4: Sewing two more squares
With the 2 pieces connected by the zipper, sew 2 more pieces of the squares to make one large row of 4 attached squares. Do this by placing one square wrong side down on top of the right most square that is right side up. Pin on the edge and sew. Do this until all 4 squares are attached in a row with all of the seams on the wrong side of the fabric (no seams should be seen when looking at the row right side up). Attach the two ends of your row to create an inside out square tunnel and sew along the seam of the two pieces that meet together- see example below.
Eventually, all of the sides will touch so if you end up out of order it shouldn’t be a big deal, so long as you have a way to turn the pouf right side out again after sewing your seams in!

Step 5: The 4 side
Next, sew another square to the 4 sides of the square tunnel that you just sewed together with all of the fabric wrong side up so that the seams are kept inside the cube (finished step below).
Step 6: Sew with zipper open
Repeat step 5 with the zipper open to finish up your cube and all of your fabric wrong side up (see photo above). Keeping the zipper open will allow you to pull your cube right side out when you are finished attaching the last square.
Step 7: Filling
Fill your pouf with foam and batting and zip shut! Put your feet up and enjoy your new pouf!
