How to Remove Tile Tub Surround with Metal Mesh

This tutorial will show you how to remove a tile tub surround with metal mesh. Before you begin, take one last look at your bathtub. For better or worse, once you begin this project, there’s no turning back.

You must be prepared for whatever you find underneath that tile, behind those walls, inside that drain. If you’re fully committed to getting it done, let’s move on. Step by step, we’ll show you how to remove a tile tub surround with metal mesh.

DIY Level: Intermediate
Materials Needed to Remove Tile Tub Surround:
- Hammer and crowbar
- Heavy duty gloves
- Dust mask
- Safety glasses
- Large dumpster / garbage can
- Broom and shop vac or similar
- Razor blade, chisel
- Patience

Reasons to Remove a Tile Tub Surround
One goal of this particular tile tub surround removal is to be able to re-tile the surround all the way up to the ceiling.

Another reason for this removal was to update the outdated tile with increasingly chipped grout areas. Of course, if we loved the tile, we could have redone just the grout.

Removing Tile Tub Surround Step One: Clear the space
So, let’s begin the bathroom tile tub surround removal. First, remove everything from the bathroom itself. The upcoming project will be incredibly messy and dusty…and even that is an understatement.

Removing Tile Tub Surround Step Two: Plug holes
Cover any outlets and drains and vents with painter’s tape, plastic, or cloth.

Removing Tile Tub Surround Step Three: Protect the tub
Lay an old drop cloth or sheet in the tub itself. This will serve to provide a little protection to the tub itself as tiles fall, and it will also help catch falling tiles and debris for easier cleanup.

Removing Tile Tub Surround Step Four: Start at the edge
Pick a spot on the edge of your tile surround and, with a hammer and crowbar, start pounding.

The goal at first is to get at least one tile removed so you can see what you’re looking at underneath.

Removing Tile Tub Surround Step Five: Create a crack
Work your crowbar from one side of the tile’s edge to the other until you’ve formed a crack big enough to wedge your crowbar into.

Removing Tile Tub Surround Step Six: Remove that first section
Push on the crowbar’s handle, which serves as a lever to shove the tile away from the wall. The tile may come out in one piece, or it may break and come out in multiple pieces. Since we are not saving our outdated tile, either way is fine.

Finding Metal Mesh Under Tile Tub Surround
Depending on the age of your house’s construction, you may find metal mesh underneath your tile. This complicates the project, but it’s not an insurmountable challenge. Basically, you’re looking at just another layer: drywall, metal mesh, mortar, and the tile itself. All of this except the drywall (although probably that, too) will need to be removed.

Here’s a better look at the metal mesh. This was a common practice in home construction decades ago. It’s no longer necessary, though.

Removing Tile Tub Surround Step Seven: Continue removing tiles
Now that you know what you’re dealing with, simply continue on with your hammer and crowbar, ripping out tile by tile. You may find it easiest to move strategically from one row to the next, or you may be more comfortable fanning out from your first removed tile. Whatever is most comfortable for you and makes the most sense for how your tile is coming out is great.

Removing Tile Tub Surround Step Eight: Remove debris as you go
Be sure to clear out the fallen tiles, chunks, and debris periodically. I found it most helpful to clear out every 4-ish square feet.

Tip for Removing Tile Tub Surround
You’ll find it easiest, whether you’re working from side to side or top to bottom, to always move from the outer edges toward the inside of your tiled tub surround walls. Stick the crowbar behind a tile, hammer it in, and push the handle toward the wall.

This should pop out bits of or the whole tile. Be particularly careful around windows, with removing the tile and swinging your hammer. Tiles can go flying when levered out of place aggressively, so use caution.

Removing Tile Tub Surround Step Nine: Remove moldings
Speaking of windows, if you are tiling up to the ceiling, you’ll need to remove any molding around your window(s) so that you can run the tile right up to them. Use a hammer and crowbar to do this.

Once you get going, you will probably find some strategies that work well with your particular combination of tile and mortar (and metal mesh). I found that it was helpful for me to hammer (hard) the corners of the tiles I was about to remove. This weakened the bond of each tile’s corners as well as the grout between the tiles, which ultimately made removal (with a crowbar) much easier and more efficient.

Another strategy I employed was to avoid aligning the crowbar exactly with the back of the tile, which left the mortar intact on the wall. Because we’ll be removing that anyway, it makes sense to try to remove it along with the tile where possible.

Removing Tile Tub Surround Step Ten: Remove face plates
Remove the face plates where applicable from your shower and tub fixtures so you can remove the tile and mortar from behind them.
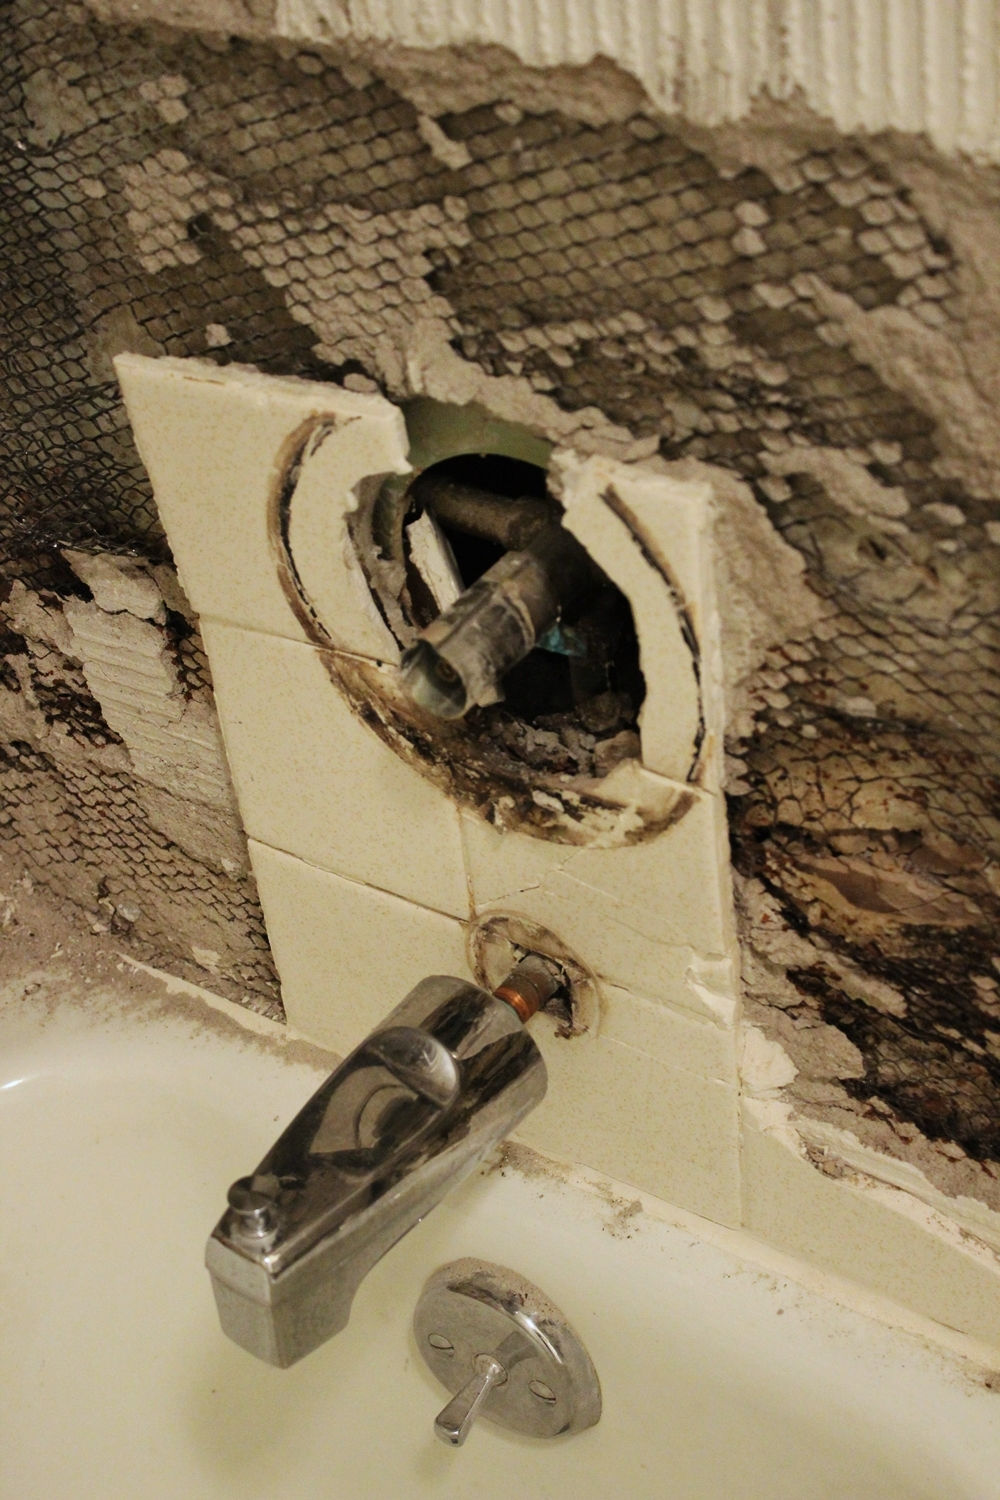
Removing Tile Tub Surround Step Eleven: Remove rest of tiles
Once the tile behind the fixtures is exposed, remove it in the same way you’ve been doing elsewhere in your tub surround.

To do this, align your crowbar tip at the back of the mortar, right exactly next to the metal mesh. Then, when you lever the crowbar, it will pull off both the tile and mortar, leaving an exposed (and more easily removed) metal mesh.

Removing Tile Tub Surround Step Twelve: Remove the metal mesh
Removing the metal mesh can be easy yet tricky at the same time.

Wherever the mortar came off with the tile, the metal mesh is left exposed on top of the drywall. I could sometimes remove just a few nails around the edge, then grip the metal mesh with my gloves, and pull it off in large pieces.

Removing Tile Tub Surround Step Thirteen: Loosen large chunks
Wherever large clumps of mortar are still stuck to the metal mesh, smash your hammer over those sections to loosen them from the metal mesh. Then you can remove the metal much more easily.

Removing Tile Tub Surround Step Fourteen: Prepping the drywall
If your drywall has remained intact, and if you’re planning on keeping it, you may move onto the upcoming tutorial for prepping your tub surround for tile.
However, you may choose to remove the drywall for a number of reasons.
These might include: (1) You want a flush alignment between hardibacker (the cement backerboard to which your tiles will be attached) and adjacent drywall. (2) Your drywall was damaged in one or more areas, so it makes sense to remove it all for continuity. (3) You will be making plumbing changes with your shower/tub fixtures and thus need to access the area behind the drywall.

Removing Tile Tub Surround Step Fifteen: Removing the drywall
Strategic removal of your drywall will create less work for you overall, so pay attention to where and how you remove it. You’ll need to remove the drywall to the first stud past the edge of your tub, but you should only remove it to the halfway point on the stud itself. So, on a 2×4 stud, you’ll only want to cut out your drywall to 1” (or actually 3/4″, since 2×4 isn’t the true measurement).

Carefully locate your first stud by cutting out a sliver of drywall from the edge of your tub. Once you’ve found it, use a razor blade to cut, at the stud’s vertical halfway line, the drywall all the way up to the ceiling.

Score the corners and joints of the drywall, then use your hands or hammer to pull the drywall off the studs.

Do this all the way around your tub surround until all drywall is removed.

Removing Tile Tub Surround Step Sixteen: Clear window frame
Remove anything next to the window frame. This window had PVC board installed next to the frame itself, before the window sill and moldings. It all has to be removed when you are tiling around a shower window.
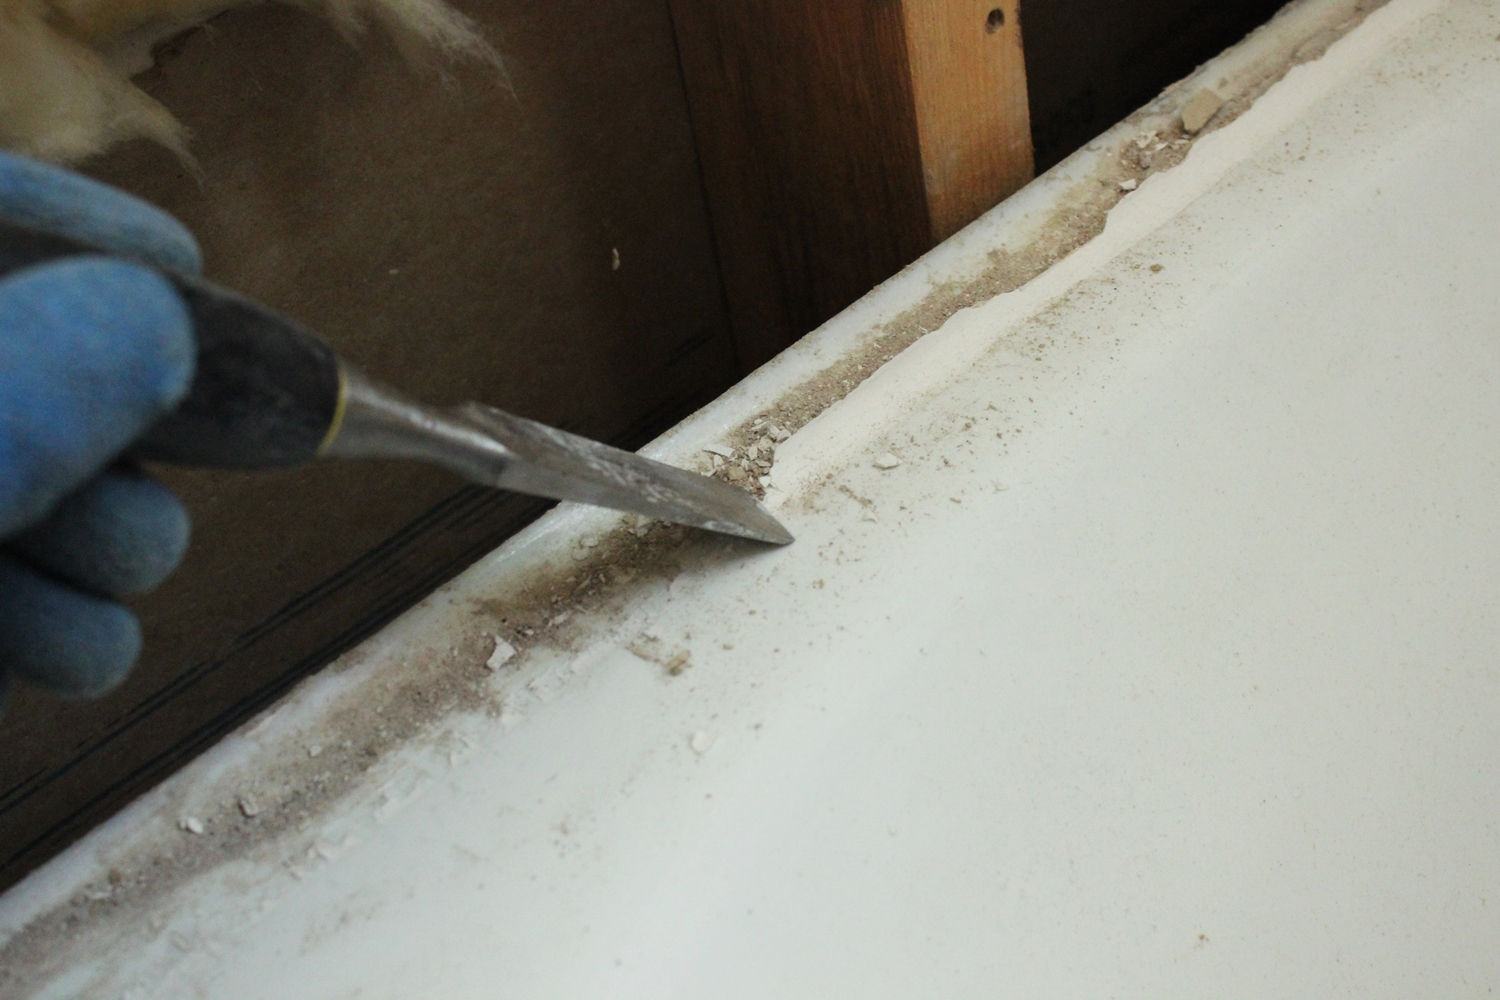
Chances are high that you’ll have some residual caulk or similar material on the edge of your porcelain tub itself. If it doesn’t peel off easily, try working with your chisel to get it off.

Use a hammer to gently but firmly chip the stuff away. This can take a bit of time.

With everything removed and your insulation/framing exposed, you’re ready to make whatever plumbing changes are required and begin prepping the area for tiling.
Note: The author is an experienced, although not professional, DIYer. Neither the author nor Homedit is responsible for any injury or damage that may be a result of following this tutorial.