DIY Modern Wooden Toy Box with Lid: A Step-by-Step Tutorial


Learn to make a DIY wooden toy box with our straightforward guide. While you may think creating a wooden toy box would be complicated, rest assured, that’s not so.

With the right wood and some power equipment, you’ll be off to creating a kid-approved piece of furniture confidently. Read on and learn how.
Learn To Build A Wooden Toy Box

Materials Needed to Build a DIY Wooden Toy Box:
To create this kids wooden toy box, first you’ll want to secure the below materials.
- Out of 1/2″ plywood: two (2) 12”x12” squares AND two (2) 12”x32” rectangles AND one (1) 13”x33” rectangle
- Out of 1×3 lumber: two (2) 12” cuts AND two (2) 32” cuts AND three (3) 13” cuts
- Out of 1×2 lumber: two (2) 12” cuts AND two (2) 32” cuts
- Out of 2×2 lumber: four (4) 18-1/2” cuts
- One (1) 3/4″ thick project panel (also sometimes called “craft pine”) in 16”x36” rectangle
- Two (2) torsion hinges (example uses 40# load) or hinge of your choice
- 1” and 1-1/4” pocket hole screws
- Wood glue
- Kreg jig, jigsaw, 120- and/or 220-grit sandpaper + sander, drill, clamps
- Felt/rubber pads for lid (optional)
- Finish (e.g., stain, paint, sealant) of your choice
Step 1: Sanding

Begin by sanding everything. This might feel tedious when you’re excited to get building, but trust me. It’s much faster, easier, and better for the end product to sand now than after the toy box is assembled.
Step 2: Build side panels
You’ll start by building your side panels.
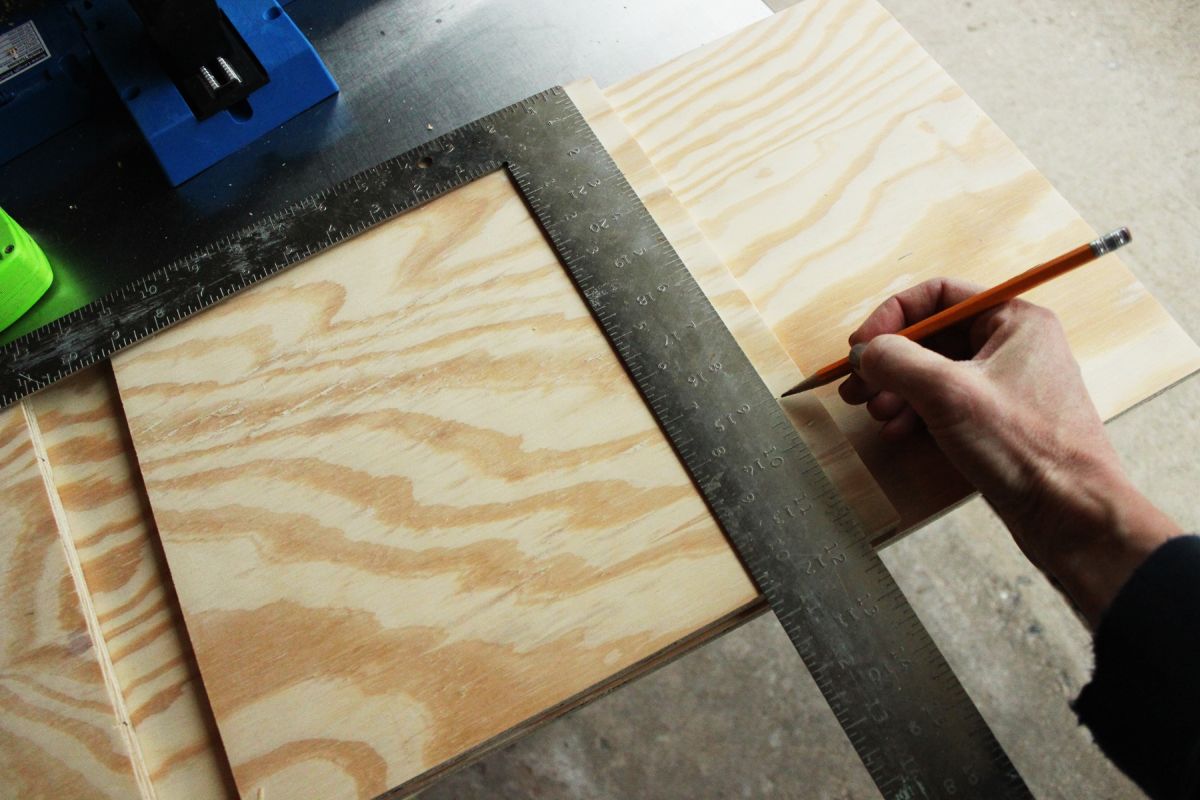
Take a 12”x12” plywood square and determine which side will face the interior of your toy box.
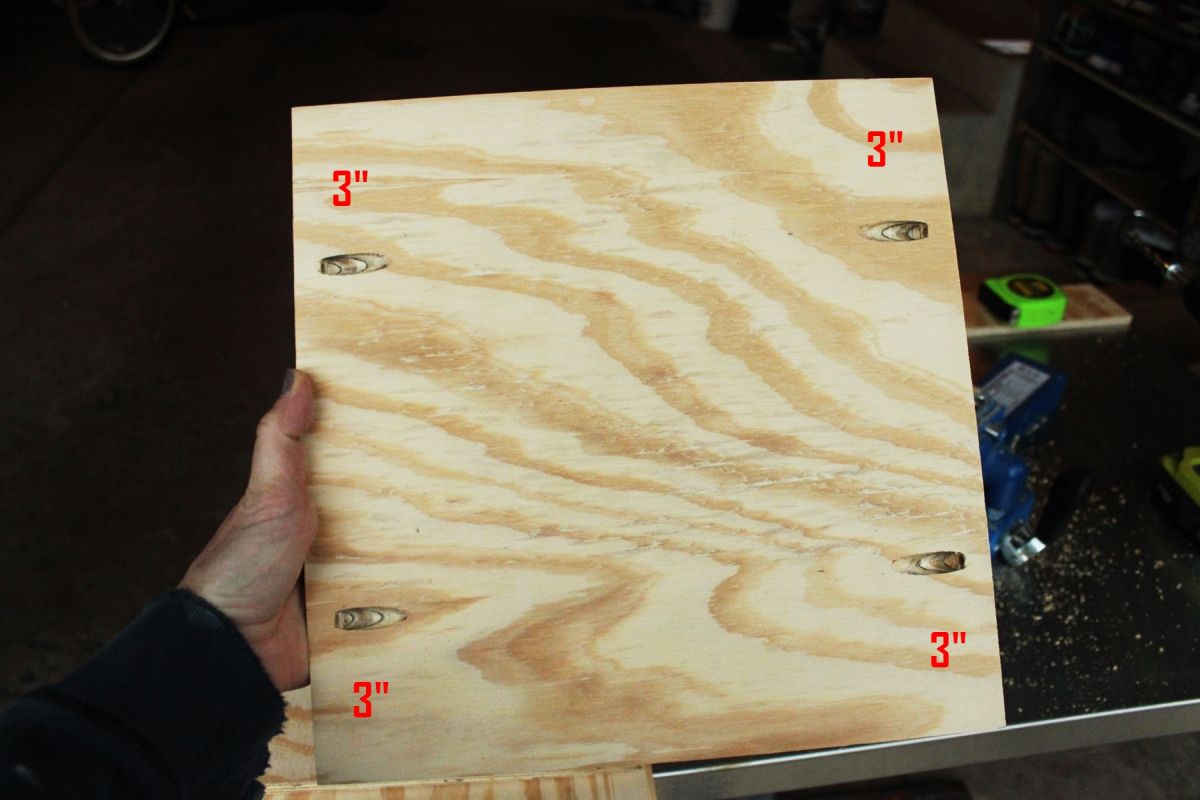
Place the grain running sideways, then measure 3” in from the corners on the two sides (at the entry/exit points of the grain).
You’re marking the pocket hole placement for the side panel to attach to the legs here.
Step 3: Set up Kreg Jig and drill holes

Following instructions, set up the Kreg jig at the 3/4” depth mark.

Drill your four pocket holes (two per side).
You should have 4 holes total.
Step 4: Measure the pocket holes

Next, measure for two or three pocket holes on the top and bottom ends of your square (note: use the photo for measurement reference).
These holes will attach the top and bottom inset strips onto your side panel.
Repeat these steps for the other side panel.
Step 5: Choose Inward Facing Side and Drill Holes

On your 12”x32” rectangle, determine which side you want facing inward on your toy box.
Measure and mark 3” in from the top and bottom corners on both ends.
Drill these four holes (two per end).
Then measure and mark five pocket holes on the top and bottom ends.

Your piece should now look like this.
Repeat for the other rectangle.
Step 6: Drill holes into longer, thinner wood strips

It’s now time to grab your 1×3 and 1×2 strips, including not just the 12” but also the 13” lengths.
The 12” 1×3 strips will go on the top (as in, close to the lid) of your plywood panels, the 1×2 strips will go on the bottom (as in close to the floor) of your plywood panels.
The 13” strips will go onto the bottom of your toy box to support the box floor.

Drill two holes into each end of your 1×3 pieces and one hole into each end of your 1×2 pieces.

Repeat for the longer (32”) strips as well.
Step 6: Prepare and measure the front strip of the DIY toy box

We now need to prepare the Front top strip (one of your 32” 1x3s) for cutting out the finger hold.
From each (side) end, measure and mark the 4” and 5” spots along the top (close to the lid) end.

Use a square at your 5” marking to place a new 5” point that is 1-3/4” up from what will be the bottom (away from the lid) end.
Now draw a line from the 4” point at the top to the new 5” point.
Do this from both sides of your wood strip.

Use a straight edge to draw all the lines you need to guide your jigsaw.
Step 7: Use your jigsaw to cut the wood

Use a jigsaw to make your cut-out.

When you have a relatively wide corner like this, simply curve your jigsaw around the corner on your first pass.
You should still be able to see the pencil marks at the corner point.

When the main piece is cut out, come back with your jigsaw and, coming in from both sides of the corner, sharpen up that corner angle.
Repeat on both sides.

Your finger hold should look something like this.
Step 8: Sand your wooden toy box piece

Go ahead and sand your fresh cuts.
Step 9: Use wood glue and attach pieces

With everything ready with pocket holes, it’s time to assemble your box.
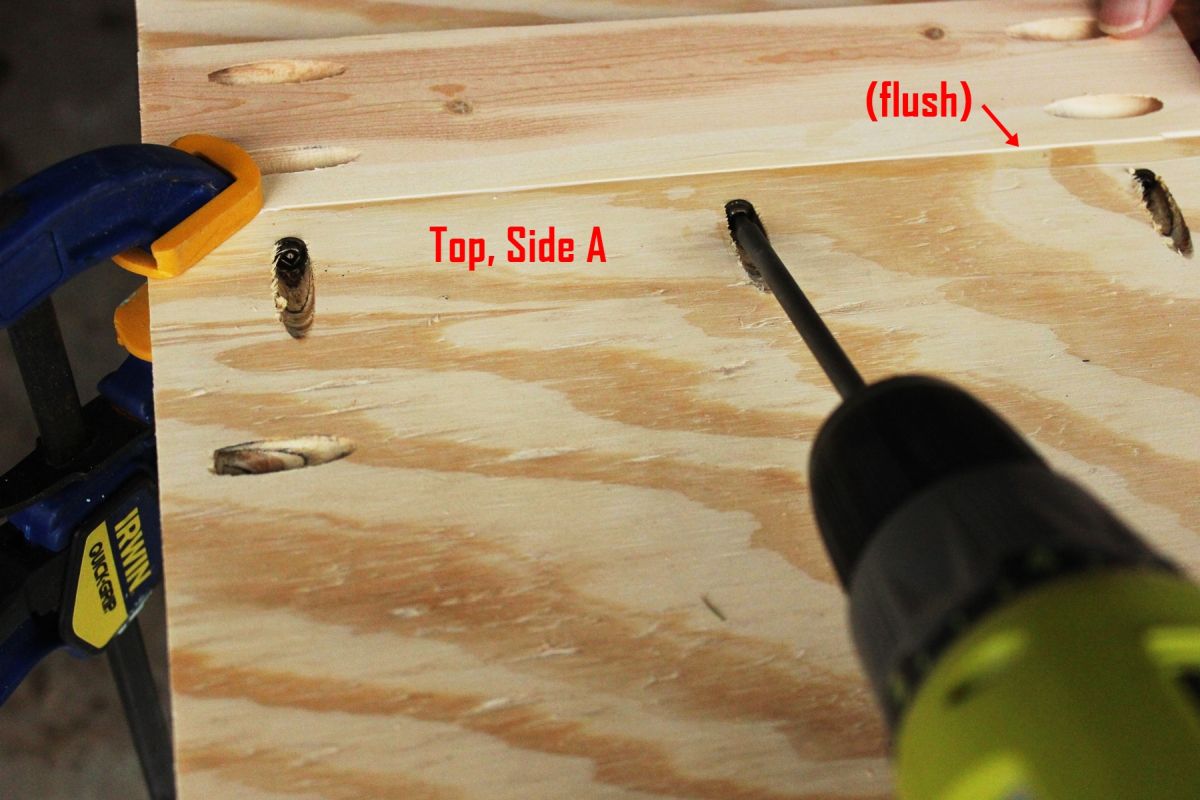
Run a bead of wood glue along the bottom of a 1×3 12” strip.

Join the glue side with the top end of your Side A plywood.
The pocket hole sides should be flush.
Pro Tip: Use other wood pieces underneath to make it flush; as in, stick a piece of 1/2″ plywood under the 1×3 strip that you’ve glued and a 1×3 strip under the plywood you’re gluing to.
This creates a flat surface for you where the pocket holes connect.) Make sure the sides are flush and all pocket holes are visible.
Clamp in place, then use 1” pocket screws to attach.

Wipe away any excess glue.
Note: Be sure to wipe on the front and back sides, and remember that if you’re staining your toy box, stain won’t take to glue so make sure that it’s all the way wiped off.

Repeat this process for a 12” strip of 1×2 on the other (bottom) end of your Side A.
Then repeat for Side B.

Repeat this exact process for the rectangular panels to create your Front and Back panels.

Be sure you’re checking for glue squeezing out on both the interior and exterior sides of your panels.
It’s easy to finish the pocket screwing and move on without checking the other side, but this would be a mistake, because glue will likely be squeezing out on that side as well.
Step 10: Attach all the panels and legs to assemble the large wooden toy box

It’s now time to assemble the box by attaching all the panels to your box legs, which are the 18-1/2” long 2×2 boards.
Grab Side A and run a bead of glue along the side.
Set the Side A panel, glue side down, onto a 2×2 leg with the top ends flush.

The inside (pocket hole side) of your side panel should be positioned 1/2″ away from the corner edge of your 2×2 post.
When the panel is positioned precisely, attach with 1-1/4” pocket screws.

Wipe away excess glue.
Repeat for the other leg on this panel.

Note: With both 2×2 legs attached, the inside of your Side A panel will look like this.

By positioning your side panel 1/2” away from the corner edge of your 2×2 leg, it gives the exterior of your side panel strips a beautiful 1/4″ inset.
Repeat this process for Side B.
Step 10: Assemble and attach back and front panels

Now it’s time to attach the Back and Front rectangular panels to the leg posts.
Glue along one side of your panel.

Align the panel onto the leg (keeping it 1/2″ in from the edge of the leg post, top flush), and attach with 1-1/4” pocket screws.

Repeat the attachment steps with the Front panel.
Step 11: Grab a helper and a power drill to attach all panels to create a box shape

Lay your Side B panel, pocket holes facing upward, on your flat, clean work surface.
Run two beads of glue along the open ends of your Front and Back panels.
Note: Have a helper flip the U-shaped Front/Side A/Back piece over and place the glued ends onto the Side B legs.
Have them hold the box in place while you align precisely and attach both ends with pocket screws.


Step 11: Build the toy box wood floor panel

Time to build the box floor.
Flip your box upside down and place on a clean, level surface.

Place a 13” 1×3 strip in the center of the box, with the pocket holes facing you.

Use a square to make sure it’s, well, square.
Then use 1” pocket screws to attach the 13” strip to the box Front and Back strips.

Repeat for the other two 13” 1×3 strips.
Your base support is now ready for the box floor.

Measure 5/8” from the corners of your 13”x33” plywood rectangle.

Locate the 1/2″ you left from the corner edge of each leg when you attached your side panels.
You need to cut out that part from the four corners of your kids wooden toy box floor so it fits.

Use a jigsaw to cut them out.

They’ll look like this.
Step 12: Sand everything before laying the floor

Sand anything that may need it before you lay the floor in the box.

With the smoothest side facing upward, slide your floor rectangle into your box.
It should be snug but not crazy tight.
Step 13: Place scrap wood to level the floor

To ensure leveling, consider placing a small piece of scrap wood at each corner and hammering downward.
This helps the floor to settle completely.
Note: You can use 1” screws through the bottom of your base support boards if you feel it’s necessary to keep your floor in place.
Step 14: Paint or stain your DIY toy box

Finish your box how you want it.
Use wood stain or paint.
Let dry fully before adding a lid to your unfinished wooden toy box.
Step 15: Add a lid to the wooden toy box bench

Unwrap your project panel first; this will be the top (lid) of your box.
Step 16: Sand the project panel

Give the lid a light sanding.

On the inside/under side of your lid, along the back end, measure 5” in from the sides and 1-7/8” in from the back end.
This will not make the back of the lid flush with the back of the toy box; instead, it will be inset a little bit, which evens out the overlap of the front end of the lid on the toy box
Mark this point, and draw some light pencil lines.

Align the outside edge of your hinge with your lines.
Double check to make sure it is perfectly parallel with your lid and is aligned.

Your hinge comes with two 1” screws and other 3/4” screws.
Choose the 3/4″ screws for this job.

Secure the hinge to the underside of your lid.
Repeat for the other hinge.

Now slide the hinges onto the back panel of your toy box.
Center the lid.

For this next job, you’ll want to choose the two 1” screws.

Double-checking that the lid is, indeed, centered on your box, attach the hinge to the back panel.
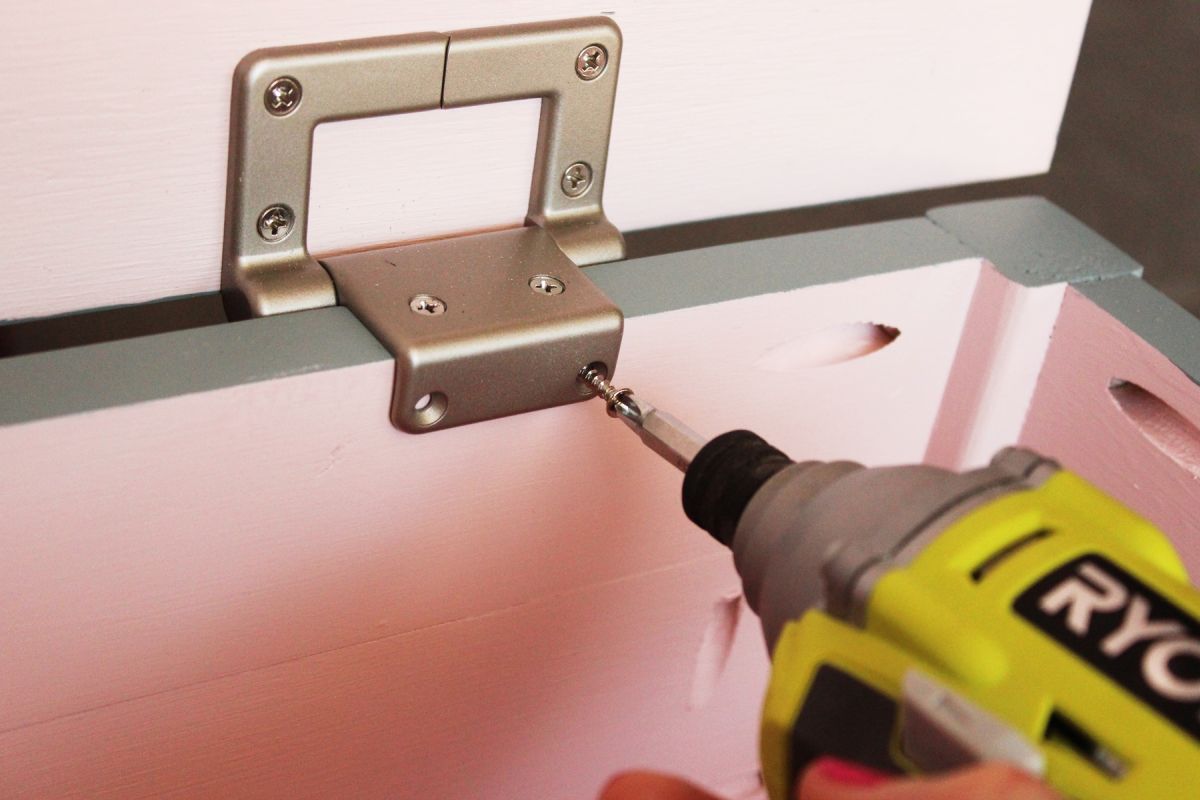
Then, using 3/4″ screws, attach the front side of your hinge base to the back panel as well.
Repeat for the other hinge.

Open your box lid to check it works properly.

Pro Tip: You can place rubber or felt pads on the lid or on the top of your front leg posts to protect the front end of your lid when it’s down.

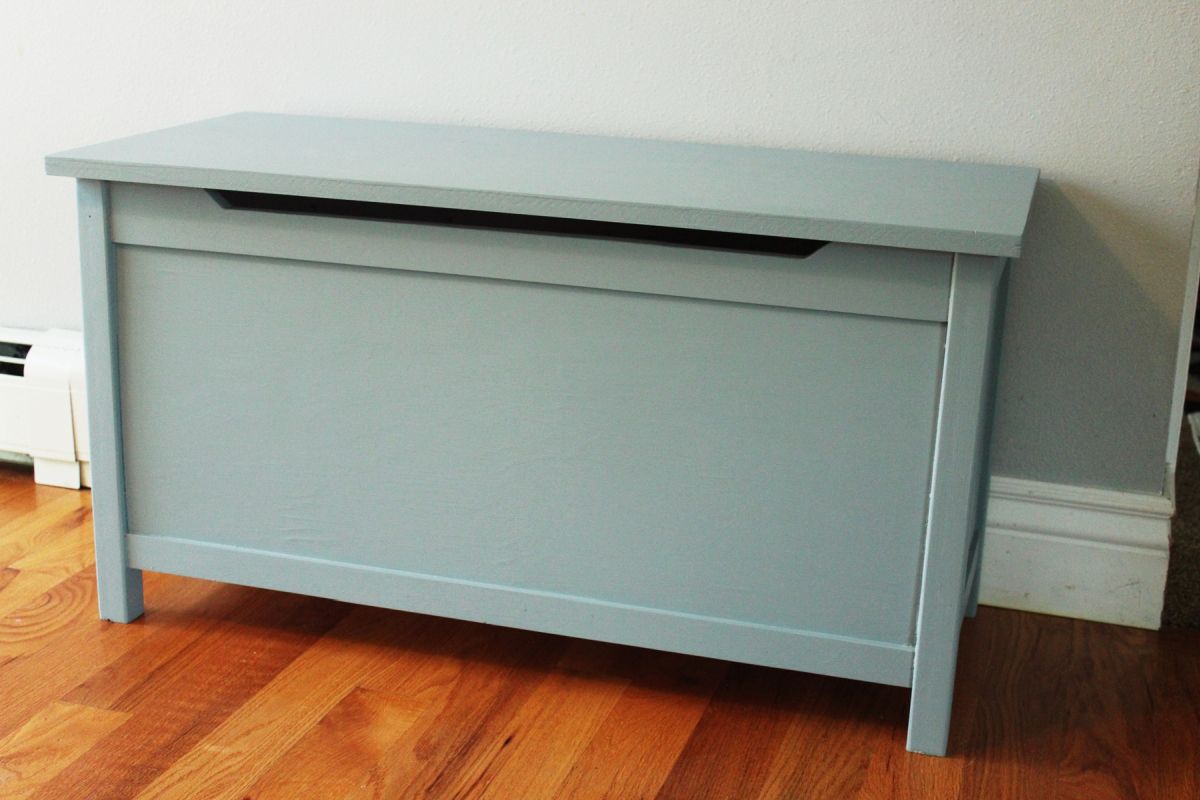
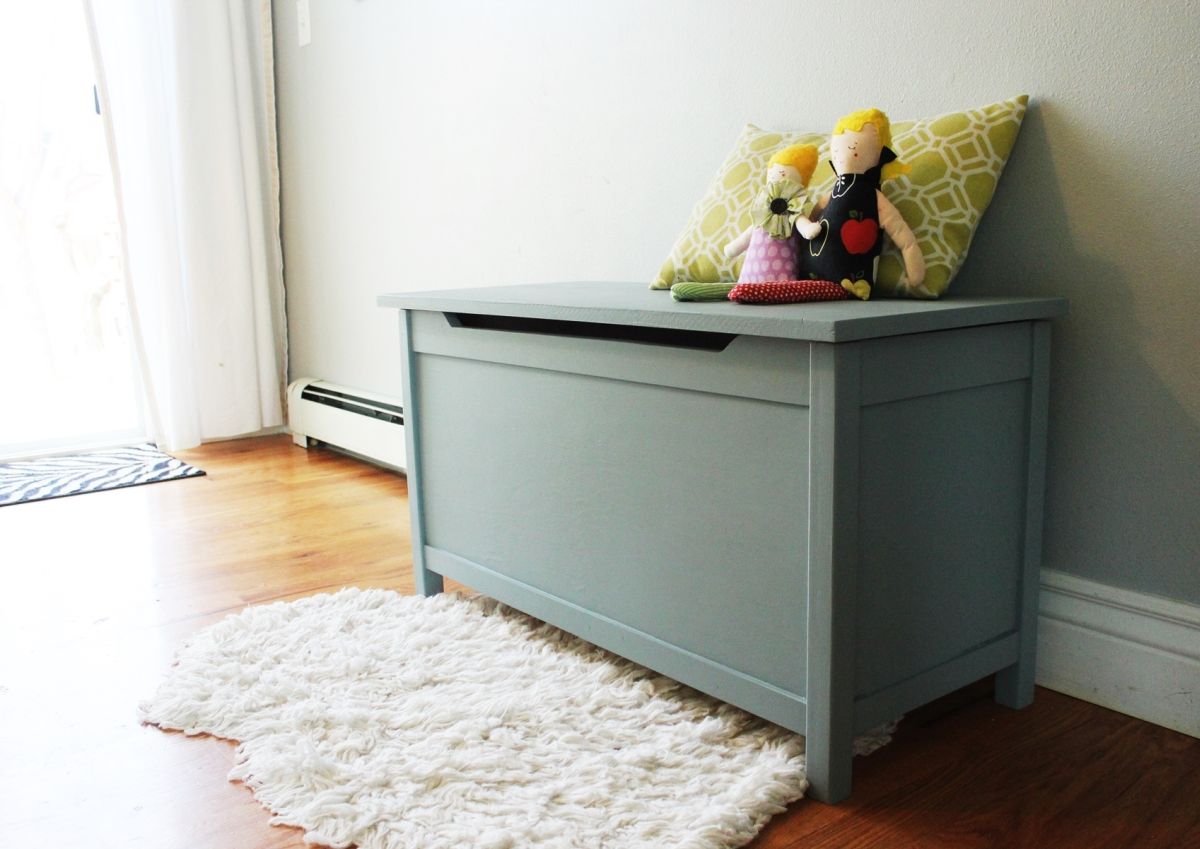
Your own beautiful DIY modern wooden toy box, which may or may not look like an elephant.


The lid’s staying power is a lifesaver.

You could also choose to attach a sort of guard (with 1×3 strips) along the top sides and back of your lid for a more craftsman look.


Frequently Asked Questions (FAQ)FAQ
What kind of paint should I use on children’s furniture?
You should you choose a low-VOC paint when painting children’s furniture. These types of paints have reduced amount of volatile organic compounds and release less fumes, making them a safer option for children.
What kind of paint do you use on wood for kids?
A great paint to use for wooden projects with kids is tempera paint. This type of paint is safe and effective.
What kind of paint can you use on wood furniture?
You can use low-VOC paint or tempera paint on wood furniture for kids.
How do you paint kids wood toys?
To paint kids wood toys, you’ll want to use tempera paint. Make sure that you set the area up beforehand, and lay lots of newspaper or old rags down to prevent a mess. Then, go ahead and get painting. Let dry fully and add a second coat for good luck.
Wooden Toy Box: Conclusion
As you can see, to create girls or boys wooden toy box, the process isn’t as complicated as it may initially seem. With the right tools, a free weekend day, and a little motivation, you can have a beautifully handmade DIY wooden toy box in no time.
We’re positive your kids will be obsessed with it.