Practical DIY Woven Cork Ikea Skala Tray

Ikea represents an amazing brand which everybody appreciates it for its simplistic and practical designs. For those who love these types of things and even would like to create them on their own here it is a nice idea.
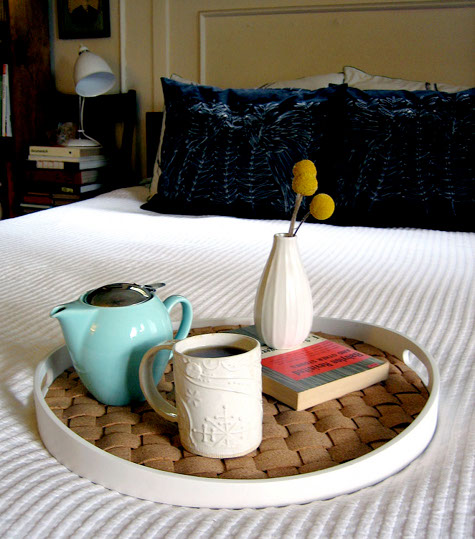
Take this Skala Tray from Ikea and following the next instructions you will be able to get a really nice DIY Woven Cork Ikea Skala Tray that can be used for so many things. You may take your tea in bed; you can put a book, a small magazine, and some things that you need to be close to your bed.
Here are the materials that you need: roll of cork (these are available at office, craft, and hardware stores – make sure the cork is at least 20″ wide and the roll needs to be at least 30″ long), craft/utility knife, ruler (preferably as long or longer than the cork roll’s width), cutting mat, glue gun, primer spray paint ,painting surface (tarp or large piece of cardboard), marker, scrap paper or cardboard (at least 17″ by 17″),protractor (or pencil and string).

Take your tray to a well ventilated area and put it down on the painting surface. Cover it with an even coat of primer. Allow it to dry for about 15 minutes, and then give it another coat, making sure the sides of the tray, both inside and out, are completely covered. Let the tray dry. (Paint with another color if you desire and let that dry as well.).

While the tray is drying, take your cork roll and lay it on your cutting mat. Press it down to the surface with the curve of the cork facing down (the opposite of unrolling a blueprint or a map, so the cork wants to curl under itself). Use the marker and ruler to mark 1″ strips on the cork.Using the ruler as a cutting guide, slice the cork into 1″ strips with your utility knife. Apply firm pressure and cut in a fluid motion to ensure the cork doesn’t tear.
You need about 30 strips total, which will probably not be the whole roll of cork. Once you have them all cut, make sure you do not have any uneven or off-measured ones in the bunch. Replace them with new ones if you do.
Place 15 strips of cork down (curve side down so the edges point down and not up) and push them up next to each other, leaving no space in between. Also make sure their edges are lined up.

Begin by taking another strip and weaving it through the center of the strips, pulling up every other strip to allow the strip in your hand to fit underneath. Make sure it is aligned parallel to the 15 strips on the floor and not at an angle.
Repeat step 6 with another strip, pulling up the opposite strips from the one before it to create an alternating weave. After the strip is woven through, slide it as close the previous strip as possible and adjust it to make sure it is straight. Maintain a tight, clean weave throughout by sliding and adjusting the strips.
Repeat with the remaining strip to create a woven square that is 15 strips by 15 strips. Adjust everything to ensure it is tight and straight.
Glue the end flap of each strip to the strip underneath it. This will close the woven square and secure all the pieces so you can move the entire piece. Flip the entire piece over.
Use the protractor to draw a circle on your scrap piece of paper/cardboard that is 16 and 6/8″ (this is the diameter of the inside of the tray). Cut out this template and use it to trace a circle on the cork. Cut out the cork circle carefully. You will be removing the glued pieces but the weaving should still stay together because it is tightly packed.

Gently flip the woven circle over and place inside the tray. If it does not quite fit in any spots, use your scissors to carefully remove any excess off the sides, until the cork weaving fits perfectly in the tray.
Use your glue gun to glue down the weaving all around the edges of the tray. You do not need to glue the center, it will sty put if the edges are secure and the weaving fits in the tray correctly.
Remove any splinters of cork from cutting, and any loose strands of hot glue. Make sure all flaps at the edges of the weaving are glued down to the tray, and the cork flaps are glued to the cork strip that lies underneath it on the edges.{found on designsponge}