DIY Garage Shoe Storage: An Easy, Fast, and Versatile Project


Declutter your garage with a DIY shoe storage rack made from scrap wood.

Materials:
- Four (4) 2x4s as tall as you want your diy garage shoe rack to be (example uses 37-1/4”)
- Four (4) 1/2” plywood as wide and deep as you want for each shelf on your garage shoe storage to be (example uses 37” wide by 11” deep)
- Eight (8) smaller trim pieces, such as 2x2s or 1x2s, each cut the same length as the depth of your shelves
- Wood screws in varied lengths, depending on the size of your trim pieces (2” or 2-1/2” screws are great if your trim pieces are 2x2s; 1-1/4” or 1-1/2” work well if your trim pieces are thinner)
- Kreg rip cut tool/attachment (optional but HIGHLY recommended)
- Measuring tape, square, miter saw, circular saw, power drill, impact driver
*NOTE: This tutorial shows a project completed using only odds and ends/whatever was available. You could easily create a finished shoe storage shelving unit that’s appropriate for interior décor following these same simple instructions (plus sanding + priming/painting).
Step 1. Measure and mark desired height of your DIY shoe storage for garage.

Begin by measuring and marking your 2x4s to your desired height.
Note: Example uses 37-1/4”. (Keep in mind that your unit’s true height will be this measurement plus the thickness of whatever shelving you’re using.)
Step 2. Cut your 2x4s.
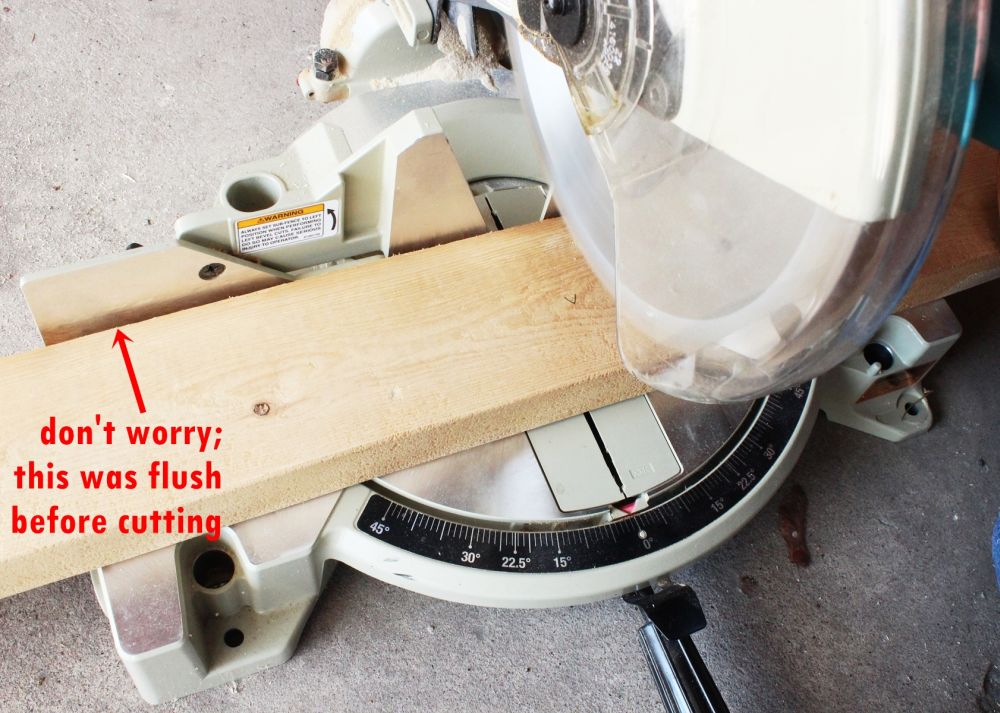
Cut all four 2x4s to the exact same length you marked using a miter saw.
Step 3. Cut your slabs easily and precisely with a tool attachment called the Kreg Rip Cut.

Line up some board supports on the ground. These will raise your plywood slab off the ground while still keeping it steady as you cut with the circular saw.

Set your plywood slab down on top of the support boards.
Keep a broad space in the center (or wherever the line is that you’ll be cutting) as well as a clear edge on the left-hand side (unless your circular saw is a left-blade layout, in which case you’ll want to keep the right-hand side clear).

Assemble and attach the Rip Cut onto your circular saw by following the instruction that comes with it.
Then set the length of your desired shelf depth on the Rip Cut.
Pro-tip: Consider the length of the largest shoes to be stored in determining the depth of your shoe storage unit.

With the cut line set, align the guide “arm” (blue piece on the left) of the Rip Cut on the side of your plywood slab.
This will automatically place your circular saw blade to cut at the precise depth you set earlier.
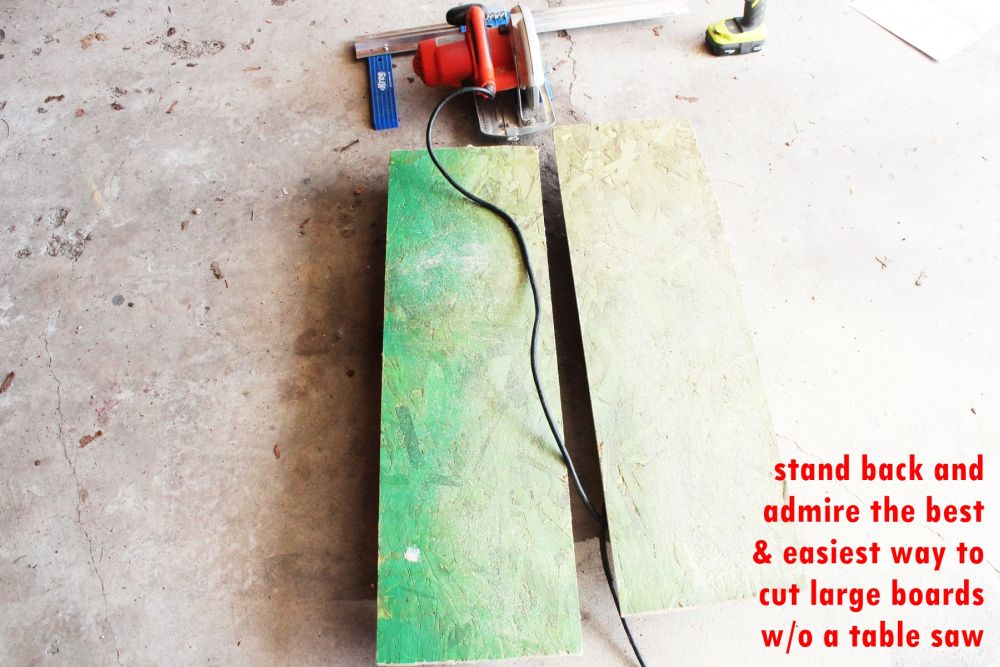
Use the circular saw like normal, keeping the guide arm flush against the plywood’s edge as you cut along, smoothly and evenly.
Repeat for as many shelves as you want for your garage shoe storage rack.
Step 4. Measure and trim the shelves.

When your shelves are all cut to equal depths, it’s time to measure, mark, and cut their lengths to be perfectly square. This will help your final shelving unit to come together nicely but, more importantly, to function well.
Note: Remember that the final width of your shoe storage shelving unit will be 3” wider than the length of your shelves, because of the 2x4s. Take this into consideration if you’re customizing your unit to fit a certain space.

If you want the top shelf to cover the tops of your four 2x4s, cut the topmost shelf to be 3” longer than the other shelves.
Step 5. Measure and mark desired shelf position on all 2x4s.

With your shelves ready to go, it’s time to determine where you’ll want the shelves to hit on your side 2x4s.
Measure and mark these positions.

The next shelf up needed to be a bit on the tall side, too, but the other two shelves didn’t really matter. So, this example places shelves at 14”, 24”, 31”, and flush with the top (all measured precisely from the bottom of each 2×4).
Step 6. Precisely align all four 2x4s from the bottom.

You’ve marked the positions of your shelves, but now you’ll need to mark them so they’re level and even with each other.
The best way to do this is to lay all four 2x4s next to each other, line up their bottom ends, and use a square to draw the lines for the shelf placement across all four 2x4s at once.

You now have your four 2x4s marked and your four shelves cut and ready.
It’s now time to cut your shelf supports.
Step 7. Measure and mark desired shelf depth on trim pieces.

Measure and mark your trim pieces to the desired depth of your shoe storage unit.
Cut the pieces with the miter saw.

Note: 2x2s are easiest to work with as shelf supports, but slimmer pieces such as 1x2s look better because they’re not as intrusive into the unit’s “white space.”
Step 8. Assemble your DIY garage shoe storage.
Lay two of your 2x4s down, with the bottom ends pointing in the same direction and your shelf support markings facing up.

Position shelf support on these two boards, with the top side of the shelf support touching the bottom side of the 2×4 lines.
Make sure that every shelf is positioned in this way – aligned with the bottom side of your 2×4 lines – so that your shelves are level and spaced the way you want them.

When the shelf support is lined up, pre-drill one hole on one side.
Always pre-drill whenever you’re working with trim pieces, especially when you’re screwing close to the end.
This helps avoid splitting, and also enables you to position the wood precisely.

Loosely plant one screw into this first pre-drilled hole.
You want to be able to swivel the shelf support a little if necessary.
Be sure your screws are long enough to penetrate the 2×4 at least 5/8” but short enough to avoid exiting the outside of the 2×4.

Move to the other end of the shelf support, on the other 2×4. Align all ends and sides so they’re flush.

Pre-drill a hole here.

Plant a screw to hold the shelf support in place.
Pro Tip: Before screwing any more screws in at this point, it’s a good idea to repeat these one-screw attachment steps for at least one other shelf support on your 2x4s. Doing so will maintain the 2x4s’ in perfectly parallel position before you add more screws.

Next, predrill two other holes through your shelf support ends into each 2×4.
Insert screws.
Do this for all shelf supports on these two 2x4s.
Next, repeat the process on your other set of 2x4s with your four other shelf supports.

With your two shoe storage shelving unit “sides” assembled, it’s now time to attach the shelves.
Lay one of the sides on its side on a flat, even surface.
We recommend placing the front end down toward the ground here, particularly if the shelf depths are different from the shelf support lengths, simply because this creates a flat surface for better alignment on the front side. In other words, the front joints will be flush.
No one will really see the back of your shoe support shelving unit, especially once it’s loaded with shoes, so the front is the most important.
Position the shelves “onto” their shelf supports.
Note: Place the shelves on the top sides of the shelf supports, not on the bottom sides.

Holding a shelf firmly in place, pre-drill two parallel holes through the 2×4 that are aimed directly at the middle of the plywood shelf.
Use 2” or 2-1/2” wood screws into these predrilled holes to attach the shelf.

Repeat this shelf-attaching process for all shelves EXCEPT the top shelf.

In case you’re wondering, the shelves themselves are fully supported by the side shelf supports.
Weight-wise, they don’t need the screw attachment to the 2x4s to be functional.
The screws are important, though, for keeping the shelves in place and for making the entire unit into one piece.

For the top shelf, you need to check the positions of the screws attaching the top shelf support to the 2x4s. Locate the gaps between these screws.
These spaces are the areas you need to aim for when screwing the top shelf onto the unit.
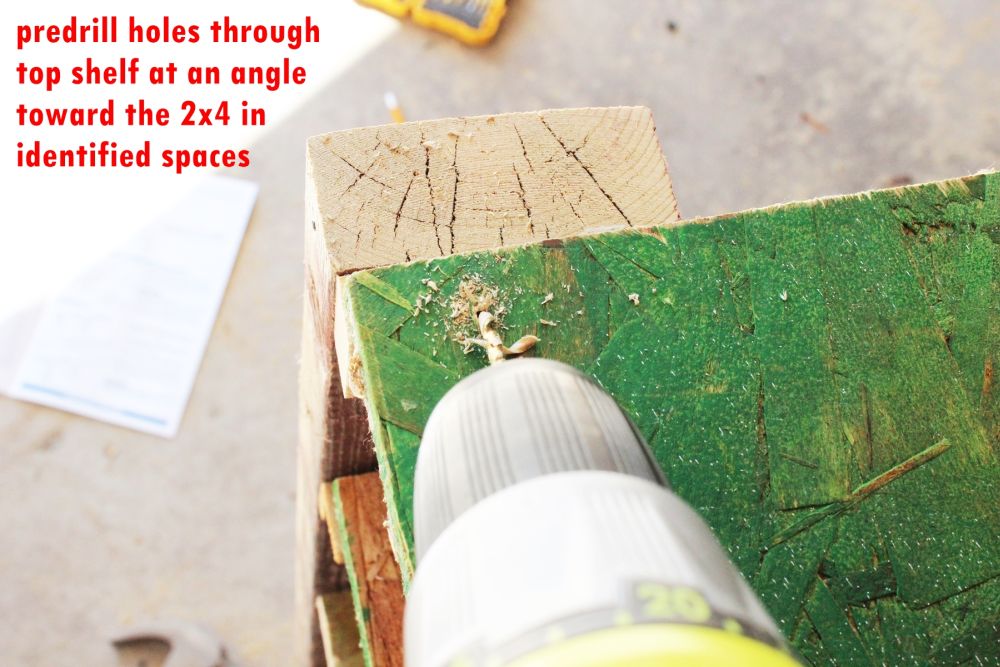
Pre-drill holes into these spaces into the top shelf ends, at an angle toward the 2x4s.
Note: If you’ve cut your top shelf to cover the tops of the 2x4s, you can just pre-drill and attach the top shelf straight down into the 2x4s, still taking care to avoid contact with the other screws.

Insert screws into the pre-drilled holes.

To further stabilize and secure the top shelf, I pre-drilled then attached two additional screws on the shelf sides, directly into the shelf support below.

If you want a polished look for your garage shoe track, your next step is to sand, prime, and paint it.

Go ahead and fill up your DIY garage shoe storage.

Store the boots near the bottom, while the shorter/smaller shoes go near the top.
Related: 35 Shoe Storage Cabinet Ideas That Are Both Functional and Stylish

Garage shoe storage: Conclusion

We hope that our garage shoe and boot storage rack DIY project will provide you with all the necessary information to help you build your very own version of it.


You can get creative when making your own storage rack, or you can just follow the simple instructions in this step-by-step tutorial and create a truly unique, awesome shoe rack organizer for garage.
Frequently Asked Questions (FAQ)FAQ
How do you make shoe shelves in a garage?
There are a lot of ideas for shoe storage in garage you can find out there but the best garage shoe storage is the one that you can easily build on your own like the one we did in this guide.
Can I keep shoes in the garage?
Yes, you can keep shoes in the garage as it’s the perfect space for storage. However, the garage can easily get messy and out of control, that’s why we recommend you to organize your shoes in a sturdy shoe rack for garage.
You can also go for a hanging shoe rack for garage instead of the usual freestanding heavy duty shoe rack for garage.
How do you make a homemade shoe rack?
There’s a lot of DIY shoe rack garage ideas you can choose from, but the one we’re making here is simple, quick, and versatile.
You can easily modify it to fit your space and your needs. The materials are also cheap and easy to find.
And the best part is that this guide is perfect for anyone who wants to try their hand at carpentry for the first time.
What can I use instead of a shoe rack?
Instead of the typical shoe rack, consider using:
– garage bench shoe storage
– ikea garage shoe storage
– garage shoe storage with doors
– wall-mounted shoe racks for garage
How do you make a PVC shoe rack?
The easiest way to make a PVC shoe rack is as follows:
– Purchase a PVC pipe with a diameter that can fit a pair of shoes.
– Cut the PVC pipe into at least 10” long pieces or depending on the length of the largest pair of shoes you have.
– Assemble the pipes as desired and glue the pieces together using PVC glue.
– For a more polished look, you can also paint your finished PVC shoe rack as desired.
Is it OK to keep shoes in boxes?
Absolutely yes. In fact, keeping your shoes in boxes provides your shoes with the highest level of protection possible. For added protection, you can also store those boxes in an enclosed shoe rack for garage.
How many pairs of shoes should you have?
There’s no limit to how many pairs of shoes a person should have. You can have as many as you want or as little as you want. It all depends on your preference and your available storage space.
To make sure that you won’t have any trouble fitting all your shoes in one place, should you opt to buy as many as you want, we recommend you to have a shoe rack organizer for garage.
Why are my shoes dry rotting in my closet?
Lack of moisture inside the closet makes your shoes more prone to dry rotting. However, too much moisture can also ruin a nice pair of shoes.
To keep your shoes from dry rotting, we recommend storing them in an open area like inside your garage. You can purchase or DIY a shoe rack for the garage so you can keep all your shoes in one place.
How do you keep Jordans in good condition?
One of the easiest ways to keep Jordans in good condition is to store them in a temperature controlled area.
But if you don’t have one, you can opt to store them inside zip locks together with a few packs of dessicants or silica. You also need to keep them away from direct sunlight so storing them inside a Magis garage shoe storage system might be your best option.