How To Build A Sawhorse Desk For Both Rustic And Modern Offices

One method through which you can add a personal touch to a home office, besides the usual artwork, framed photos and wallpaper, can also be to build the desk yourself. One type of design which is easy to implement is the sawhorse desk. As usual, there are many variations of this design you can choose from and even create yourself.

When building a sawhorse desk, the first step involves gathering the supplies. There’s no need for anything fancy given the style. You’ll need a tabletop or some lumber to craft it from, sawhorse brackets, wood stain and sandpaper. The legs can come from an old piece of furniture or can be cut specifically for this project.{found on brooklynlimestone}.
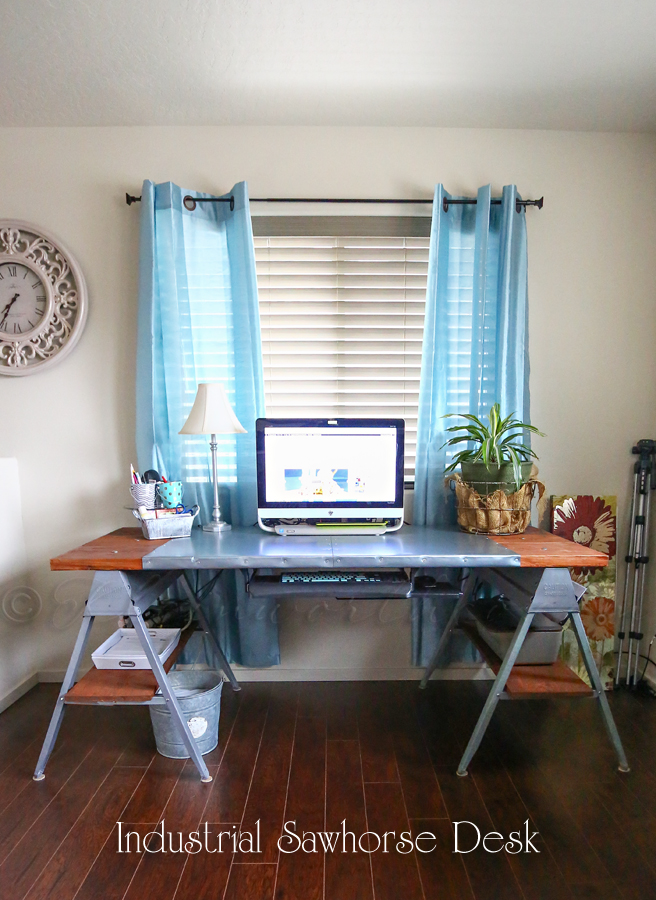
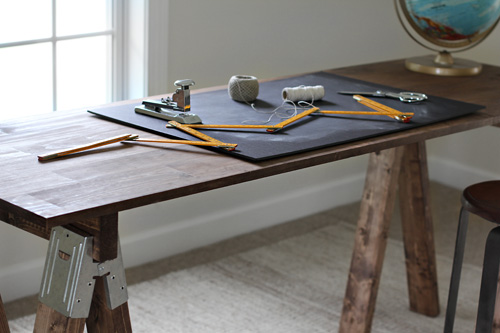
Give your sawhorse desk an industrial spin as described on Kleinworthco. It all starts with some wood boards which you put together to form the top. For the base, you’ll need metal sawhorses. Lay out the boards on them and mark their centers. Drill holes through them and secure the desk with long bolts. You can then cover the top with sheet metal.

Metal and wood is a good combination of materials if you want to achieve either a rustic or an industrial desk. However, there are also other interesting combinations to take into consideration. For example, we found this stylish concrete and wood desk on blog.homedepot. You’ll need to build a mold for the concrete top.

A desk can be customized in many different ways and the strategies differ depending on the design. In the case of a sawhorse desk, for example, you can have the legs dipped in paint in order to create a strong contrast and to emphasize and design and shape. The black and white combo displayed on Houseologie is really chic, especially when complemented by the light natural wood elements.

A different strategy can be to have the base painted in a color that stands out. This idea can be used if you want the desk to match other elements in the room for a cohesive look. The turquoise chosen for the desk on Poofycheeks is a color that suits rustic designs really well but can also look great on other styles.

The sawhorse style is often used for tables and desks that are long and narrow. However, a small desk can look charming with sawhorse base as well. A good example is the design provided on shanty-2-chic. This is a desk that was built from scratch and the sawhorses supporting it offer a great storage solution.

Storage can also be added in the form of a niche or drawer under the top. In addition, the two sawhorses supporting the desk on Ana-white also offer two shelves each which are perfect for storing and organizing documents and other supplies needed in a home office. Moreover, the top reveals three separate storage compartments, one of which is open.

A great idea when building your own desk is to give it a height-adjustable design. This should be easy if you choose an industrial look. One option is provided on ana-white. This is a sawhorse desk which can be adjusted to the desired height and can go as low as a coffee table. Check out the plans offered here and start building your own version of the desk.

The rustic and industrial designs described so far are definitely charming. But there are also other styles to take into consideration and they too can accommodate a sawhorse desk in an elegant way. A modern version of such a piece could feature a glass top which, combined with a wood base, look wonderfully balanced.

In the case of sleek and modern writing desk, a sawhorse base wouldn’t stand out that much. Its design would actually be quite sleek and stylish. Placed in the right space and with the right lighting, such a desk can become the perfect workspace for a modern or contemporary home.

A modern interior design doesn’t necessarily hve to include only minimalist pieces. Sometimes a little bit of diversity is welcome. As a result, a simple wooden sawhorse desk can make a modern attic office feel more comfortable and welcoming. It would add warmth and charm to the space.

An industrial design for a sawhorse desk can be adapted and transformed to suit a modern and elegant home office. It’s all about the finishes and the little details. A shiny glass top and a base made of stainless steel can be the defining features for such a design. The result would be elegant and with a hint of sophistication.

A simple desk can be made using two trestles and a top. A glass top would definitely look chic. Instead of a transparent one perhaps a different option would be better for a more cohesive look. The white base is a nice feature, establishing a lightweight design throughout.